Easy-To-Make Artisan Paper Mache Vase
We may receive a commission on purchases made from links.
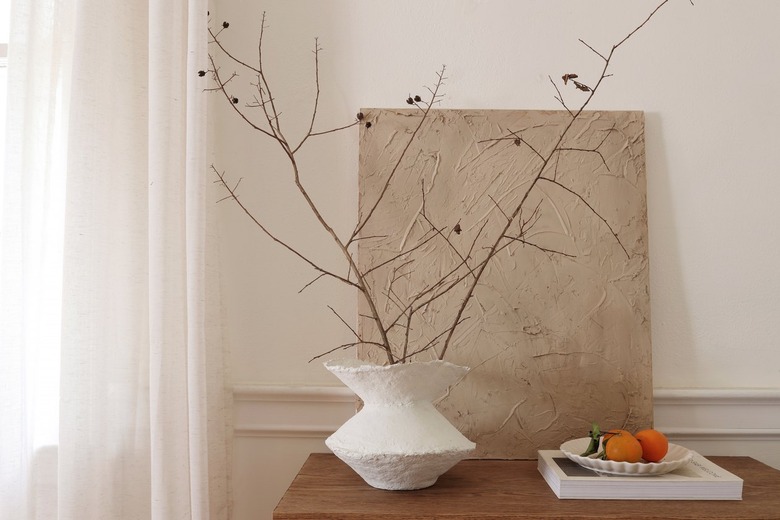
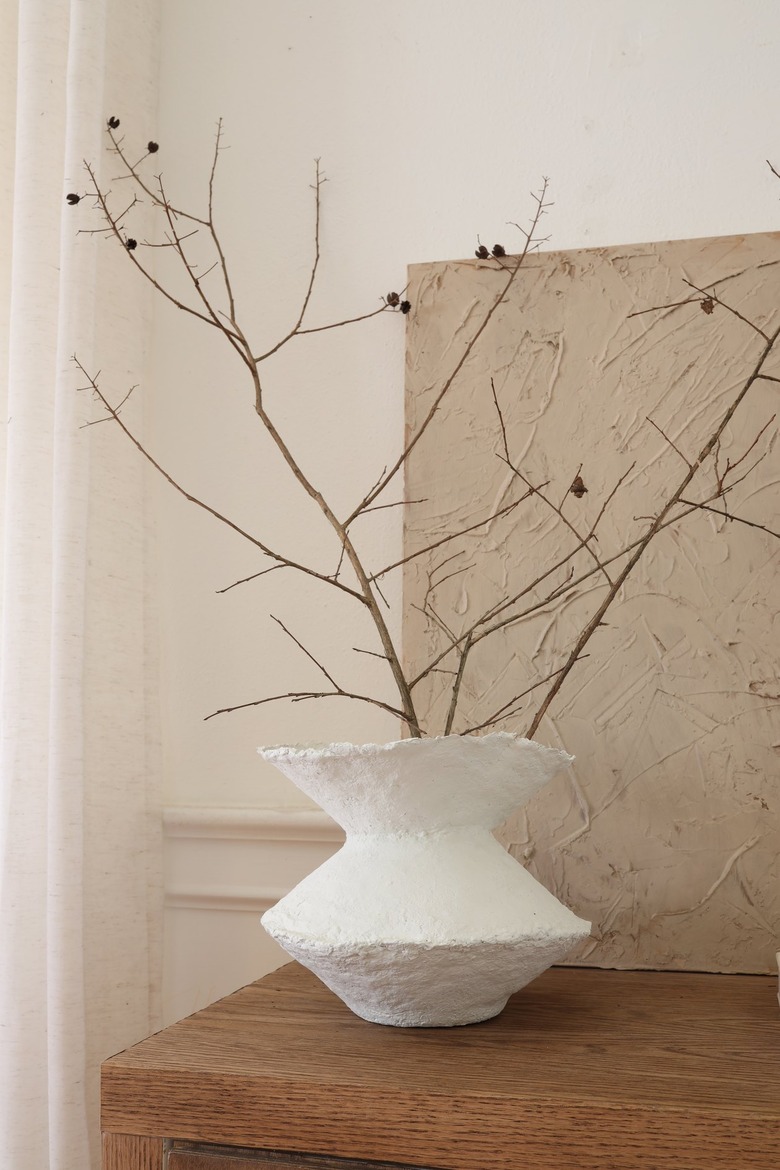
Not just for kids' crafts, paper mache is a material that has seen a recent surge in popularity among artisanal decor lovers. From vases and bowls to artwork and other fun accessories, paper mache produces offer a stylish touch to any room. They also happen to be super easy (and fun!) to make yourself. We created this vase using three bowls as molds, and then glued them together. And we totally dig how its organic shape and rugged surface adds a lovely bit of texture and intrigue to a space.
 Trisha Sprouse
Things Needed
-
Bowls, cups, or jars (to use as molds)
Step 1
Play around with various bowls, cups, or jars by stacking them to create a unique shape for a vessel. These are what will serve as your molds for the vase. Here, we've stacked three tapered 9-inch IKEA bowls, with the middle bowl inverted, to create our desired shape.
 Trisha Sprouse
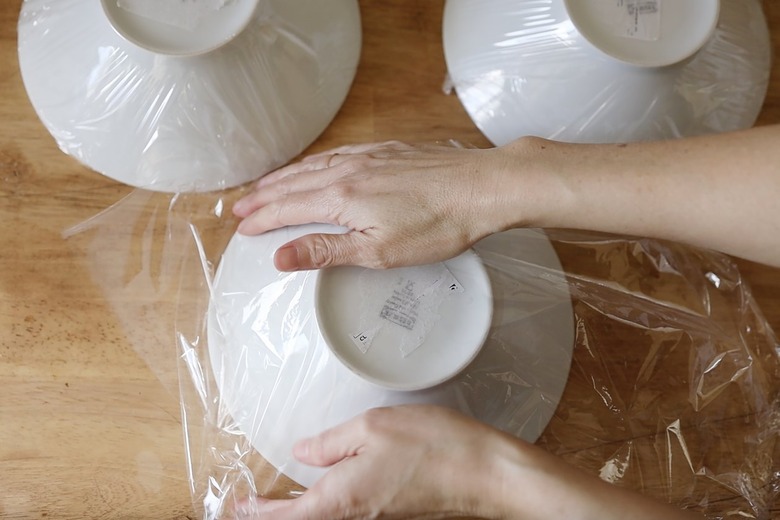
Step 2
Place your chosen molds face down and cover them completely with plastic wrap. This will allow you to remove the paper mache easily later.
 Trisha Sprouse
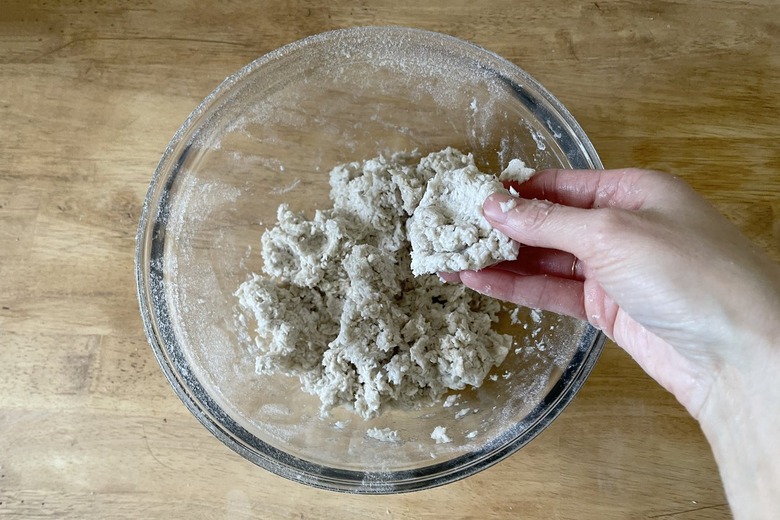
Step 3
In a separate mixing bowl, add some paper mache pulp and a little bit of water. Stir to combine, and then keep adding water a little at a time, mixing it until you reach a dough-like consistency.
 Trisha Sprouse
Step 4
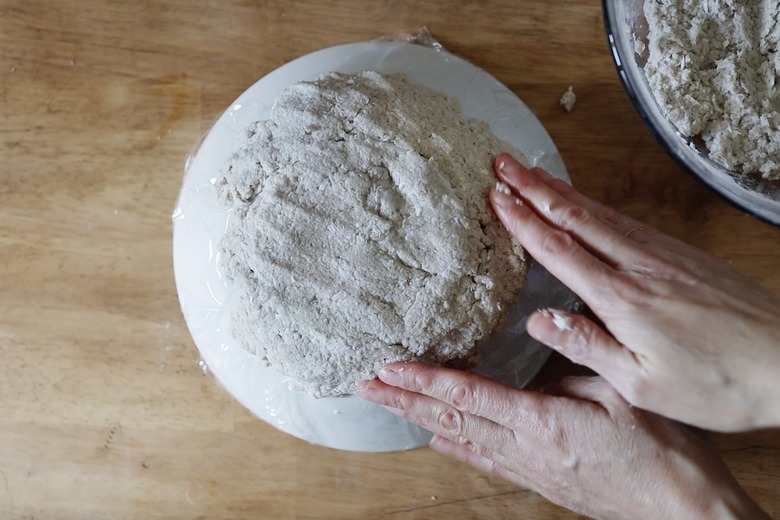
Apply the paper mache dough around your molds, pressing it firmly and smoothing out as many lumps and cracks as possible. Aim for the layer of paper mache to be about 1/2-inch thick.
 Trisha Sprouse
Step 5
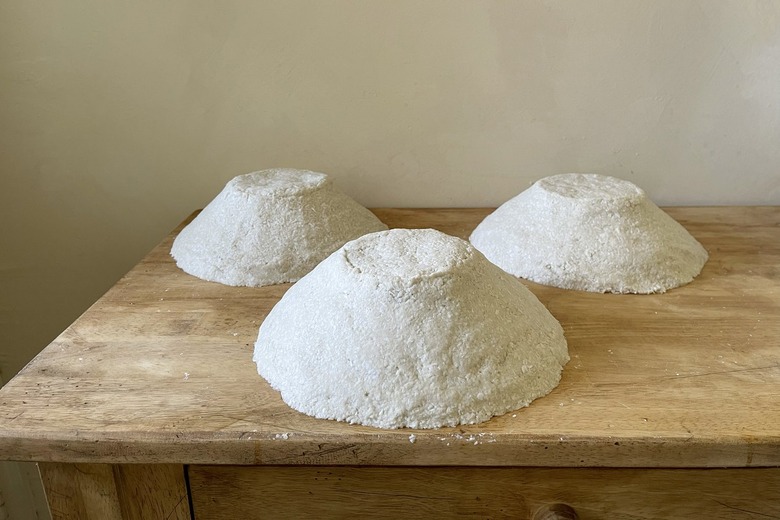
Let the paper mache dry for a day or two (you could also use a hair dryer to speed up the process).
 Trisha Sprouse
Step 6
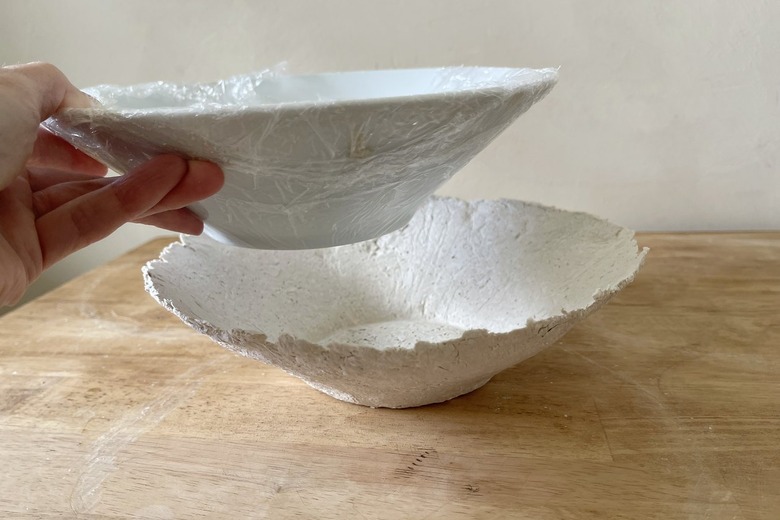
Once the paper mache feels completely dry and hardened to the touch, carefully remove the molds.
 Trisha Sprouse
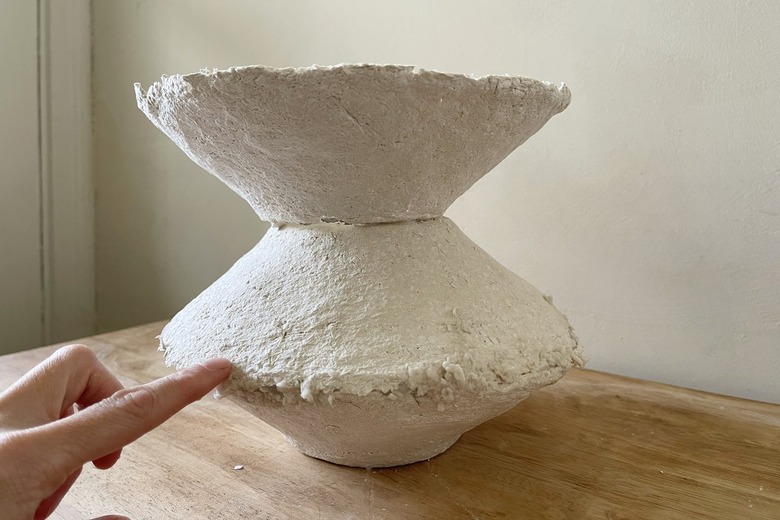
Step 7
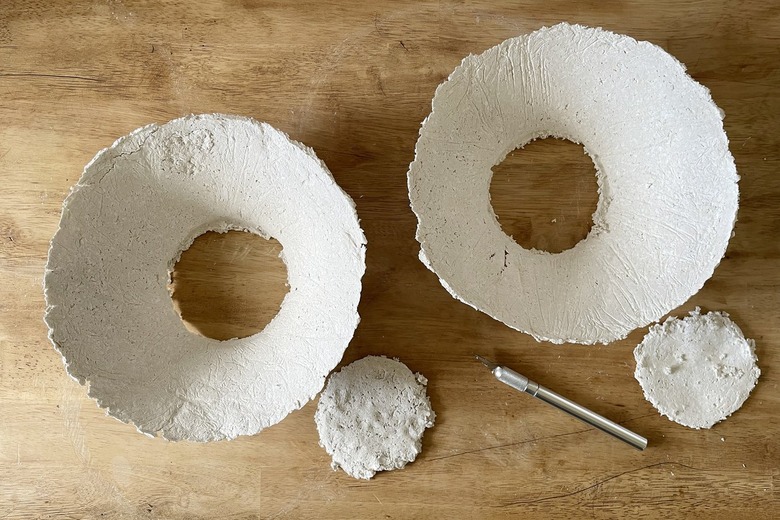
Use a utility knife to cut a hole in the bottom of your paper mache pieces to create the opening for your desired vase shape. For our structure with three bowls, we had to cut a hole in the middle and top bowls to create an opening for floral stems.
 Trisha Sprouse
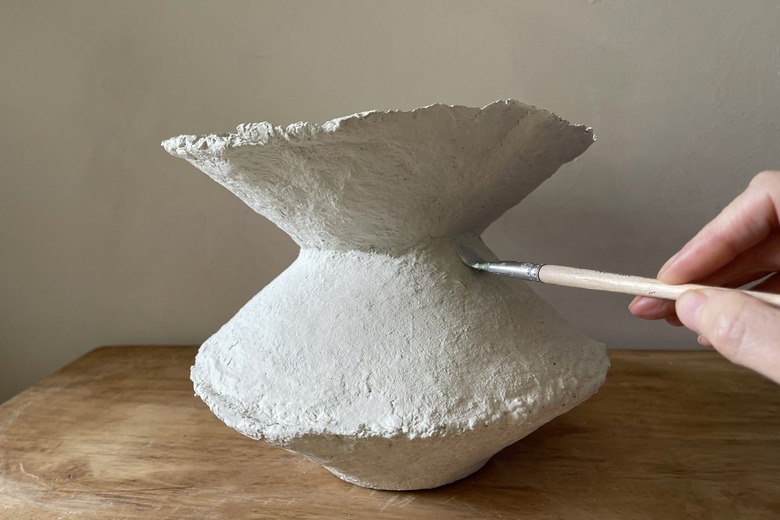
Step 8
Hot glue your paper mache bowls together to create your vase shape. Then mix up a little more paper mache dough, and smooth it over the seams of the vase to create a seamless surface. Allow it to dry completely.
 Trisha Sprouse
Step 9
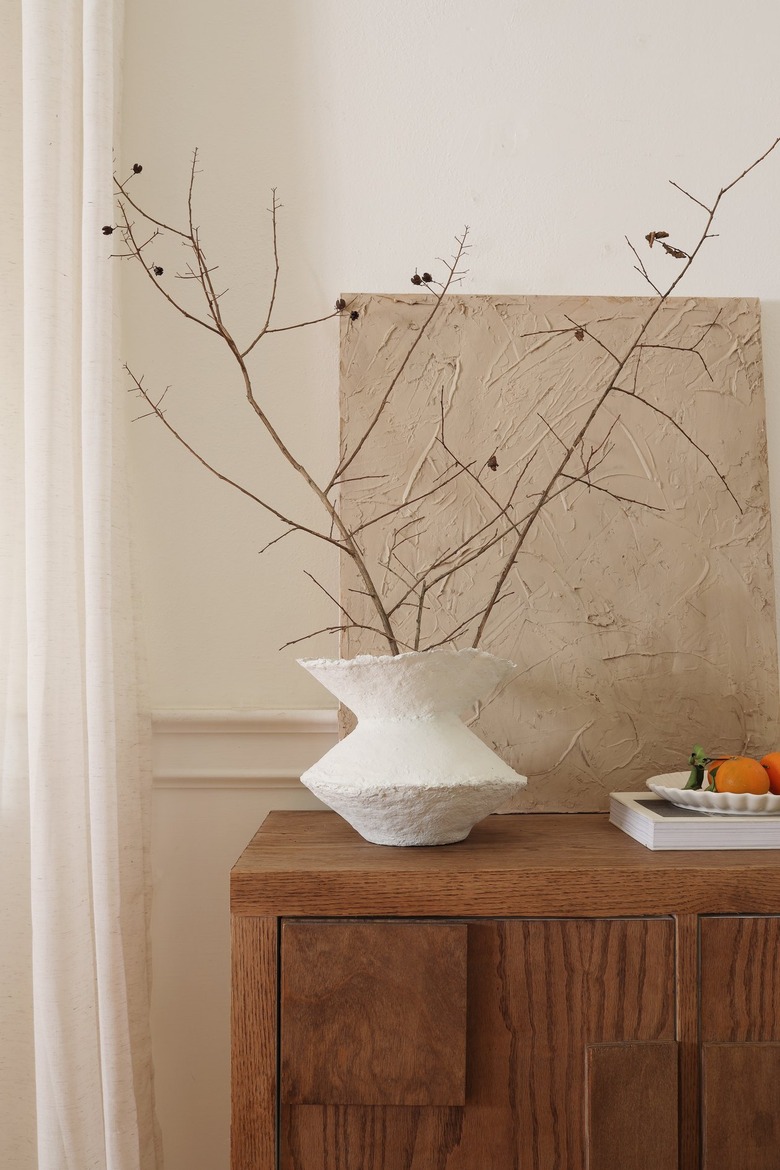
Once dry, paint the vase with your desired color. The paint will also help smooth out the surface of the vase.
 Trisha Sprouse
Now simply style up your vase with your favorite dried florals or sculptural branches!
 Trisha Sprouse