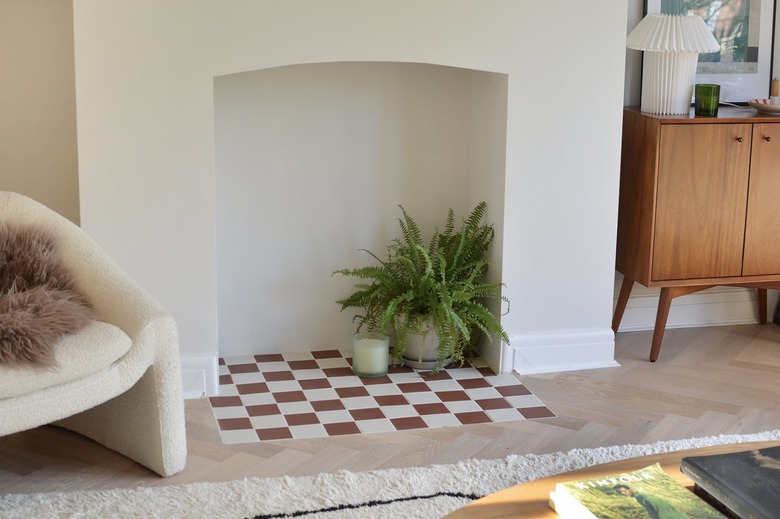
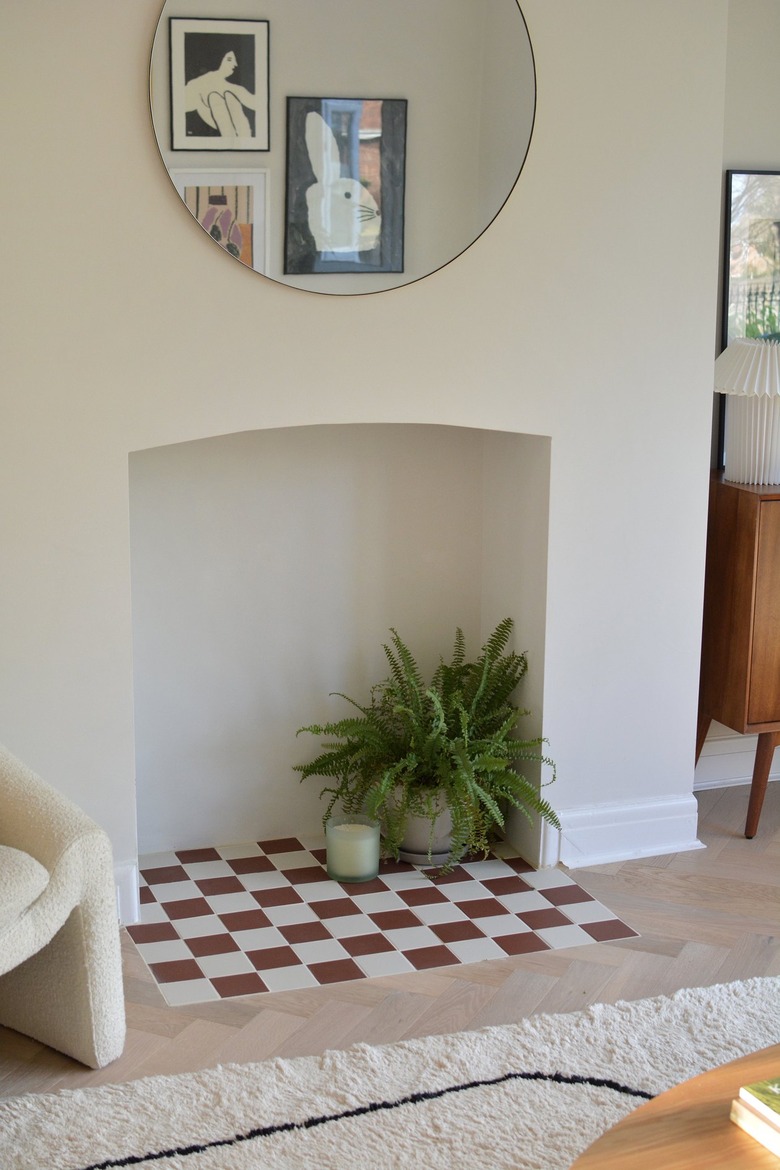
How To Tile A Decorative Fireplace Hearth
We may receive a commission on purchases made from links.
Tiling a decorative fireplace hearth can transform the look of a room by adding interest and creating a cozy focal point. In learning how to tile, you can easily update an existing one or create a brand new feature in your home. The best news? You don't have to be an experienced DIYer to take on this task, you just need the right tools and some practical advice.
For this DIY, we are focusing on tiling a fireplace hearth that is purely a decorative feature in your home — one where you do not actually burn a fire. If you want to place candles within your decorative fireplace, you might want to consider tiles that withstand heat, whether you opt for plain, patterned, hexagonal or square-shaped hearth tiles.
Porcelain, for example, is fired at a higher temperature than ceramic so it would be more suited to absorbing heat. You can also use heat-resistant adhesive and grout for this type of project. Most grouts and adhesives are available as dry powders that will require mixing with water but some come pre-mixed and ready to use. However, please keep in mind that the steps featured in this tutorial are strictly for decorative purposes.
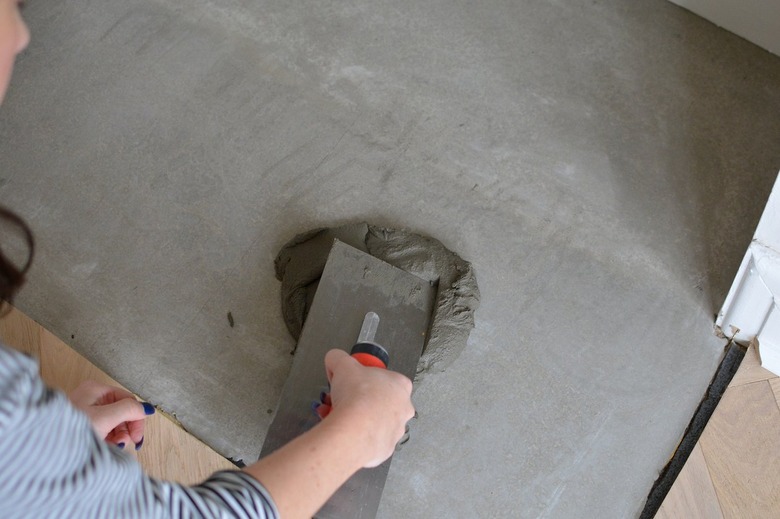
If you have an existing raised hearth you generally don't have to worry about an uneven surface but you'll want to remove existing tiles. If you have an uneven surface on a recessed hearth you can simply spread a self-levelling compound to correct any unevenness in the floor before you start.
 Caroline Burke
Things Needed
Step 1
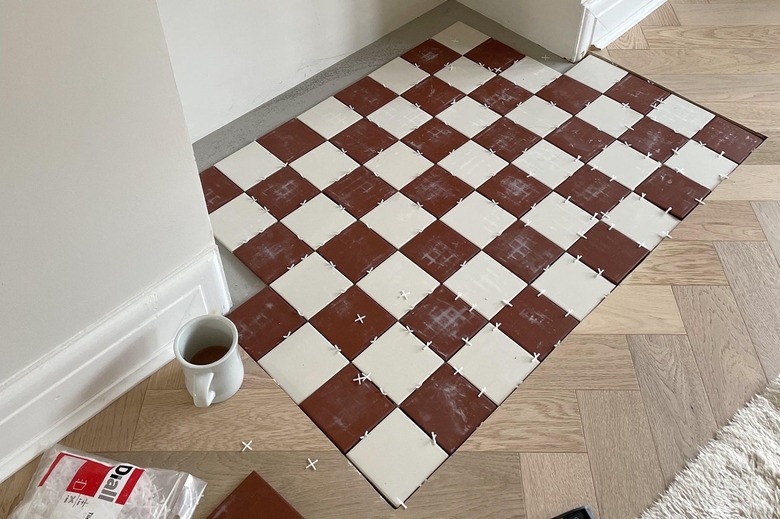
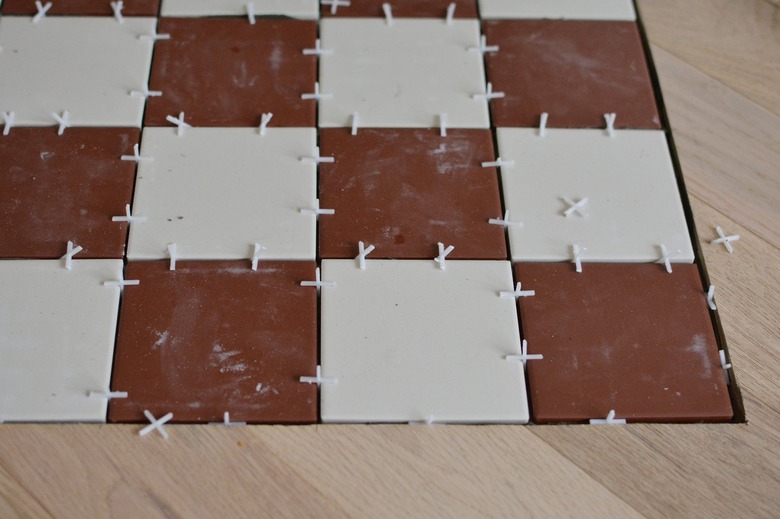
The most important thing to consider with tiling is the layout and placement of your tiles. If you decide on the pattern you want to create beforehand, you'll save yourself a lot of time later. We've laid out our tiles 'dry' as a practice run to check how they fit and see where any tiles may need trimming. Usually, you would start to tile from the centre of the hearth working outwards to create a symmetrical placement.
 Caroline Burke
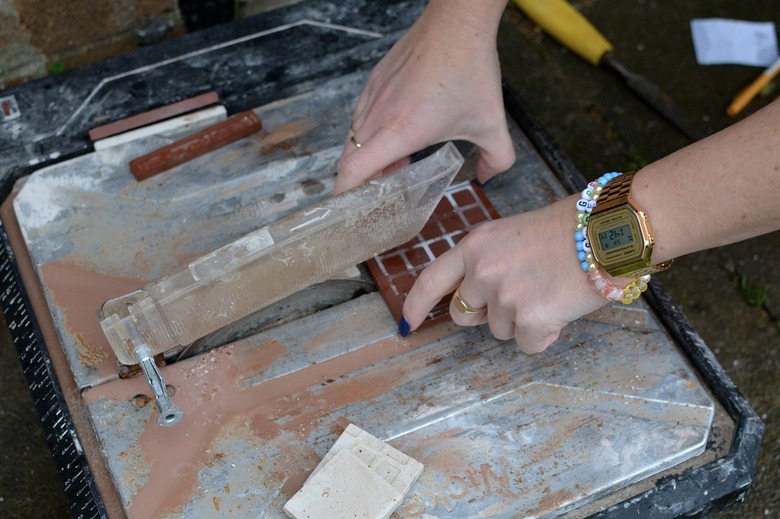
Step 2
Now that you can see how your tiles fit, use a tile cutter to trim any tiles that require cutting to fit into your hearth's dimensions. We've used an electric tile-cutting blade for ours (there are cheaper manual cutters available but they only really work best for simple cuts). It can be messy so this part is best done outdoors.
 Caroline Burke
If you don't want to invest in a tile cutter it's definitely worth asking friends or family if they have one you can borrow, or you could consider hiring one for the day.
Step 3
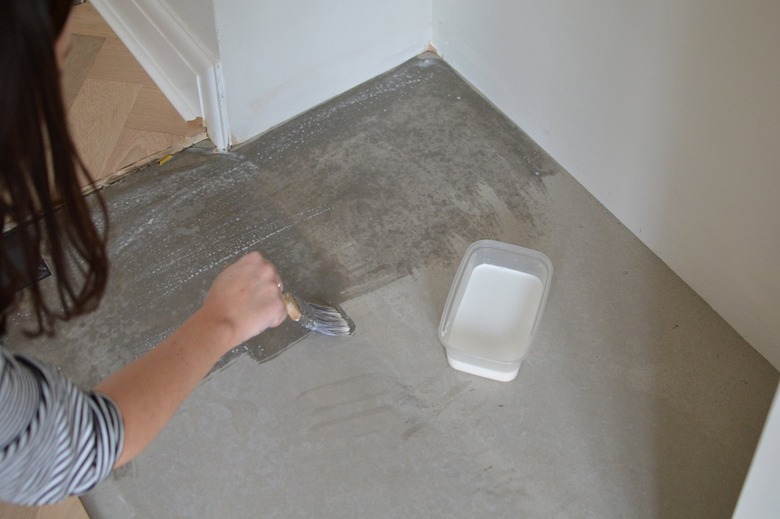
Prepare the surface by brushing on tile primer. This bonds the surface, making it ready for the tile adhesive.
 Caroline Burke
Tip
Have an old damp cloth within reach to clean up adhesive from your hands and tiles before you start!
Step 4
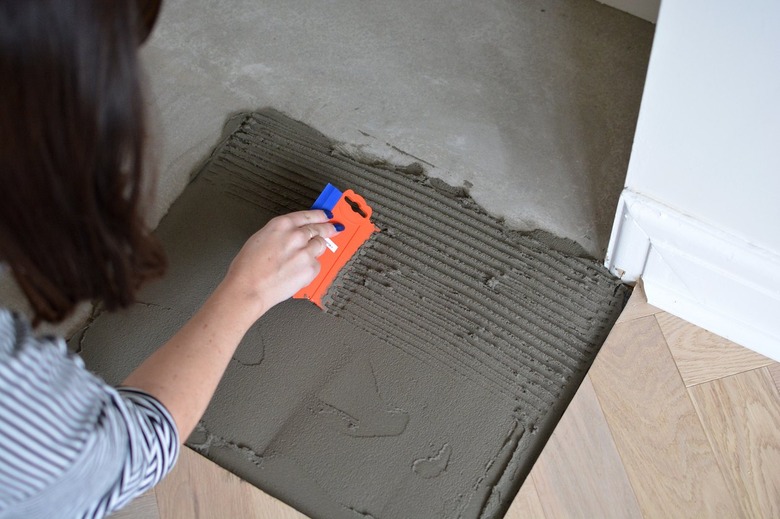
Using a trowel, place a good scoop of tile adhesive onto the hearth. Use the trowel to spread it out roughly 1/8 inch deep. Tile adhesive has a 'pot life' which means you only have a certain amount of time to use it before you should discard it. (Check what your manufacturer recommends as it does vary.) We recommend using just enough adhesive to tile 1/4 of the hearth at a time so you're not rushing against the clock to lay the tiles.
 Caroline Burke
Step 5
Run an adhesive comb or notched trowel through the adhesive to create ridges on the surface.
 Caroline Burke
Step 6
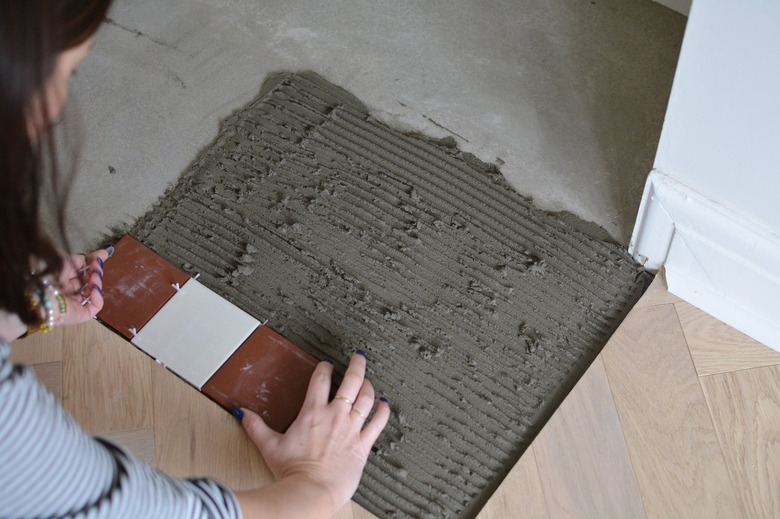
Start laying down your tiles by pressing them lightly into the adhesive with a slight twisting motion.
 Caroline Burke
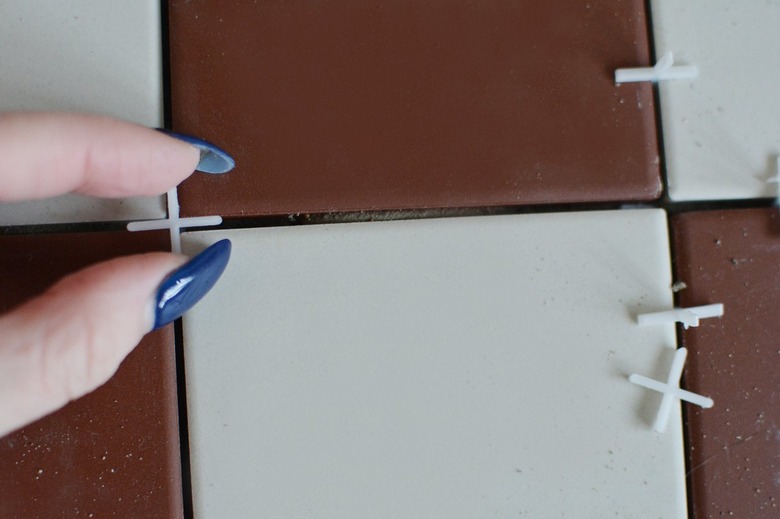
Step 7
As you continue to lay the tiles, pop in tile spacers, place them horizontally where the tiles meet at the corners to keep the edges lined up straight.
 Caroline Burke
You can also place them vertically at the sides to keep your grouting lines even. The ones featured here are handy as you can use them to scoop out any excess adhesive that comes up between the tiles later.
 Caroline Burke
Step 8
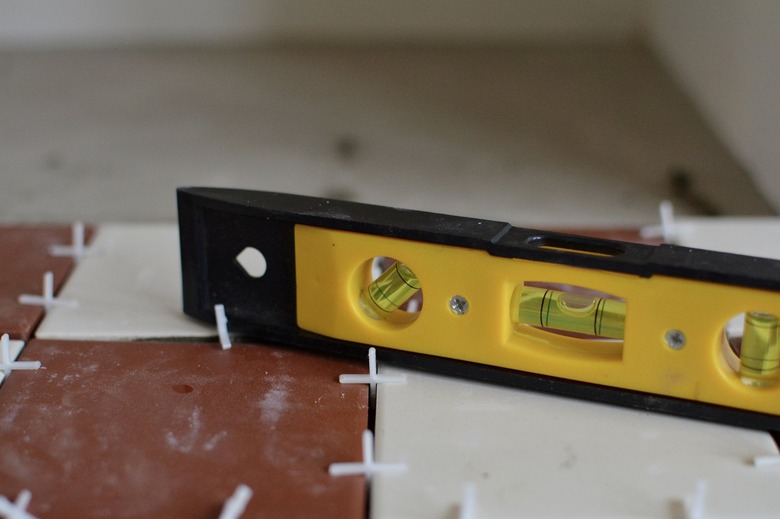
Periodically check that the tiles are level by placing a spirit level on top.
 Caroline Burke
Step 9
Leave the adhesive to dry for the required time then remove any visible tile spacers and clean down the tiles.
 Caroline Burke
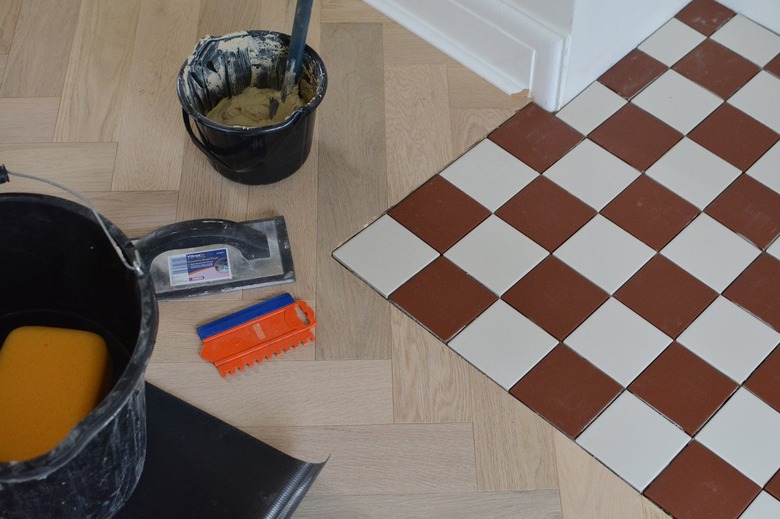
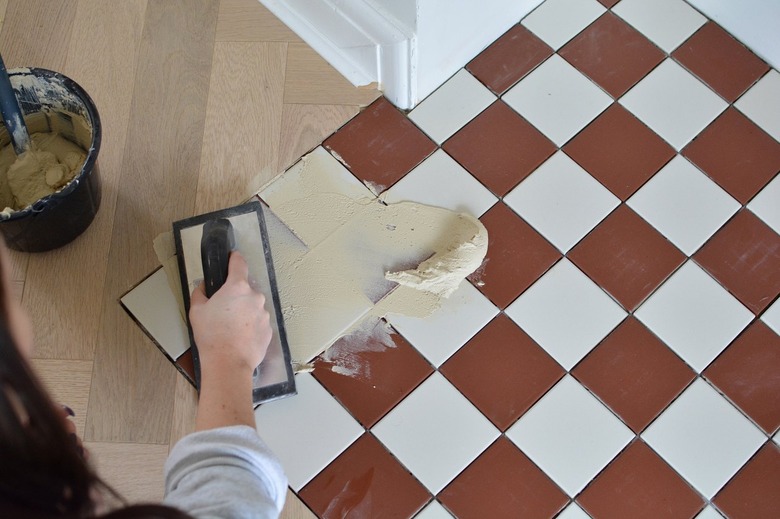
Step 10
Apply the grout in sweeping motions in all directions using a grout float. Make sure the grout is pushed down well between the gaps to fill the joints. The grout will start to cure once it is applied, so work in smaller sections to avoid the grout drying out too quickly.
 Caroline Burke
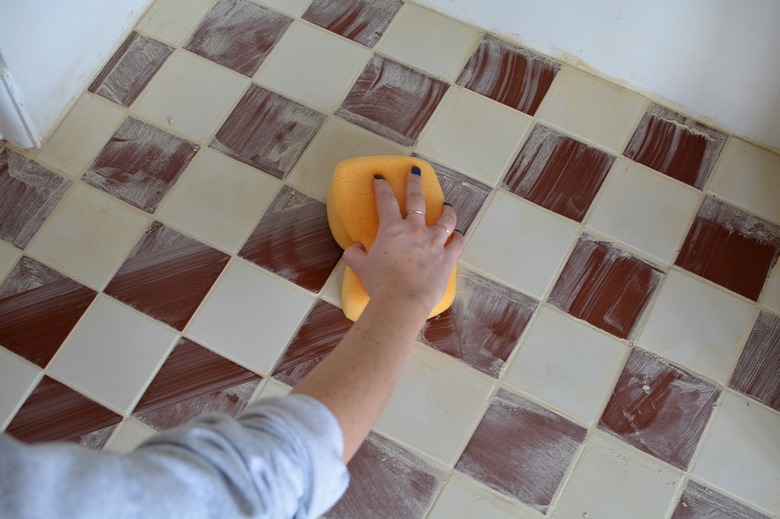
Step 11
Take a clean damp sponge (squeeze out any excess water) and lightly sweep it over the tiles to remove the excess grout. Wipe diagonally, not up and down to avoid removing too much grout from between the tiles.
 Caroline Burke
Repeat until the majority of the tiles are clean, then smooth off the joints by running your finger along the grout lines.
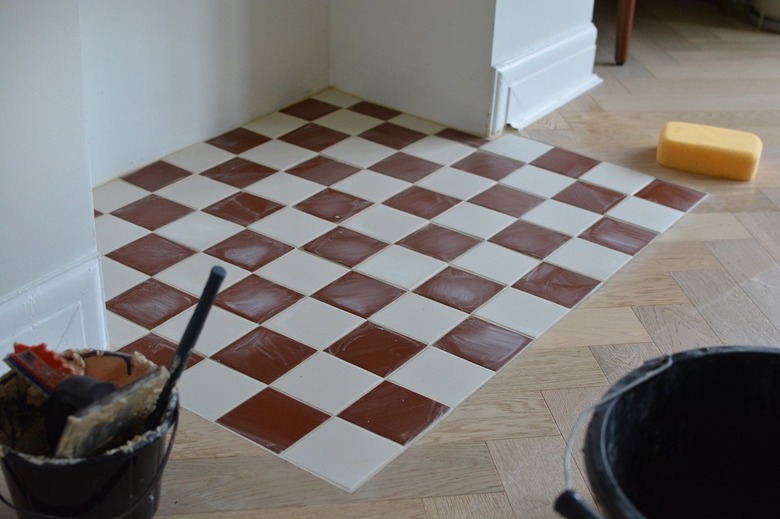
Step 12
Leave the grout to 'set' in the joints for 15 to 20 minutes before wiping the hearth one last time with a damp clean sponge. Leave the grout to dry fully before buffing off any remaining haze. We recommend that you refer to the manufacturer's grout instructions for the exact drying and buffing times since they can vary between manufacturers.
 Caroline Burke
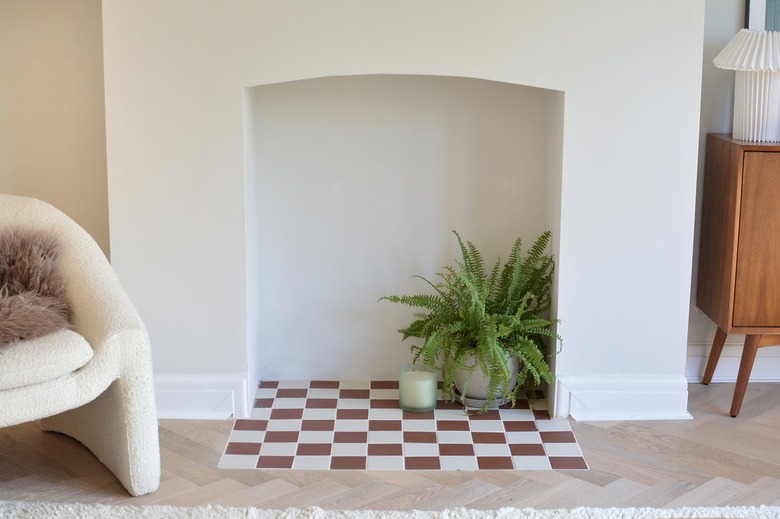
Now your new hearty is ready to enjoy!
 Caroline Burke