DIY Tree Skirt (No Sewing Required!)

We may receive a commission on purchases made from links.
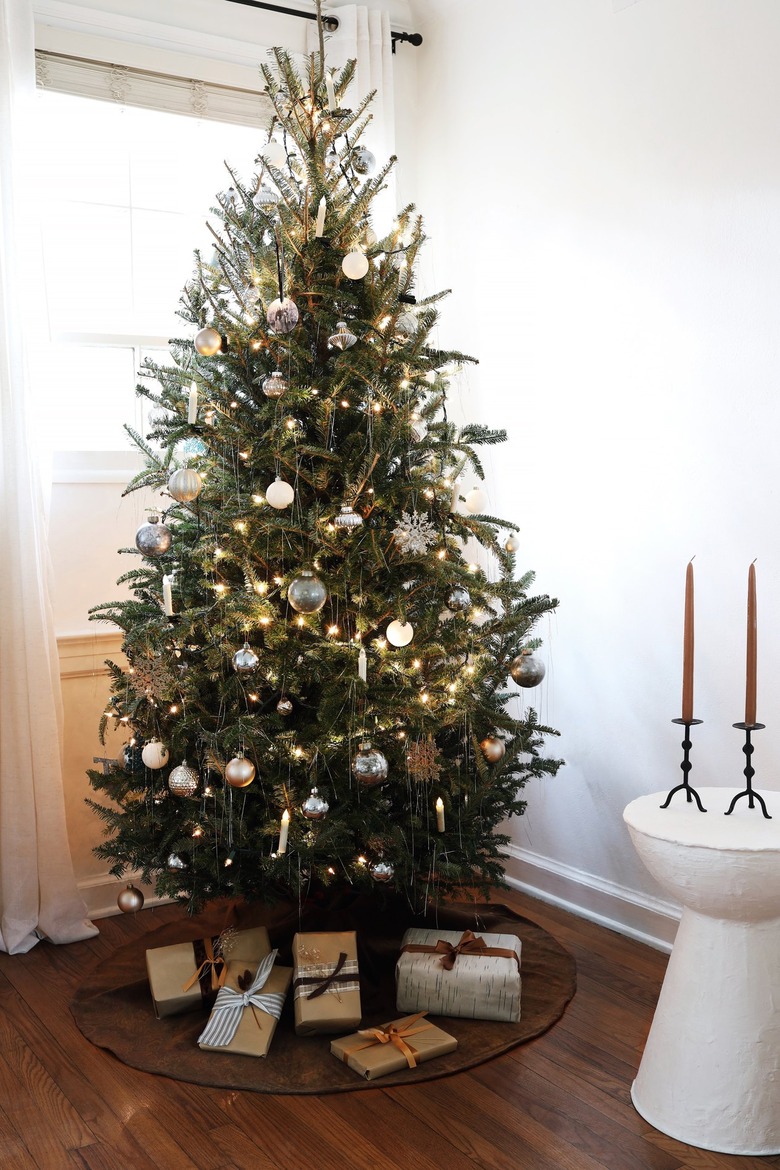
Traditional holiday colors are lots of fun, but sometimes it's nice to stray from cliche and experiment with a different palette. Adding a tree skirt that harmonizes with your existing home decor creates a festive focal point that feels thoughtful and unique. In this case, we went with a moody brown velvet featuring a muted paisley pattern for a touch of vintage earthiness. Heads up: you don't need any sewing skills to make a tree skirt yourself, and the whole thing can be done in about an hour.
Things Needed
 Trisha Sprouse
Step 1
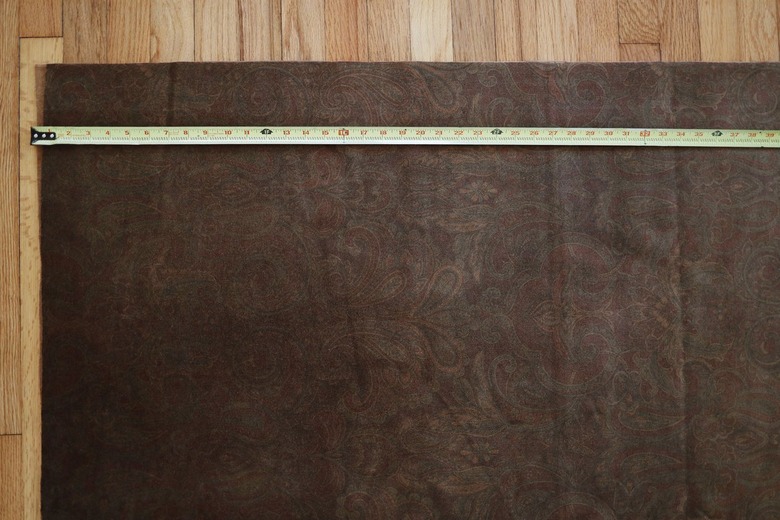
Determine the diameter you want your tree skirt to be — generally, it should be at least as wide as the bottom row of branches on your tree. Then measure and mark a large square on your fabric using that dimension, and cut it out. For example, we wanted our tree skirt to have a diameter of 51 inches, so we cut our fabric into a 51-inch-by-51-inch square.
 Trisha Sprouse
Step 2
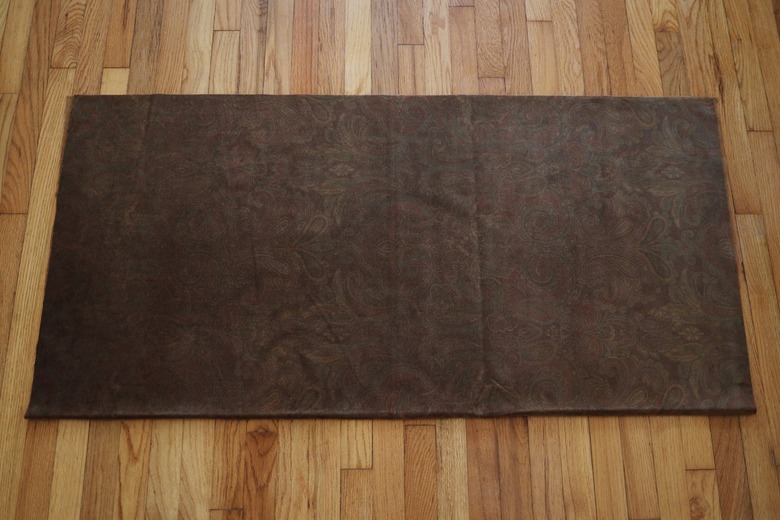
Fold your fabric square in half by bringing the bottom edge up to the top edge.
 Trisha Sprouse
Step 3
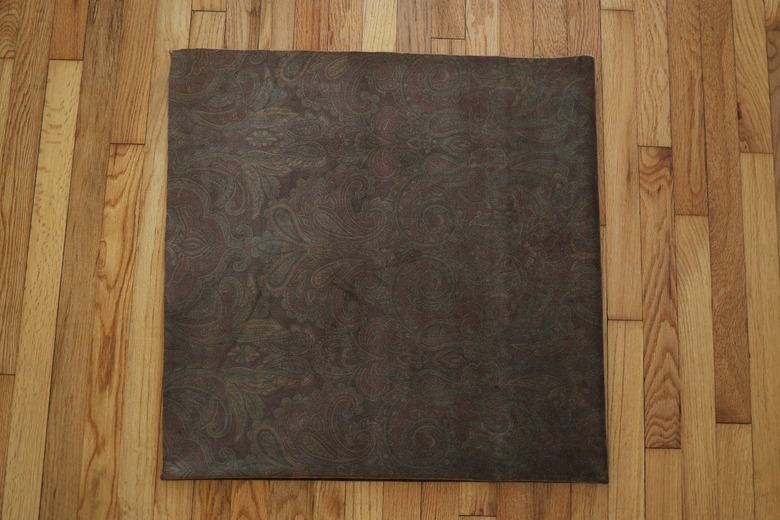
Fold your fabric in half again by bringing the right side to the left side.
 Trisha Sprouse
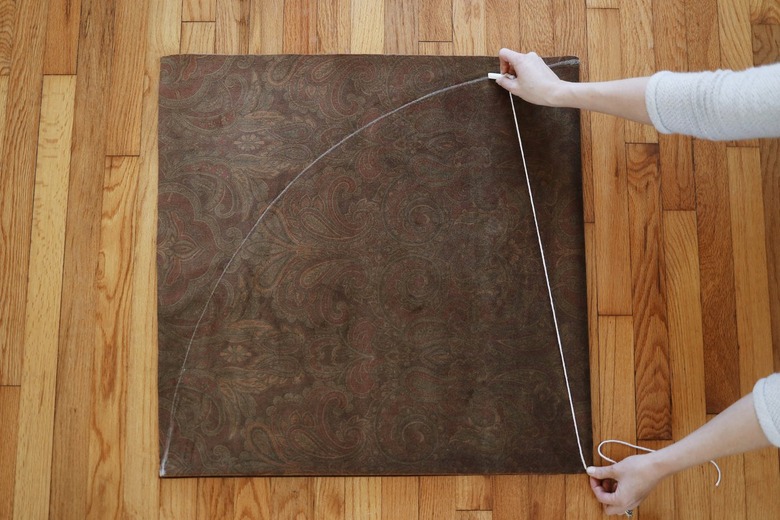
Step 4
Cut a long piece of string, and tie a piece of chalk to one end. Hold the loose end of the string firmly in the bottom right corner (this should be the folded corner with no raw edges). Stretch the length of the string until the chalk reaches the top right corner, and then drag the chalk from the top right corner to the bottom left corner to form an arc shape.
 Trisha Sprouse
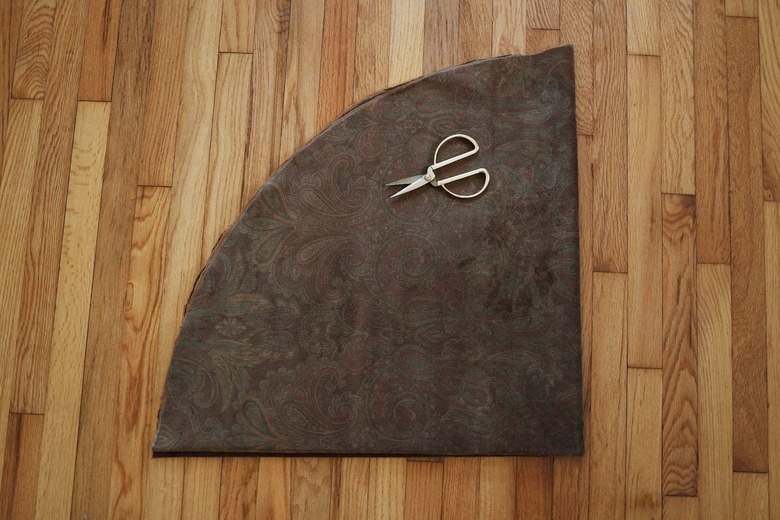
Step 5
Use scissors to cut the fabric along the chalk line. (If your fabric is really thick, it may be easier to cut through two layers at a time, instead of all four layers at once.) You should be left with a shape resembling a big slice of pie.
 Trisha Sprouse
Step 6
From the bottom right corner, measure and mark a dot that is 1 1/2 inches to the top and 1 1/2 inches to the left. Connect the dots with chalk by drawing a small arc shape. Then cut along the chalk line.
 Trisha Sprouse
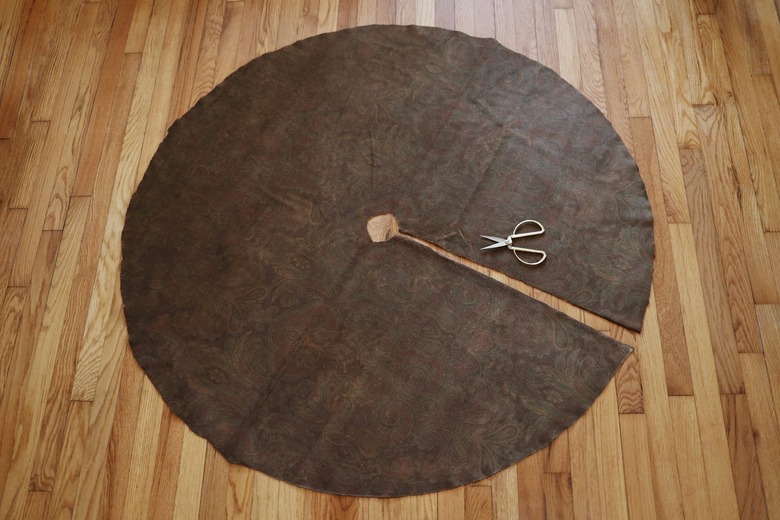
Step 7
Open the fabric up — you should now have a large circle with a small hole in the center, somewhat resembling a donut. Cut a slit from one side to the hole in the center. This will allow you to wrap the skirt around the tree.
 Trisha Sprouse
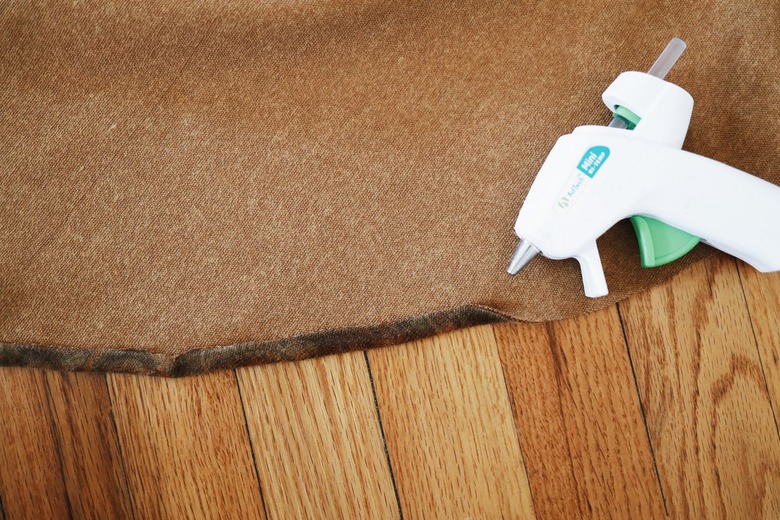
Step 8
Flip the fabric over, turn all of the raw edges over by 1/4-inch, and hot glue in place. (Note: you could use iron-on hemming tape instead of hot glue, but we didn't want to risk ruining our velvet fabric with a hot iron.)
 Trisha Sprouse
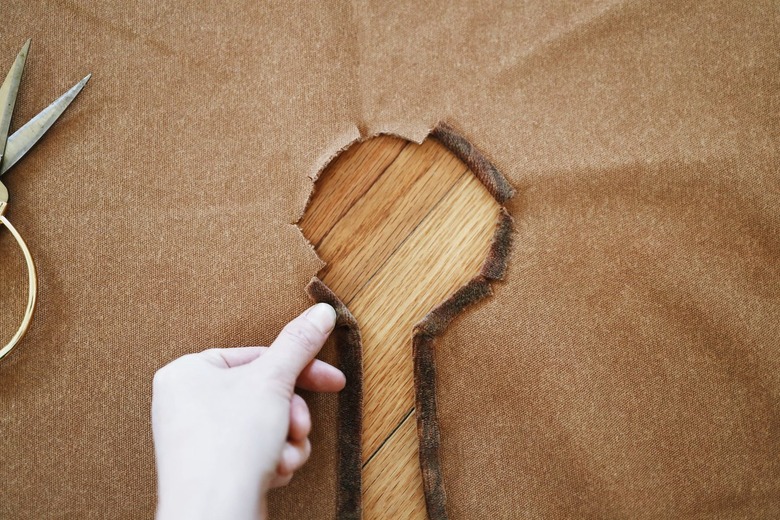
Step 9
To finish the raw edges around the hole in the center, cut several small notches in the fabric, turn each notch over 1/4 inch, and hot glue in place.
 Trisha Sprouse
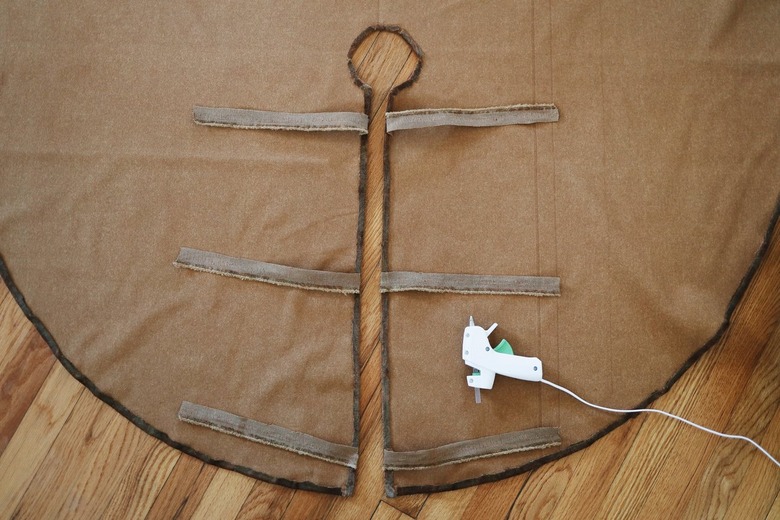
Step 10
Cut six strips of ribbon that are each 6 inches long. Glue them in three pairs along the slit in the tree skirt. Attach them so that the right side of the ribbon is facing up when you flip the tree skirt over to its right side. You'll just be gluing a small piece of the ribbon along the slit — the ribbons will then be pulled through the slit in order for you to tie the skirt together.
 Trisha Sprouse
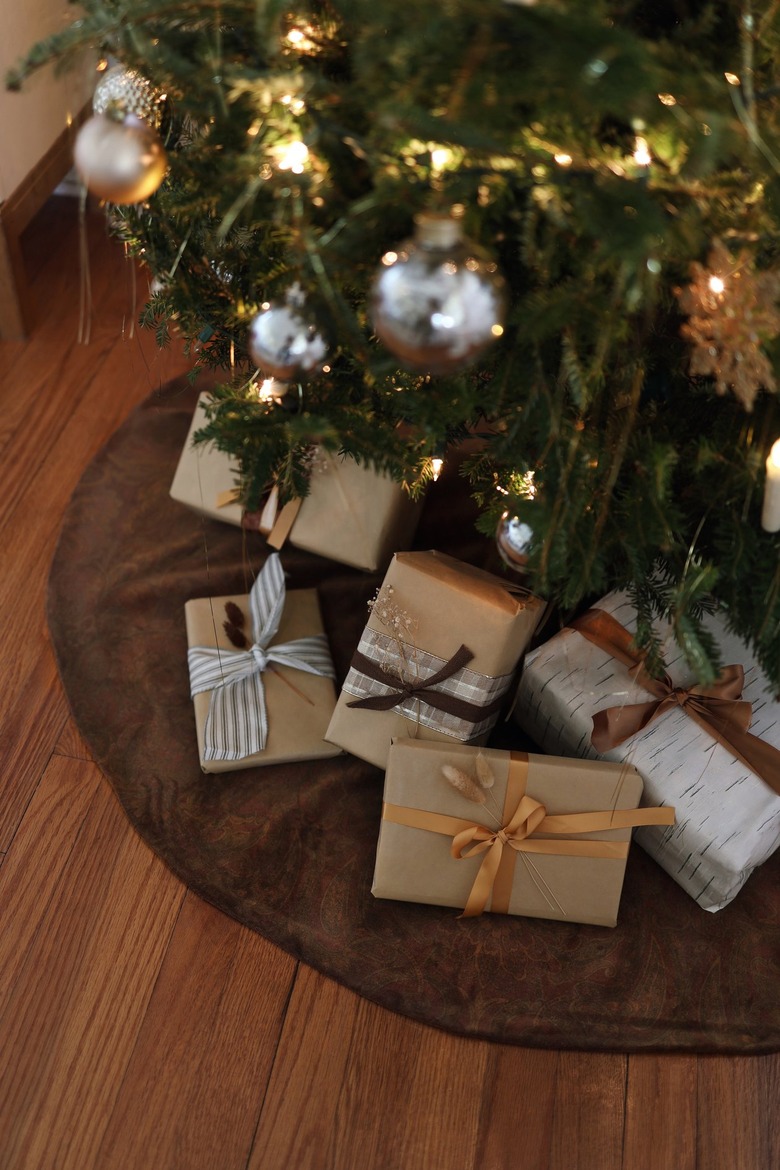
Now simply wrap your skirt around the base of your holiday tree, tie the ribbons together in the back, and let the festivities begin!
 Trisha Sprouse