See Exactly How To Make A Paper Mache Bowl (It's So Easy!)
We may receive a commission on purchases made from links.
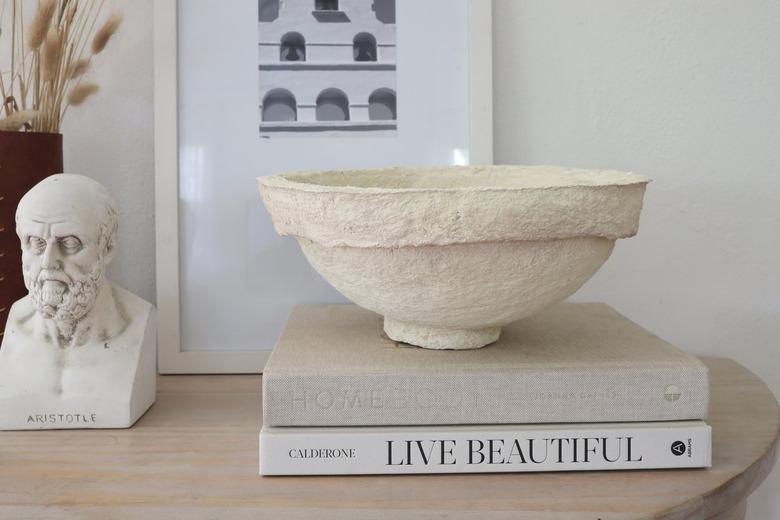
Paper mache bowls have become a hot commodity in home decor. It's easy to see why — they bring great texture and visual interest to your space. Plus, they have a wonderful artisanal quality since every piece is uniquely handcrafted. While you could easily buy one, you can just as easily make one yourself. It's a very easy (and fun!) DIY that even kids can help with. The best part about making your own bowl is that you can tailor the size and color of it to fit your home perfectly.
Things Needed
-
Bowl (to use as a mold)
Step 1
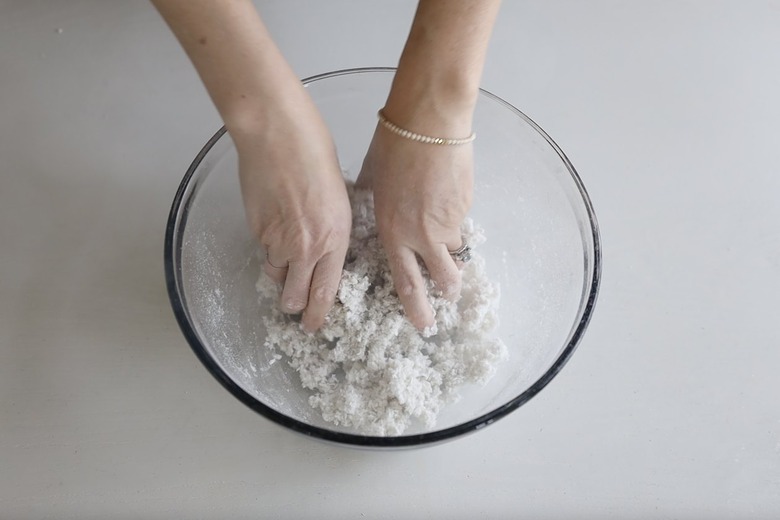
Add paper mache pulp to a large mixing bowl, and then add water a little bit at a time. Mix them together, continuing to add water as needed, until you get a dough-like consistency.
 Trisha Sprouse
Step 2
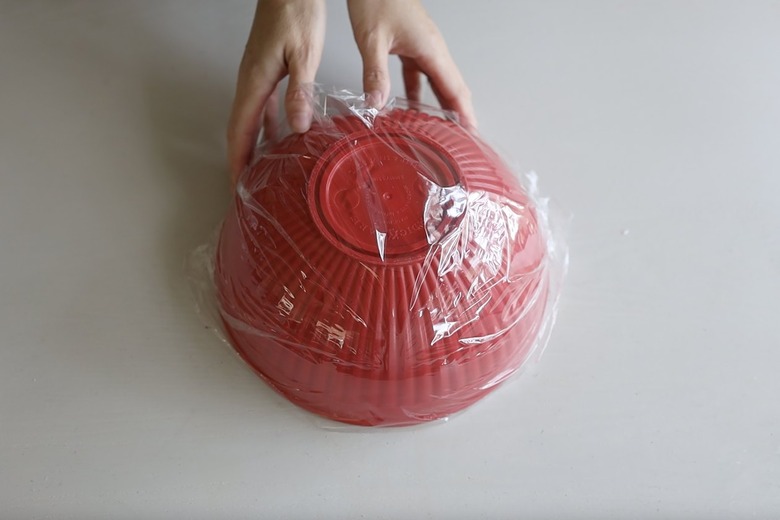
Cover the bowl you're using as a mold with plastic wrap. This will make it easier to remove the paper mache from the mold once it's dry.
 Trisha Sprouse
Step 3
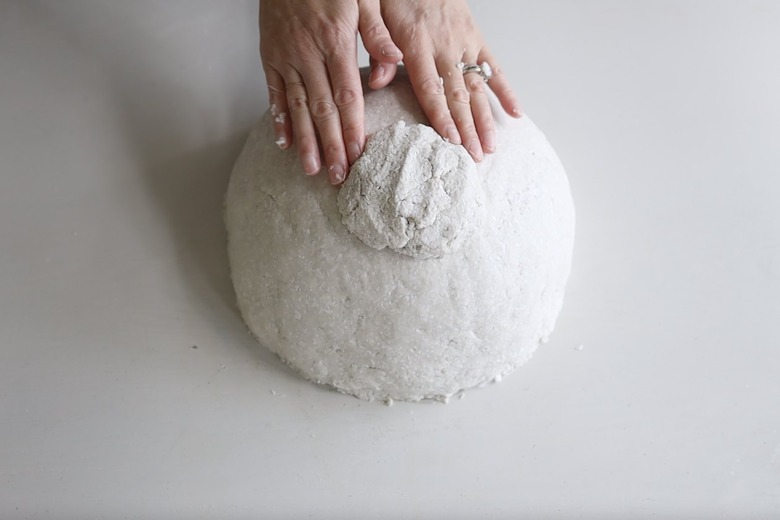
Press the paper mache dough around the entire mold, creating a layer that's about 1/2-inch thick. Smooth it out as you go, and seal any cracks or holes.
 Trisha Sprouse
Step 4
Place a large handful of paper mache in the center bottom of the bowl and shape it to create a footed base. Make sure you smooth the edges into the bowl to create a seamless look.
 Trisha Sprouse
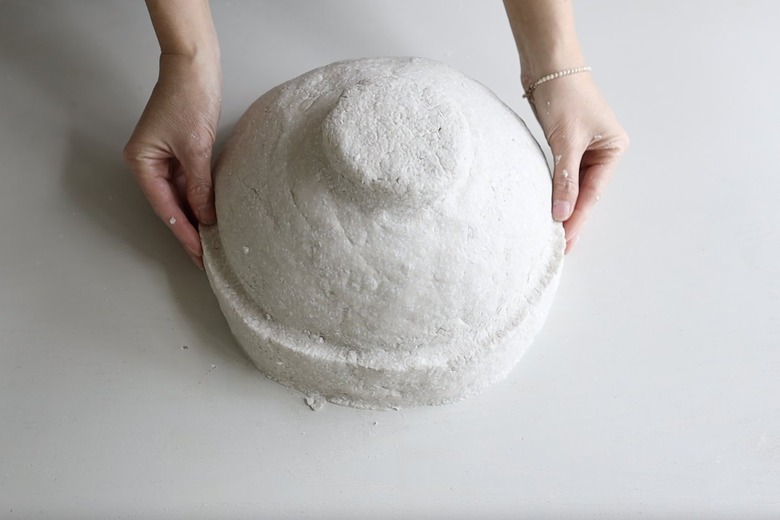
Step 5
Press more paper mache around the top rim of the bowl, creating a banded edge that's about an inch wide and 1/2-inch thick. Again, smooth the edges into the rest of the bowl.
 Trisha Sprouse
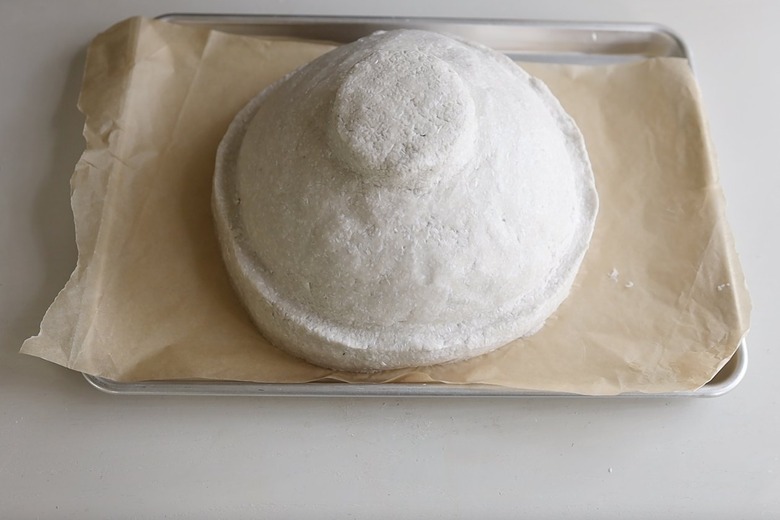
Step 6
Let the bowl dry for a day or two. It will lighten in both color and weight as it dries.
Tip
If your bowl isn't drying as fast as you'd like, you can use a hair dryer to speed up the process.
 Trisha Sprouse
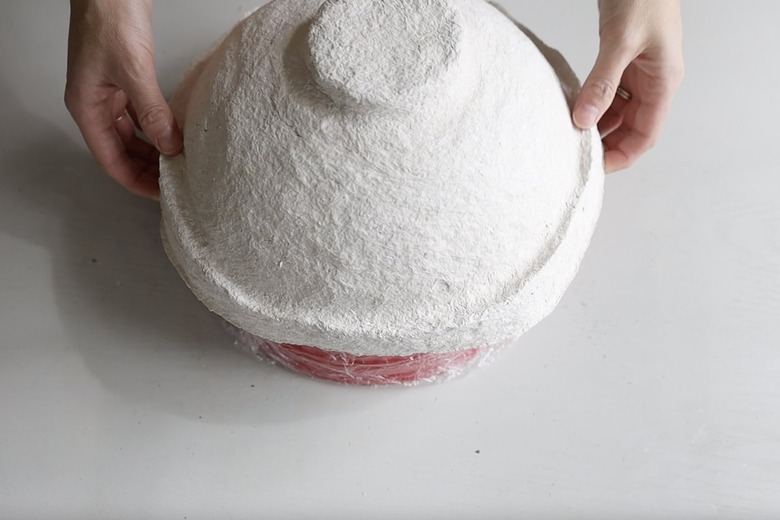
Step 7
Once the bowl is completely dry, gently wiggle and pull it to release it from the mold.
 Trisha Sprouse
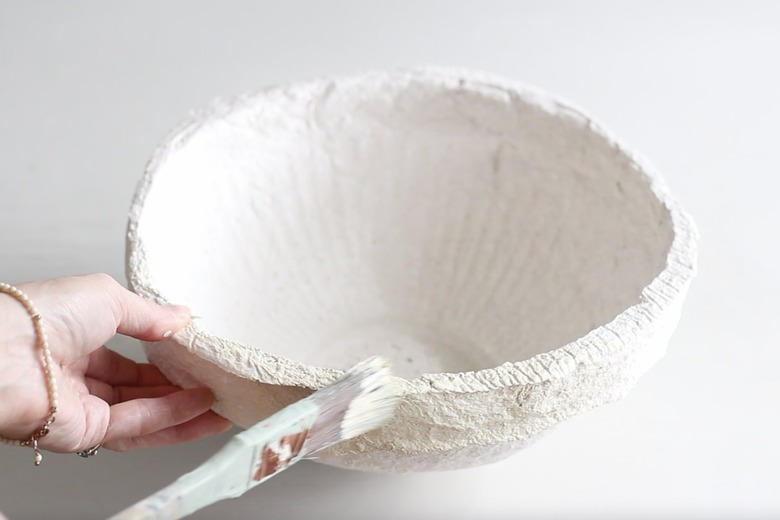
Step 8
You could leave the bowl as-is, or paint it any color you like. We painted it with a creamy hue for a more aged look.
 Trisha Sprouse
Your bowl is ready to use (just not for food!). We love to use it as a catch-all for keys, jewelry, and other trinkets.
 Trisha Sprouse
 Trisha Sprouse