How To Build A DIY Platform Deck (Free Plan Included)
We may receive a commission on purchases made from links.
Think building a deck is only possible for the pros? Think again! We built our own DIY platform deck in just two days, and are sharing the step-by-step process below — including our deck plan drawing. Let's get started.
 Carrie Waller
Things Needed
-
Assorted outdoor slate tiles
-
Sand or loose fill dirt
-
Metal bar for leveling
-
Eye protection
-
Drill bit
-
Hammer
-
4-inch-by-4-inch-by-8-feet treated posts (2)
-
2-inch-by-6-inch-by-12-feet treated pine boards (17)
-
1-inch-by-6-inch-by-12-feet treated deck boards (25)
-
Corner braces (8)
-
String
-
Pressure washer, if desired
 Carrie Waller
Step 1
Check with your local permit office to see if you need a permit for your deck. We ultimately needed to have our deck signed off by the city, so double-check to see if you need to follow your own local guidelines before getting started.
Keep in mind that this particular deck design is not meant to be connected to a house or structure. It is also a platform-style deck, meaning that it's sitting on the ground without the use of concrete piers. The only anchors used here were six 4-inch-by-4-inch posts, which we'll explain in the sequence below. Check national and local code for height restrictions if you want to avoid the use of railings, like we did.
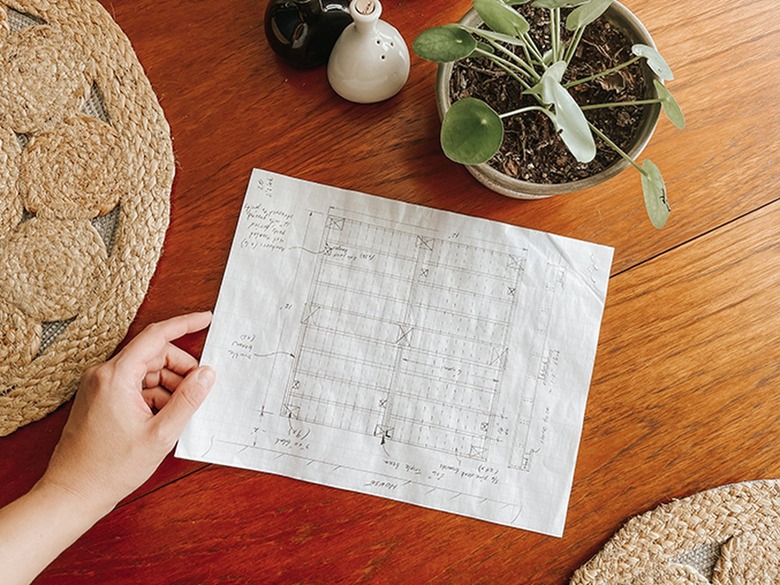
Decide on the measurements for your deck. Ours, for reference, measures 12 feet by 12 feet. Keep in mind that the top deck boards extend over by an inch, so the deck frame below (composed of beams and joists) will be slightly smaller by a couple of inches. Download a free PDF of our deck plan drawing here.
Step 2
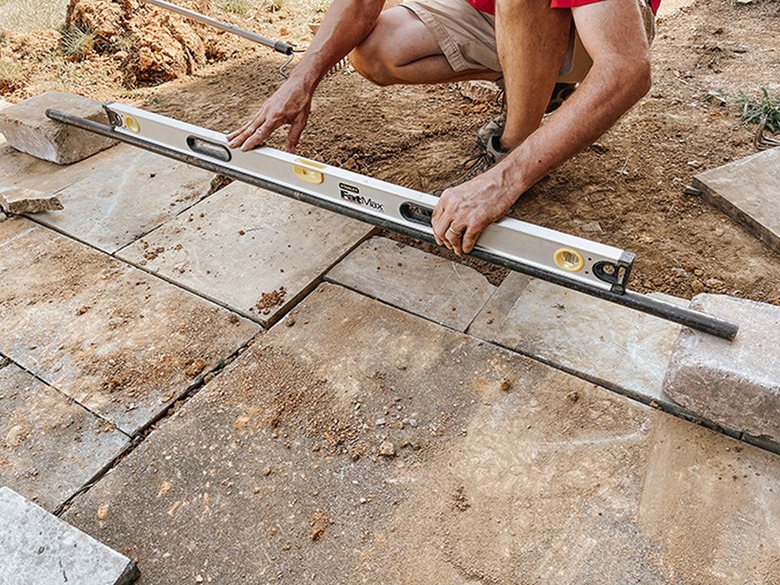
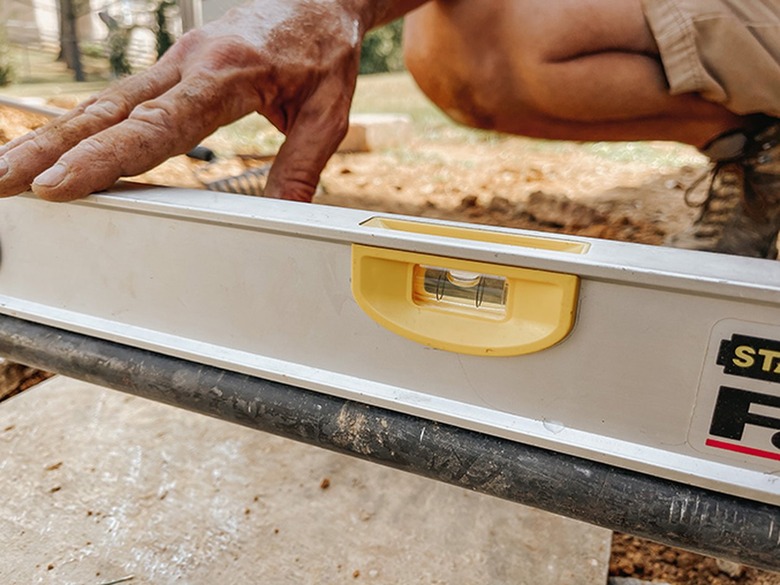
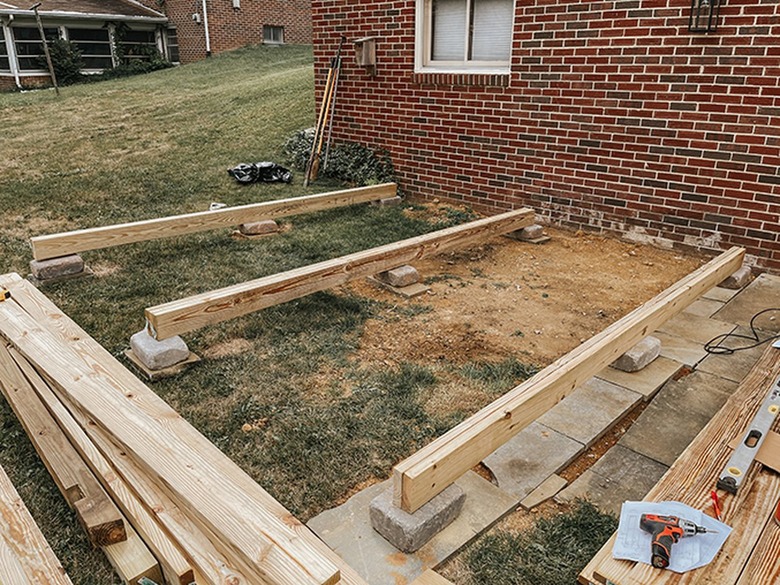
Lay slate tiles at each of the outside four corners where your deck will sit based on the design drawing. Place one more in the exact center of the deck, followed by four others between the outer corner slate pieces, for a total of nine tiles. Place cement blocks on top, and use a level to level the blocks. If your level isn't long enough (like in our situation), use a straight piece of wood or metal bar to put under the level to extend it from one block to the next.
If your slate and blocks need to come up in order to be level, fill underneath with sand or loose fill dirt. Use a pick ax to loosen and move the dirt, as needed. Make sure you pack the dirt or sand down before putting the slate and blocks on top so that you reduce the amount of gradual settling over time.
Once you have the blocks leveled on top of the slate, use measuring tape to make sure your blocks are each in the right place based on your design drawing. To double-check how square your block placement is, measure the diagonal in both directions. The two measurements should be identical.
 Carrie Waller
 Carrie Waller
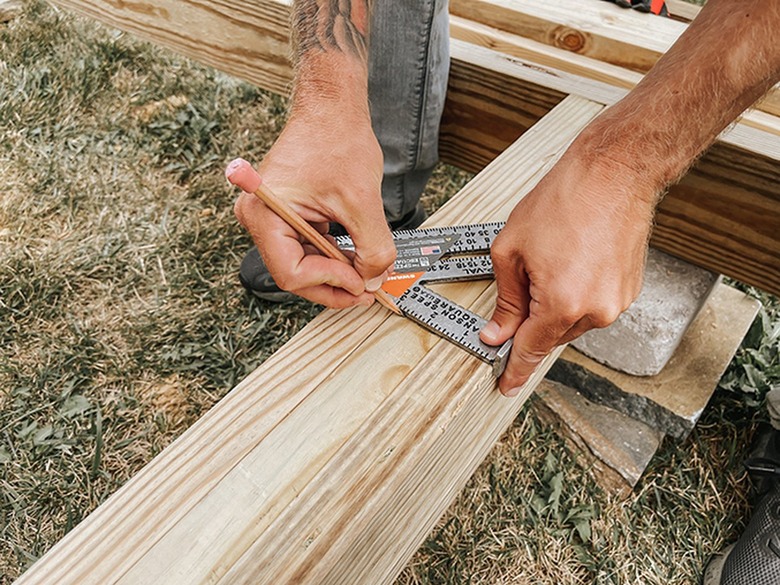
Step 3
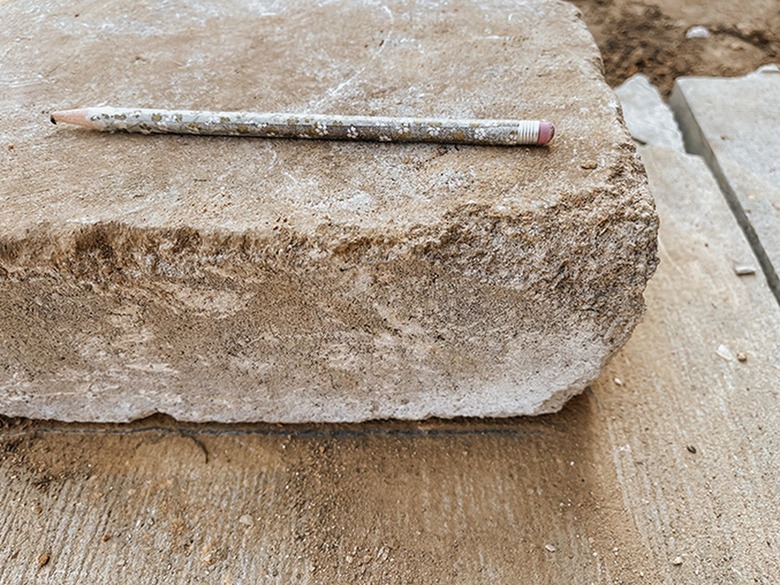
Draw a pencil outline around each block once they're perfectly placed and leveled, that way, if they accidentally get jostled out of place, you'll know where to scoot them back to.
 Carrie Waller
Step 4
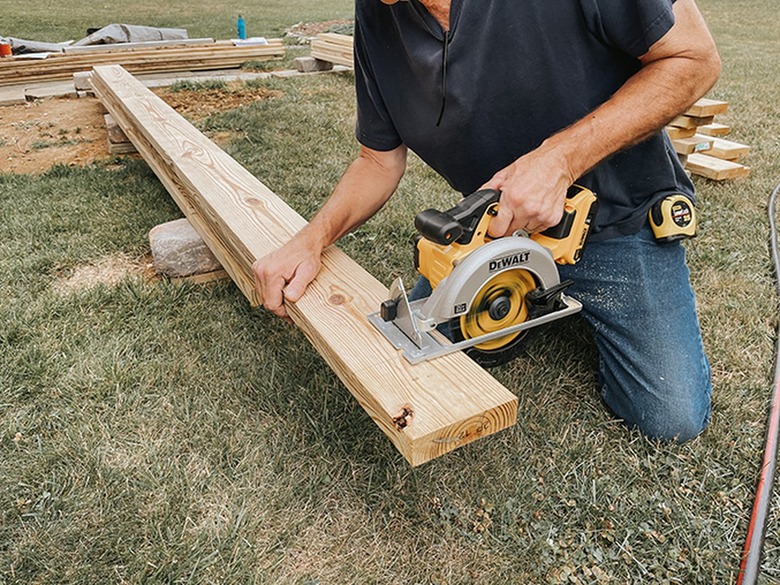
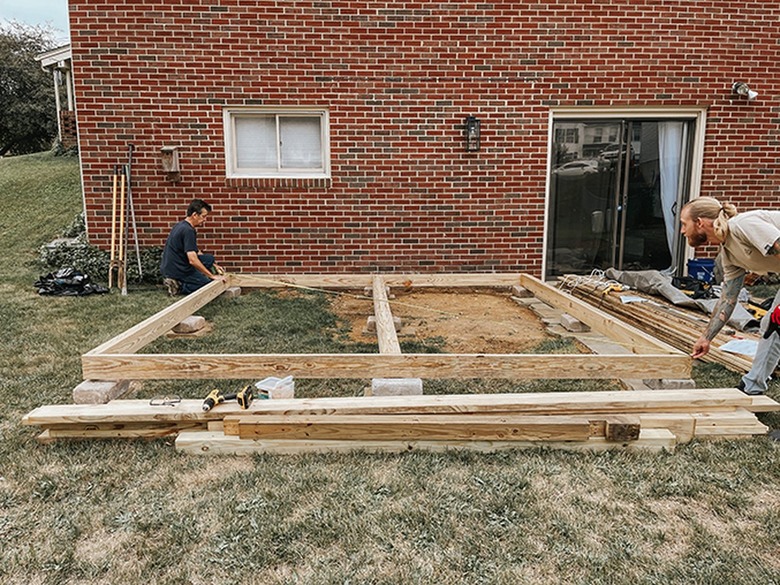
Measure and mark the proper lengths of your two double beams, single triple beam (for the center of the deck foundation), and two rim joists for either end, based on the drawing. Cut them to size using a circular saw.
 Carrie Waller
Step 5
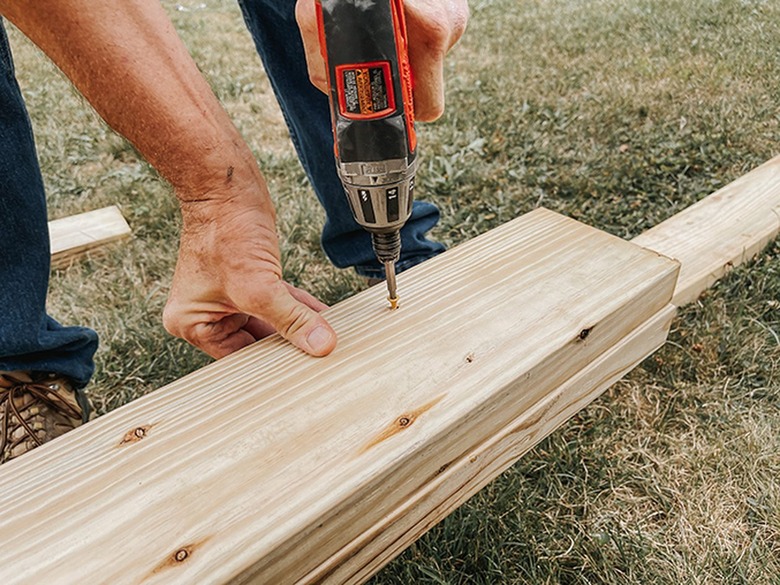
Measure and mark spots for two screws, each in line with the other, on the rim joists and beams every 16 inches. If you need to butt joists up against each other to create double beams based on city code (like we did), screw them together using 2 1/2-inch deck screws.
 Carrie Waller
 Carrie Waller
Step 6
Lift and place the finished double beams and single central triple beam on top of the blocks.
 Carrie Waller
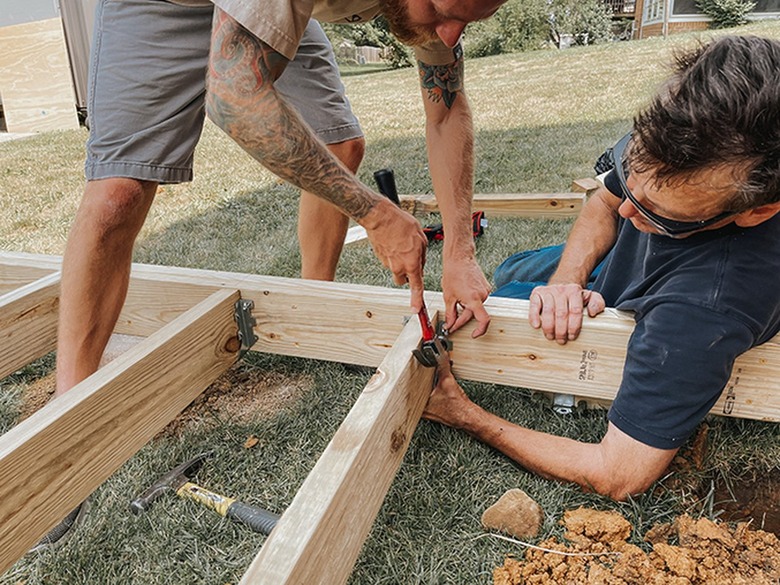
Step 7
Lift and place the two end rim joists on top of the blocks to meet the ends of your beams. This will complete the shape of your deck frame. Pre-drill holes in the rim joists, and screw them to the ends of the beams using 2 1/2-inch deck screws.
 Carrie Waller
 Carrie Waller
Step 8
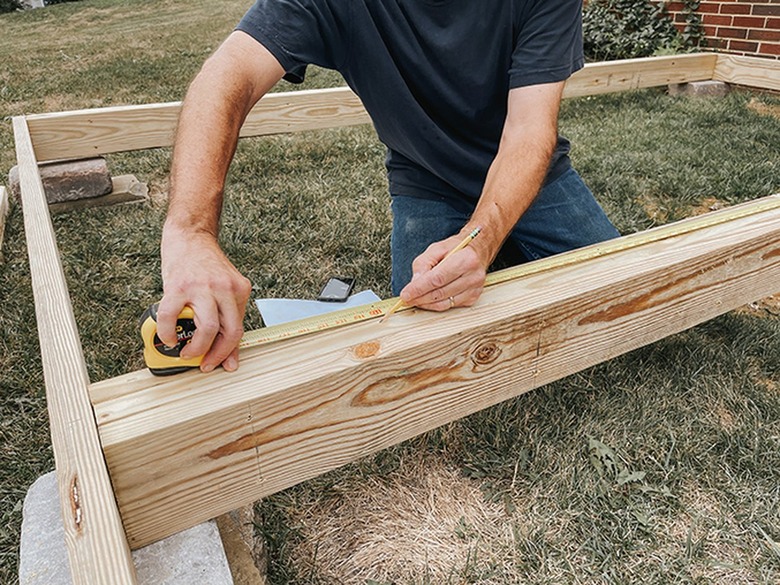
Measure the diagonal and adjust the frame as needed based on the drawing until everything is squared up.
 Carrie Waller
Step 9
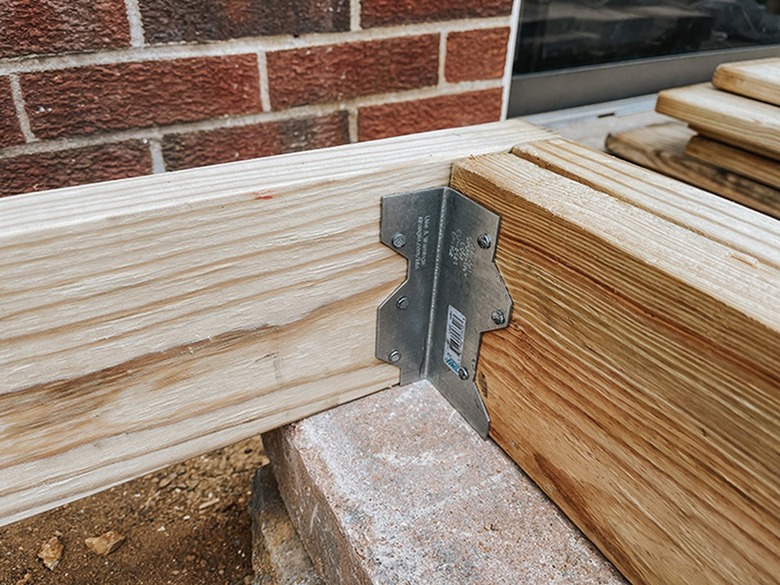
Use a hammer and nails to attach corner braces in each of the corners where a beam meets a rim joist. There should be eight corner braces in total if you're following our design.
 Carrie Waller
Step 10
Measure and mark the tops of the outer double beams every 16 inches. Do the same on the center triple beam. This denotes where your joist hangers will go.
 Carrie Waller
 Carrie Waller
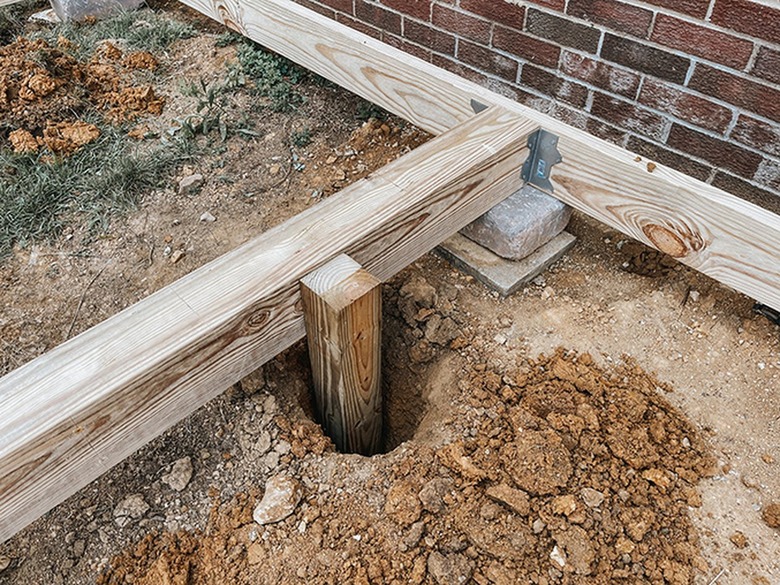
Step 11
If your city requires anchors per building code, use a tampering iron and post hole digger to dig holes roughly 12 inches deep. If the dirt is especially solid/hard, fill the hole with water and let it sit for an hour or so to loosen the soil. Then continue digging it out.

 Carrie Waller
Step 12
Before finishing the anchor install, work on installing the joists. You'll need to work on installing the joists first since the anchors would otherwise get in the way of your hand when you need to hammer in the joist hangers.
The first step in installing the joists is to measure and cut the joists to size. If you're following our design, they should each be 65 1/2-inches long. Nail them in place with joist hangers on either end where you measured and marked the beams before in Step 10. Make sure the tops of the joists are level with the tops of the beams.
 Carrie Waller
 Carrie Waller
Step 13
Now you can officially install the anchors. Measure and cut the 4-inch-by-4-inch treated posts to size (ours got cut to 2 feet in length), then put them in the holes you dug. Backfill around the anchor with dirt to make it sturdy. Bolt deck ties around the anchors and into the beams. Then hammer in place the rest of the way.
 Carrie Waller
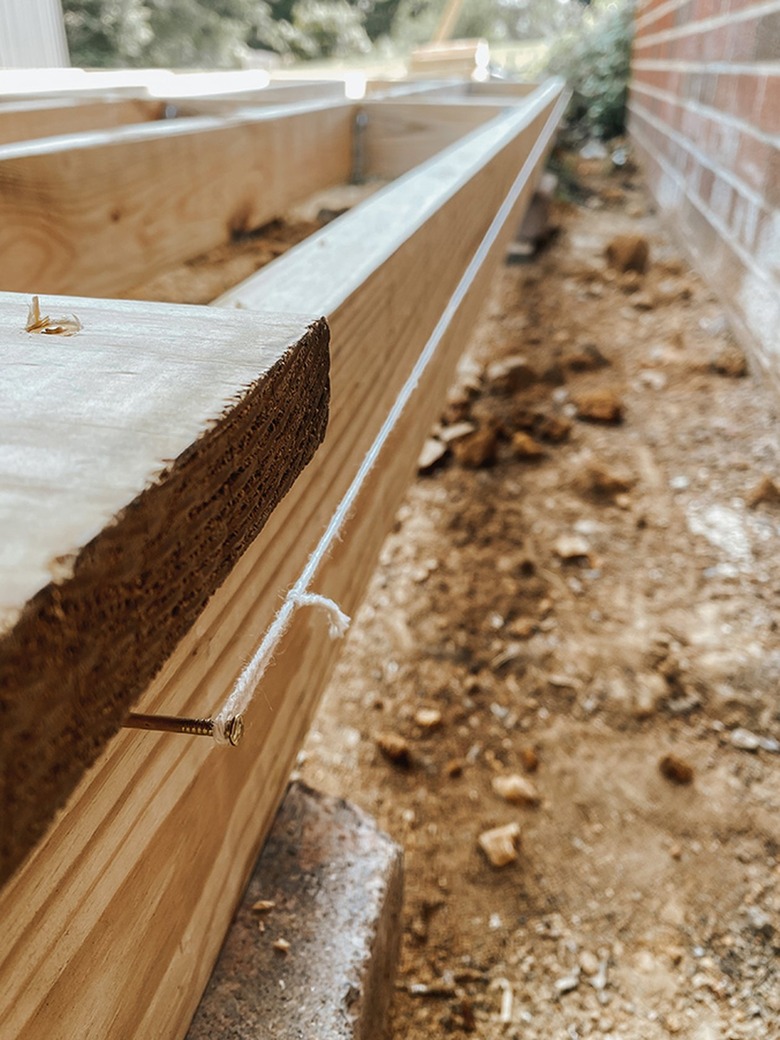
Step 14
Time to install the deck boards! To ensure that the ends of the deck boards are all lined up with one another, hammer two nails, one on each end, into the back side of the deck. Tie a string between the nails, and make sure it's run exactly one inch parallel away from the deck. Again, you'll use this as a guide to make sure all of the deck board ends are lined up with one another.
 Carrie Waller
Step 15
Keeping in mind that the actual deck board dimension measures roughly five inches wide, and that they will overhang the outside double beam by one inch, run a snap chalk line parallel to how the deck boards will run four inches in from the edge of the deck beams. Snap the chalk line to put colored marks/lines on the tops of each of the joists. Now, lay your first deck board down, making sure that it's perfectly straight and lined up with the snapped chalk marks you made. You'll need a second person to tug or push on the board to make sure it's perfectly straight as you screw it in using 2 1/2-inch deck screws.
 Carrie Waller
Step 16
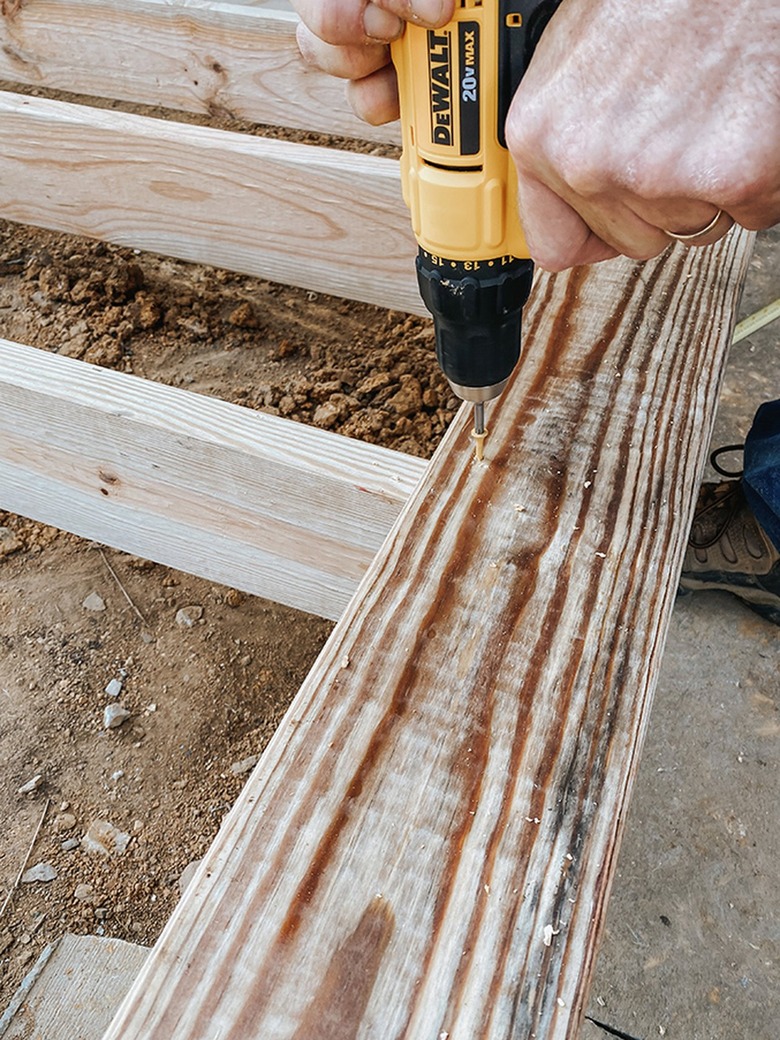
Once you have that first perfectly straight board in place, you'll screw in each subsequent deck board from there. Leave a small gap (roughly the width of a nail) between the boards to allow for drainage and wood expansion. Just use four or so screws per board to get them all in place. When you're done with all of the boards, you can finish screwing in the rest of the screws. You'll need 20 screws per board, which works out to two screws over each joist for each deck board. Remember to use the temporary string guide that you installed in Step 14 to help line up the ends of the deck boards as evenly as possible.
Tip
When all of the deck boards are in place but before you've put in the rest of the screws, you will lose sight of the joists. Measure and find the center of the joists underneath, then run the snap chalk line perpendicularly across the tops of the deck boards on top to give you a guide for screwing into the joists now hidden below the deck boards.
 Carrie Waller
Step 17
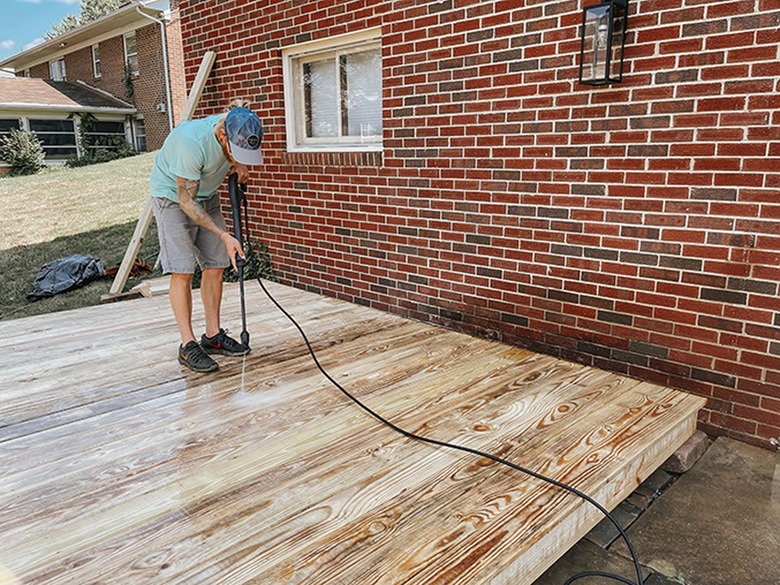
Use a circular saw to cut the outside edge of the deck boards cleanly and evenly (use the snap chalk line again to create a guide if you want to). Pressure wash the deck to get rid of any treatment residue from the hardware store. This will also get rid of the chalk lines.
 Carrie Waller
 Carrie Waller
Step 18
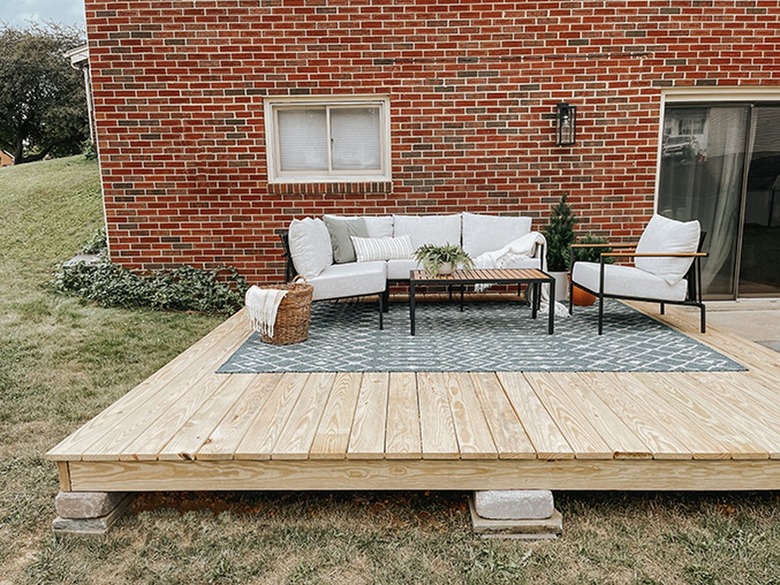
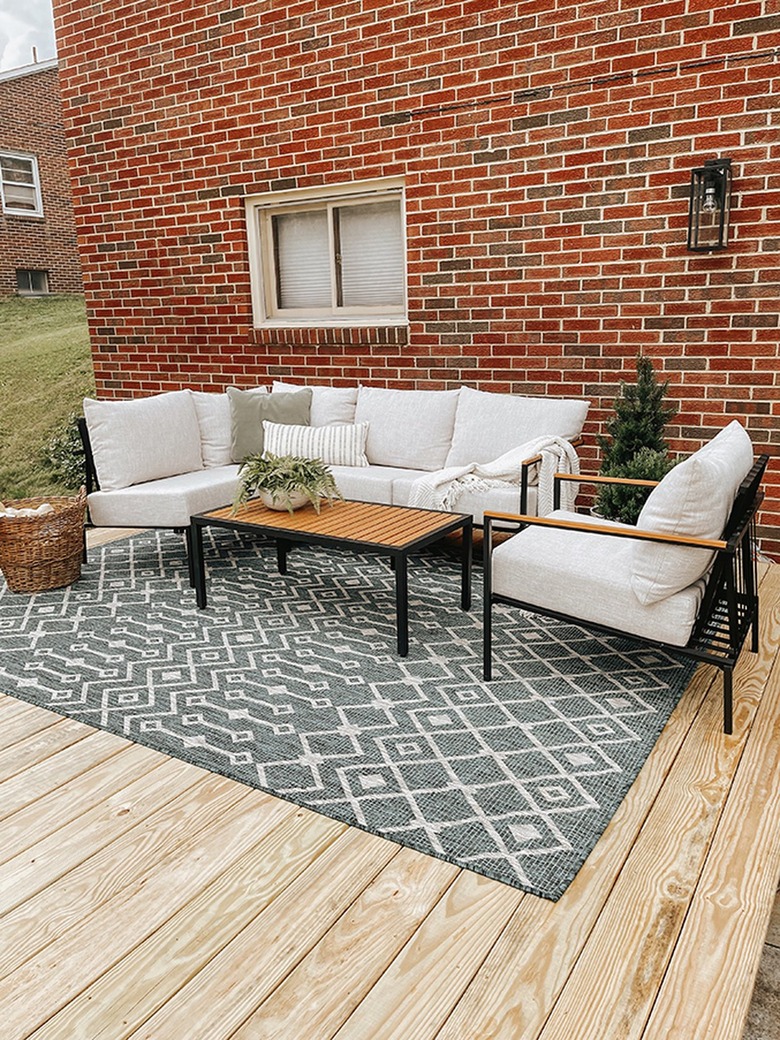
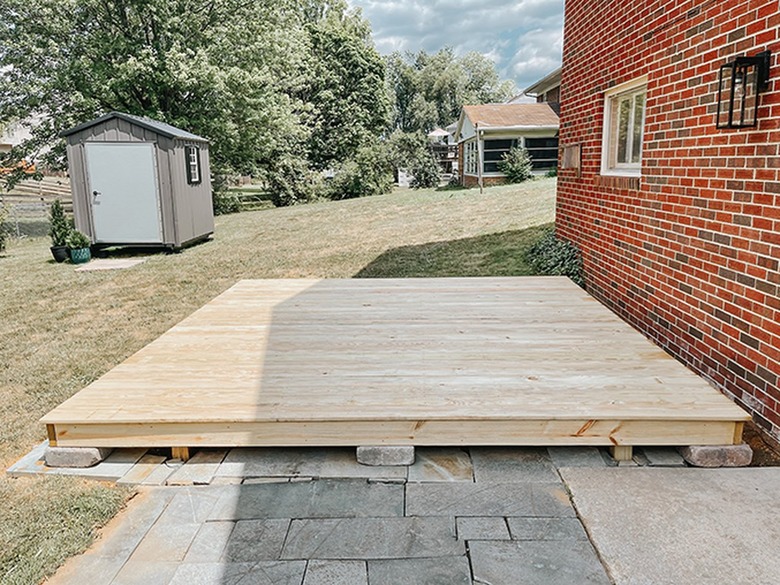
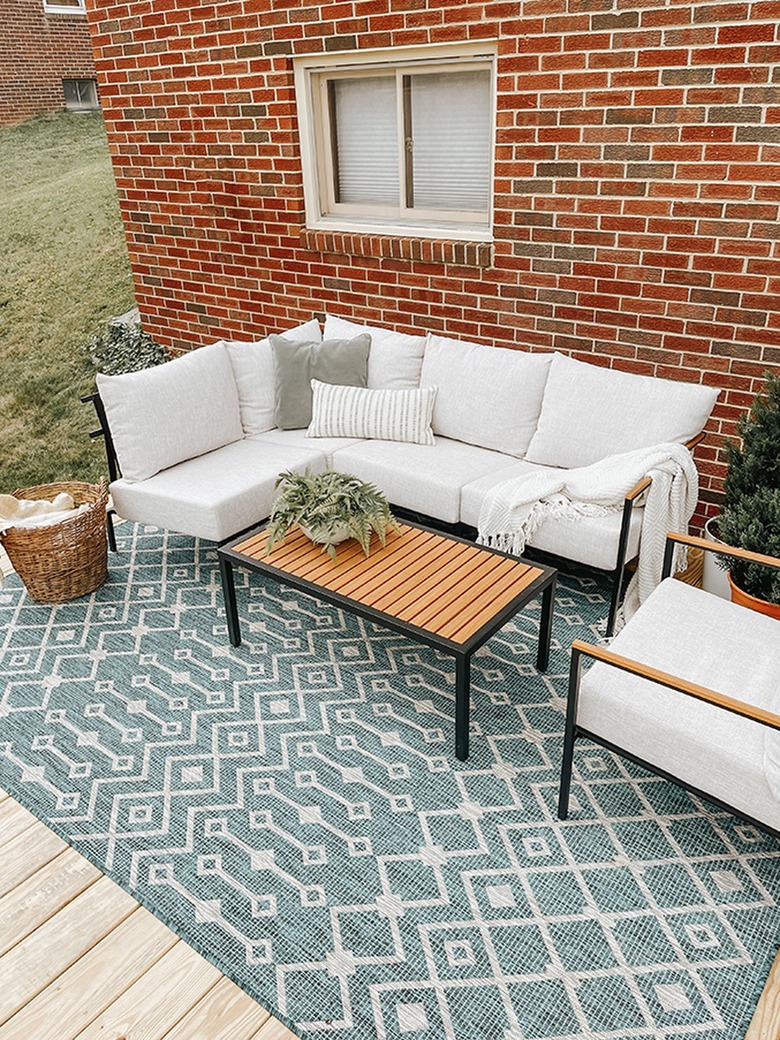
You'll need to wait before staining it. The length of time will depend on the time of year you built the deck. We won't be staining our deck for three to four months. This allows the treated wood time to dry out entirely. It's okay to go ahead and use the deck, though, so feel free to load it up with cool outdoor furniture and an outdoor rug.
Carrie Waller
 Carrie Waller