Wood Charger + Beads + Rope = This Cute Boho Hanging Planter
We may receive a commission on purchases made from links.
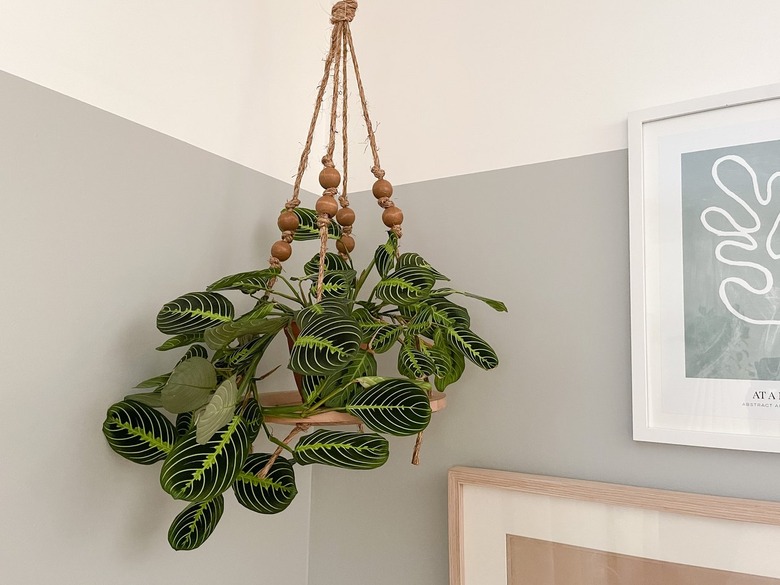
Even that empty corner in your home wants to feel cute, so why not dress her up with an adorable boho hanging planter? This DIY is so easy, you can definitely do it in one day. Time to break out the craft supplies and turn up your favorite playlist. We can pretty much guarantee that you'll enjoy making this hanging plant stand using simple materials, including a wood charger, rope, and beads.
 Carrie Waller
Step 1
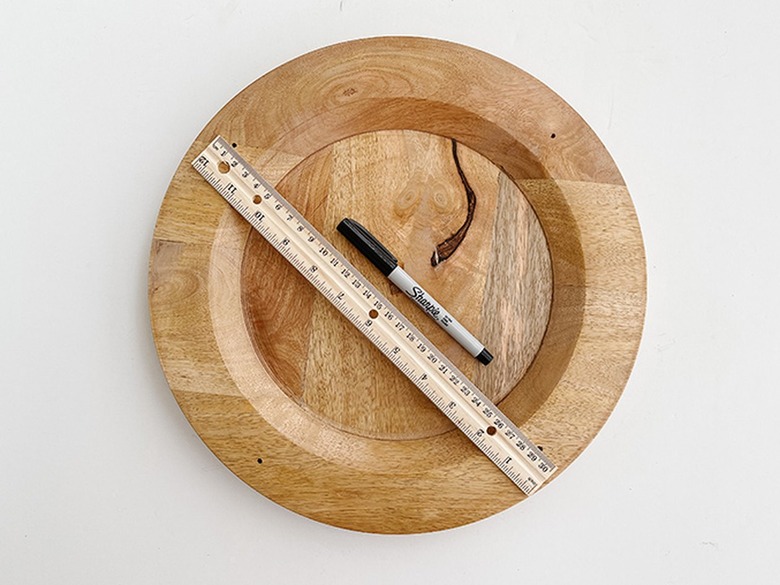
Measure and mark four holes at an equal distance from one another all the way around the rim of the wood charger.
 Carrie Waller
Step 2
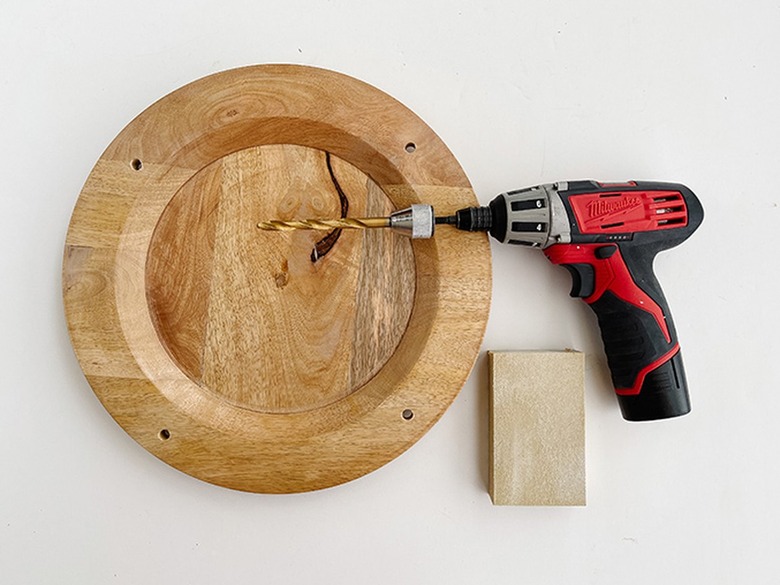
Drill through the marks using a 5/16-inch drill bit and a power drill or drill press. If your holes splinter the wood at all during drilling, you can sand those rough edges smooth using a sanding sponge.
 Carrie Waller
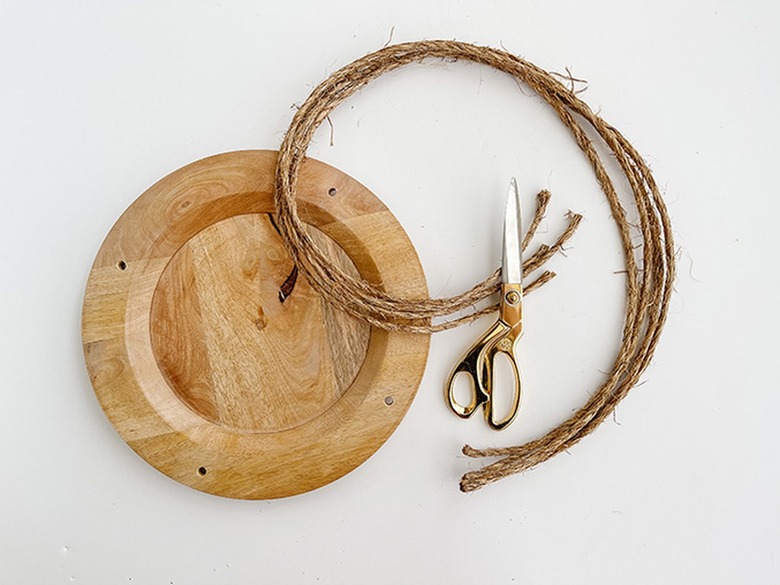
Step 3
Cut four equal lengths of rope. The length will depend on the height of your ceiling, but go ahead and cut longer rope than you think you'll need to ensure you have plenty of rope to work with when it comes time to hang the planter. Note that the knots you tie in a later step will end up shortening the rope considerably, so make sure you cut the rope longer than you think you'll need right from the start. We cut our four pieces to four feet long.
 Carrie Waller
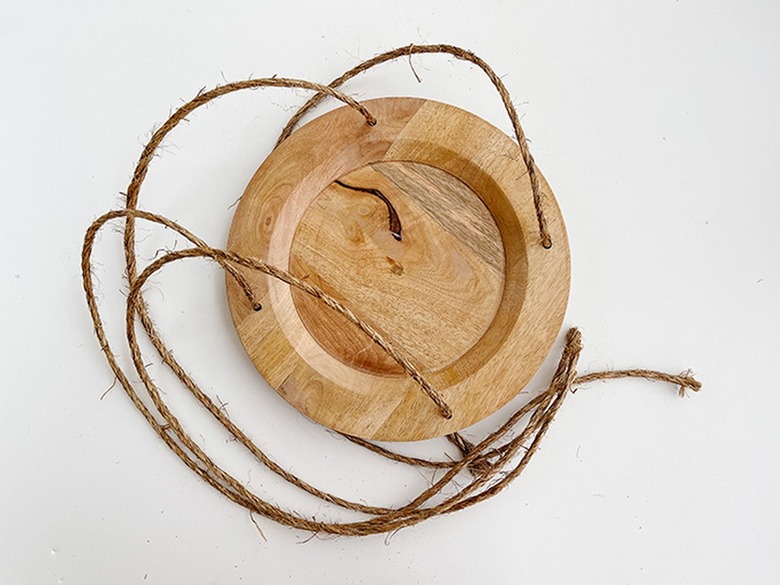
Step 4
Tie single knots in the ends of the rope, making sure to pull the knot as tight as you can. Next, pull the rope up through the bottoms of the holes you drilled earlier, stopping only when the knot hits the underside of the charger.
 Carrie Waller
 Carrie Waller
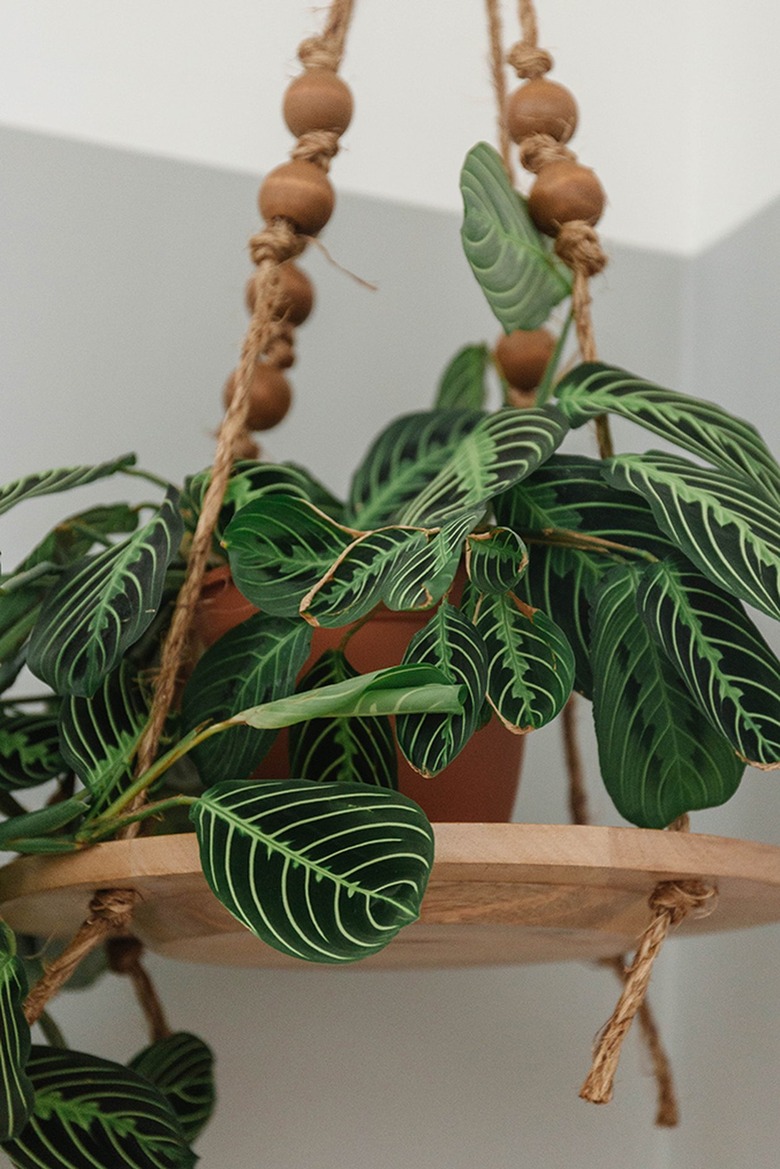
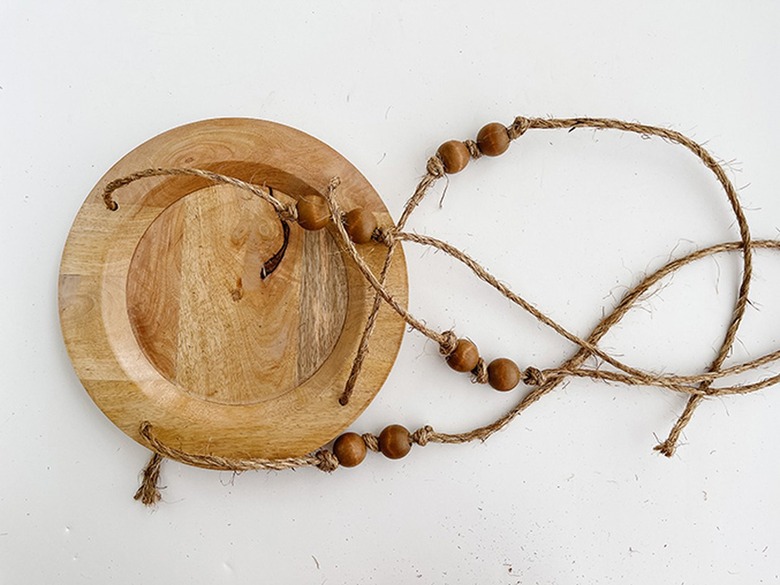
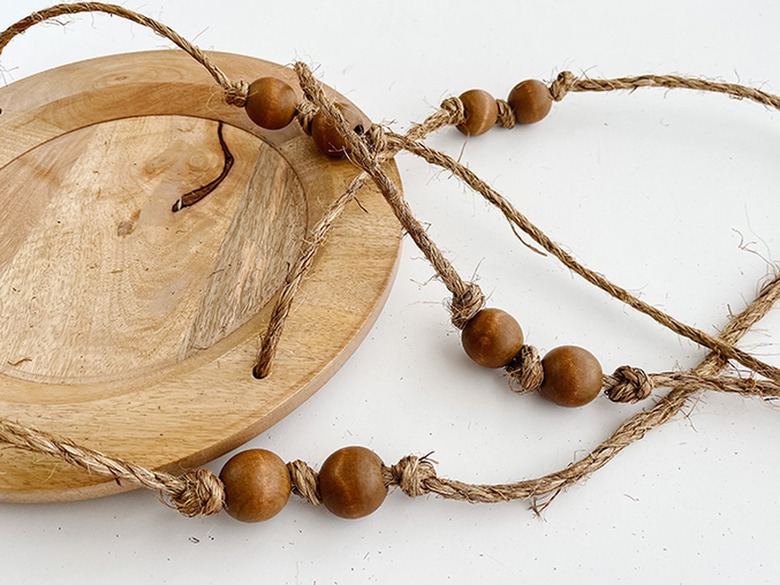
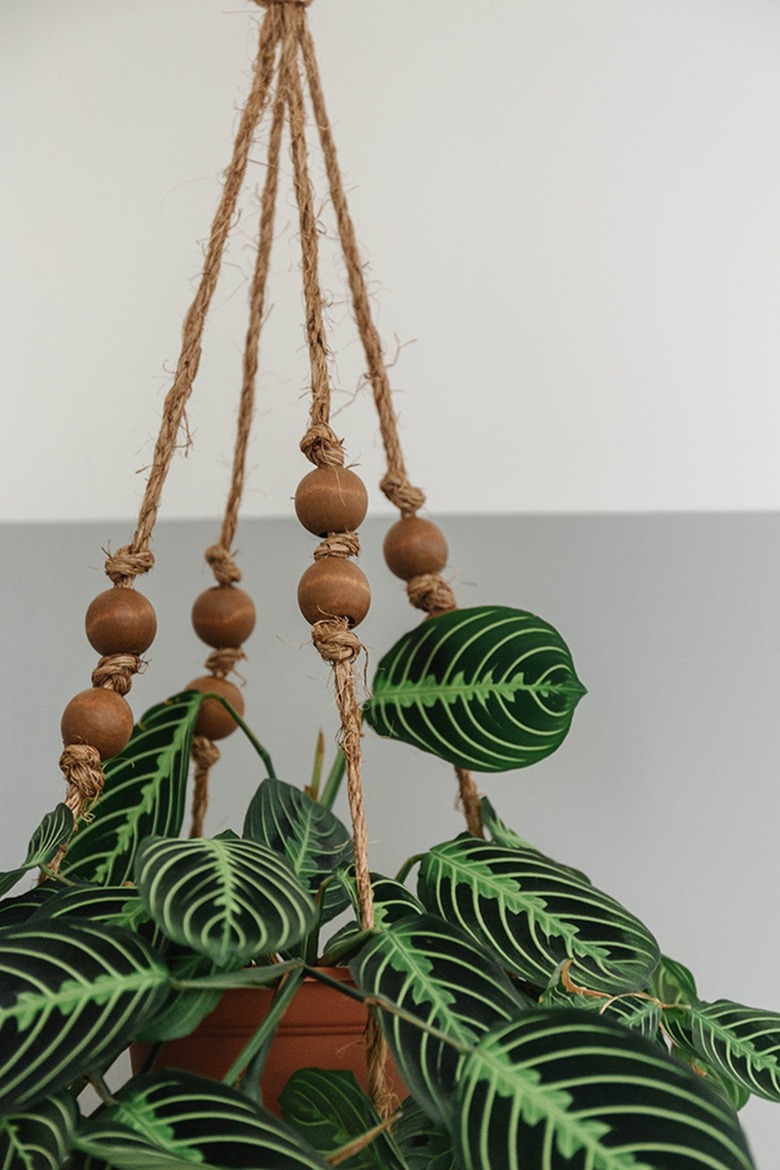
Step 5
Tie knots in various places along each of the four pieces of rope, and then run beads down to each knot as you go for decorative purposes. We sandwiched beads between knots each time to make them stand out more.
 Carrie Waller
 Carrie Waller
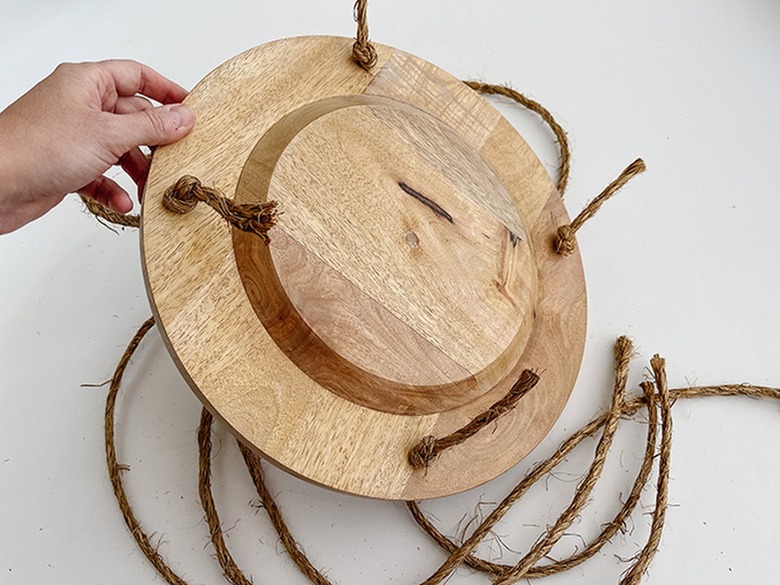
Step 6
Pull the ends of all four rope pieces together up at the top, and twist them into one big knot. Tie it as tightly as you can.
 Carrie Waller
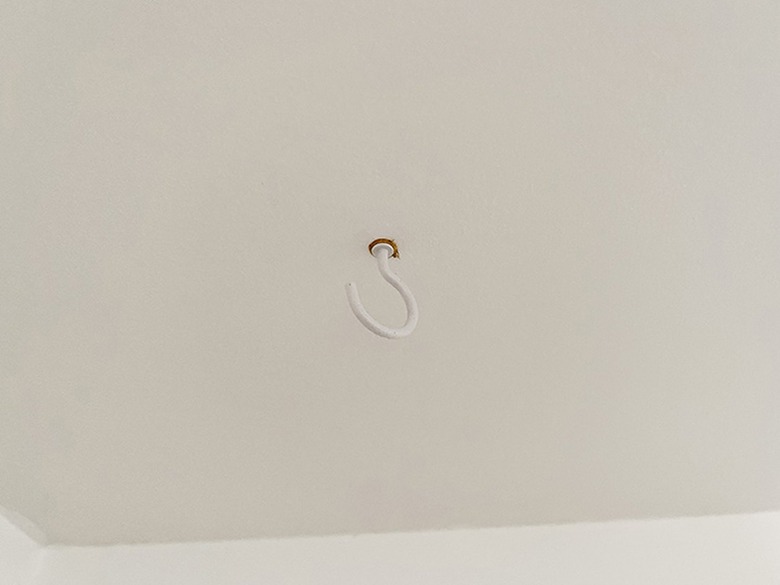
Step 7
Install a cup hook in the ceiling. Try to screw the hook into a stud if you can, but you can use a drywall anchor if you're not able to line up with a stud.
 Carrie Waller
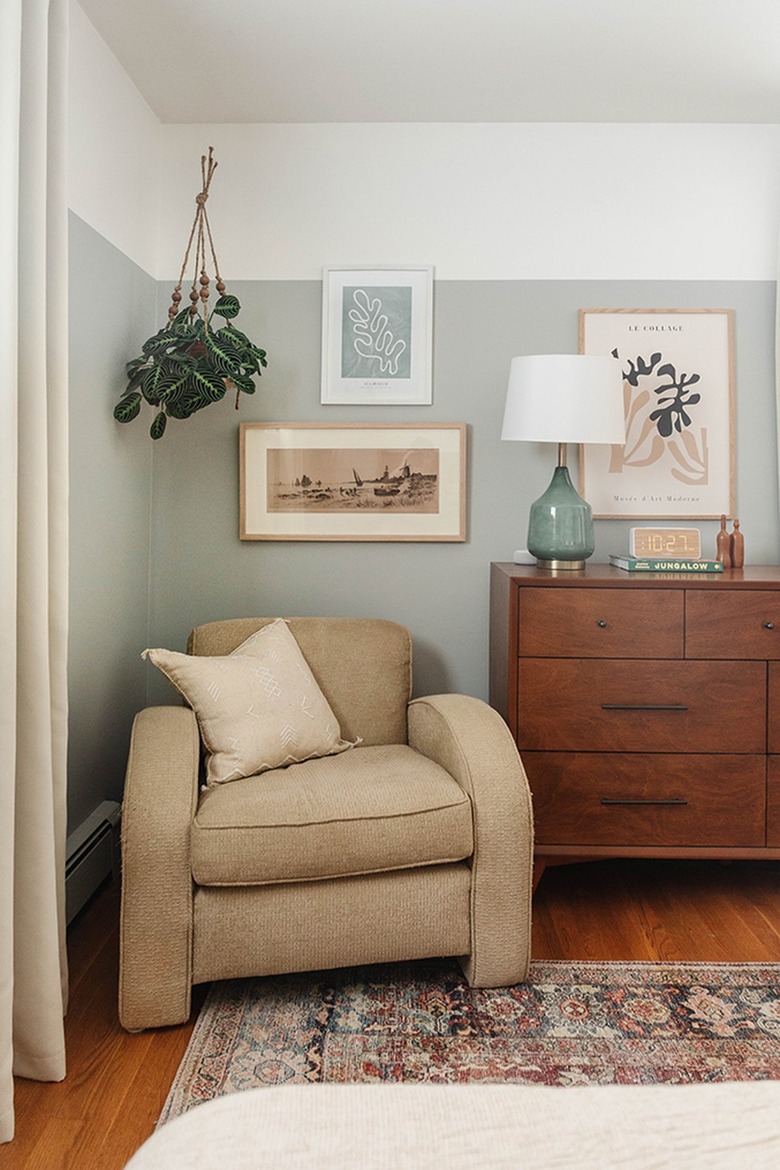
Step 8
Loop the top knotted end of the rope onto your installed cup hook, and then place a live trailing plant on the charger to finish. We used a Lemon Maranta Prayer Plant for our purposes because the trailing vines fall nicely over the edge of the charger plate as it grows. For other ideas, these nine houseplants are ideal for hanging.
Tip
If you end up needing even more length from your planter to get it to sit at just the right height (like we did), then loop some heavy-weight clear fishing line through the top knot of your hanging planter, and set that over the cup hook. The invisible fishing line creates a cool floating effect that's extra eye-catching.
 Carrie Waller
 Carrie Waller