DIY Planter That's Part Cottage Core Charm And Modern Decor
We may receive a commission on purchases made from links.
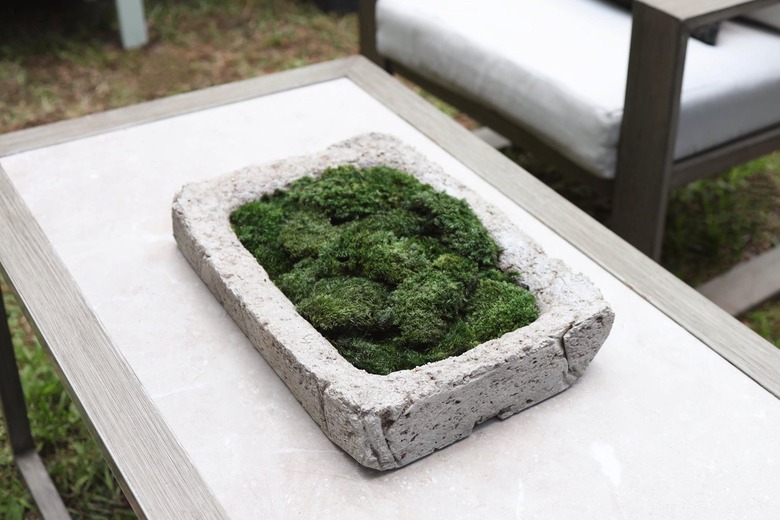
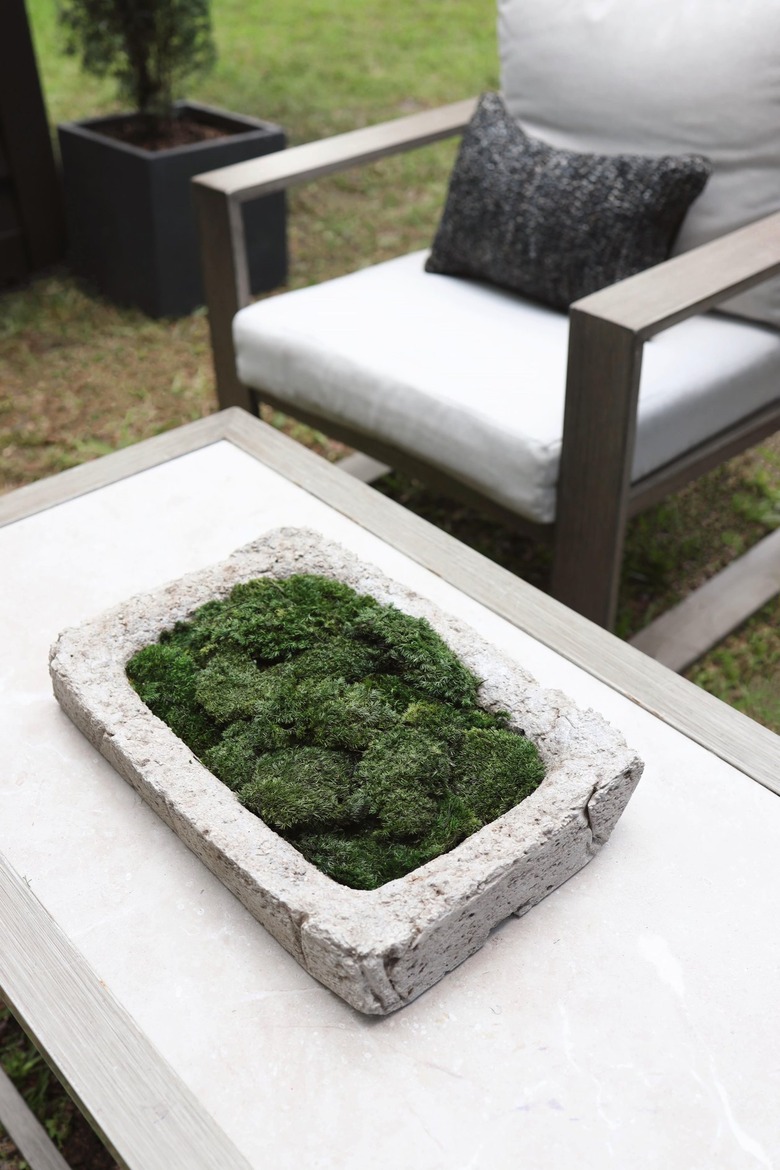
Looking to add a bit of greenery to your indoor or outdoor table? A moss trough centerpiece strikes just the right balance between cottage core charm and chic modern decor. Lush pillowy green moss piled inside a rustic stone planter — no wonder Restoration Hardware seems to feature them in just about every catalog and store display. While you can buy these super stylish centerpieces at RH (for a pretty penny), you can just as easily and more affordably make your own hypertufa version instead. All it takes are a few simple ingredients from your local home improvement store. The best part? No maintenance required.
Things Needed
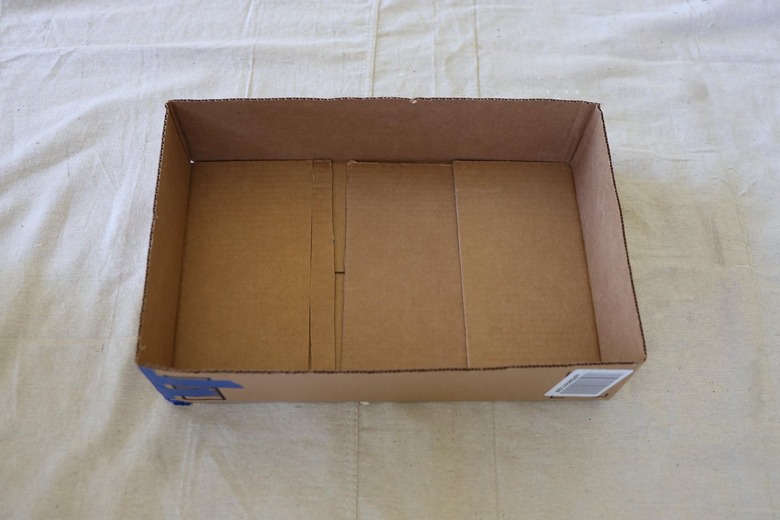
1. Make a Mold
Find an empty cardboard box (Amazon deliveries, anyone?) that is the desired width and length of your trough. Use a box cutter or utility knife to cut down the sides to the height you prefer. We cut ours down to a height of two inches.
 Trisha Sprouse
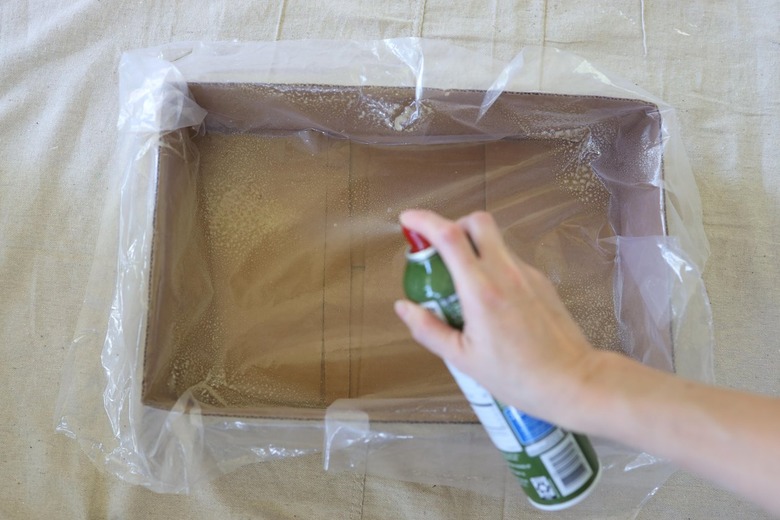
2. Line the Mold
Line the box with a plastic tarp or garbage bag and spray it generously with cooking spray.
 Trisha Sprouse
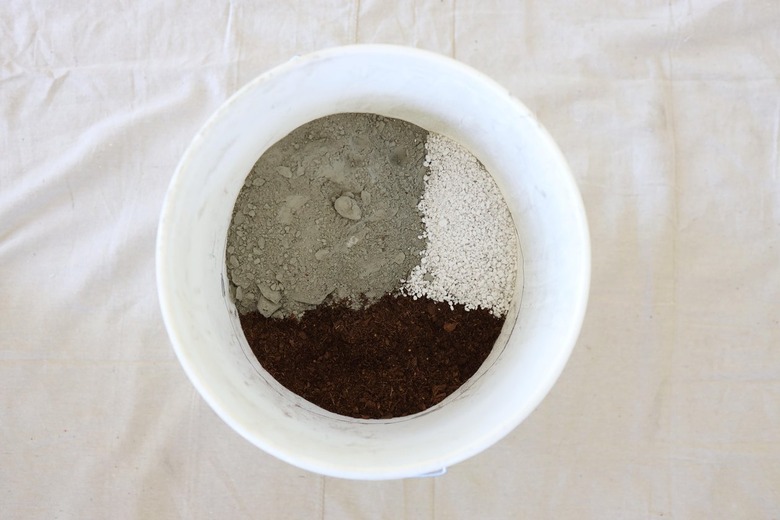
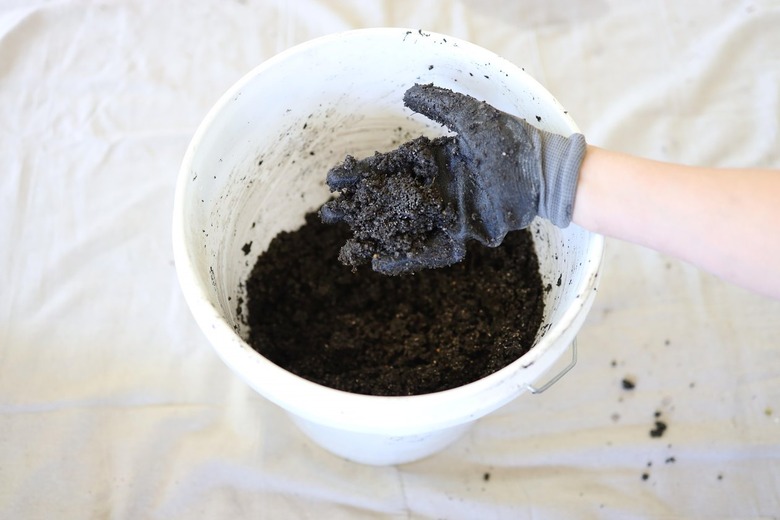
3. Prepare the Hypertufa Mixture
Put on a dust mask and rubber gloves. In a plastic bucket, pour in equal parts peat moss, Portland cement, and vermiculite/perlite.
 Trisha Sprouse
Add water, a little bit at a time, and mix the ingredients together until you have the consistency of cottage cheese. The mixture should stick together easily when formed into a ball and be fairly wet but not soupy.
 Trisha Sprouse
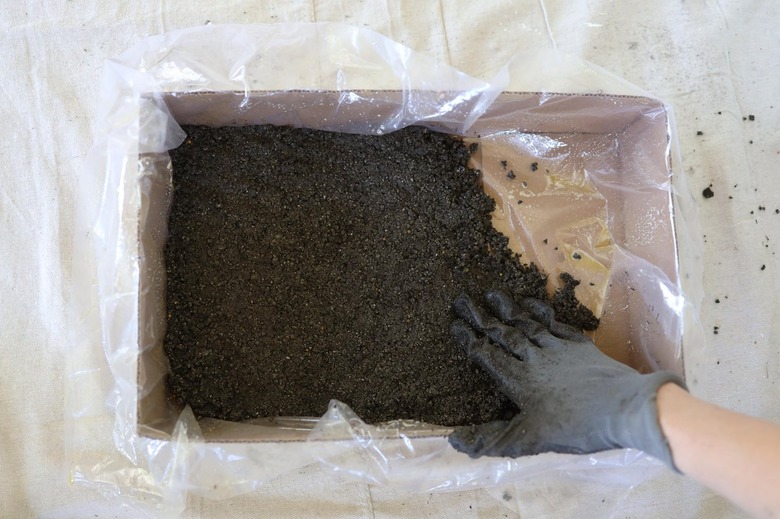
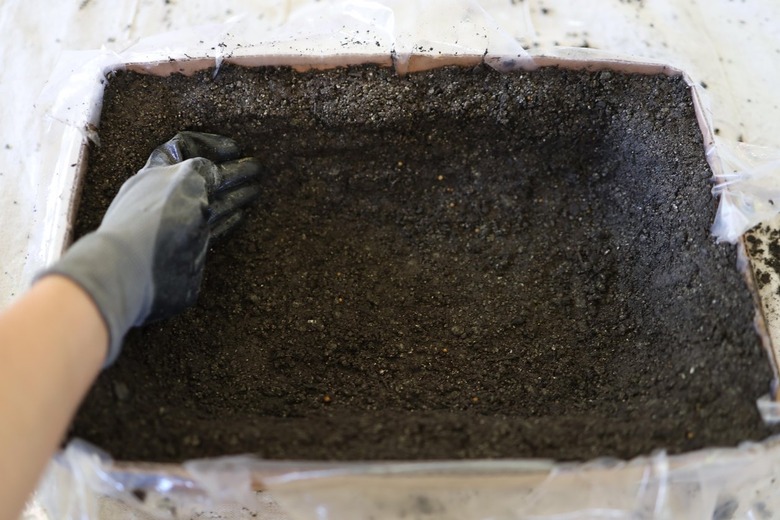
4. Press Hypertufa Mixture Into Mold
Start by packing the hypertufa mixture into the bottom of the mold, pressing it firmly down. You want to create a bottom layer that's approximately an inch thick.
 Trisha Sprouse
Once the bottom is done, press the hypertufa mixture around the sides of the mold, again packing it in firmly. The sides should also be approximately an inch thick. Be sure to smooth the sides into the bottom layer to create a seamless trough.
 Trisha Sprouse
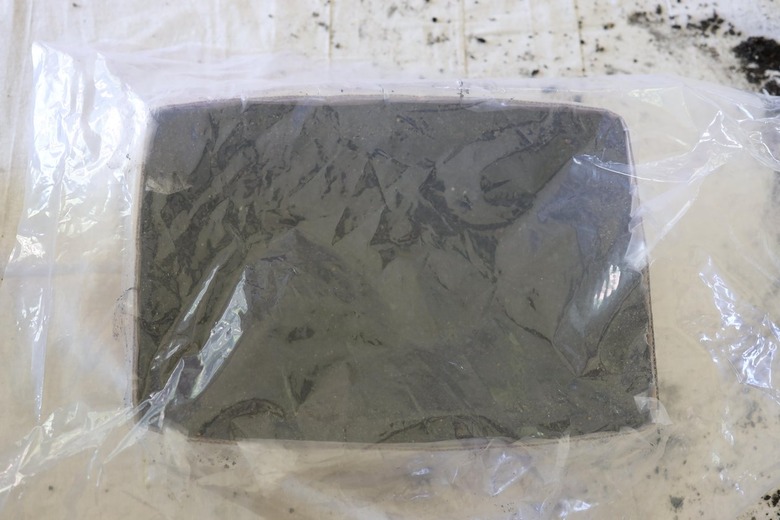
5. Let Dry for 48 Hours
Cover the hypertufa trough with a plastic tarp or garbage bag, place it in a shady spot out of direct sun, and let it dry for 48 hours.
 Trisha Sprouse
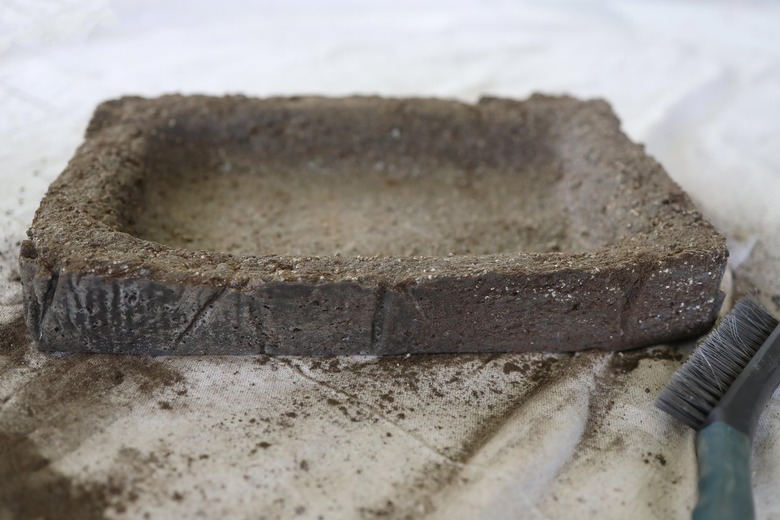
6. Scrub With a Wire Brush
After the hypertufa has dried for 48 hours, gently remove it from the mold. Scrub the entire trough with a wire brush to rough up the texture and give it more of a craggy limestone look.
 Trisha Sprouse
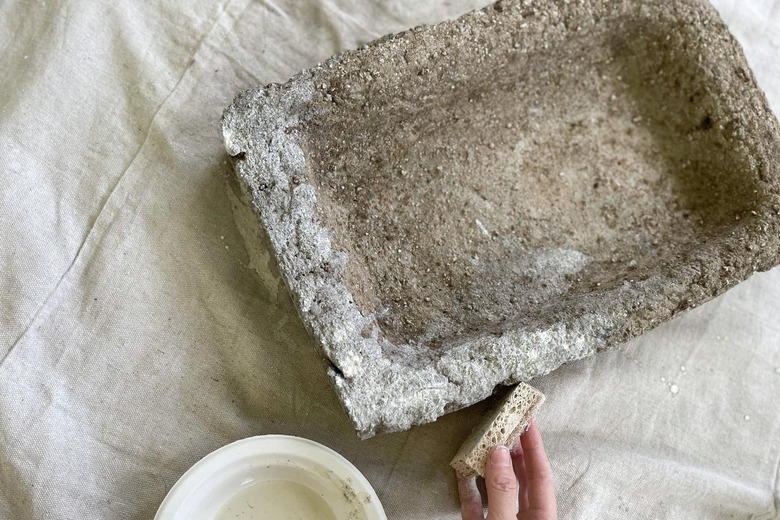
7. Let Dry for Two Weeks and Then Paint
Cover the hypertufa with a plastic tarp again, and let it dry completely for about two weeks. It will lighten in both color and weight as it dries. If a lighter stone color is desired once it's fully dry, simply water down some white paint, and paint the trough with a light coat.
 Trisha Sprouse
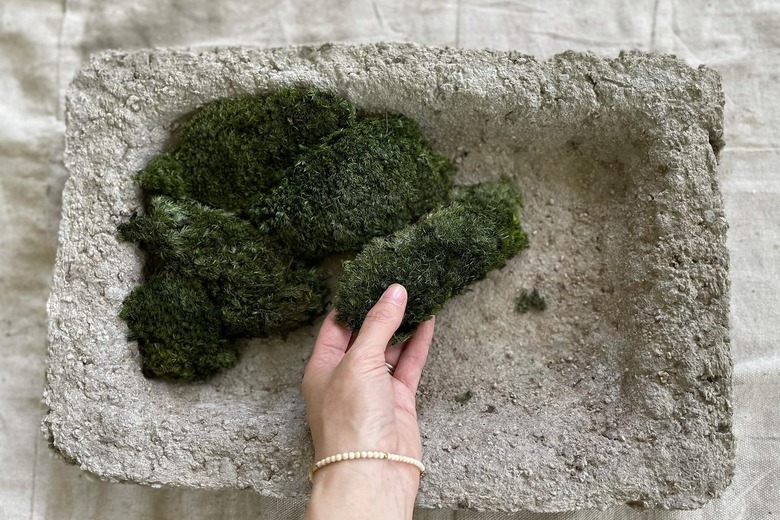
8. Plant the Moss
Once the paint is dry, arrange pillow moss as desired inside the planter.
 Trisha Sprouse
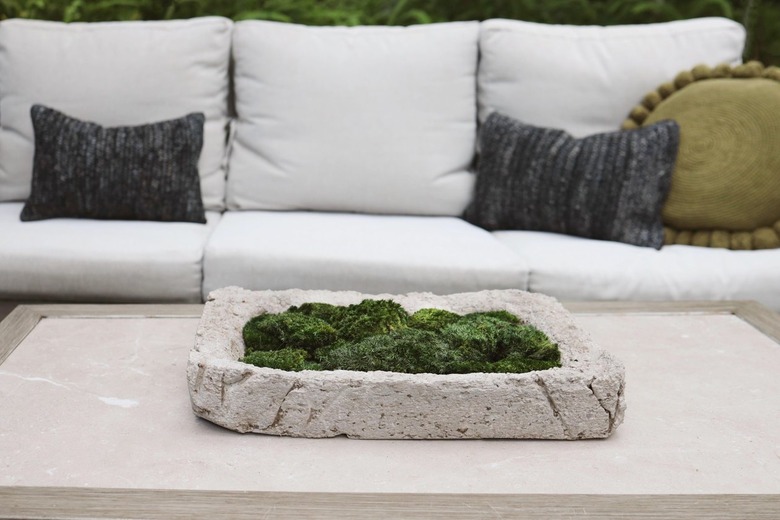
Place your new moss trough in the center of your indoor or outdoor table. Since the moss is preserved, it requires absolutely no watering. Huzzah!
 Trisha Sprouse
 Trisha Sprouse