How To Set Up A Rain Barrel For Irrigation
We may receive a commission on purchases made from links.
Setting up a rain barrel allows you to make use of the rainwater that hits your roof. This is water that would ordinarily wash away, usually into a storm drain. Rainwater harvesting for your garden provides a number of benefits, including conserving the water supply, saving on water bills and avoiding excessive rainwater runoff. Think of it as the complement to making your own compost using what nature provides to nourish your garden.
The United States Environmental Protection Agency estimates that the typical household uses about 30 of its water outdoors, and most of that goes to watering lawns and plants. That's a lot of water, especially when you consider that less than 3 percent of the earth's water supply is freshwater. So, even small steps, such as rain barrel water harvesting, can have a big impact on water conservation.
You can collect more water than you may realize. Every inch of rainwater falling on 1,000 square feet of roof produces about 600 gallons of water. Most home gardeners won't need that much or be able to collect that amount, but in many parts of the country, it is available for the taking.
Rain Barrel Basics
Rain Barrel Basics
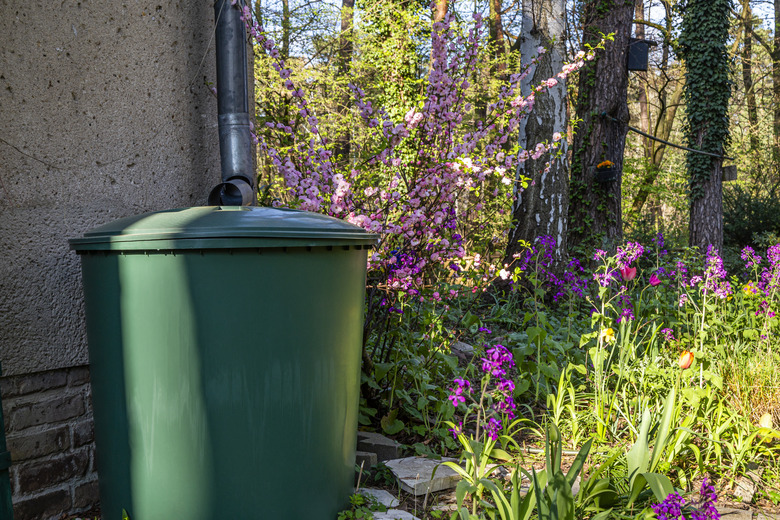
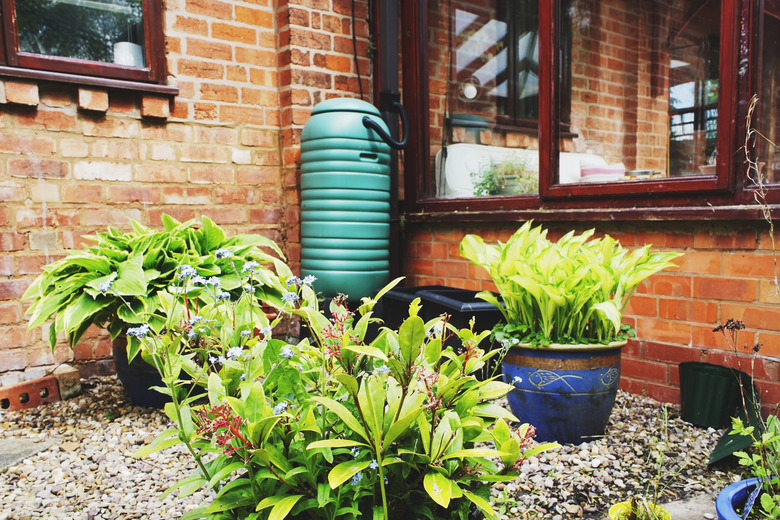
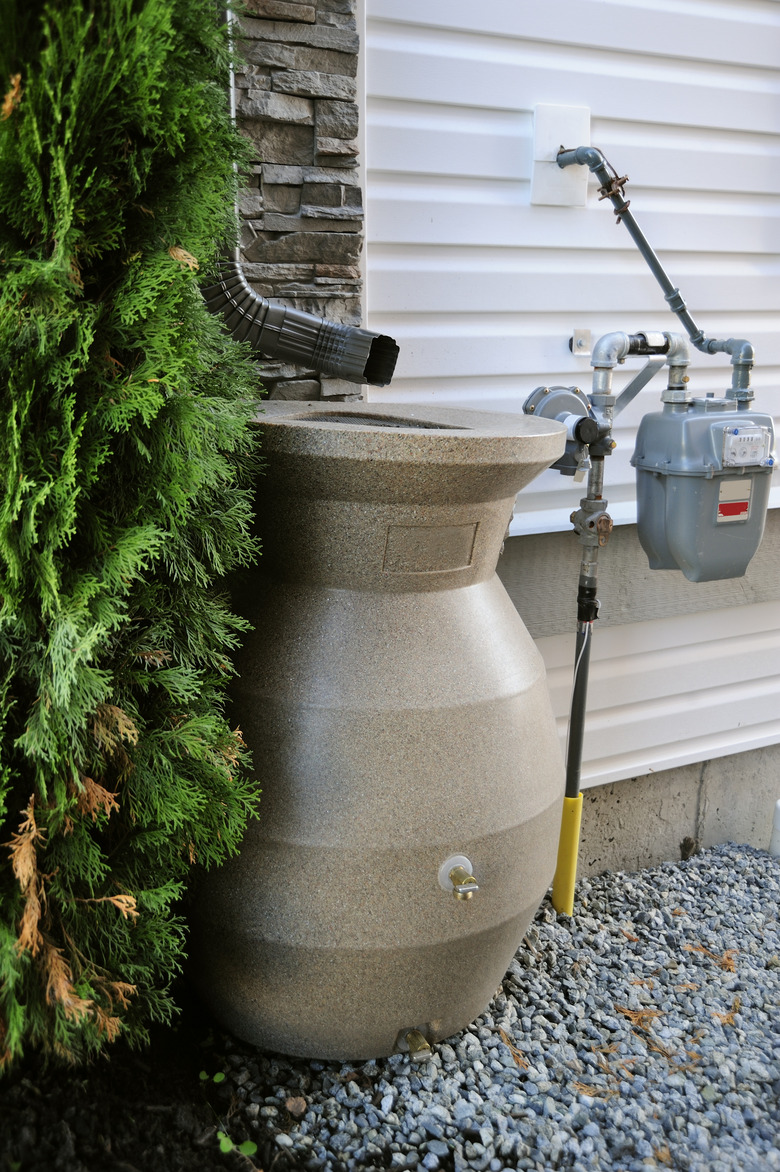
A rain barrel is a food-grade barrel that is made to hold liquids. Most barrels for home use are in the 55- to 90-gallon range. They are positioned under a downspout to catch the water that flows off the roof during a rain.
Newer rain barrels usually have a lid to keep out small animals and insects. Some lids are solid, but others have holes covered with a fine mesh to let in the water but keep out the bugs. They are usually a dark color that is opaque so that sunlight can not get through to the water. Sunlight encourages the growth of algae.
A rain barrel always has a spigot, also called a hose bib, located near the bottom of the barrel for accessing the water inside. The spigots have threads that allow you to connect a hose to them. Some barrels have a second faucet about midway up the side of the barrel. This is for filling a watering can.
Rain barrels can fill up quickly, and they need a means for dealing with overflow. Some have hose connections near the top of the barrel so that you can direct the excess water to a garden bed or a drain. Others include diverters that redirect downspout water to continue in the downspout when the rain barrel is full.
Rainwater is relatively clean, and because it does not soak up minerals from the ground, rainwater is soft water. However, it is not drinkable clean. Rain barrel water is for irrigation only.
Using Rain Barrel Water
Using Rain Barrel Water
The water you collect in the barrel will flow across your roof and will likely flow through dirt, bird droppings and the like. It is important to keep the roof and gutters clean. Some roofing materials, such as old asbestos shingles and treated wood shingles, may contaminate the water, making it unsafe for watering herbs or a vegetable garden.
Studies done at a number of universities have found rain barrel water safe for use on edible plants, but some studies have found E. coli and other bacteria levels that exceed official standards, which is one of the reasons the water is unsafe for drinking. It is recommended to treat rainwater in a 55-gallon barrel with 1 ounce of household bleach once a month and more often if there is a lot of rain. Let the water sit for 24 hours before using it to give the bleach time to dissipate.
It is also a good idea to avoid getting the water on leafy plants that will be eaten. Rather, use drip irrigation to get the water directly into the soil. Rain barrels complement efficient irrigation practices to create an environmentally friendly landscape.
Rain Barrel Types
Rain Barrel Types
Most rain barrels are made from plastic. Many are manufactured to look like decorative garden accessories, such as a classic wooden barrel, a terra-cotta urn or a wicker basket — designed to enhance the garden and blend in with the plantings.
They come in a variety of colors, and some include built-in planters to decorate the top of the barrel. You can also find natural wood and stone rain barrels, but they tend to be more expensive than plastic and are more difficult to find. Many plastic barrels are repurposed barrels used in the food industry, or they are made from recycled material.
Many rain barrels are sold as fully assembled products that include the barrel, faucets and everything but the garden or soaker hose you use to draw the water. You can also buy the components separately. One strategy is to buy a barrel and a diverter kit. The kits include all the hardware to assemble a rain barrel.
Rain Barrel Installation Basics
Rain Barrel Installation Basics
Installing your rain barrel is a cinch — just place it near a downspout and ensure the ground is level to prevent the barrel from tipping over. Word to the wise: choose the barrel site carefully because the barrels are heavy. (A filled 55-gallon barrel will weigh over 400 pounds, which won't be fun to lift when you're cleaning it or moving it for any reason.)
Because the faucet is near the bottom of the barrel, most gardeners place the barrels on a raised platform of some type. The height cuts down on the bending involved and makes it easier to place a watering can below the faucet and to hook up hoses. You can use concrete blocks or bricks or a ready-made wood platform to raise the level of the barrel.
Another reason to raise the barrel is to increase the water pressure because the water pressure coming from a typical rain barrel isn't high enough to do things like run a lawn sprinkler. That's because gravity-fed systems rely on elevation to move the water. However, every foot of elevation increases the pressure by 0.43 pounds per square inch (PSI). A gravity-fed system needs about 6 PSI to be the most efficient — that's a height of 14 feet.
Obviously, an elevation of that level is impractical for most home systems, but even an elevation of just a few feet will allow you to use gravity-fed drip irrigation systems and soaker hoses. On flat land or a downward slope, the system can deliver water up to about 20 feet from the source, but it will take longer than if the system was hooked up to your home's outside faucet. You can experiment with different layouts to get the best results.
Before using the barrel, turn it on its side and rinse the interior using a garden hose. You can clean the barrel by scrubbing with a vinegar and water solution or a mixture of about 1/3 cup bleach to 1 gallon of water. Rinse the barrel thoroughly before using it.
 RonTech2000/iStock/GettyImages
Rain Barrel Maintenance
Rain Barrel Maintenance
To maintain your rain barrel, douse it with bleach once a month. If you have the type of barrel where the downspout discharges the water onto the top of the barrel, you should remove any leaves or other debris that may accumulate there. Many people place a layer of decorative river rock on top of the barrel. The water will seep through to the barrel, but the stones can help keep debris from clogging the flow.
During the course of a growing season, you may be emptying and refilling the barrel a number of times to keep the water fresh. If you do detect an odor, simply empty the barrel and clean it.
If winter temperatures get below freezing in your area, disconnect the barrel from the downspout. If you removed a section of downspout for the barrel, reconnect the section so that the downspout reaches to the ground. Be sure to angle the flow of water away from the house. Empty the barrel and store it upside down until next spring. If possible, store it in a garage or shed.
How to Set Up a Ready-Made Rain Barrel
How to Set Up a Ready-Made Rain Barrel
Rain barrel kits come complete with everything you will need to get the barrel set up and ready for filling. In some cases, the hose faucet and overflow tube are already installed. If they are not, simply screw them into place. You may need to reach inside the barrel to secure the fittings with washers and nuts. This type of barrel directs the water from the downspout to the top of the barrel. The water then drains into the barrel through a fine mesh screen.
- Position the empty barrel next to or in front of the downspout. Some people place the barrel on a raised platform to make it easier to access the water. Make sure the bottom faucet is in a position where you can reach it easily.
- Align a flexible downspout elbow with the downspout and the top of the barrel. If your kit does not contain the elbow, make sure to get the size that fits your downspout. Mark the downspout where the top of the elbow meets it. Measure down 2 inches and make another mark.
- Put on work gloves and eye protection and cut the downspout at the lower mark using a hacksaw. Remove the lower portion of the downspout (keep it in storage in case you want to use it again).
- Slip the top of the elbow over the cut edge of the downspout. The downspout should fit inside the elbow. Secure the elbow using self-tapping screws.
- Adjust the elbow's position so that water flows onto the top of the barrel.
- Attach a section of hose to the overflow fitting at the top of the barrel. Direct the overflow away from the house.
How to Set Up a Rain Barrel Diverter System
How to Set Up a Rain Barrel Diverter System
Because you can never predict how much it's going to rain — and therefore fill your rain barrel — you need a plan for overflow, which is typically solved with an attachment called an overflow hose. Rain barrel diverters eliminate the need for an overflow hose, however, because they stop the flow of water into the rain barrel when it's full. This diverter is installed in the downspout, and when the barrel is empty, the diverter directs the water to the barrel. When the barrel is full, the water pressure within the connecting hose prevents more water from flowing into the barrel and directs the water down the downspout.
There are a few different types of diverters available, and many are part of kits that include the diverter, the spigot and the connection hoses. This one is inserted through a hole drilled into the downspout. Another type requires that a section of the downspout be removed and the diverter installed.
- Position the barrel near the downspout. Some people place the barrel on a raised platform.
- Use a straightedge to align the top of the barrel with a spot on the downspout. Mark the spot. Measure 3 inches down and make another mark in the middle of the spout.
- Put on work gloves and eye protection. Drill a hole through the downspout at the lower mark. The diverter instructions will tell you what size hole to drill, or the kit may contain a hole saw.
- Push the diverter connection piece into the downspout with the collection portion of the diverter facing up. Secure the connection piece with self-tapping screws.
- Measure down 3 inches from the top of the barrel. Drill a hole for the fill hose. The diverter kit should include a hose connection piece and the necessary seals to prevent leaks. The hole in the downspout and the one in the top of the barrel should be more or less even with each other. If there is too much of an angle, the diverter will not work correctly.
- Measure up about 3 to 6 inches from the bottom of the barrel and drill a hole for the spigot. If your kit includes a spigot, the directions will tell you what size hole you need to drill. If it does not include the fitting, get a spigot designed for rain barrels. Drill an appropriately sized hole, usually 3/4 inch to 1 1/4 inches, and place the spigot into the hole. Secure it with the washers and nuts that come with the product.
- Connect the barrel to the downspout by inserting the fill hose into the two fittings, the one in the downspout and the other at the top of the barrel.
Remember to remove the fill hose to disconnect the system during the winter. Remove the diverter and cover the hole in the downspout with the cap that came with the kit. Empty the barrel and store it for the winter.