Germinating And Planting Vegetable Seeds: A Beginner's Guide
We may receive a commission on purchases made from links.
When spring is right around the corner, it's the perfect time to start thinking about starting and germinating vegetable seeds. There's nothing wrong with buying ready-to-plant seedlings from your local nursery, of course, but starting vegetable seeds is a fun way to experiment with varieties, like heirloom seeds, and watch the path of a plant's growth from a tiny seed to a hulking plant.
Starting Seeds Indoors: The Basics
Starting Seeds Indoors: The Basics
Some vegetable seeds need to be started indoors before warm spring weather arrives. How far in advance you need to start seeds depends on your USDA hardiness zone. In warmer climates, starting indoors isn't even necessary because of a long growing season. Getting a head start inside ensures that your seeds have enough time to germinate and grow a bit before you transplant them into your garden. Plants stay indoors until the temperature outdoors isn't likely to kill them. What do seeds need to germinate? A few basic requirements include moisture, light and ideal temperature.
Seeds need enough moisture to get the sprouting process going but not so much that they suffocate and drown. Light isn't usually necessary until seed sprouts exit the ground, but it's an essential factor in the early growth of seedlings. Ideal temperature varies from seed to seed. Tomato seeds, for instance, will likely need added warmth to spur germination. Conversely, if it's too warm, cool-weather seeds, like lettuce, may not germinate at all.
Starting indoors is an excellent strategy for plants with long growing seasons, like tomatoes (Lycopersicon esculentum, USDA zones 10-11), eggplants (Solanum melongena var. esculentum) and peppers (Capsicum spp.). You can also get a head start on fast-growing crops, like greens, by starting a batch indoors. However, not all plants enjoy being transplanted. For example, root veggies don't respond well to transplanting and do better when direct-seeded in the garden. Some seeds, like radishes (Raphanus raphanistrum subsp. sativus), sprout and grow so quickly that starting them inside isn't necessary.
If you're direct-seeding — sowing seeds directly in the garden — make sure to follow seed packet timing and weather guidelines. You can also pre-sprout seeds indoors to increase your chances of success. Just grab a paper towel and moisten it. Sprinkle seeds on top of half a paper towel, fold over the unseeded half, and put the towel in a plastic zipper bag. When you notice the seeds sprouting, you can then place them outside. Remember to follow seed packet instructions for seed planting depth.
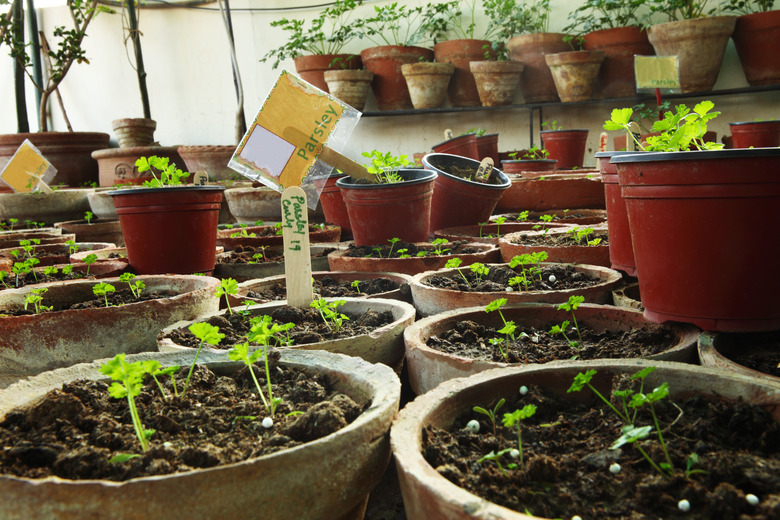
The Importance of Location
The Importance of Location
Set up a seed-starting station in a spot where you won't mind a bit of clutter for a few months. Ideally, you'll have easy access to the outdoors and to a sink. It's not always possible to have your seed-starting area in a high-traffic room of your home, but having it within frequent view is important. You need to be able to see your plants and watch for potential problems, like damping off, a common fungal disease that occurs in seedlings. Having seedlings within view also means you'll remember to water, thin and care for them. Your chosen location should also have adequate air circulation. If you're starting seeds in a basement, providing airflow can be a challenge. Add a fan to improve conditions and prevent mold growth.
 danishkhan/iStock/GettyImages
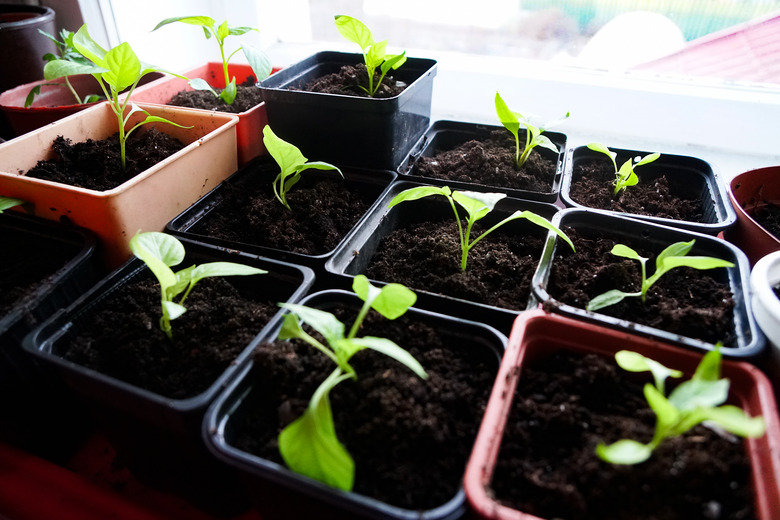
Picking a Soil Mix and Choosing Planters
Picking a Soil Mix and Choosing Planters
To start the germination process, you need a growing medium to host your vegetable seeds. There are many options, but whichever you choose, opt for a sterile growing mix that is meant specifically for seed starting. Bagged mixes usually state this explicitly on their packaging. Avoid plain old garden soil since it may contain fungal spores or bacterial pathogens. Don't get confused — potting soil is not the same as seed-starting mix. They shouldn't be used interchangeably. Seedlings should start out in a clean, disease-free environment. Some people like to use convenient germination pods to start vegetable seeds. They start off as pellets and expand when you add water. They're mess-free but can be expensive if you're starting a lot of seeds.
Every gardener has a personal preference for germination pots or seed trays. Trays are ideal for starting large quantities of seedlings. If you're just starting out, single pots are fine. If you opt for plastic, choose sturdy pots so you can reuse them from year to year. Biodegradable pots are another option, but they're often a lot more expensive than plastic pots. You can also make DIY seed-starting containers by using things like plastic cups, Tupperware and egg cartons. Many DIY options don't have built-in drainage, but it's easy to add your own drainage holes.
Providing Light, Warmth and Water
Providing Light, Warmth and Water
When your seedlings sprout, they'll need light to keep them chugging along. Providing ample light ensures that seedlings don't become "leggy." Leggy seedlings are too tall and lack the strength to stay upright, so they're more susceptible to disease and aren't as healthy as plants that have been exposed to plenty of light. Plants grown on a sunny windowsill often become leggy because the window light just isn't good enough. Investing in grow lights or a light shelf can help you avoid sickly, floppy seedlings.
Warmth is also vital for heat-loving plants, like peppers and tomatoes. Some seeds need heat to germinate. Adding a heat mat under your grow trays or plant pots can help encourage sprouting. After seeds sprout, the heat mats keep seedlings at a comfortable temperature.
Young seedlings need a lot of water. If you let the soil dry out, you'll quickly find yourself with trays of dead plants on your hands. Too much water, though, is a recipe for mold, fungal disease and drowned seedlings. Using trays to house your seedling pots, pods or packs allows for easy watering. You can water from below and easily see when the tray needs refilling.
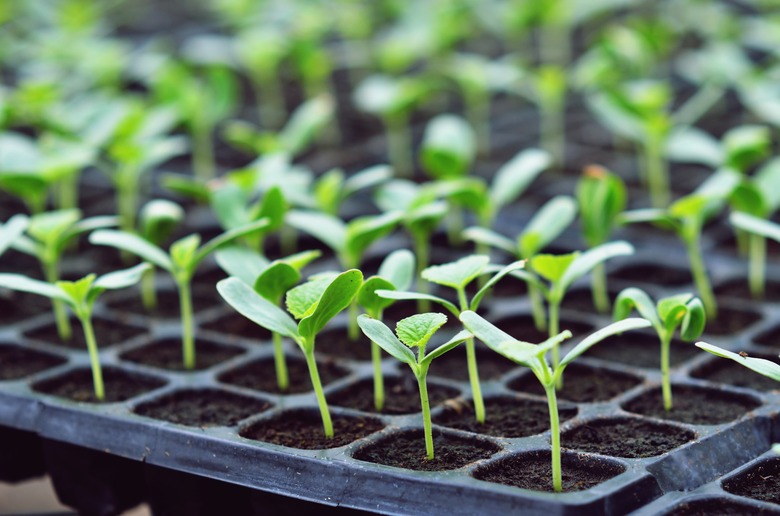
Thinning Out Seedlings
Thinning Out Seedlings
When sowing vegetable seeds, it's a good idea to sow several seeds per hole. You'll need to thin out seedlings after they sprout. If you're broadcasting seeds in a tray or planting in furrows, you'll also have to thin out the sprouts.
It can be hard to cull healthy seedlings, but giving your plants plenty of room to grow ensures they'll become big and strong. Crowded seedlings are typically unhealthy and stunted. If you've planted multiple seeds in a pot, thin to a single seedling or as directed by the seed package instructions.
If you've planted in rows, thin out seedlings by ensuring each has adequate space to grow a bit larger. For lettuce (Lactuca sativa), that might mean giving seedlings a few inches of breathing room. For some seedlings that are started very early, like tomatoes, you'll need to repot plants before you even begin to think of transplanting them to the garden. Growers often start slow-growing plants, like eggplants, peppers, squash (Cucurbita spp.), Brussels sprouts (Brassica oleracea) and tomatoes, in their own pots to minimize the need for multiple repotting sessions.
 Sundaemorning/iStock/GettyImages
Hardening Off and Transplanting Seedlings
Hardening Off and Transplanting Seedlings
Transplanting seedlings happens when the weather conditions are right. For some plants, like kale (Brassica oleracea), transplanting can happen before the last frost date. Other plants are frost-sensitive, and you'll need to wait until the chance of frost is completely gone. Transplanting should only happen when plants are big enough. You can tell a plant is at a suitable growth stage if it has several true leaves. This foliage appears after the initial germination stage.
Before transplanting, though, you'll need to acclimate seedlings to outdoor weather. Your baby plants have been indoors for so long that setting them directly in the garden can be quite a shock. "Hardening off" is the process that allows plants to get used to outdoor conditions. Depending on the weather, the process takes about a week. Although it requires a little time from you, ultimately it ensures the survival of your carefully raised plants. To harden off plants, set them outside and gradually expose them to sunlight. At first, keep plants outside in a shady location. After a day or two, move them to a spot where they receive an hour or two of filtered sunlight each day. Over the next few days, gradually move them into locations with increasing sunlight until they can handle direct sun. You may want to put the pots or trays in an elevated spot, such as a garden table or shelf, to discourage rabbits and other creatures from snacking on the tender seedlings.
When the plants are finally hardened off, transplant them in the garden. Choose a spot, dig a small hole that accommodates the plant's roots, place your seedling inside the hole, replace the soil, and topdress with compost. Add mulch around the base of the plant to help conserve moisture, but be sure to pull the mulch away from the stems. If you're worried about extreme weather, you can add frost-protection fabric or other weather-protection accessories. Cloches, for instance, can keep your plants from succumbing to a hard freeze.
Caring for Young Plants
Caring for Young Plants
It's important to keep a close eye on young seedlings once they've been set outside. Young seedlings are the perfect target for hungry pests and garden critters. Catching problems in their infancy means you can stop them in their tracks. Are you seeing nibbles on your newly transplanted lettuce? Cover your plants to keep away starved bunnies. Are you noticing drooping leaves and dry soil? Don't forget to mulch your seedlings. Frequent watering is vital for all vegetable garden plants, but it's especially crucial for young seedlings. Inconsistent watering now can impact the harvest later. Plants have different needs, but generally, watering deeply at least once a week will keep a vegetable garden happy. Water less if it has recently been raining, and water more often if it has been particularly hot and/or dry.