DIY Fluted Side Table (We're Officially Obsessed)
We may receive a commission on purchases made from links.
We have been seeing fluted furniture everywhere. From bathroom vanities to console tables to accent walls. Dowel rods and moulding make the perfect material to create the fluted look. If you've been wanting to try your hand at this style, this project is perfect for any skill level. Plus, your local hardware store should have everything you need to get started.
Things Needed
NOTE: You can make this table any size you'd like. The cardboard tube also comes in 10-inch and 12-inch diameters. You can also make the table shorter by cutting the tube at a shorter length. For this DIY, all dimensions and measurements below reflect building a side table that is two feet tall.
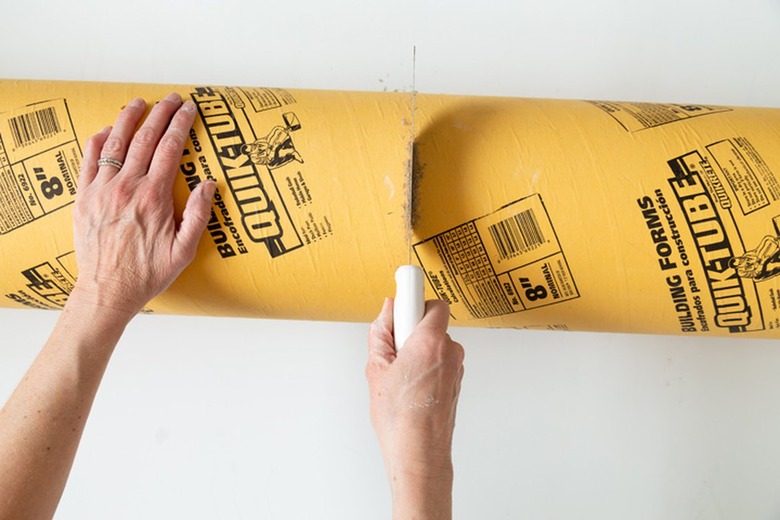
Step 1
Using a hand saw, cut the cardboard tube in half, creating a tube that is two feet long.
 Sara Albers
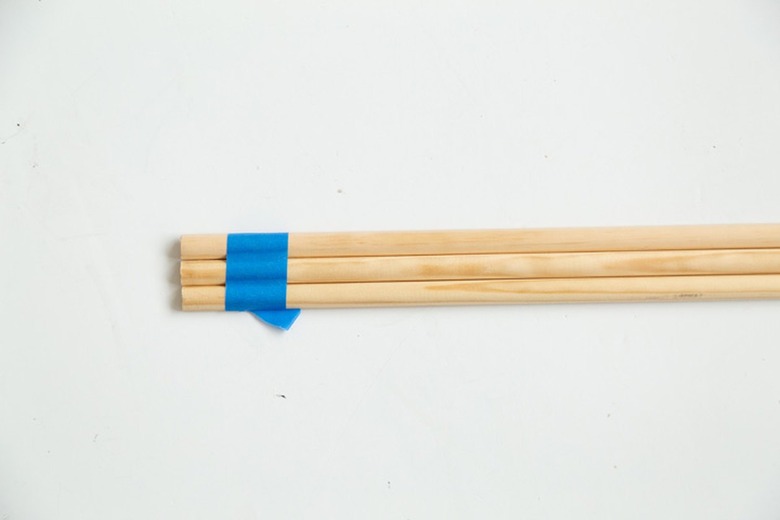
Step 2
Tape three pieces of moulding together. Measure out two feet, and the cut the moulding using a hand saw or power saw. (We like using a compact handheld circular saw for this type of project.) The moulding is eight feet long, so you will get four pieces from each board. Cut 12 boards, making 48 pieces of moulding for the fluted table.
 Sara Albers
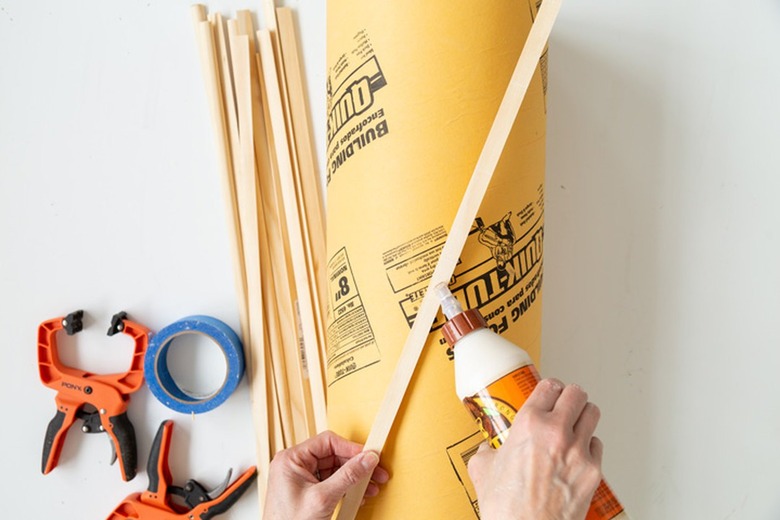
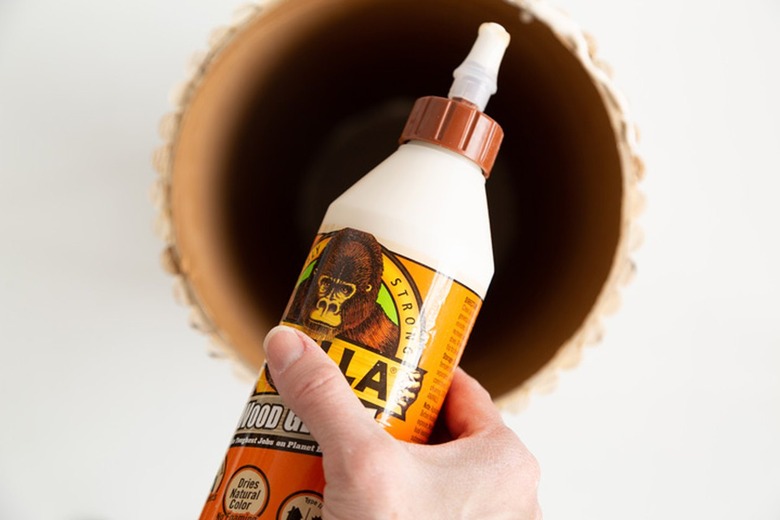
Step 3
Adhere the moulding to the tube using wood glue. Be sure to press and hold for a few seconds to allow the glue to grab the tube. If your boards are not completely even at the bottom, that's okay. You can trim later. (But try to make as even as possible at the top.)
 Sara Albers
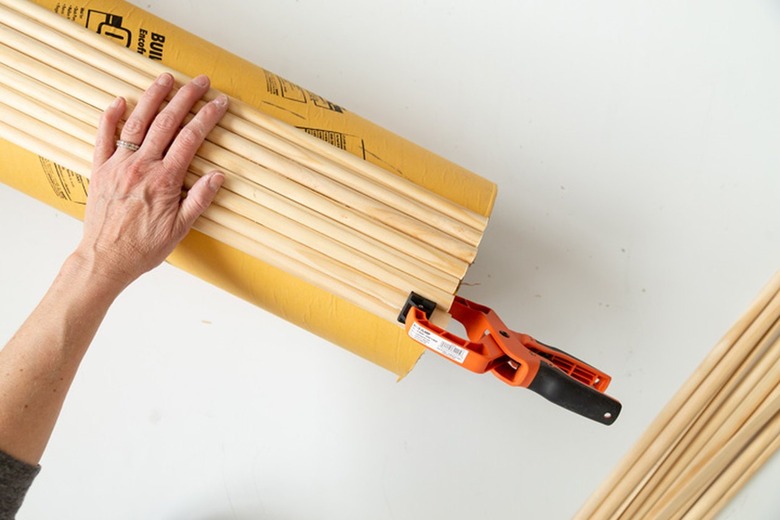
Step 4
Secure the moulding using clamps. As you continue to add new pieces of the moulding, be sure to press the pieces close together. After a few minutes, move the clamps to the next section.
 Sara Albers
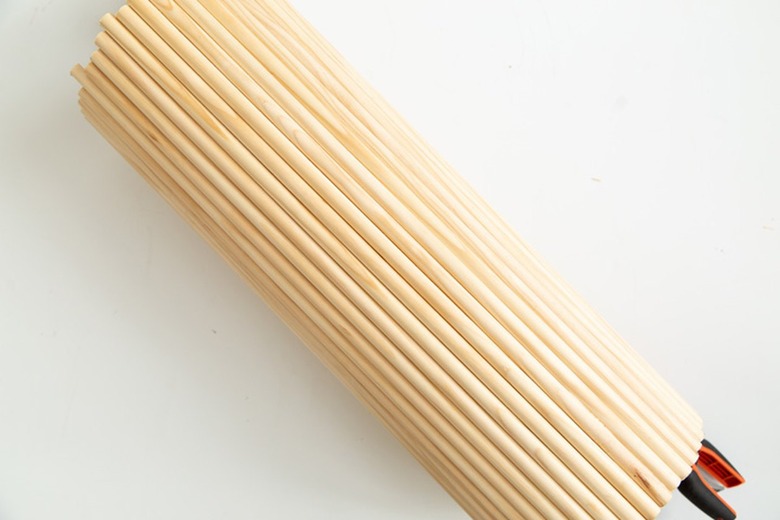
Step 5
Allow the glue to dry completely. (Follow the directions on the wood glue labeling.)
 Sara Albers
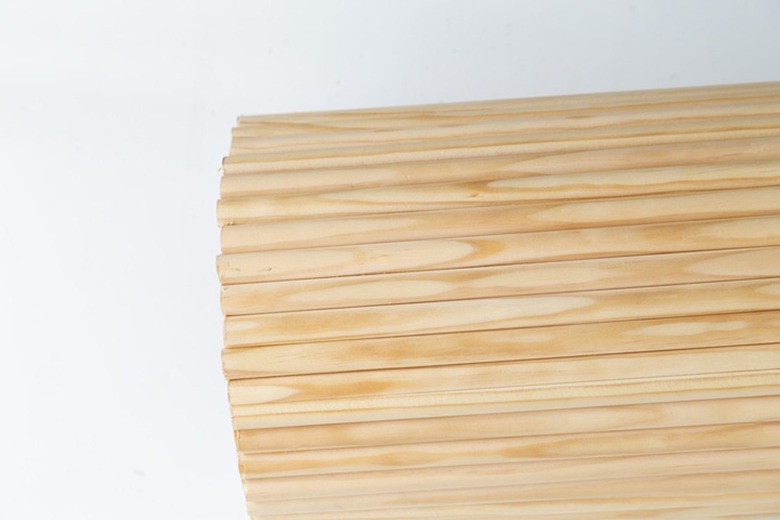
Step 6
Use a hand saw or handheld circular saw to trim the edges of the moulding boards at the bottom of the table (tube). Use a sander to smooth out the edges.
 Sara Albers
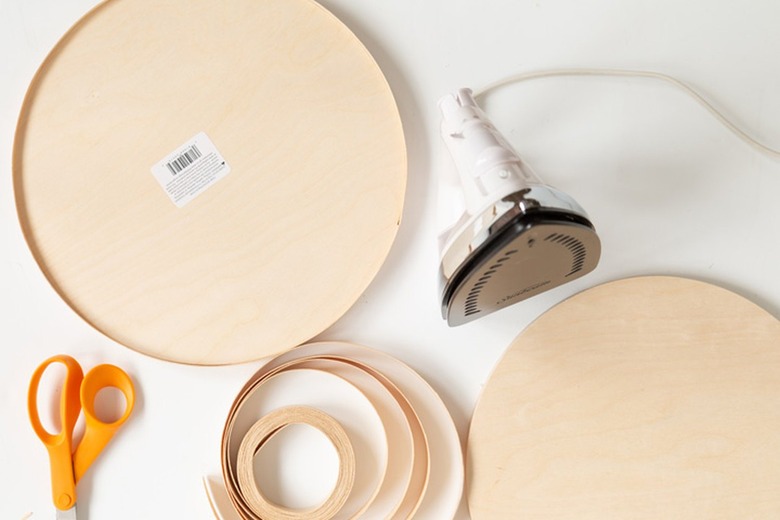
Step 7
Use an iron to adhere the wood veneer edging to the outer edge of the tabletop piece. Note: the tape will be a bit wider than the edge of top piece. That's okay!
 Sara Albers
Step 8
Add wood glue to the top edges of the moulding, and then attach the circle wood piece. Make sure to center this top piece.
 Sara Albers
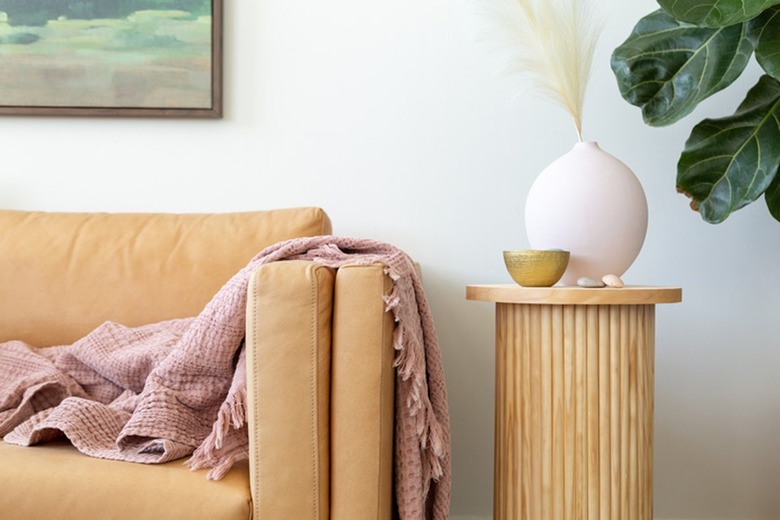
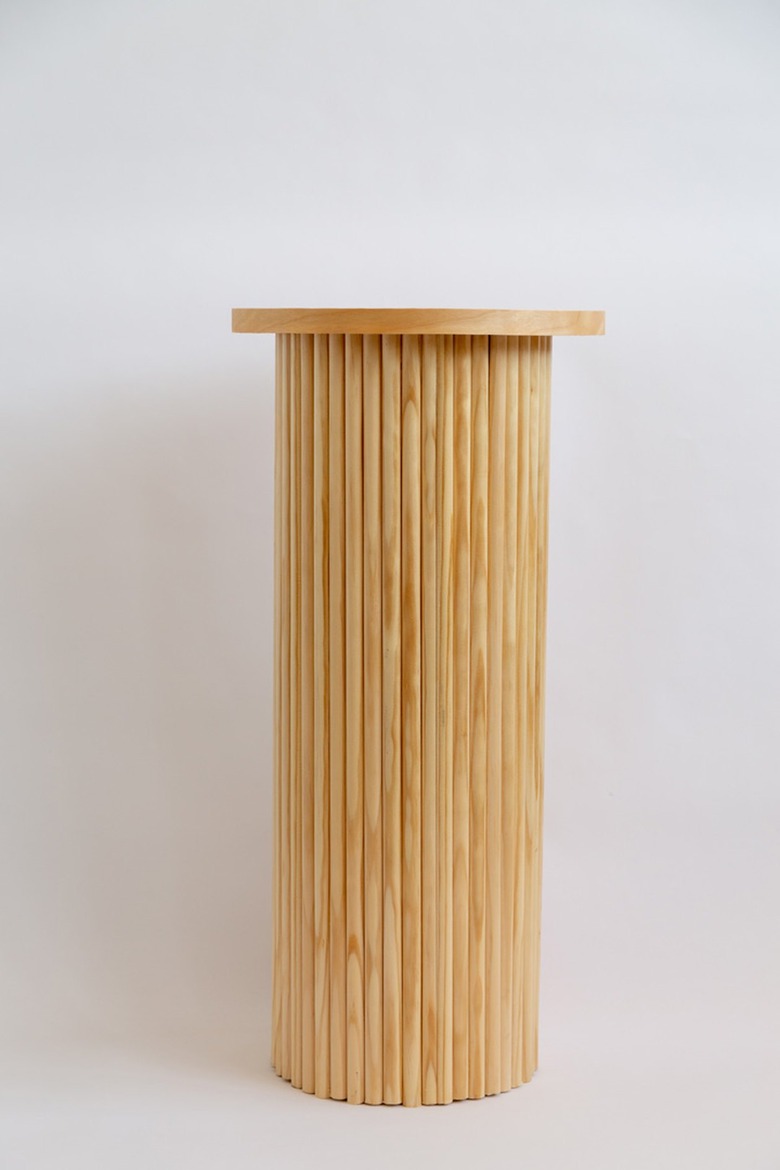
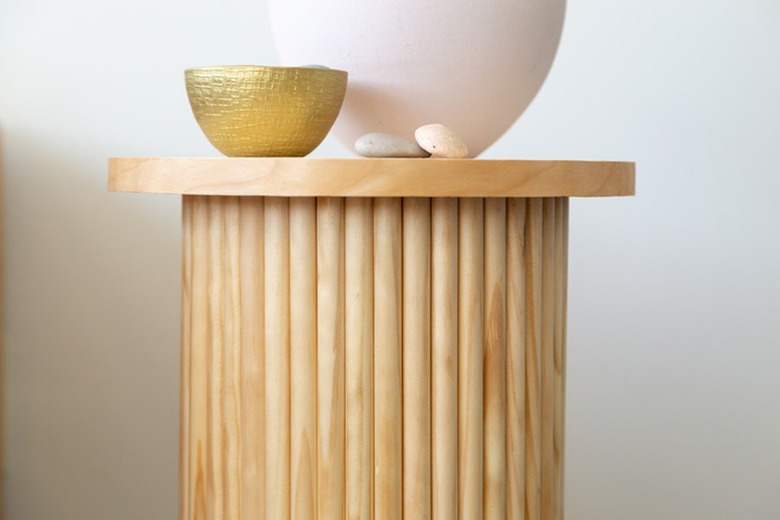
How lovely is this new piece of furniture?!
 Sara Albers
 Sara Albers