Converting A Patio Into A Four-Season Sunroom
We may receive a commission on purchases made from links.
As far as DIY projects are concerned, converting your patio to a sunroom is one with a lot of room for creativity, but it can be challenging, especially if you're interested in making a four-season room, and you have cold winters. If your patio already has a roof with sturdy posts supporting it, you have a head start on your project as long as the building department approves the structure. The building department also has to approve the new use of the space, and approval depends on local land-use ordinances and code requirements.
Checking into local ordinances and building requirements is the first step all homeowners have to take when undertaking DIY projects that increase usable indoor space on a property, and just as you would for a family room, second living room or some other room addition, you'll need to get a building permit. You might not need a permit for a lightly insulated three-season room, but a four-season room needs a heat source, insulation, a structure hefty enough to hold insulation and electricity. This is more than is typically supplied with a prefab patio enclosure kit that you can assemble on-site in a few days and doesn't require a permit.
You need a plan to get a building permit, and you should get the help of a licensed contractor to draw one up. The contractor will be able to tell you whether the existing structure, including the patio cover, is sturdy enough to incorporate into a permanent enclosed room and will help you design the space and choose the best materials based on cost and functionality. A professional plan will minimize the glitches and setbacks that inevitably occur if you go it alone.
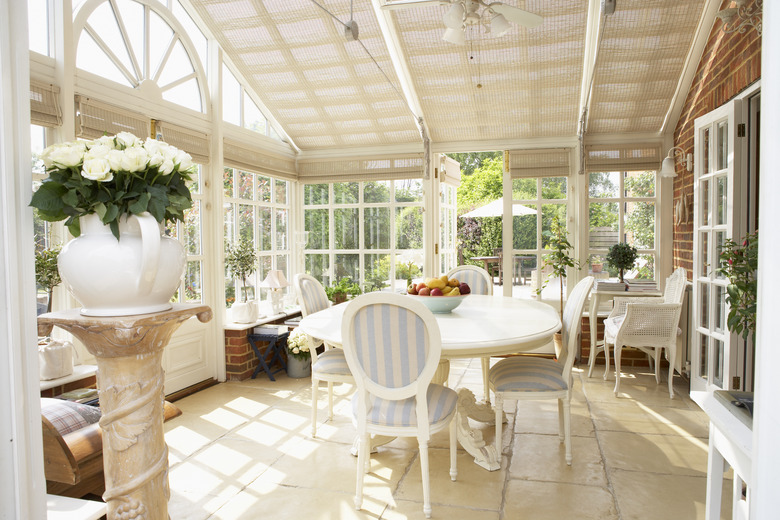
The Porch You Have to Work With
The Porch You Have to Work With
The design possibilities and the amount of work involved with the conversion depend on what's already there. Assuming your covered patio is on a concrete slab, the patio is likely either adjoining the house or set out in the middle of the yard, and the patio cover may be freestanding or it could be part of the house's roof. If the roof is attached to the house, there's a good chance you can keep it as is, add insulation and enclose the space underneath it. A freestanding patio roof made of corrugated metal or some other thin material, however, isn't going to provide much thermal protection for a living space, and you might want to replace it.
The concrete patio itself provides little to no insulation, and the sunroom will be cold unless you cover the concrete with some kind of insulated flooring. You can get the maximum insulation value from a raised floor stuffed with R-30 or higher fiberglass rigid foam or spray foam insulation and covered with subflooring and hardwood or laminate flooring, but it's easier to install thermal underlayment with a vapor barrier and cover it with a laminate floor covering. If you live in a moderate climate where the winters aren't too cold, painting the concrete with a good-quality floor enamel is also an option, particularly if you're on a budget.
Good, solid posts supporting the existing roof provide all the structure you need to frame in the walls of the sunroom, which — because it's a sunroom — will be primarily windows or panels of insulating glass, which consists of two sheets of tempered glass separated by an internal layer of an inert gas, such as argon. You can order glass panels in any size you want for about $10 per square foot or about $15 per square foot if you include features such as low emissivity (low-e) or high heat absorption for extra comfort.
 davidmartyn/iStock/GettyImages
Designing a Comfortable Sunroom
Designing a Comfortable Sunroom
You expect a sunroom to be sunny, but too much sunlight can be uncomfortable, especially in summer. You want to build in a little shade, and the best way to do it depends on the orientation of the patio. The south-facing side typically receives the most direct sun, so if you want a solid wall, that's the best side to put it unless that side is already well-shaded by trees or the house. You can also install shades or curtains you can close to block the intense afternoon sun and open to allow the vitalizing morning rays to enter. Alternatively, if you hope to capture sunlight to warm the space in winter, a south-facing wall is ideal for lots of windows.
Perhaps more than any other room, a sunroom needs good air circulation. Without air movement, a tightly insulated four-season room consisting mostly of windows can get uncomfortably hot, and in winter, moisture from warm air is likely to condense on the windows. If the sunroom is built onto your house, it isn't difficult to extend the home's central air system to the new room, but if the sunroom is detached or you don't want the extra expense of expanding your central air system, consider installing a ceiling fan. It's also important to make sure you can open one or more windows so fresh air can circulate during the warmer months.
A sunroom usually doesn't have much interior wall space, even if it's a four-season room, and what walls there are usually sport a white, beige, gray or light-colored wood tone to keep the room bright even when the sun isn't out. Drywall and vinyl are two common wall materials, but wood paneling works well to create a more grounded atmosphere. Consider a blonde to whitish wood paneling, such as maple, birch or whitewashed oak or pine.
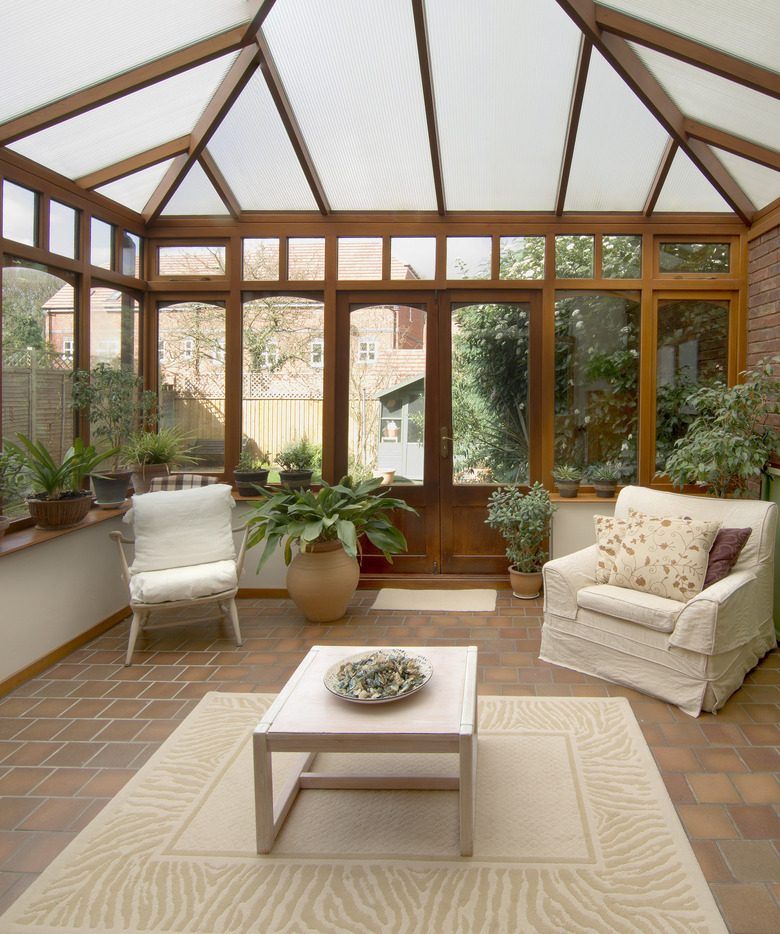
Construction and Materials in a Nutshell
Construction and Materials in a Nutshell
Since you already have a floor in place and assuming the posts and roof of your covered patio are robust enough to shelter an interior living space, construction of your sunroom basically involves erecting walls, framing in openings for glass and windows, insulating the walls and installing the interior and exterior wall coverings. In terms of construction, few DIY projects are less complex because all the support is already there. In terms of materials, a partial list of what you'll need includes:
- 2x4 lumber to frame the walls
- 4x4 lumber for the window and door headers
- House wrap
- Insulation with an R-value appropriate for your climate
- Siding to match your house
- Drywall
- Interior trim, including baseboard and door and window casing
- Silicone and acrylic caulk
- Glass and/or windows
You can erect the walls in place or build them on the ground and lift them into place, securing them to the floor with concrete screws or by driving fasteners with a powder-actuated nailer. Take advantage of the existing posts by securing the framing to them with screws or nails. The tops of the walls can blend into the contours of the existing roof, or you can construct a ceiling with joists into which you can install insulation, which is probably the better option if the roof is made of a thin material.
If the roof is too flimsy for a living space, you may have to rebuild it, or if it has a strong structure but thin roofing material, you may have the option of covering it with a thicker material. When a roof extends from the main roof of the house, chances are it's structurally adequate for a sunroom, but since it's a patio roof, it might be covered with corrugated plastic or steel. You'll probably want to replace this with something that more befits a room addition, so you'll have to add the roofing materials to your overall expenses.
 KatarzynaBialasiewicz/iStock/GettyImages
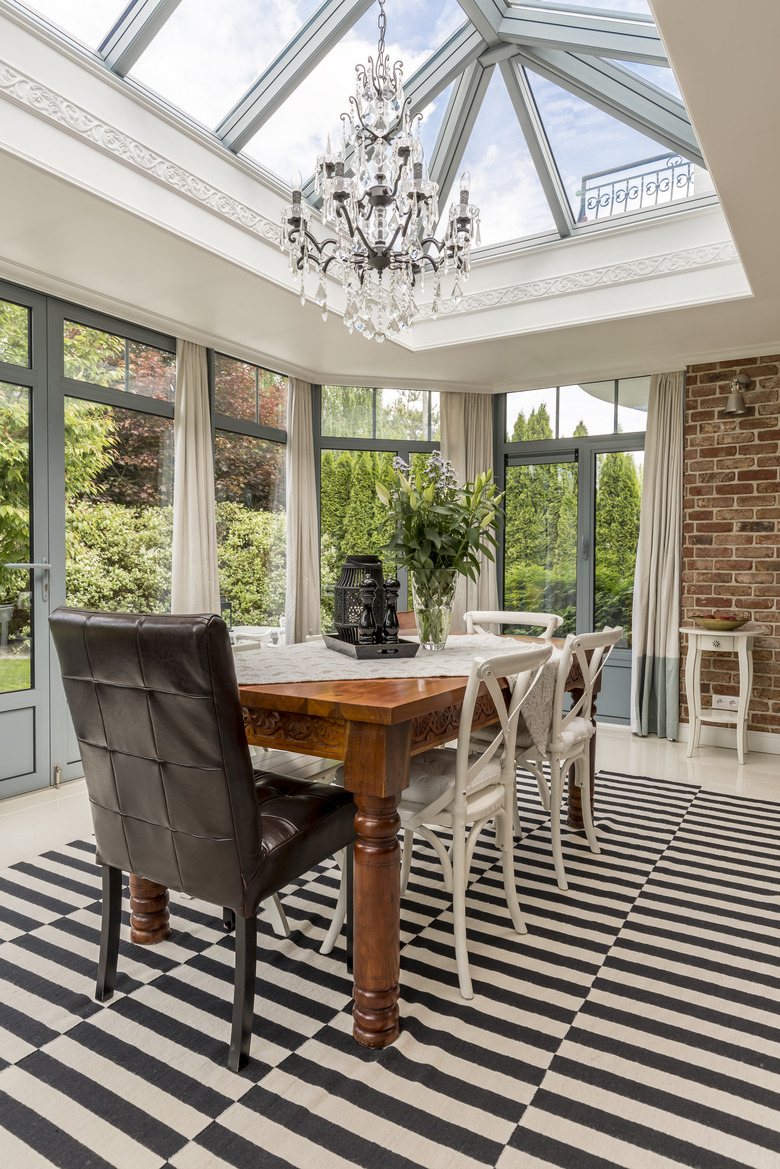
The Cost of a Sunroom Conversion
The Cost of a Sunroom Conversion
As a rule, DIY projects cost less than jobs for which you hire contractors, but it's unlikely you'll be able to do all the work yourself, so you'll still probably have some labor costs. If you can manage to do all the work yourself, your costs could be anywhere between $15,000 and $60,000 depending on the size of the room and your choice of materials. Hiring a contractor to do the entire job while you vacation in the Bahamas increases the cost of the project by $10,000 to $20,000.
Realistically, you'll incur some labor costs even if you do most of the work yourself. For example, if you install electrical circuits and central air, it's safer and more practical to have the work done by licensed contractors than it is to do the work yourself, and besides their labor, which can be anywhere from $50 to $100 an hour, you also have to include the electrical and HVAC materials in your costs. If you have to install new roofing, add on about $8,500. You should probably expect the project to cost at least $20,000 to $25,000 even if it's a small area and you use budget materials.
The Prefab Option for Sunrooms
The Prefab Option for Sunrooms
A number of companies, including Champion, Sunspace and California Sunrooms, offer prefabricated sunrooms that can cut your up-front costs by more than half. These are not patio enclosures but full-on living spaces with interior wall panels, thermal windows and all the insulation you need to be comfortable on cold winter days. They are modular units, so they probably won't match the style of your house, although you can find kits made of wood that are paintable. Prefab sunrooms offer a fast, painless way to get the job done, especially since the manufacturer often includes installation in the purchase price.
A prefab sunroom costs anywhere from $5,000 to $30,000, and it may be the best option for a patio with a poorly constructed roof that has to be replaced. A wide selection of interior styles and layouts is available, and most come pre-supplied with flooring and insulation so you don't have to think about those parts of the project.
How Long Does Construction on a Sunroom Take?
How Long Does Construction on a Sunroom Take?
Anyone who has ever worked on a construction project knows that framing, siding, roofing and glass installation can happen quickly, often in a week or two, but the time-consuming part of most home improvement projects is the interior finishing. Drywall installation, trim work, floor installation and painting, not to mention electrical and HVAC work, all take time. Moreover, all these jobs have to happen in sequence; you can't do them all at once to save time. If you're working with contractors, the project can get bogged down while you wait for someone who is busy on another project or if the weather turns bad, and slowdowns can happen even if you're working by yourself or with a small crew.
Don't forget to add time for the building permit to get issued, which usually takes four to eight weeks from the time you submit the application, and for materials you custom order to arrive, which can also take weeks. It's good to apply for the permit and order the materials a few months before you plan to start building. Once you do begin, expect the project itself to take a month or two.
Things can go much quicker if you choose a prefab unit. Once you've secured your permit, made your order and received the materials, the installation crew can make short work of construction given that all the parts are pre-formed at the factory to fit together. A prefab unit can go up in a matter of days rather than weeks.