DIY Hypertufa Planter (Get Ready To Be Charmed)
We may receive a commission on purchases made from links.
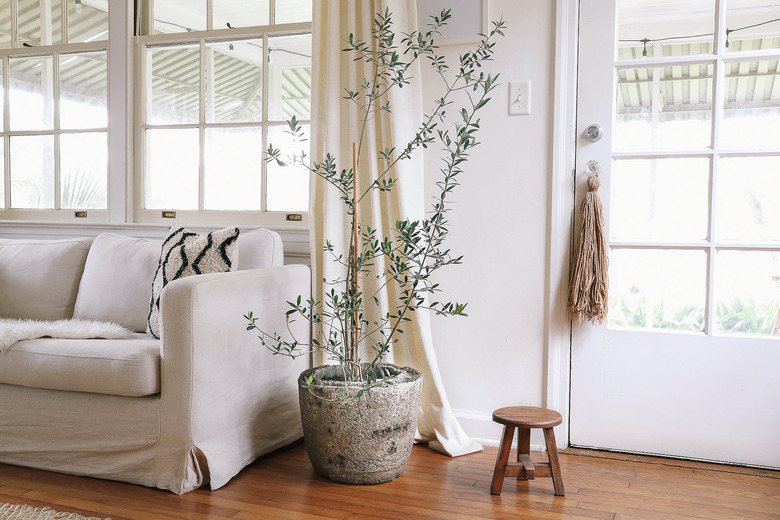
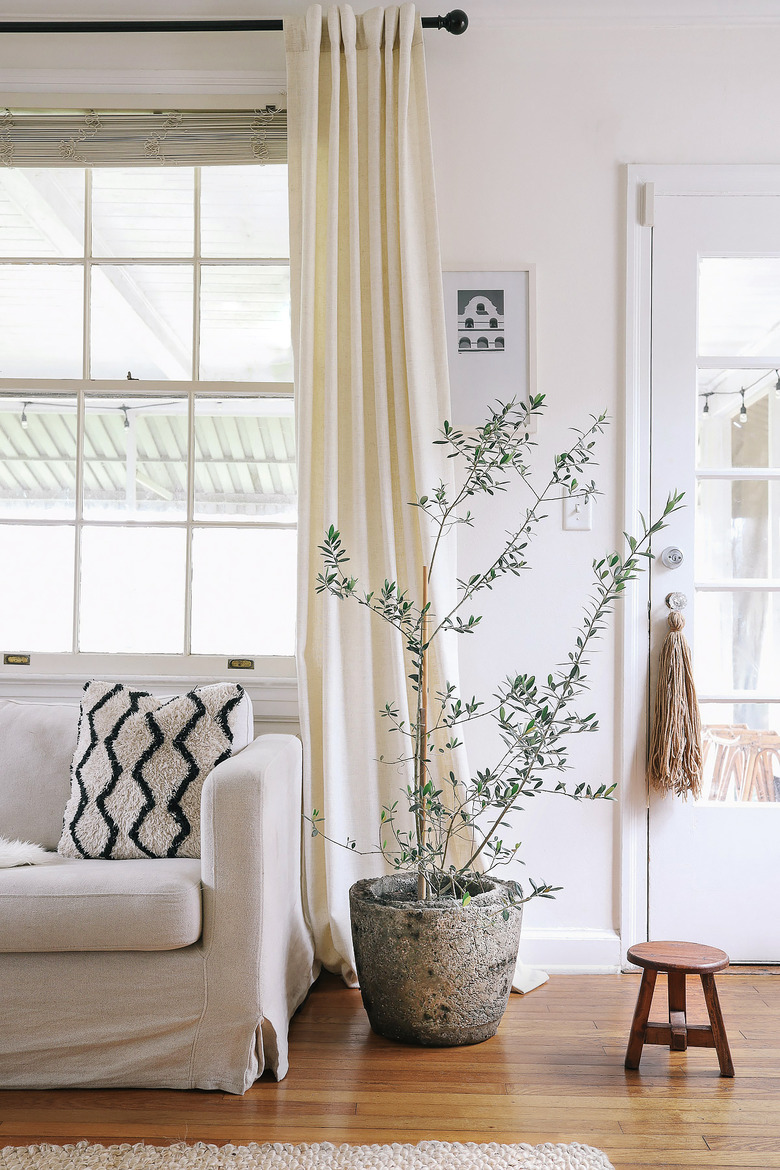
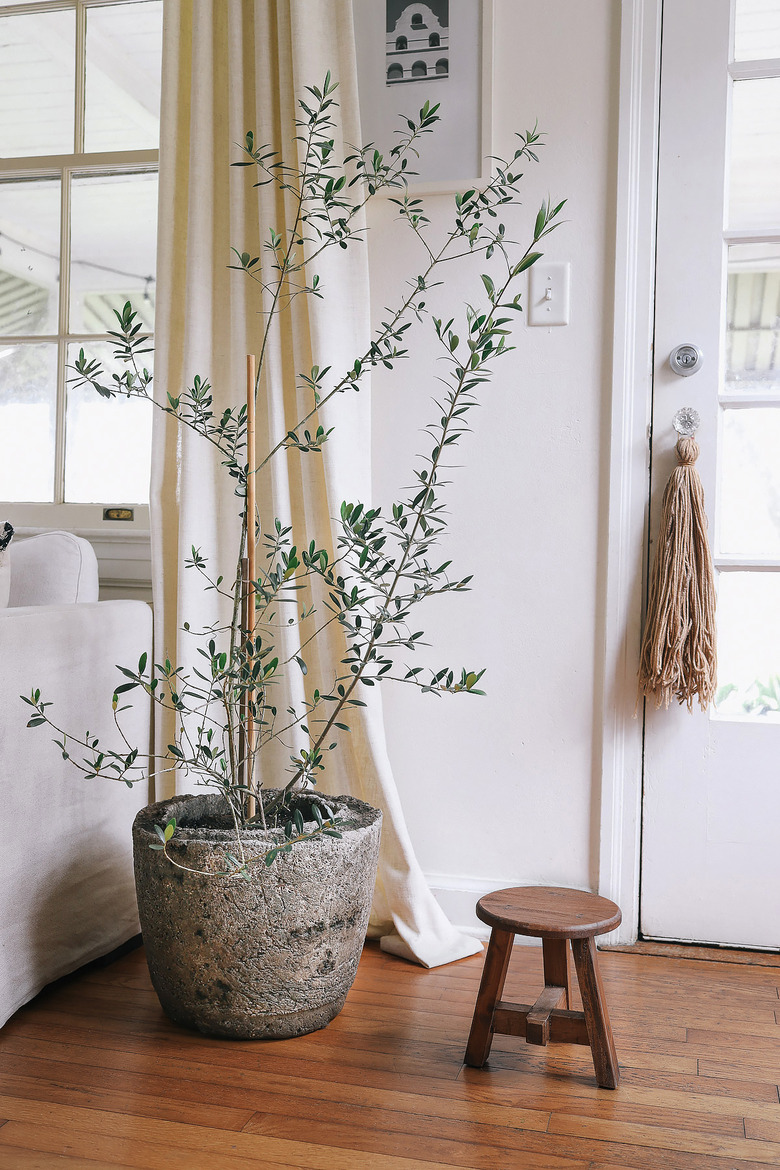
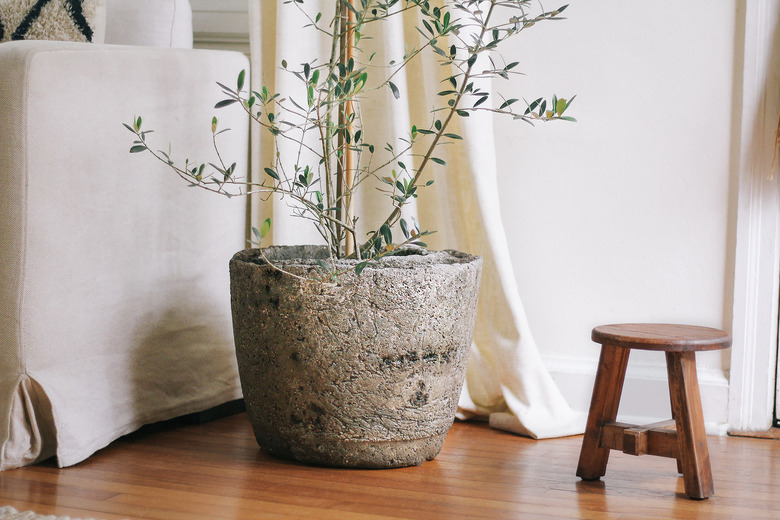
If you've ever had your eye on an Old World limestone planter (that you may have once seen in an English cottage garden but now see all over Instagram and Pinterest holding various trees, plants, and succulents), then you know that cost and weight can be considerable barriers to actually owning one. But guess what? You can easily get the high-end look for a whole lot less by making your own hypertufa pot. Meant to mimic the old stone troughs of yesteryear, hypertufa planters are much lighter than limestone, so you can move them around, and they are super affordable to DIY. Plus, they're porous like stone, which makes plant roots happy, and can be used either indoors or outdoors. Seriously, what's not to love about them? If you're ready to roll up your sleeves, then follow this tutorial and learn how to make your very own hypertufa container.
 Trisha Sprouse
Things Needed
-
Water
-
Large planter plastic pot or other mold
-
Smaller planter plastic pot (to nest inside the larger one)
-
Plastic sheets (or cut up garbage bags or large plastic bags)
-
1/2-inch PVC pipe or wooden dowel
-
Live culture plain yogurt (optional)
-
Instant coffee (optional)
-
Dish sponge (optional)
NOTE: Don't use any type of fast-drying cement for this project. The hypertufa needs to dry slowly to avoid cracking.
Step 1
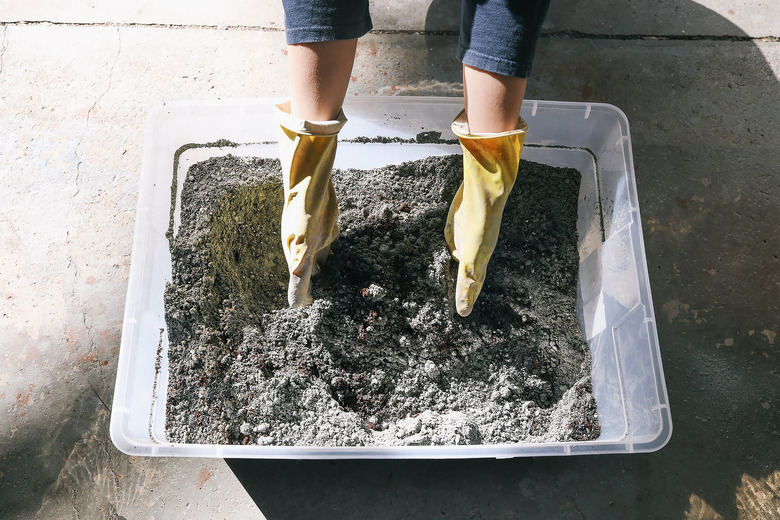
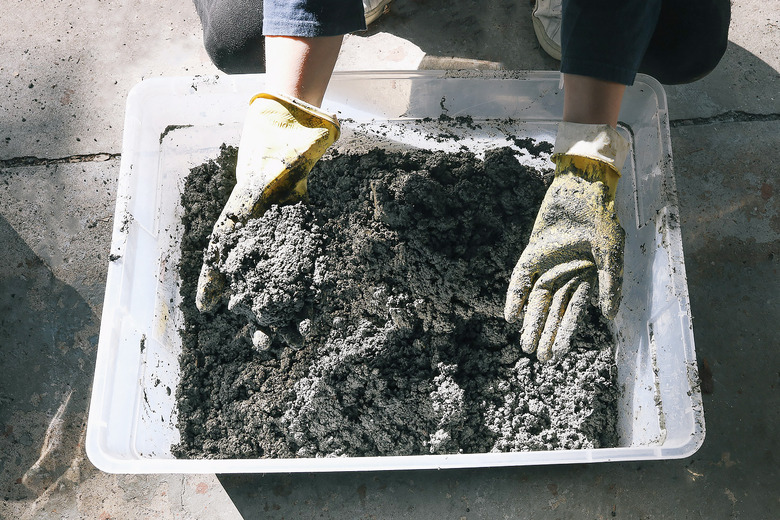
Prior to handling the materials, put on rubber gloves and a dust mask. In a large plastic storage bin or wheelbarrow, pour in three parts peat moss, three parts perlite (or vermiculite), and two parts Portland cement. Mix the three ingredients together with your hands (or a garden trowel) until well combined.
 Trisha Sprouse
Step 2
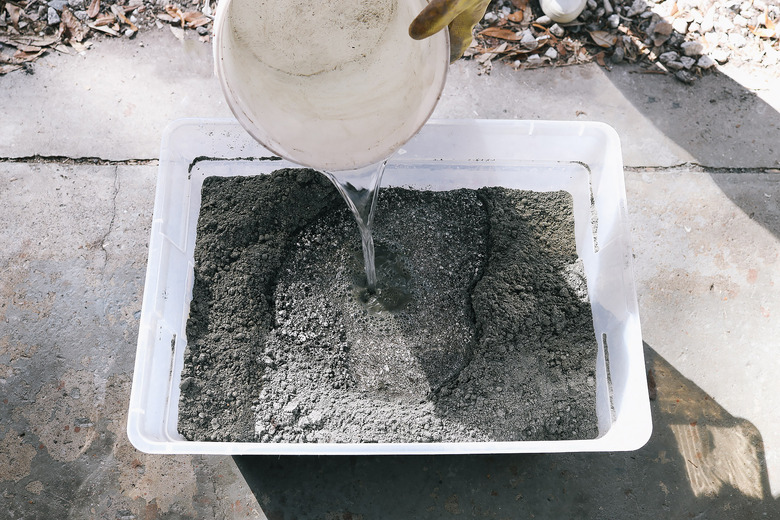
Add water to the mixture a little bit at a time, and mix with your hands until it has the desired consistency of cottage cheese.
 Trisha Sprouse
 Trisha Sprouse
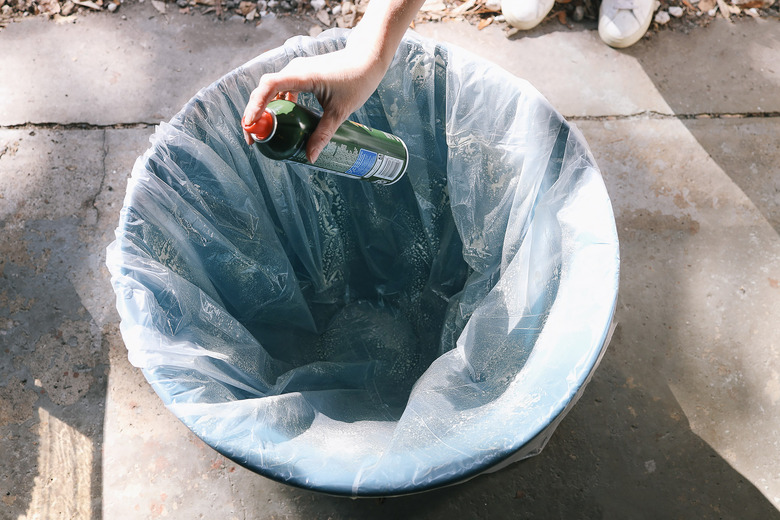
Step 3
Line the inside of the larger planter pot (or whatever you're using for a mold) with a plastic sheet, and spray it generously with cooking spray.
 Trisha Sprouse
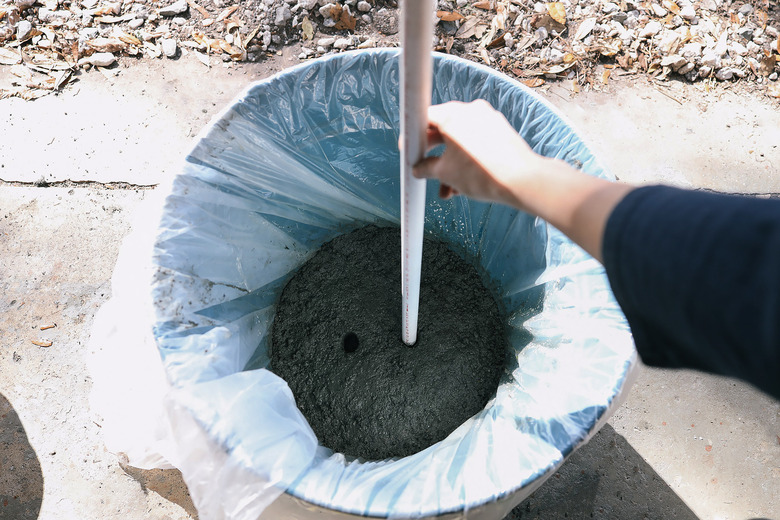
Step 4
Scoop some of the hypertufa mixture into the bottom of the mold, and pack it down firmly. Keep adding more of the mix until you have a base layer that's at least two inches thick. Then press a small PVC pipe or wooden dowel all the way through the mixture to create drainage holes.
 Trisha Sprouse
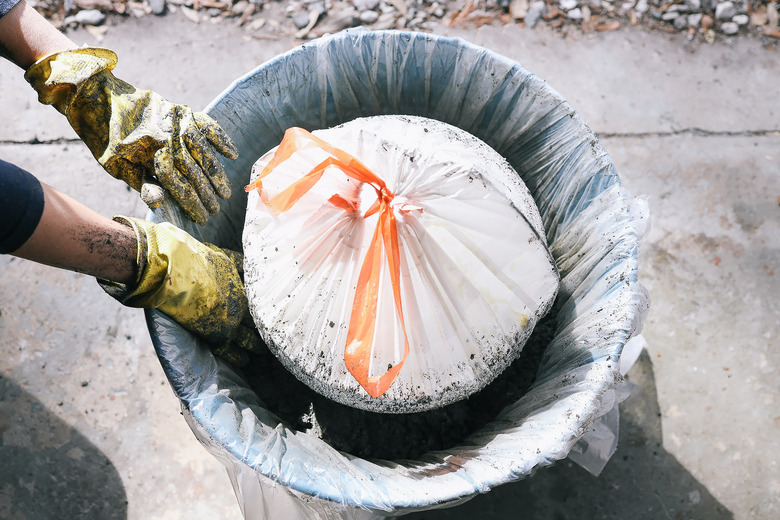
Step 5
Wrap the smaller planter pot or bucket inside plastic (we simply put it inside a garbage bag), and coat the outside generously with cooking spray. Then place it centered inside the larger planter pot, and pack the hypertufa mixture in the space between the two pots to create the side walls.
 Trisha Sprouse
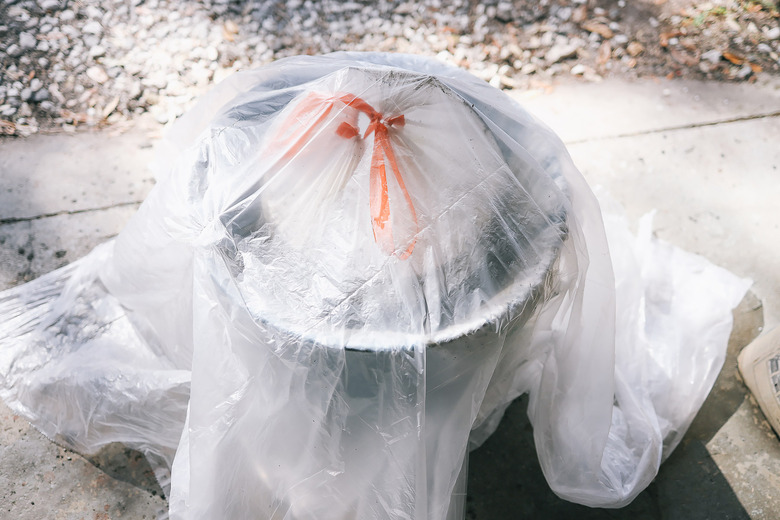
Step 6
Cover the planter with a plastic sheet, place it in a shady spot or covered area away from direct sun, and let it dry for approximately 48 hours.
 Trisha Sprouse
Step 7
Remove the plastic sheet, lift the smaller planter pot out of the mold, and then carefully remove the hypertufa from the larger mold. You may need to tap lightly around the sides to release it.
 Trisha Sprouse
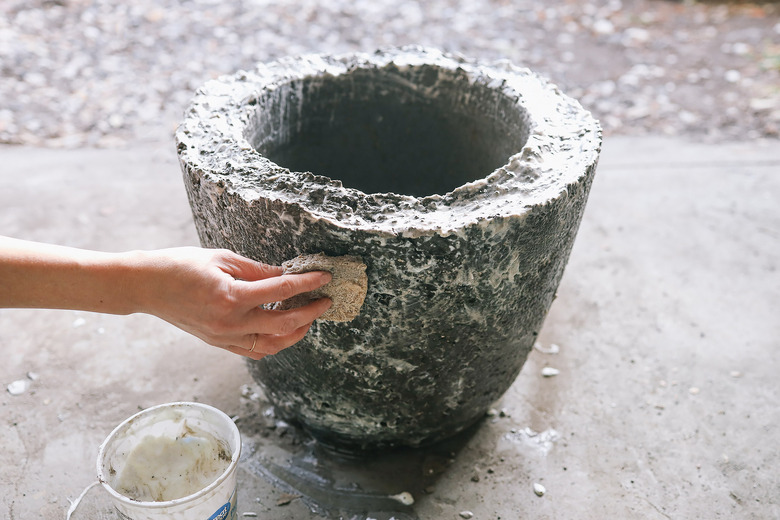
Step 8
Scrub the sides and rim of the hypertufa with a wire brush to rough up the surface and give it more of a porous stone appearance. You could also use sandpaper to smooth any rough edges. Afterwards, mist the pot lightly with water, re-cover with plastic, and let it sit in a shaded or covered area for at least two weeks until dry. The pot will lighten in color and weight as it continues to dry.
 Trisha Sprouse
Step 9
Once dry, if you'd like to give your pot more of a whitewashed look, you can coat it with some watered-down white paint or live culture plain yogurt, and let it dry. The yogurt dries to a chalky white finish, and will encourage moss to grow on the pot when left outside in a shaded area. You can even mix a little bit of live moss into the yogurt before brushing it on to give the moss a head start.
 Trisha Sprouse
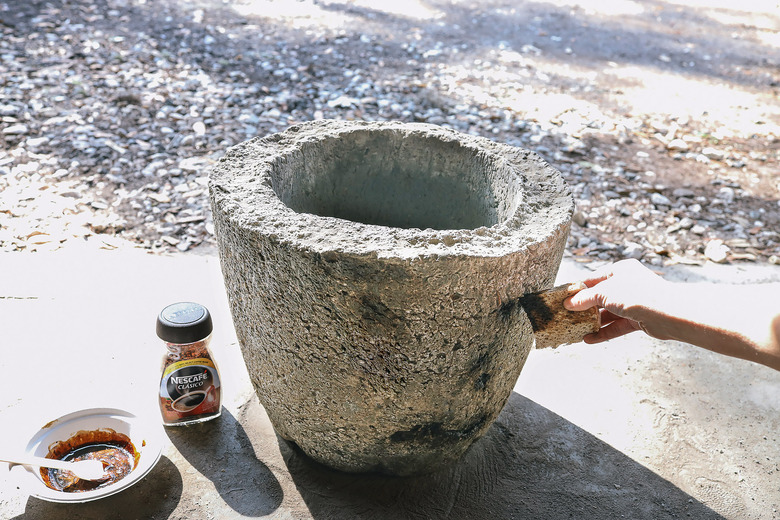
Step 10
If you'd like to create a bit of coppery patina to the pot, mix 1/4 cup of instant coffee with a teaspoon of water (or watered-down brown paint), and sponge some of the mixture into small crevices or areas around the pot. Blot with a damp paper towel to blend the edges and dilute some of the color.
 Trisha Sprouse
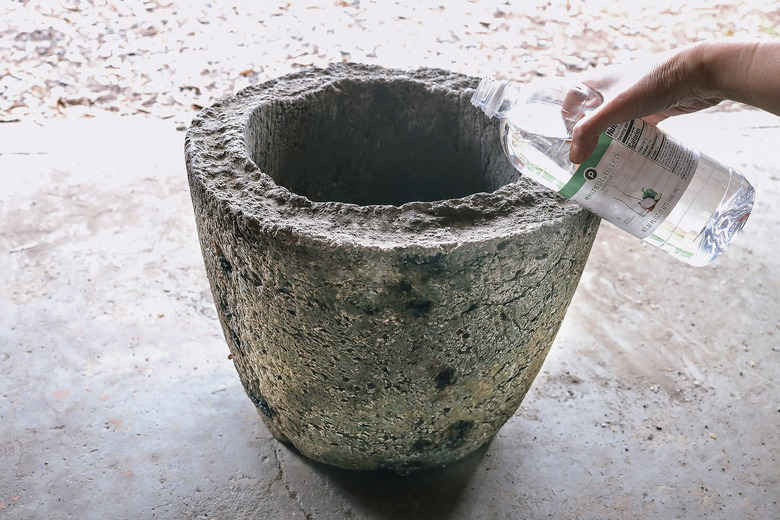
Step 11
Before planting, neutralize the lime in the planter by pouring in one gallon of water and 1/2 cup of vinegar. Pour the solution out and let the planter dry.
 Trisha Sprouse
Now you're all set to give your favorite houseplant a fancy new home! If you're still working on your green thumb, check out our plant care tutorials, tips, and advice for getting the most gorgeous greenery at home.
 Trisha Sprouse
 Trisha Sprouse