Transform A Popular IKEA Dresser Using This Surprising Material
We may receive a commission on purchases made from links.
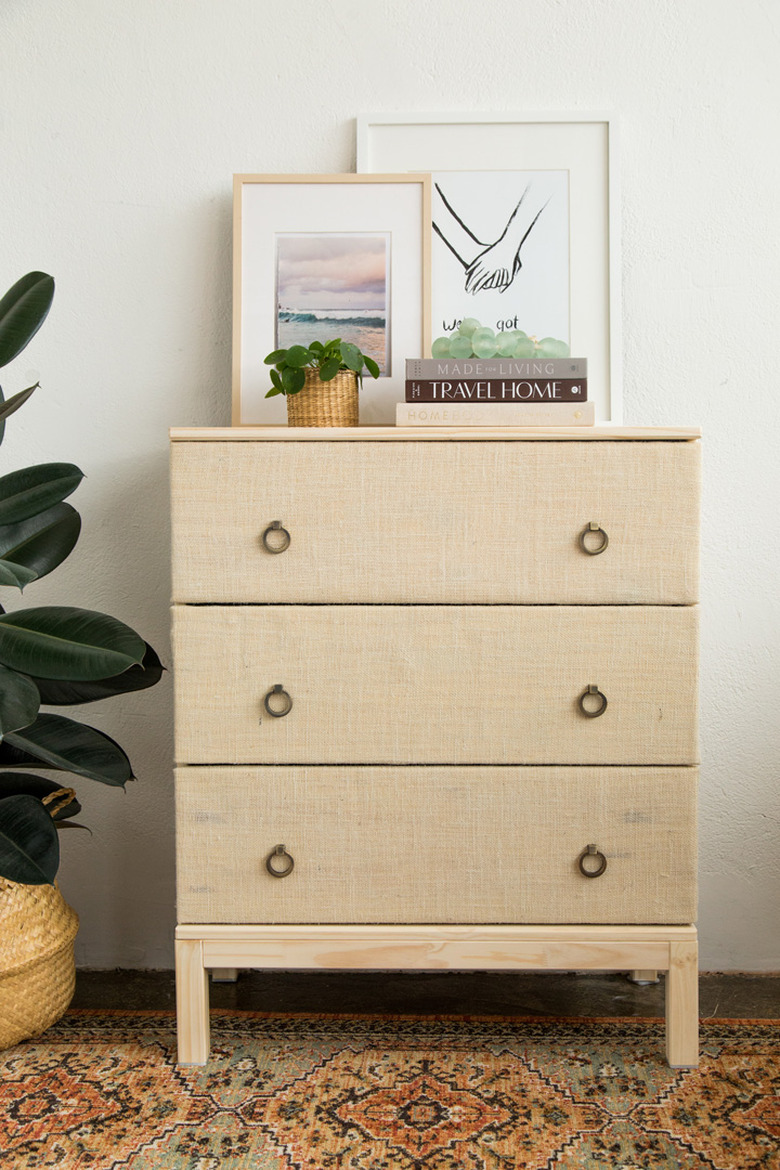
Adding fabric to the drawer fronts of a simple pine Tarva IKEA cabinet can transform the look of this beloved and simple piece of furniture. Texture is a big component in making this look high-end. The secret ingredient in this DIY dresser makeover is burlap! Using a lighter colored burlap from the fabric store is just the right color to match the pine wood.
Traditionally, IKEA pine furniture has a yellowish tone. In this tutorial, we added a white wash stain to take away that yellow color. Instead of the pine wood drawer pulls, add brass ones for a high-end look.
Things Needed
 Sara Albers
Step 1
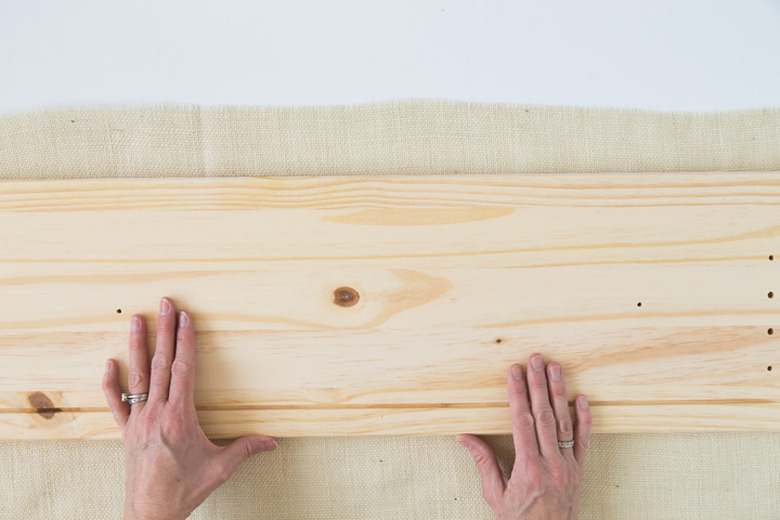
Cut the fabric to fit the drawer fronts. Lay the drawer front on top of the fabric. Leave about two to three inches of fabric around the drawer.
 Sara Albers
Step 2
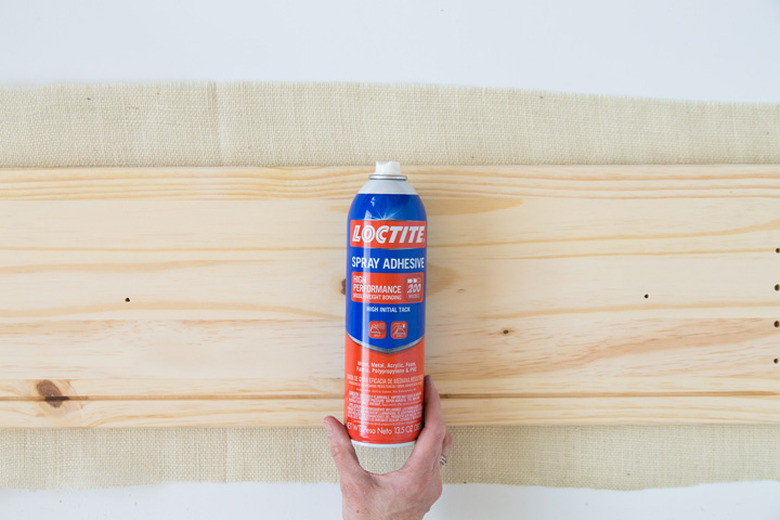
Use spray adhesive to adhere the fabric to the front of the drawer fronts. Make sure and do this in a well ventilated space. Be sure to smooth the fabric out on the front of drawers.
 Sara Albers
Step 3
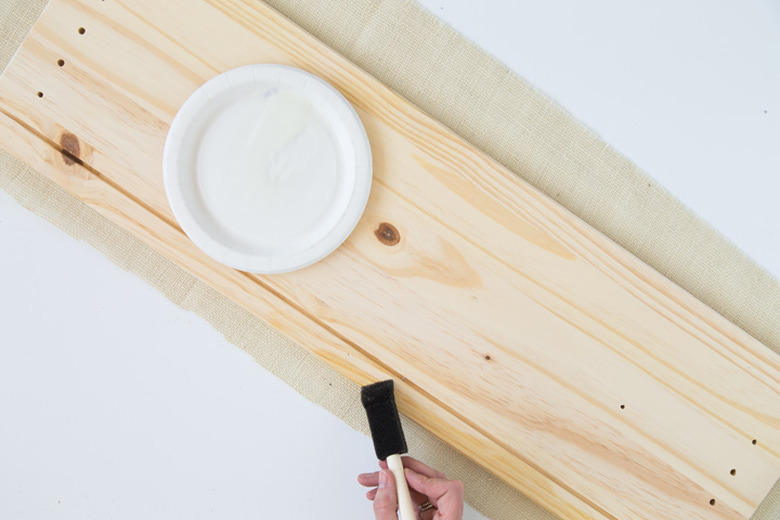
After you have pulled the fabric tight and smoothed on the front of drawers, you will now wrap the fabric around to the back of drawers. Instead of spraying the back of the drawers with adhesive, spray a bit on a paper plate and used a sponge brush to brush onto the back and side edges of drawers. Pull the fabric edges tightly around. Make sure and not to cover the slit on one edge of back of the drawer.
 Sara Albers
Step 4
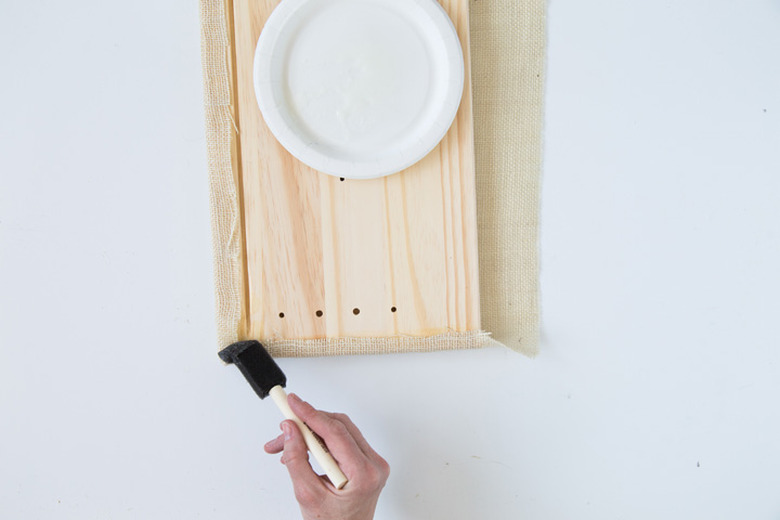
Wrap the edges of the drawer with the burlap similar to a present. Tuck the edge and fold over the back of the drawer.
 Sara Albers
TIP: If your fabric becomes a bit loose once the adhesive dries and you have glued the sides of fabric to the back, you can use a glue gun to pull the fabric tight once again on the back edges.
Step 5
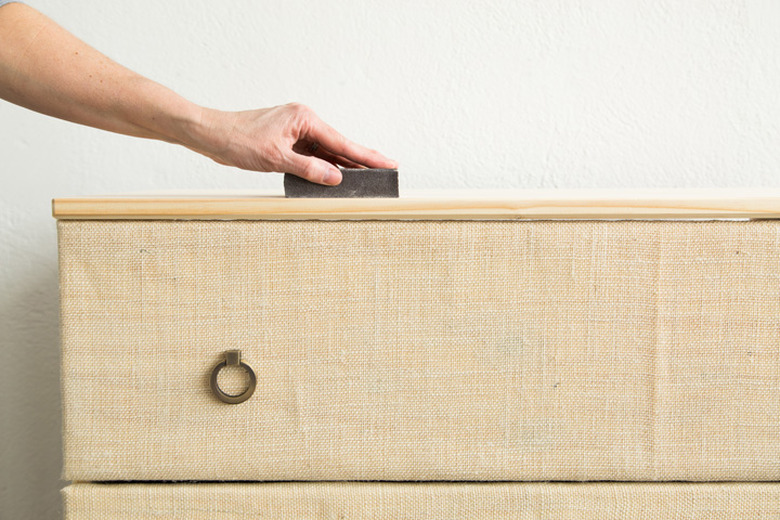
Put the Tarva dresser together per the IKEA instructions. Next, sand the dresser lightly to prep for staining. Wipe down with cloth after sanding.
 Sara Albers
Step 6
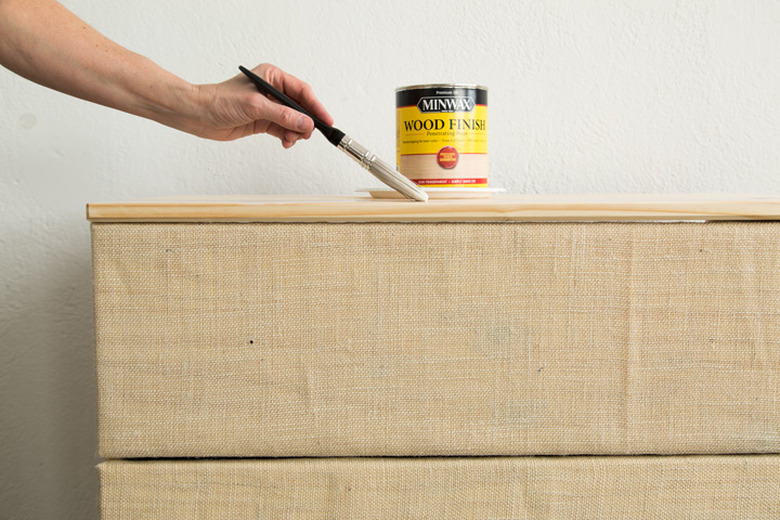
Instead of using a paint color, add a white washed finish to the pine dresser, using a white wood stain. Apply with a stain paint brush. Wipe the stain to give it a washed look.
 Sara Albers
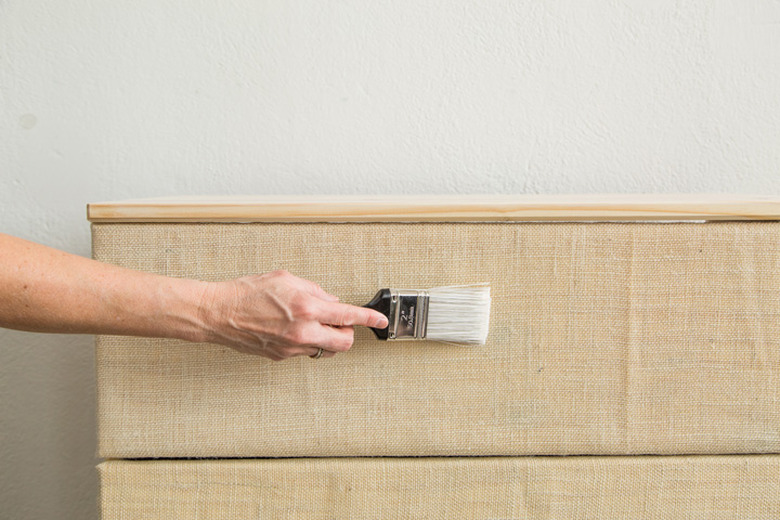
Step 7
Lightly apply stain to the fabric fronts. A little bit goes a long way.
 Sara Albers
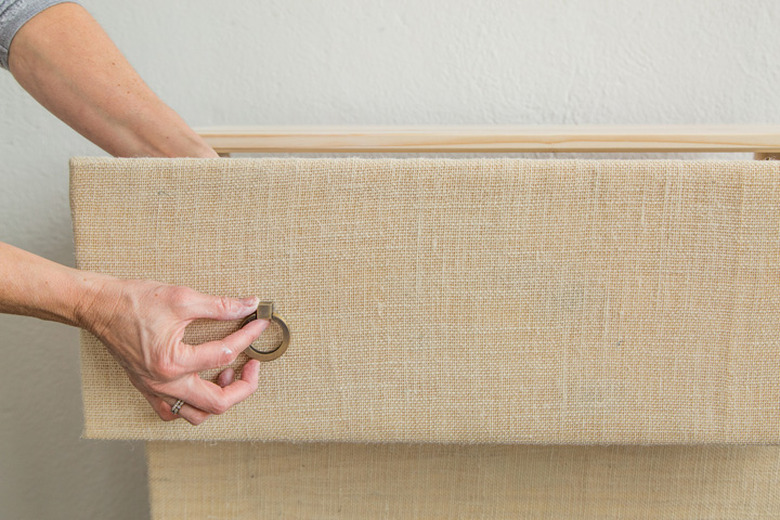
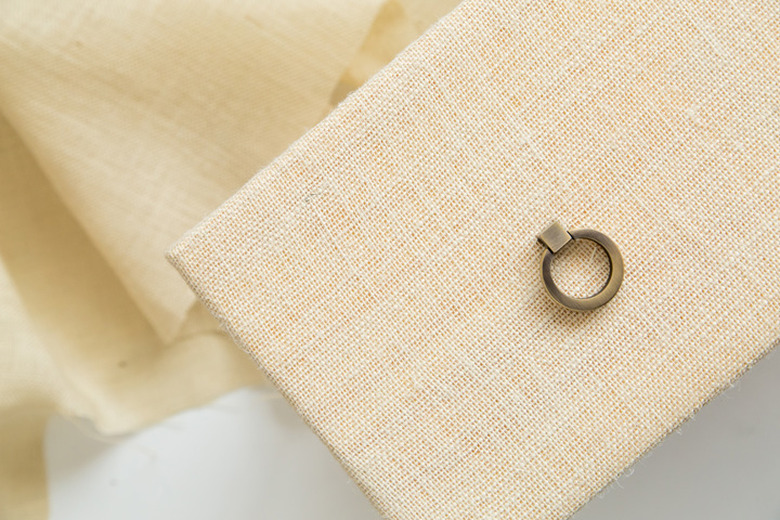
Step 8
Screw on new drawer pulls to give the furniture a more high end look. New hardware gives it such a fresh look. (Amazon has these pulls that are gorgeous.)
 Sara Albers
 Sara Albers
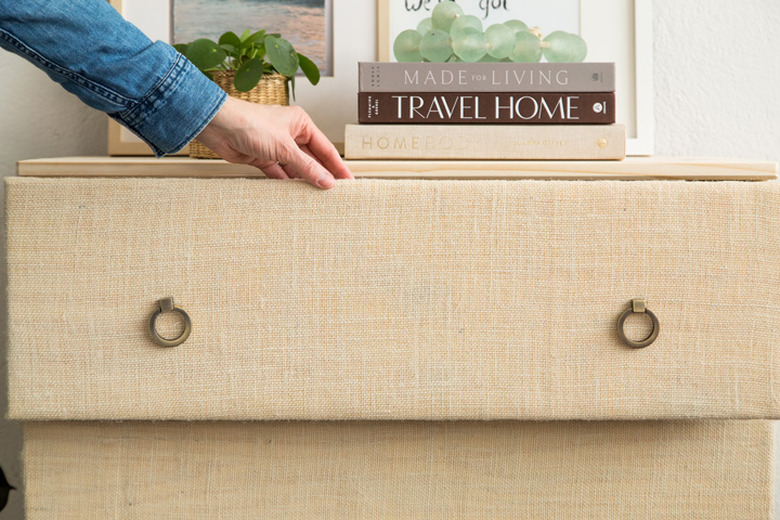
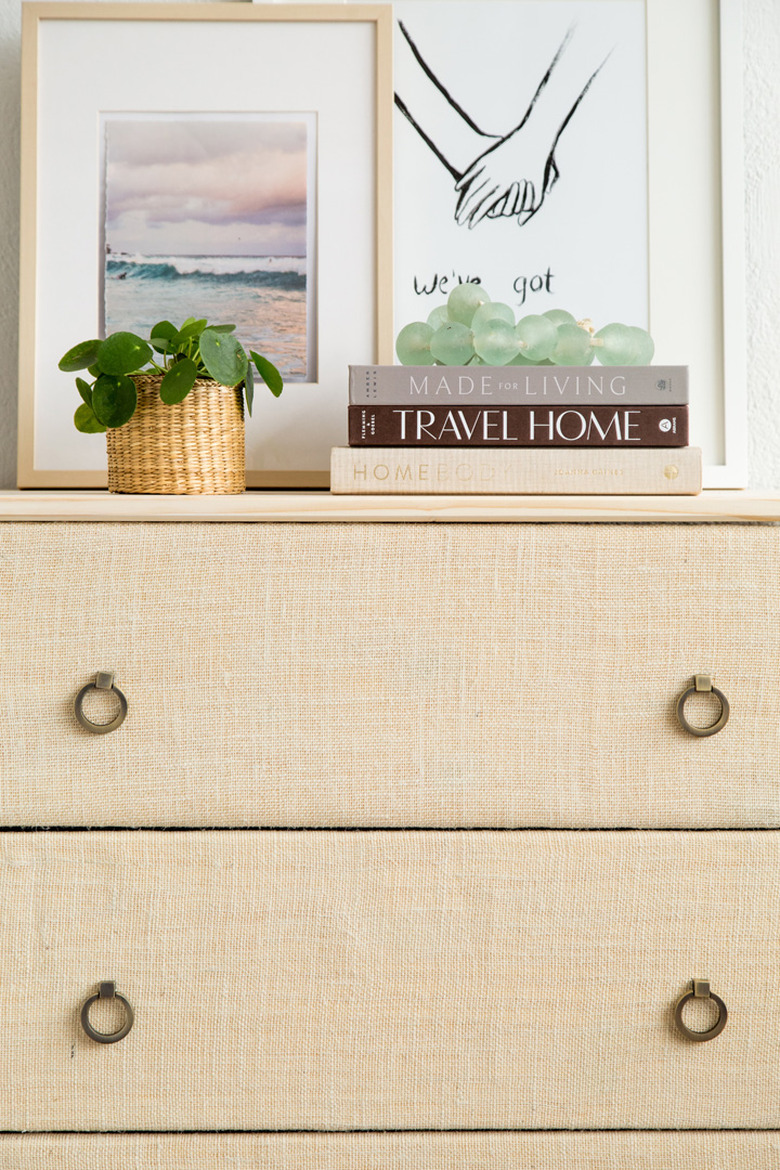
Place your new dresser into your favorite room because this beauty is ready to go out on display.
 Sara Albers
Love this IKEA Tarva dresser hack? For more IKEA hacks, DIYers love these roundups of IKEA furniture and popular products from 2020 and 2019. We have easy, budget friendly DIY projects for every space, from the kids' room to the master bedroom to your living room — home decor for every room.