Make A Modern Mood Board Using This Easy Tutorial
We may receive a commission on purchases made from links.
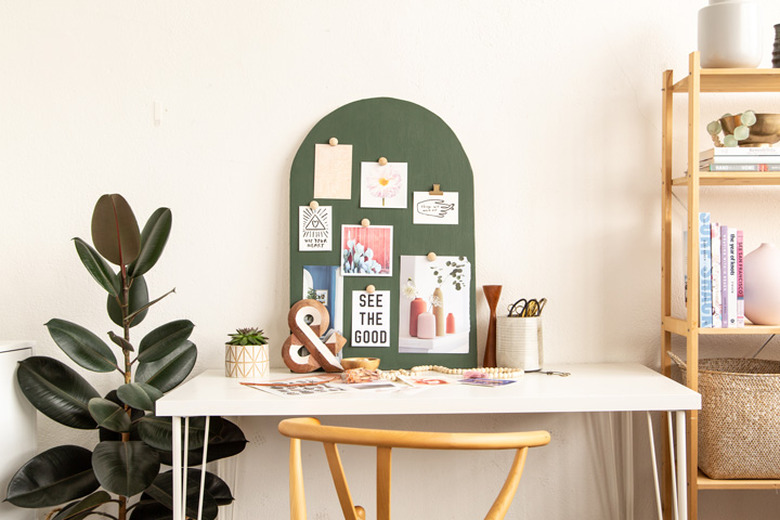
Mood boards are a beautiful way to put on display what inspires you: Quotes, helpful people, places you want to visit, home decor, hopes, and dreams. When it comes to a mood board, the sky's the limit as to what you want to see, day after day.
For this tutorial, we're featuring an arched-shaped magnetic mood board influenced by the gorgeous painted arches we've seen on Pinterest. This is an easy, non-committal way to get on this trend, and the mossy green paint is a favorite look for 2021.
The hardware store will have everything you need to create your own. And if you haven't used magnetic paint before, it might just become a new obsession.
Things Needed
-
Magnetic paint (See tip below before using.)
-
Half wood bead circles (optional)
-
Magnets (optional)
 Sara Albers
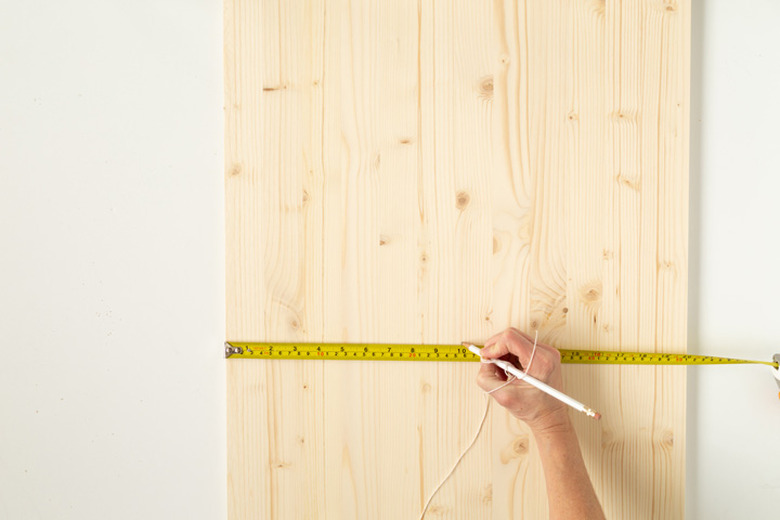
Step 1
Use a tape measure to find the center of your board. This will be your starting point for making the arch shape.
 Sara Albers
Step 2
Tie string around a pencil to use as a tool to create the arch shape. Place your finger over the end of string tightly on the center point of the board. Lightly draw an arch shape with the pencil to determine where you want your arch to be. You can move the end of the string up or down for the shape and height you want.
 Sara Albers
Step 3
After finding the perfect arch, draw over your pencil line with a black marker. This will make cutting easier.
 Sara Albers
Step 4
Place the wood panel on top of a box or workbench and secure. Using a jigsaw, cut the wood using the black line as your pattern. (If you don't have a jigsaw, have your local hardware store cut this for you.)
 Sara Albers
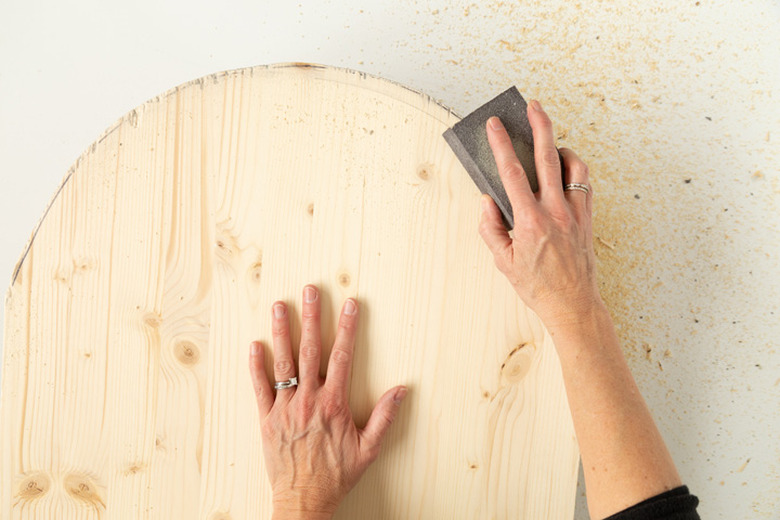
Step 5
Sand the edges of the cut using a sanding block or a power sander.
 Sara Albers
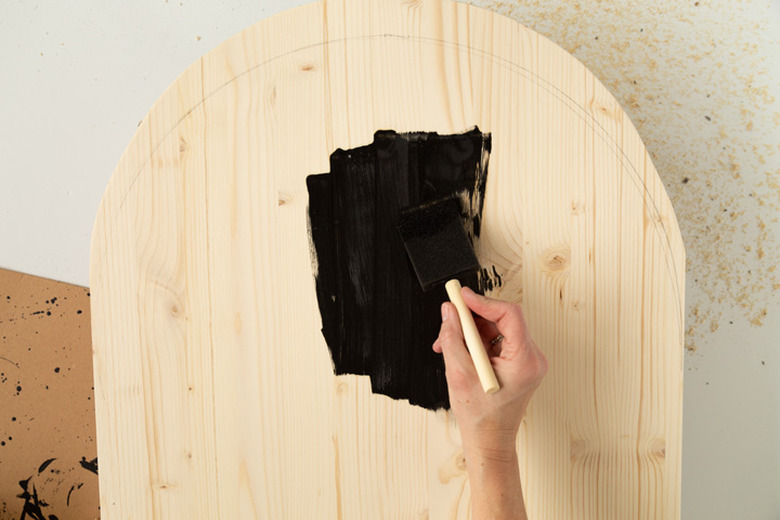
Step 6
Next, add the magnetic paint. We recommend at least four to five coats of magnetic paint. Use inexpensive sponge brushes for adding all of these coats.
Tip
Take your magnetic paint to a paint store or hardware store and have them "shake" the paint for you. The metallic components of the paint make this paint very hard to mix yourself.
 Sara Albers
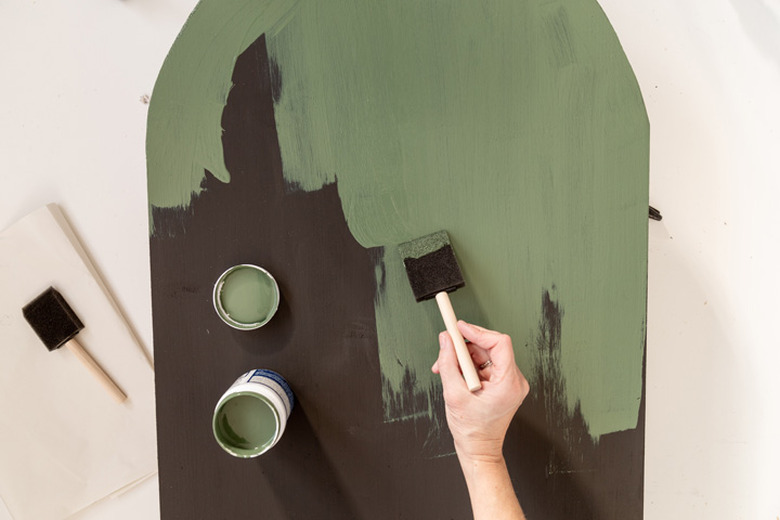
Step 7
Add the top coat of paint. We went with an on-trend moss green paint color. (We only needed two coats of paint.)
Tip
You may need to gently sand the magnetic paint if you have some clumps before you begin with your top coat.
 Sara Albers
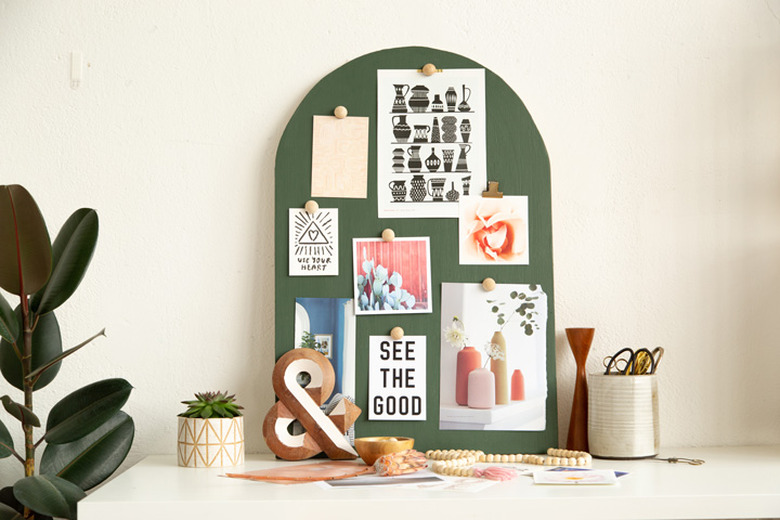
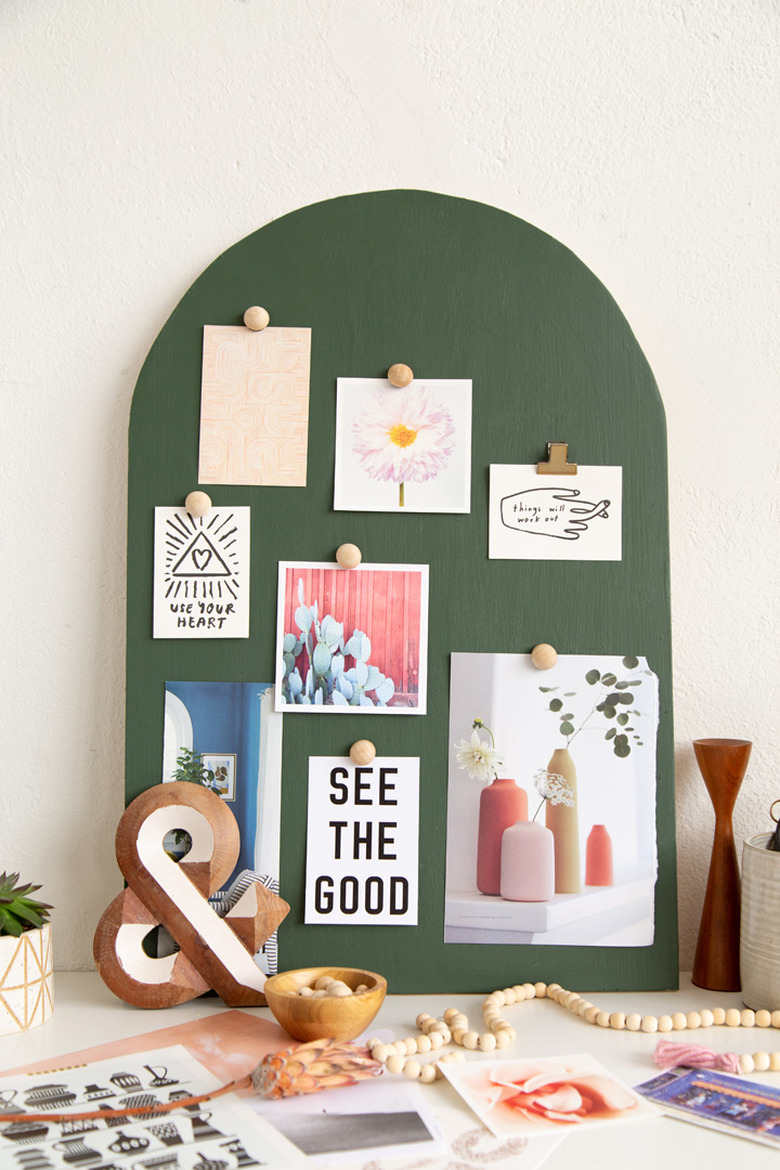
Step 8
Time to fill your board with inspiration! We made some quick magnets using half wood circles, magnets, and hot glue.
You can prop up your arched mood board on your desk or adhere it to the wall using velcro Command Strips.
 Sara Albers
 Sara Albers
 Sara Albers