How To Grow Turnips
We may receive a commission on purchases made from links.
Turnips (Brassica rapa [Rapifera Group]) have been around for at least 3,000 years, and they are cultivated for their greens as well as the large, bulbous root, which some say tastes like a cross between a carrot and a potato or perhaps a cabbage and a radish. The slightly bitter taste of the raw root is actually a feature when it comes to small turnips, which some people eat like radishes, but larger roots have to be cooked to make them palatable. Turnip leaves have a sharp, spicy flavor reminiscent of mustard, to which the turnip is related.
The turnip is a fast-growing plant that likes cool weather, which is one reason people in emergency food situations often plant it as a last resort. Turnips helped feed the British people during World War II, and the winter of 1916-1917 is known to Germans as the "turnip winter" since that was all they had to eat. Both scenarios attest to the fact that turnips, besides being fast-growing, are also easy to grow.
The turnip is a biennial, which means it flowers during its second year of growth, but most farmers and gardeners grow this root vegetable as an annual and harvest the leaves and roots as soon as they mature. If you do leave the root in the ground over the winter, however, the plant will produce light-yellow flowers that cluster around a central stem the following spring. During the first season, which is as far as most turnips make it, the light-green leaves are long and hairy, and the top of the root, colored purple by sunlight, is usually visible just above the ground.
Best Uses for Turnips
Best Uses for Turnips
Turnips don't have much visual appeal to add to your garden and belong with all the other vegetables. Because they grow quickly enough to allow you to harvest one crop and plant another if the growing season is long enough, they deserve a place all to themselves. However, you can mix them with companion plants, especially vine-growing legumes like peas and beans. You can also plant turnips late in the growing season in a part of the garden where you have already harvested corn, onions, squash or beans.
Some people grow turnips just for the leaves, and others grow them just for the roots, but both have a place on the table. Spicy turnip greens, which are rich in folate and vitamins A, C and K, add a great touch to any salad, and turnip roots, which contain healthy amounts of vitamin C, dietary fiber and minerals, can be stir-fried, boiled, mashed, grated, roasted and even turned into French fries. You can store turnip roots for up to three months in a cool place, such as a root cellar or the refrigerator, so you'll have plenty to tide you over for the winter.
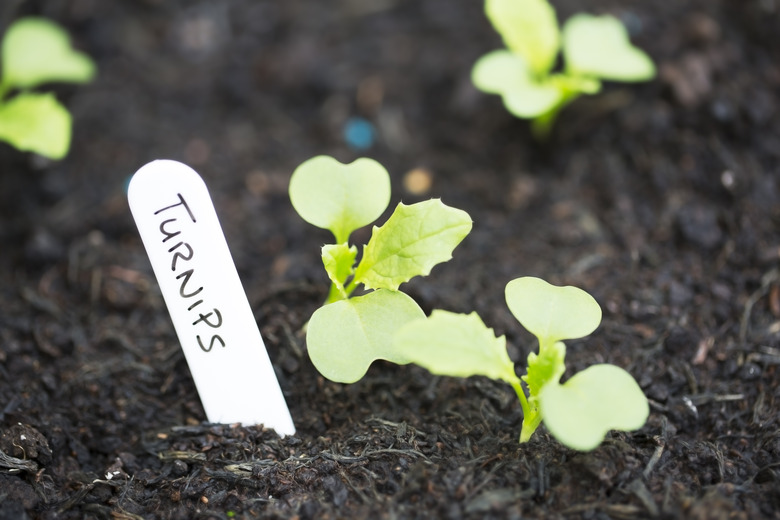
How to Start Turnips From Seed
How to Start Turnips From Seed
Turnips, like most root crops, don't tolerate transplanting well and are almost always grown by direct seeding. If the soil temperature is 70 degrees, seed germination takes from three to 10 days, but it might take slightly longer in cooler soil. The seeds need to be buried 1/2 inch deep and gently pressed into the soil. A common cause of seed failure is insufficient soil contact.
Plant seeds in rows spaced about 12 inches apart and space the seeds by about 2 inches. When the seedlings emerge, thin them to increase the spacing to 4 to 6 inches unless you're planning to harvest only the greens, in which case you can maintain the spacing at 2 inches or increase it to 4 inches depending on the projected size of the plant.
Not all turnip cultivars produce roots as large as the popular 'Purple Top White Globe.' Some, like Japanese Baby ('Mikado'), have very small roots. Others, such as 'Hinona Kabu,' grow long and narrow carrot-like roots, and still others, like 'Seven Top,' grow tiny roots and are planted primarily for the greens. When the turnip roots are small, you can space the plants more closely together.
In What Zone Do Turnips Grow Best?
In What Zone Do Turnips Grow Best?
Turnips love cool weather, and because they ripen to maturity quickly, they are a perfect crop for people who live in northern climates, especially USDA hardiness zones 2 through 5, where the growing season is short. They flourish when the soil temperature is around 60 degrees Fahrenheit, so in the warmer zones of 6 through 11, they are best planted in the early spring or late summer to avoid the summer heat. Bolting (going to seed prematurely) is common when turnips are exposed to too many days of hot temperatures.
When Should You Plant Turnips?
When Should You Plant Turnips?
In southern zones, it's common to plant two crops: one in spring and another in late summer. In colder zones, it's possible to sow seeds at 10-day intervals to produce a continuous harvest throughout the growing season. When planting turnips for a late spring harvest, sow the seeds two to three weeks before the last frost date, and when planting for a fall harvest, sow them in late summer when temperatures are cool enough for them to grow. If the growing season is long enough, you can also plant turnips early in the fall and harvest them in late fall or early winter.
Soil, Sunlight and Water Recommendations for Turnips
Soil, Sunlight and Water Recommendations for Turnips
Turnips are sturdy plants and don't need much, if any, fertilizer, but they do need some nutrients, so it's important to prepare the soil with plenty of organic matter, including compost and manure, before planting them. Soil needs to be loose and free of rocks that could inhibit root growth, so turn the soil over to a depth of about 8 inches and manually remove the rocks and stones. The soil should be slightly acidic with an ideal soil pH between 5.5 and 6.8.
Even though turnips are a cool-weather crop, they need full sun, although they are shade-tolerant to a degree. Shading may even be necessary in hot, sunny weather to prevent bolting, and you can provide this with a shade cloth. Avoid planting turnips under a tree or near a structure that blocks the sun.
Turnips need moderate moisture and may bolt if the soil dries out, so water at the rate of 1 inch per week and spread mulch around plants to retain moisture. Mulch also helps control weeds, which should be removed carefully if they appear to avoid disturbing the turnip roots.
How to Propagate Turnips
How to Propagate Turnips
Turnips are usually grown from seed, and while the seeds are readily available and inexpensive, you can obtain them for free by leaving one or two plants in the ground over the winter and collecting the seeds from the flowers during the second growing season. You can also collect seeds from a plant that has bolted. Bear in mind that most cultivars will not grow true from seed, so be sure to grow heirloom turnips if you plan to save the seeds.
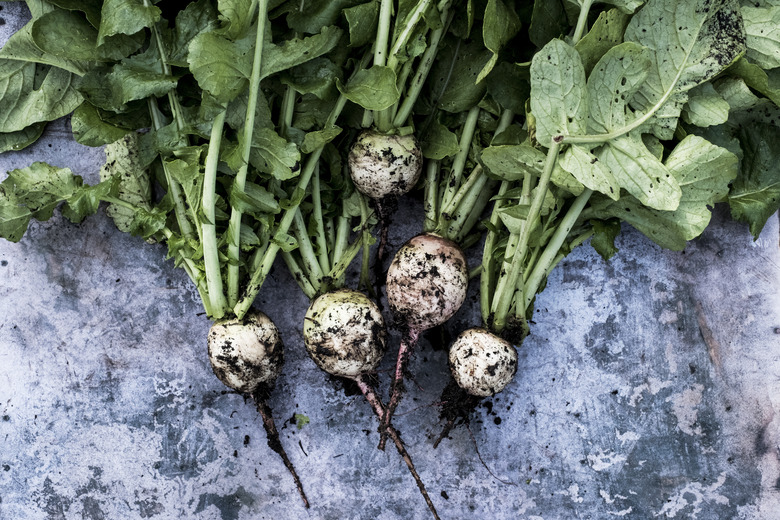
How to Harvest Turnips

How to Harvest Turnips
Turnips are ready to harvest five to 10 weeks after the seedlings emerge depending on the cultivar, growing conditions and your taste preferences. Young turnips are generally more tender and tastier than fully mature ones, but of course, they are also smaller. The best time for harvesting a late-fall crop is after the first or second light frost but before a hard freeze.
When harvesting the entire plant, simply grasp the leaves and pull the whole plant out of the ground. If you're unsure about the timing, pull out one plant and check the size of the root. You may decide to leave the other plants in the ground for a few more days to allow the roots to get bigger.
You can harvest leaves whenever they are big enough to eat, but don't wait too long because they're at their best when they're young and tender. Take the tops of the leaves only or remove them from the outside of the cluster and leave the middle ones so the root is still able to draw energy from the sun.
Common Pests and Other Problems for Turnips
Common Pests and Other Problems for Turnips
Like rutabagas, kohlrabi and other root vegetables, turnips are vulnerable to a number of insects that cause damage to leaves or young plants. You may be able to reduce insect damage by planting mint, onions and garlic, coriander, chives or anise nearby, as these plants may attract the harmful bugs away from your turnips.
Aphids congregate on the undersides of leaves, causing the leaves to curl, deform and turn yellow. Aphids suck sap from the plant and leave a sticky substance on the leaves called honeydew, which ants love, so following a trail of ants moving up and down the stem usually leads to an aphid colony. Honeydew promotes the growth of sooty mold, so the aphids have to go, and an easy way to get rid of them is to spray the plants with water or insecticidal soap.
Harlequin bugs and stink bugs suck the sap from the plants and damage the leaves, which will turn white or yellow and develop deformations. Both are shield-shaped, and harlequin bugs are mostly black, while stink bugs are gray. Hand-pick the bugs and their eggs from affected plants and avoid leaving debris in the garden where they can overwinter.
Flea beetles eat tiny 1/8-inch holes in the leaves and are most active in spring. Control them with an organic insecticide containing pyrethrin and protect the plants from infestations by using row covers. You can also use the insecticide to control aphids.
Cabbage maggots burrow into the ground and eat holes in the roots, causing the plant to wilt and shrivel and making the roots unmarketable. Sprinkling wood ash around the base of the plant usually deters these pests.
Common Diseases for Turnips
Common Diseases for Turnips
Fungal and bacterial diseases that affect turnips can usually be prevented by rotating crops, providing the plants with plenty of nutrients and avoiding overwatering.
Clubroot infects the roots, causing them to grow irregularly and the leaves and stems to turn yellow. Remove affected plants and avoid planting turnips or any other related crops in that part of the garden for seven years.
Bacterial leaf spot produces lesions on the leaves that turn varying shades of white and yellow, and it usually occurs in wet weather. This bacterial infection spreads rapidly and can easily infect an entire crop, so affected plants should be removed quickly. This is the best way of controlling the spread of this disease, since chemical controls generally are ineffective.
Downy mildew is a problem primarily in the fall when the weather is wet and temperatures are cool. This fungal-like disease initially appears as yellowish or brownish spots on the leaves, and when conditions are favorable, it creates lesions that can kill the leaf and even cause the root to split. You may have success treating it with liquid copper, but a better choice is a fungicide containing chlorothalonil. Prevent downy mildew by watering the soil and not the leaves and removing any nearby wild mustard or wild radish plants, as they also harbor the disease.