How To Use Stencil On Furniture
We may receive a commission on purchases made from links.
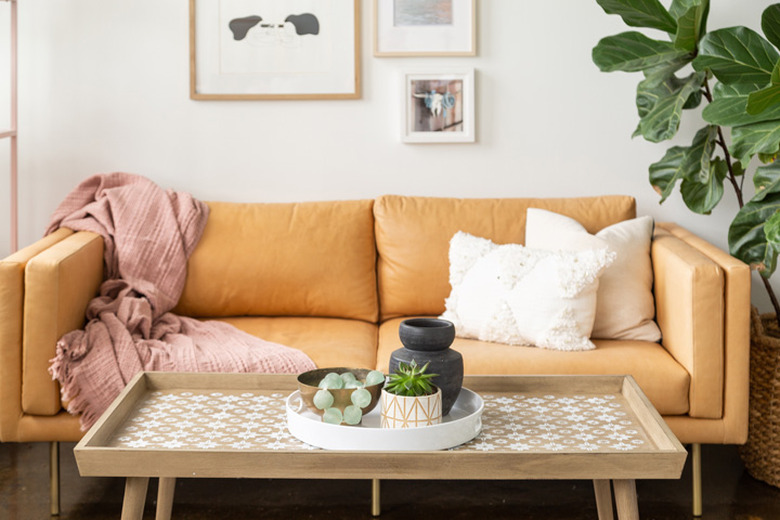
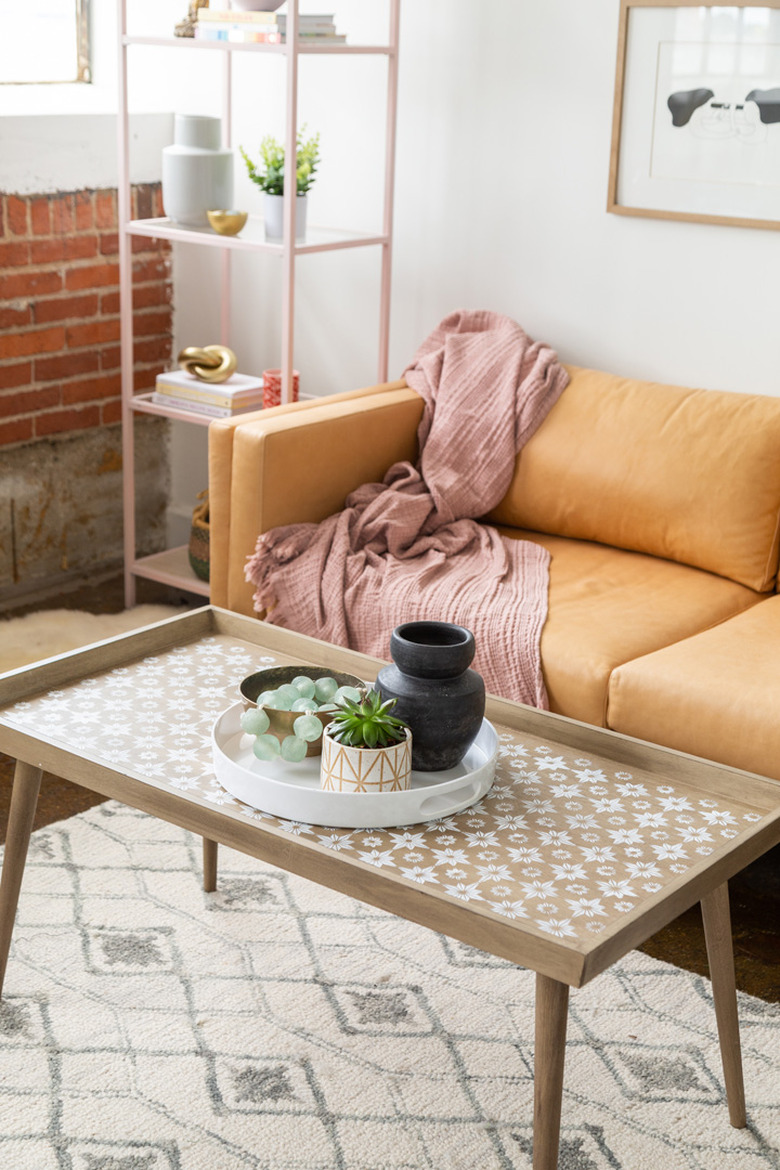
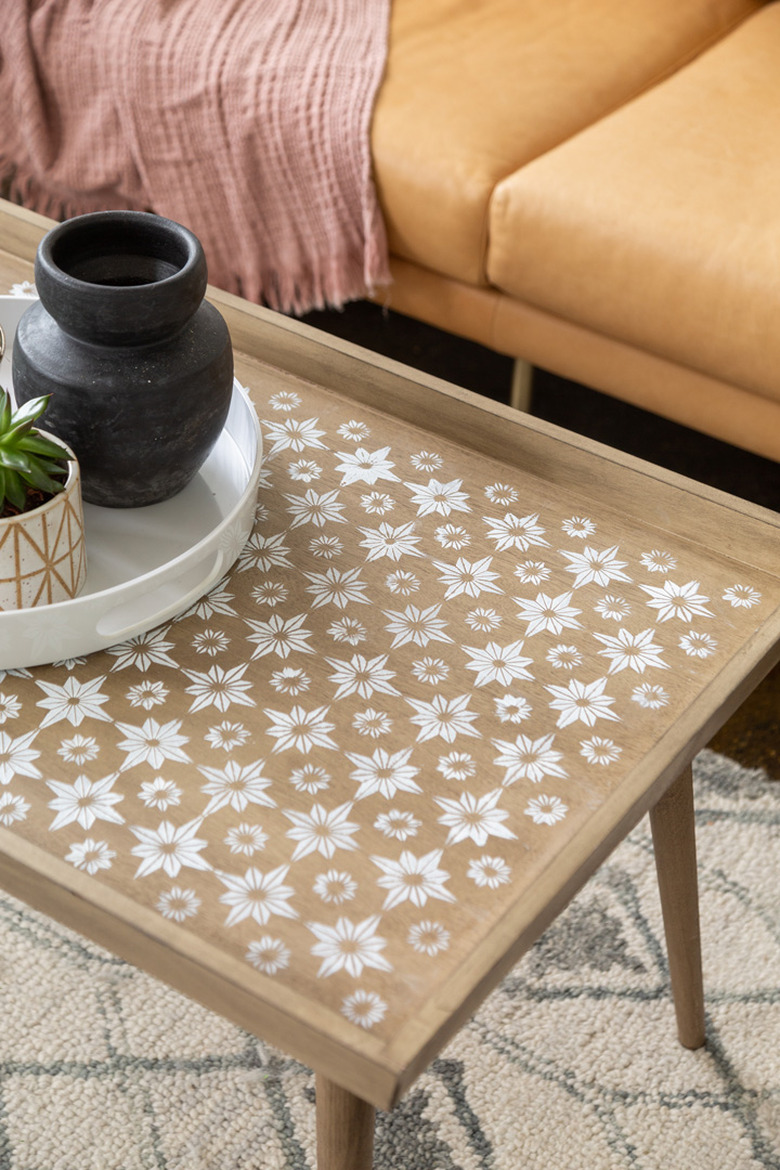
Stenciling furniture is easier than you might imagine and something you should definitely try as your next DIY. Depending on your design style, there are Moroccan tiles, modern star patterns, farmhouse, and more. For this project, we used a 5-inch Plectro tile stencil from Etsy and a wood coffee table to create a look that is giving us all kind of living room boho vibes.
So, whenever you want to add pattern to your decor, or you want to make a statement, a little paint and tile stencil will get you a look you'll love, without breaking the bank.
Things Needed
-
Paper plate
-
Paper towels
-
Polyurethane (optional, for wood furniture)
 Sara Albers
1. Prepare the Furniture
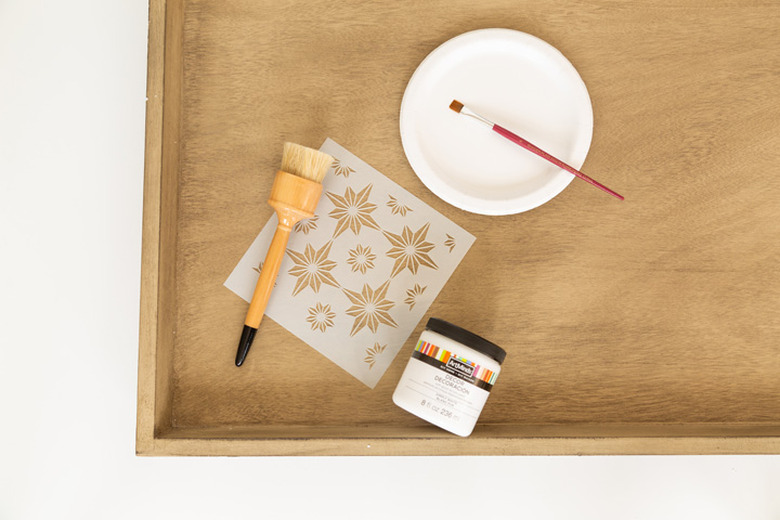
Wipe down the furniture — in this case, the table top — and let dry. For this DIY, we wanted to keep the wood color, but you could also paint the table surface for more of a tile-inspired look. For instance, paint the table top white and use black paint for stenciling. (Check out this DIY on how to use chalk paint on furniture to use as a base.)
Place the stencil onto furniture and secure with tape.
 Sara Albers
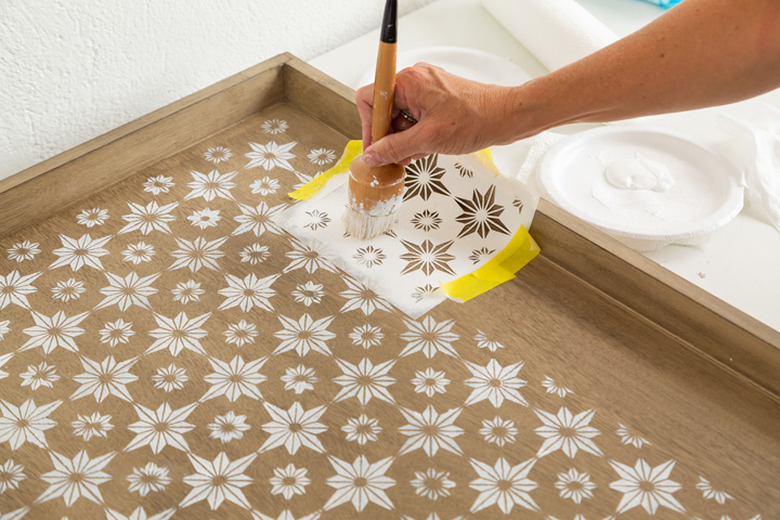
2. Start Stenciling
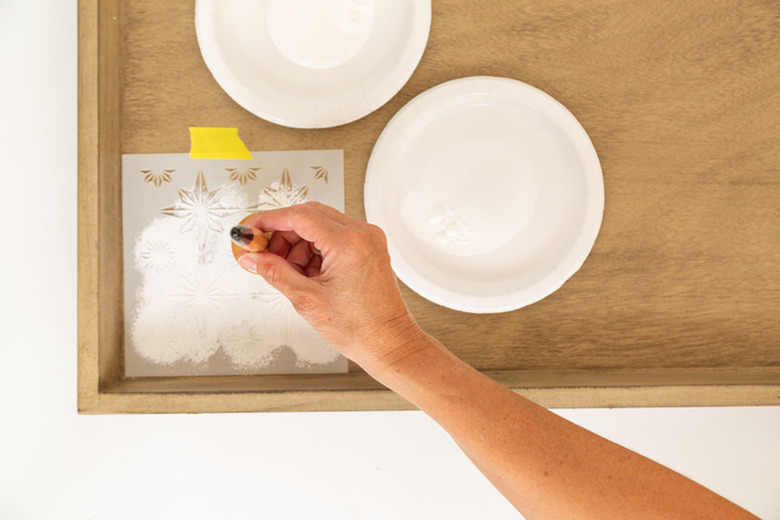
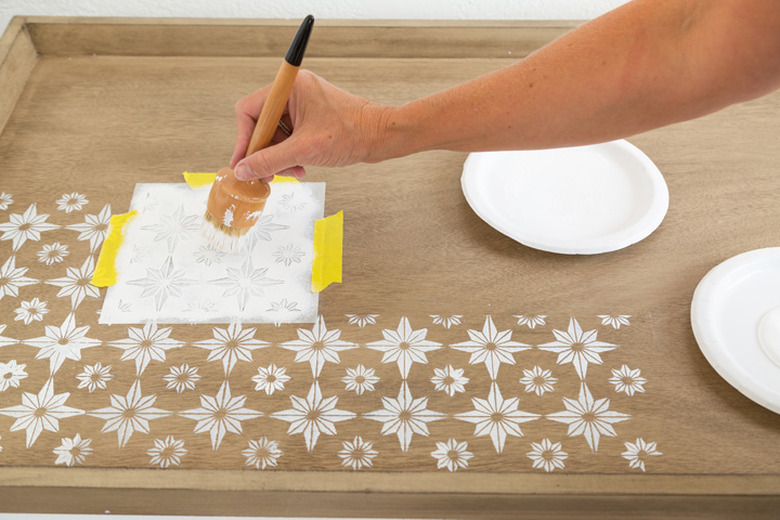
Add a small amount to paint to a paper plate. Dab the brush onto the paint and then wipe any excess onto a paper towel. It should almost feel dry to the touch — that way the paint will not be too heavy on the stencil. Then, pounce the brush onto the stencil.
 Sara Albers
Paint one stencil, allow to dry for a few minutes, and then place the stencil next to where you just painted. You can line up the stencil onto of the edge of the pattern that you had just completed. Secure again with tape.
3. Tile the Edge of the Pattern
If your furniture has a lip, like this coffee table, you'll want to paint right up to that edge. To do so, tape the stencil to the top and up the edge as well to hold it in place. Continue stenciling.
 Sara Albers
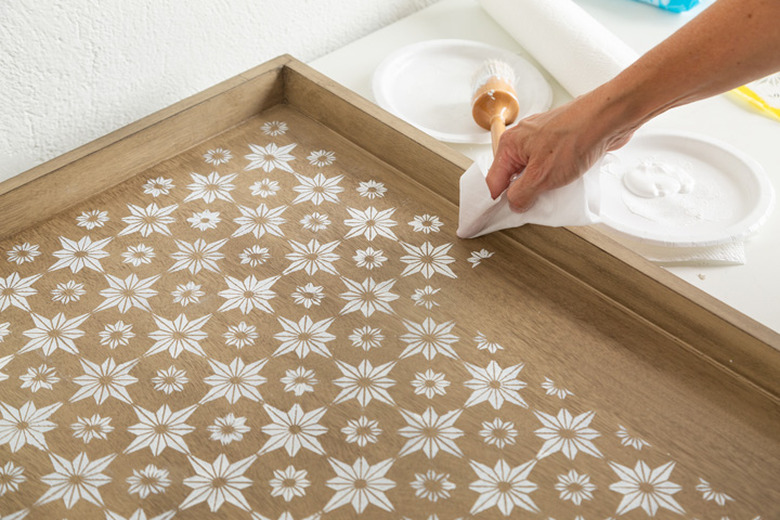
4. Wipe Excess Paint
Pro tip: Use a baby wipe to remove excess paint from the stencil.
It is a good idea to wipe down the back of the stencil after about five uses. Wipe it with a baby wipe and dry with paper towel. This helps to keep the stencil clean and not cause too much of the paint to seep through the edges.
 Sara Albers
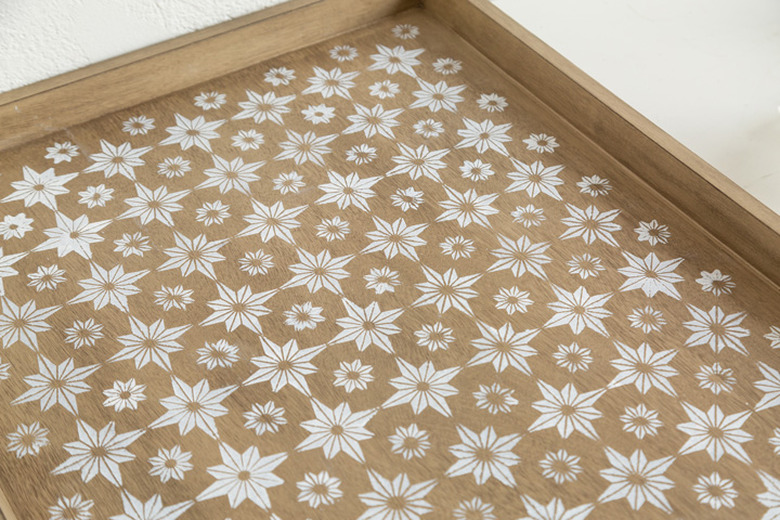
5. Add a Varnish or Polyurethane to Protect the Furniture
Apply a varnish to protect the wood furniture, and allow to dry overnight.
 Sara Albers
 Sara Albers
 Sara Albers