How To Construct DIY Garden Water Fountains
We may receive a commission on purchases made from links.
Few things are as relaxing and pleasant as the soft gurgle of a garden fountain. Adding a water fountain to your deck or garden area is a very doable DIY project. You can create your own design or install a ready-made kit.
A DIY fountain may be one of the most versatile DIY landscaping projects you can tackle. You can place a small water fountain in a corner of a deck or patio to provide ambiance and soothing background sounds, or it can be the center of attention as a focal point to stage seasonal plantings and other landscape features or to attract birds and butterflies. Whether it's your first DIY water feature or your fifth, it's important to know the components of a water fountain as well as have a plan of construction.
Garden Fountain Components
Garden Fountain Components
A water fountain is a closed system that circulates water to the open air from a reservoir located within the fountain. A submersible water pump inside the reservoir directs a stream of water to a tube or pipe that carries the water. Once outside, the water can flow, drip or cascade in any number of ways. The water flow is always downward and back to the reservoir.
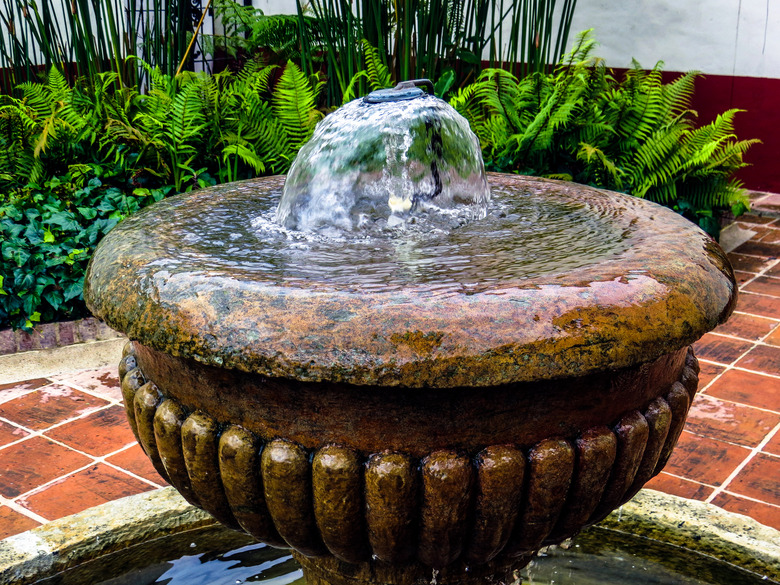
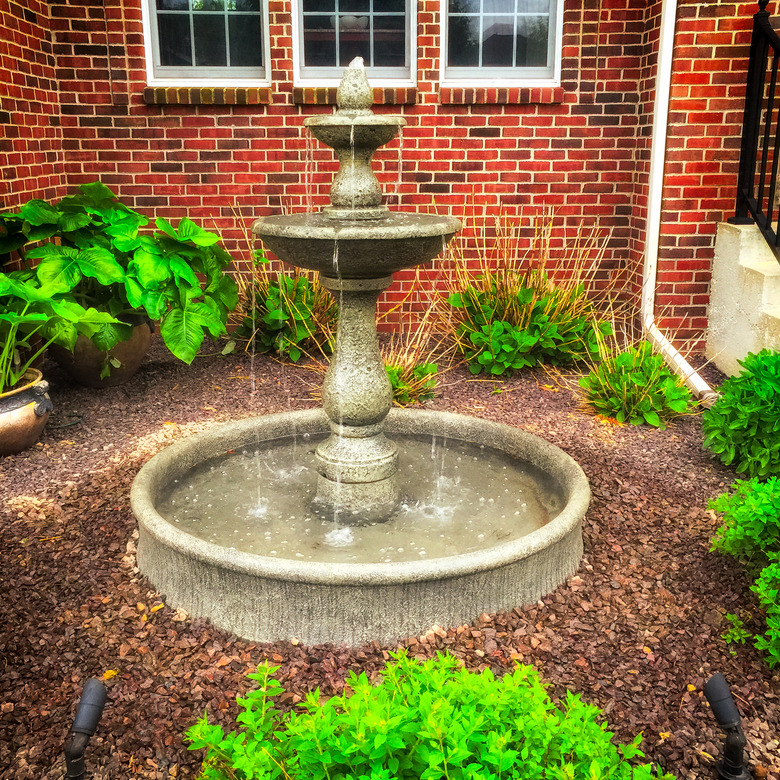
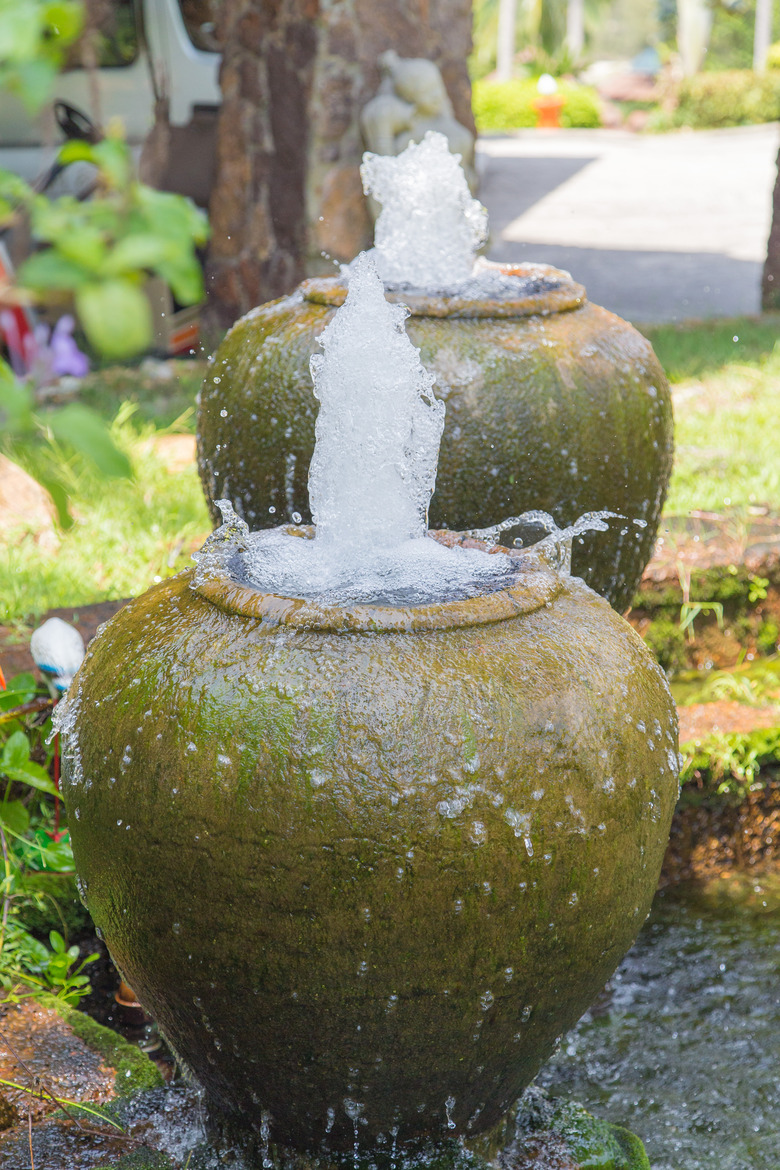
On the outside, a garden fountain can resemble a traditional birdbath with multiple levels where water in each level flows into those below. They can be made to look as though water is flowing from the top of a boulder. In fact, you can use an actual boulder that has a hole drilled through it. A favorite is to have water flowing from the top of a vase or tall urn. In these cases, the water flows over the side of the urn into a buried reservoir.
A garden fountain differs from a landscape pond in a few ways other than the obvious look of the element. With the pond, the pond itself is the reservoir. The reservoir in a water fountain, however, is usually hidden. The pond circulation system requires a filter to keep debris from reaching the pump. A separate filter usually isn't part of the water fountain, although it could be.
 Todd Ryburn Photography/Moment/GettyImages
Garden Fountain Pumps
Garden Fountain Pumps
The water pump is the engine that makes the fountain work. A pump's output — the amount of water it can move — is measured in gallons per hour (GPH). This is the maximum output, and most pumps are adjustable so that you can regulate how much water the pump moves.
Pumps have intake ports to draw in the water (usually near the bottom) and an outlet tube (usually located at the top of the pump). Many pumps include a number of different sizes of outlet tubes, or there are multiple fittings to change the size.
You must match the size of the outlet tube to flexible plastic tubing that will carry the water to the top of the fountain. Rigid tubing is also available. The water-carrying tubing is usually sold separately, as are the spray heads and nozzles that produce the fountain effect.
If you buy a fountain kit, the pump is included, but if you are creating your own DIY design, calculate the pump capacity you will need by measuring the diameter of the spray head in inches. Account for 100 GPH for every inch of diameter.
Fountain pumps are also measured by their head height. This is the vertical distance from the pump to where the water is discharged into the fountain. Head height is listed on the pump packaging, usually at different flow rates. At 1 foot of rise, the pump may be able to produce 120 GPH, but at 2 feet of rise, the pump's capacity will be lower.
To ensure a steady flow that rises into the air above the spray head, multiply the length of the tubing by 1.5. Then, pick a pump that meets those requirements.
Fountain Pump Maintenance
Fountain Pump Maintenance
The pumps used for fountains are submersible, meaning they are placed in the water they are pumping. Pumps that run without water can be damaged. Some pumps feature low-water shutoffs.
If the pump you select does not have an automatic shutoff, you will need to keep an eye on the water level in your fountain. The level can drop from evaporation and water spilling onto the ground. A fountain that is in the path of a sprinkler can receive replenishment from the sprinkler.
Follow the pump manufacturer's directions for maintenance. Most pumps need periodic cleaning of debris from the inlet ports. Keep that in mind if you are designing your own fountain. Make sure the pump is easily accessible for routine maintenance.
Most pumps cannot stand up to freezing weather. Drain the fountain, disconnect the pump and bring it inside during the winter.
Proper Location for a Garden Fountain
Proper Location for a Garden Fountain
A DIY garden fountain is a landscape feature that provides pleasing sights and sounds. So, in most cases, you may want to place it where you can both see and hear it. Some possible locations include an area on or adjacent to a deck or patio. If there is a secluded seating spot in a garden, a small garden fountain can complete the area. Some people also place a small water fountain near the front entrance to welcome visitors.
When used as a focal point or to attract birds and butterflies, consider using other landscaping features to enhance the area. Decorative landscape stone and round river rocks are good candidates for piling around the base of the fountain. Blooming shrubs and perennials serve as good backdrops, as do colorful annuals. The plants you select can help attract birds to the fountain.
The shrubs and other plants may be a necessity, especially if the water feature is located away from the house. The water pump used in fountains needs electrical service, so there must be an electrical outlet nearby. This usually isn't a problem when the fountain is on a deck or patio, but it can be a problem elsewhere.
An electrician can install a remote receptacle (outlet), and plants can keep it hidden. Any outdoor outlet receptacle must be a GFCI receptacle, which will cut electrical power to the outlet immediately if there is a problem. The receptacle itself should be covered with a weatherproof cover. You may also want to include a timer so that the pump runs only when you want it to run.
DIY Vase Fountain With a Buried Reservoir
DIY Vase Fountain With a Buried Reservoir
This design takes its cue from pondless waterfalls. Rather than draining into an open pond, the waterfall drains through decorative stone at its base and then filters into an underground reservoir. The design is similar here except instead of a waterfall, a fountain is the source of water. The water overflows the sides of the vase to the stone below.
You can use any size vase in this DIY project—from a short planter to a tall urn. Sturdy plastic tubs used for pondless waterfalls serve as the buried reservoir. These have tops that support the vase and the decorative stone and allow the water to drain back to the pump. Some have predrilled holes for tubing as well as hatches for easy access to the pump.
Another important thing to remember is that you'll need to match the height of the vase with the delivery tube. Ready-made extension tubes are available for this purpose. Be sure the tube has threaded ends, as some don't. The tubes are usually in the 10-inch to 18-inch range, but they usually come with spray heads that produce different flow patterns.
You can instead use a length of PVC pipe. If you use PVC, paint it black rather than leaving it white. That way, it won't be as visible in the vase. The pump you select needs the vertical lift to get the water from the reservoir into the open air.
- Dig a hole for the reservoir. The hole should be as deep as the reservoir plus about 2 inches.
- Add 2 inches of sand to the hole. Put the reservoir in place and make sure it is level. Place cinder blocks in the corners of the reservoir and one near the center.
- Add some water to the reservoir and run the pump to test it.
- Use a masonry bit to drill a hole in the center of the bottom of your vase or urn.
- Turn the vase on its side and insert a fitting that has threads on one side and is barbed on the other. The threaded portion goes inside the vase. The size of the fitting will depend on the requirements of your pump, usually 3/4 inch. Hold the fitting in place with waterproof epoxy per the directions on the packaging. This should keep the vase from leaking.
- Pour water into the vase and check for leaks.
- Connect the flexible tubing to the barbed fitting using a hose clamp.
- Thread the tubing through the hole in the reservoir top and connect it to the pump using a hose clamp.
- Place the pump in a filter bag and cinch the area around the flexible hose. The bag keeps debris away from the pump.
- Turn on the pump but leave it unplugged.
- Carefully place the reservoir top in position and set the vase upright over the center of the reservoir. Make sure it is level. If it isn't, use metal shims to level.
- Thread a fountain pump extension into the threaded fitting at the bottom of the vase. The extension should be long enough so that it is a little higher than the top of the vase. If you are using a section of PVC, you will need a fitting with female threads to attach the PVC to the fitting in the bottom of the vase.
- Cover the area around the base of the vase with decorative stone and river rock.
- Hide the pump's cord with decorative stones or with plants.
- Place some river rock in the bottom of the vase.
- Fill the vase with water and plug in the pump.
 bebecom98/iStock/GettyImages
DIY Patio Fountain
DIY Patio Fountain
This version of an outdoor fountain can sit on an outdoor dining tabletop or can be placed on a pedestal. You can use any container, such as a planter or a large ceramic bowl or plate that is the appropriate size. A container that is 8 to 10 inches tall works well. If there are drainage holes in the bottom of the container, plug them with marine epoxy or plumbers' putty. Use a small submersible pump, about 40 or 50 GPH. Be sure to place the fountain near electrical service. The fountain may be heavy, so put it together where it will be placed.
- Place the pump in a corner or near the edge of the container.
- Attach a length of tubing to the pump's outlet port using hose clamps.
- Pour some water into the container and test the pump.
- Leave the pump on but unplug it.
- Place bricks on both sides of the pump.
- Place a flat stone, such as a piece of slate or bluestone, on top of the bricks to hide the pump.
- Position the tubing so that it rests on top of the flat stone, but the tubing should only cover about half of the surface of the stone. Once the pump is turned on, water will run across the stone and drop over its side. Use stones to keep the tubing in place and to help hide it. You may need a little waterproof adhesive to keep the tube in place.
- Add more stone of different sizes and colors to the container. Arrange the stone around the container to create a scene that includes an open pond-like area surrounded by stone.
- Plug in the pump.