A Complete DIY Guide To Landscape Beds

We may receive a commission on purchases made from links.
Well-designed and properly installed landscape beds can add a polished look to your garden design by eliminating random plantings and artistically painting a living canvas that has cohesive qualities. Garden beds have become the "little black dress" of modern landscape design — the green-industry counterpart to this essential wardrobe staple.
When they're custom designed for an individual landscape instead of fulfilling a cookie-cutter template that doesn't suit all landscapes, DIY planting beds replace (or enhance) the outdated foundation plantings of suburbia and breathe new life into other sections of your yard.
Rethinking Foundation Plantings
Rethinking Foundation Plantings
Many older homes had unsightly foundations, which were typically hidden by evergreen shrubs that became known as foundation plants. Most commonly, these foundation plants were lined up at the base of a home's front wall with the goal of masking an undesirable view of the utilitarian foundation with a pleasing view of plant material.
Often, these foundation plants weren't restricted to a home's front presentation, but they were also wrapped around an entire home, similar to a scarf around someone's neck. While these house-wrapping plants may have projected an image of warmth and softness like that scarf, they also had a tendency to present a choke-hold image.
As Cornell University points out, even though contemporary homes generally don't have unattractive foundations, you'll likely still find those ubiquitous and unfashionable foundation shrubs skirting the base of the exterior walls. Enter landscape beds. By replacing shrubs — which are lined up like soldiers around a home's foundation — with a mixed planting design that includes groups or clumps of plants, you'll create a completely different and modernized look to boost your home's curb appeal.
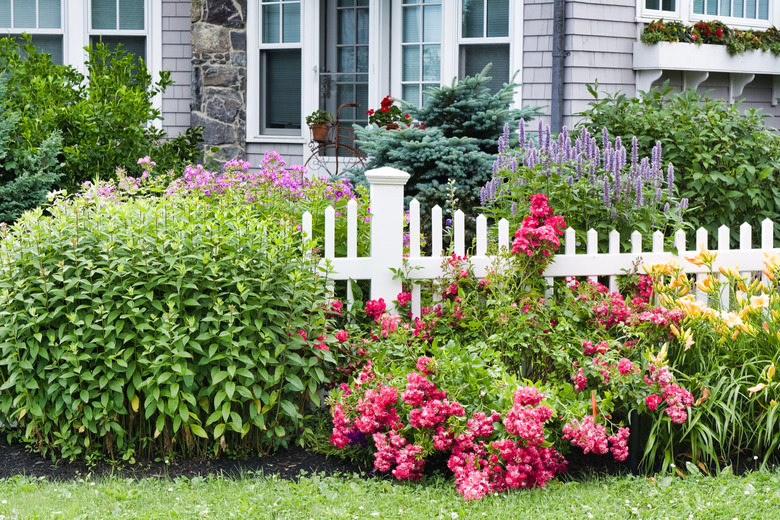 Amy Newton-McConnel/iStock/GettyImages
Types of Landscape Beds
Types of Landscape Beds
Landscape beds have more applications than solely being used as a replacement for foundation shrubs. Without removing your foundation plants, you can also plant, for example, a flower bed in front of the existing shrubs to add a multidimensional look and to add color to the evergreen backdrop.
Aside from foundation garden beds, another type of landscape bed forms borders in front of fences or around sidewalks. A suitably placed and properly planted island bed adds a focal point that pulls together other landscape features in a well-appointed design.
Because border beds are located in front of a backdrop, such as a fence or row of hedges, Proven Winners notes that they are designed to be seen from one side only. With this in mind, it's important to stagger the planting heights in the bed area so that the taller plants are in back and the shorter ones are in front.
It's also more aesthetically desirable from a landscape design perspective to place plants in groups or drifts instead of in lines. An exception is planting low-growing flowers or ground-cover plants along the front of the border to define the garden bed with clumps of other plants inside the bed.
Island beds, on the other hand, are viewed from all sides. As the name hints, these landscape beds are self-contained and are typically bordered on all sides by a "sea" of turfgrass in a lawn. Island beds commonly have an anchor, or focal point, that can be a plant, a piece of sculpture, a garden bench or another item of interest that draws the eye toward it. The shapes of island beds vary, including circular, oval, rectangular, kidney or even amorphous.
Choosing Plants for Garden Beds
Choosing Plants for Garden Beds
When choosing plants for your garden beds, resist the urge to let your preference for a favorite plant overshadow the consideration of that plant's growing needs. Consider the sun, soil and climate conditions of the plants you want in your landscape beds to make sure you're matching the right plant with the right place for growing it.
For example, if you're planning a sunny border bed along your picket fence, you'll probably see shade-loving plants struggle to prosper if you plant them there. If you want perennials to grow in your island bed but you choose plants that are not winter hardy in the climate where you live, you may lose all your new plants during the first winter after planting them.
Also, when to plant is often as important as what to plant. Although summertime may be the best time of year for you to create a new landscape bed, it's not the best season to get certain types of plants started. Many plants will experience difficulty trying to become established in the heat of summer, particularly if you live in a warm climate.
PennState Extension notes that autumn is typically the best time to plant shrubs, trees, hardy perennials and spring-blooming bulbs. As a rule of thumb, mark your calendar at least six weeks from the first expected frost date and plant your perennials no later than this date. Spring, however, is the season to plant a landscape bed with annual flowers or summer-blooming bulbs. Just make sure that the last frost of the season has passed before setting out your plants.
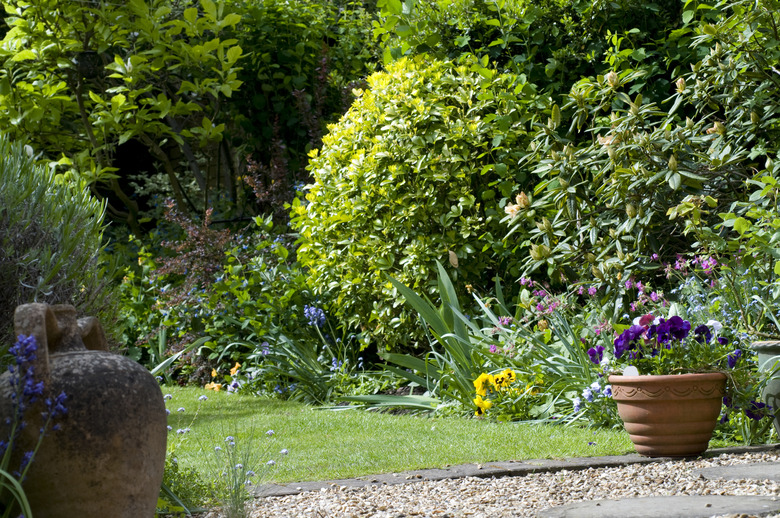 SEAN GLADWELL/Moment/GettyImages
Creating Landscape Beds
Creating Landscape Beds
Even if you're not a landscape designer, you can create a DIY garden bed by following a few basic steps. Before you plant anything, first define the shape of the new bed, remove the existing grass and weeds and amend the soil. After you've prepped the garden bed and installed your new plants, adding a layer of mulch provides a finishing touch that has multiple benefits.
- Define the shape. Use inverted marking spray paint, which is formulated to spray
upside down, to trace the outline of your garden bed. You can also use your
garden hose if it's long enough by forming it in the shape of your proposed
bed. - Remove grass and weeds. Using a shovel or a half-moon edger, make vertical cuts to a depth of 6 inches all
around the outline to sever the grass. Remove
the grass and weeds (roots and all) as well as rocks and other debris from inside the garden bed's outline. - Amend the soil. To improve
drainage by raising the level of soil inside your garden bed to the grade
of the soil outside the bed, add soil amendments that are rich in organic
matter, such as compost, incorporating these amendments into the native soil. - Install the plants. When you
remove plants from their nursery pots, gently
loosen or tease the roots apart and spread them out instead of simply inserting
the pot-shaped root ball into the soil. Bury your
plants to the same depth they had in their pots, not deeper. - Apply mulch. When properly applied, mulch helps to suppress
weeds, insulate plant roots and conserve moisture. However, when improperly applied,
mulch can actually hold too much moisture against the base of a plant, which often
increases the plant's susceptibility to disease pathogens. Clemson Cooperative Extension recommends a 2-inch layer of shredded leaves, pine needles, wood
chips and even pecan shells as organic mulch sources. Inorganic mulch choices include
a 1-inch layer of stone, gravel and pebbles.
Maintaining Landscape Beds
Maintaining Landscape Beds
The perception that a garden bed is a set-it-and-forget-it project is a little off target. You'll eliminate certain lawn care tasks, such as mowing, but you'll still have to take care of plant needs, replenish mulch from time to time and stay on top of weeds that tend to encroach from the adjacent lawn. Depending on the type of landscape bed you design and the plants you install in the bed, the University of Georgia Extension notes that you may need to divide some perennials every few years.
Even though landscape beds require some maintenance, they can also be low maintenance. Managing weeds is one of the tasks that you want to stay on top of so that weed growth doesn't take over your garden bed. During the bed-prep stage, you may want to install landscape fabric around your plants as a weed barrier to help control particularly pervasive weeds. Mulching is another sound weed-management practice.
Even if you install weed fabric and mulch your garden bed, many weeds will still invade the perimeter and compete with your landscape plant roots for water and nutrients. Two other weed-management tactics include the installation of edging and the use of ground-cover plants. Although neither of these practices completely eliminates the potential for weeds to grow inside your landscape bed, each (or both) will help mitigate weed growth.
Edging options include black plastic landscape edging that you press into the ground to provide a barrier for grass and weeds, concrete edging, bricks or stones, landscape timbers and other types of wood edging. A continuous edging material that you press into the ground, such as plastic, typically holds weeds at bay better than bricks because the openings between each brick provide openings for weeds to penetrate the edging. If you install landscape timbers, which are better suited for edging straight beds instead of curved ones, dig a shallow trench around the perimeter of the garden bed and sink the timbers into the ground to help curb the growth of weed roots underneath the wood.
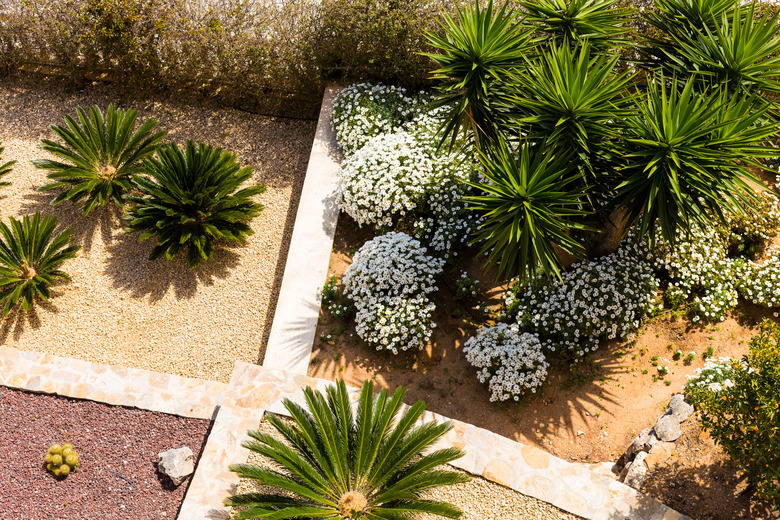 Irina Selina/iStock/GettyImages
Designing With Landscape Beds
Designing With Landscape Beds
Ultimately, a pleasing aesthetic is subjective — it's what is pleasing to you regardless of what the "rules" about landscape design dictate. There are, however, some time-honored design and installation concepts that can help keep you on track as you work your way through the project of designing a landscape bed.
Generally speaking, curved garden beds that contain groups or clumps of plants give an informal look to a landscape, and beds with straight edges and precisely placed plants lend more formality to the design. Take a good look at the layout of your property and the style of your home to design one or more landscape beds that naturally blend into their surroundings instead of looking like they're forced onto unfamiliar territory.
Plan your beds with the mature size of plants in mind, allowing for their width as well as their height. The University of Georgia Extension repeats a familiar adage about perennials that professional landscape designers have learned to trust: The first year they sleep, the second year they creep and the third year they leap. This simply means you may not see much if any growth on new plantings during their first year after being transplanted, you may see noticeable but not sizeable growth the second year and it may not be until the third year that you see significant growth.
Different plant heights and viewer perspective work together to enhance the view of a garden bed. For example, if you're planning a flower bed that you'll view from a window inside your home, you may want to place shorter plants closer to the window and taller plants away from the window. If you're planning the same flower bed that you'll view from outside your home, reverse the plant heights — put taller plants closer to the window and shorter plants away from the window. For an island bed to look balanced, place taller plants in the center and shorter plants toward the outside of the bed.
Include plants with different seasons of interest. If you plant a garden bed that contains only annual flowers, the bed will be bare during winter when the annuals die. If you plant only perennial flowers that have a short window of bloom, they'll provide a burst of color for several weeks, and then the show is over until the following summer. However, if you choose plants that provide a succession of blooms or other interesting features, then the landscape bed will transition from early-spring-blooming bulbs to summer flowers to fall-flowering perennials and even shrubs or trees that have red stems or exfoliating bark in winter for a captivating year-round display.
References
- Cornell University: Flower Garden Design Basics
- Proven Winners: Basic Design Principles and Styles for Garden Beds
- PennState Extension: Is Fall for Planting?
- University of South Florida: The Florida-Friendly Landscaping Guide to Plant Selection & Landscape Design:
- Clemson Cooperative Extension: Mulch
- University of Georgia Extension: Landscape Basics – Success With Herbaceous Perennials