DIY Easy Outdoor Mister To Keep You Cool
We may receive a commission on purchases made from links.
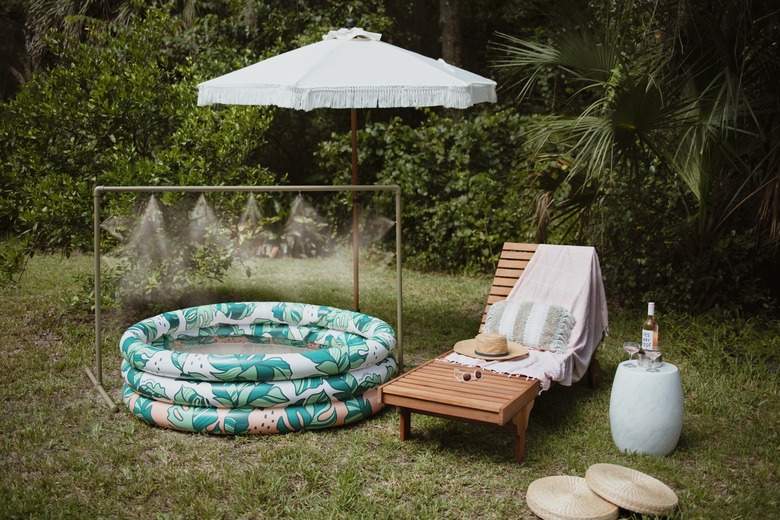
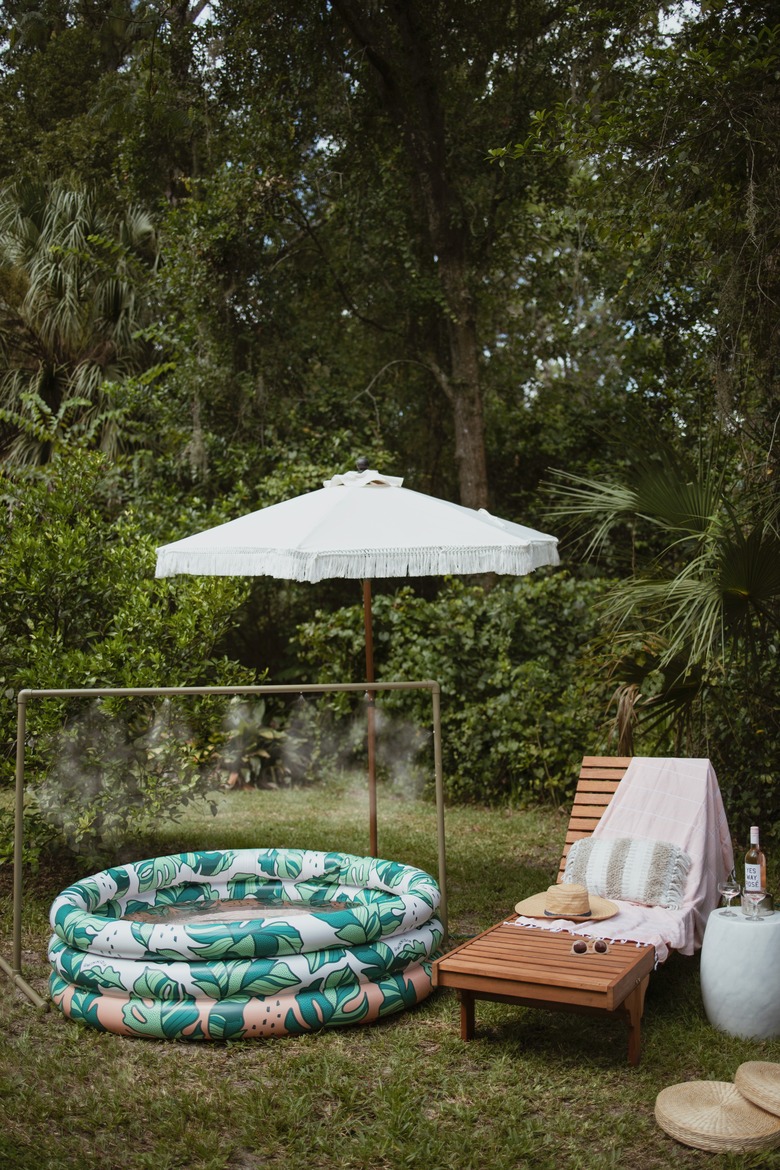
Stay cool in the pool with a DIY mister that delivers a refreshing dose of H2O from overhead. Made from PVC pipe, it's extremely lightweight and can be moved from yard to patio to create relaxing vacation vibes no matter where you lounge. We painted ours a gorgeous mossy green color to blend in with nature, and opted for brass misters to elevate the look. Even with our upgrades, you can make this mister for under $50 and in a couple of hours. That leaves plenty of time to chill out in style in your own backyard.
Things Needed
-
3/4-inch PVC caps, (3)
-
Water misting nozzles, (12)
-
Spray paint (optional)
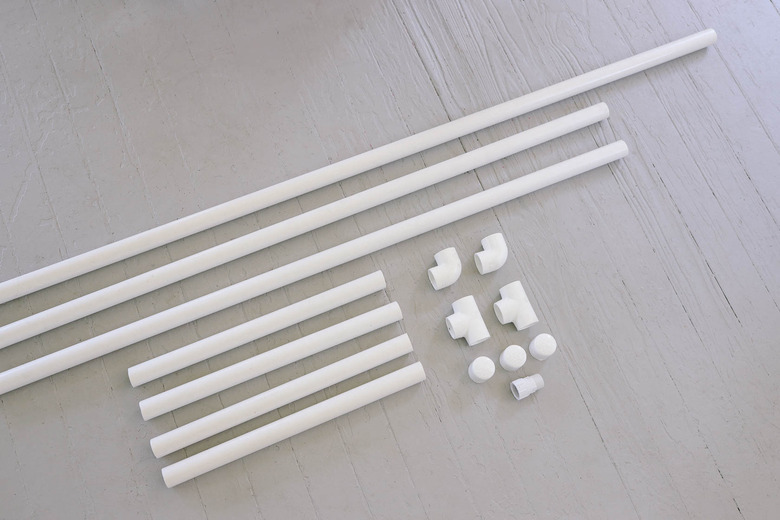
1. Cut the Pipes
Use a pipe cutter or hacksaw to cut the PVC pipes into the following lengths:
- One 6-foot pipe
- Two 4-foot pipes
- Four 1 1/2-foot pipes
 Trisha Sprouse
Tip: These measurements are based on the dimensions of our inflatable pool, which is 5 1/2-feet wide by 1 1/2-feet tall. You may need to adjust your pipe sizes based on your own pool's size, or if you intend to use the mister over a patio table, lounge chairs, or other setup.
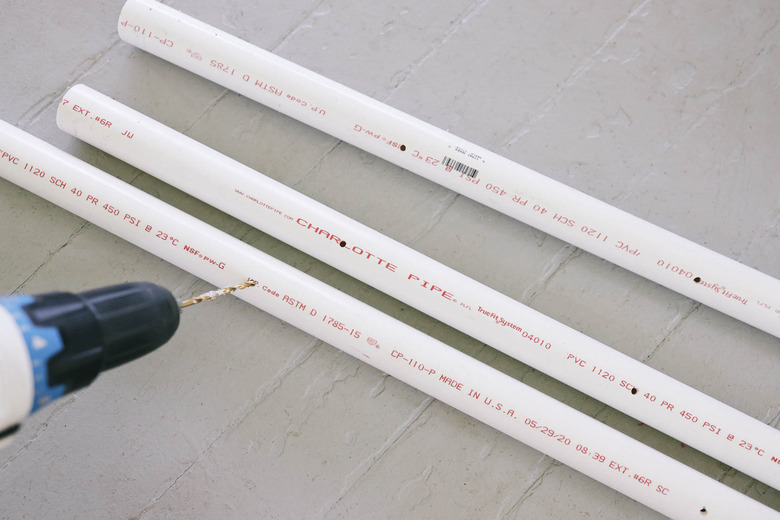
2. Drill Holes for Misters
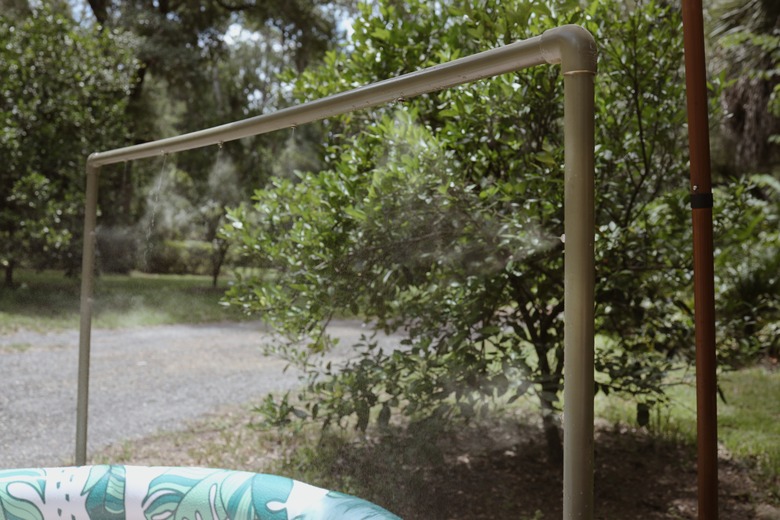
On the 6-foot pipe, measure and mark five evenly spaced dots (we spaced ours every 12 inches). On the two 4-foot pipes, measure and mark three evenly spaced dots. Use the print on the pipes as a guide to keep your holes all in a straight line. Now drill a hole in each of the dots with a 5/32-inch drill bit.
 Trisha Sprouse
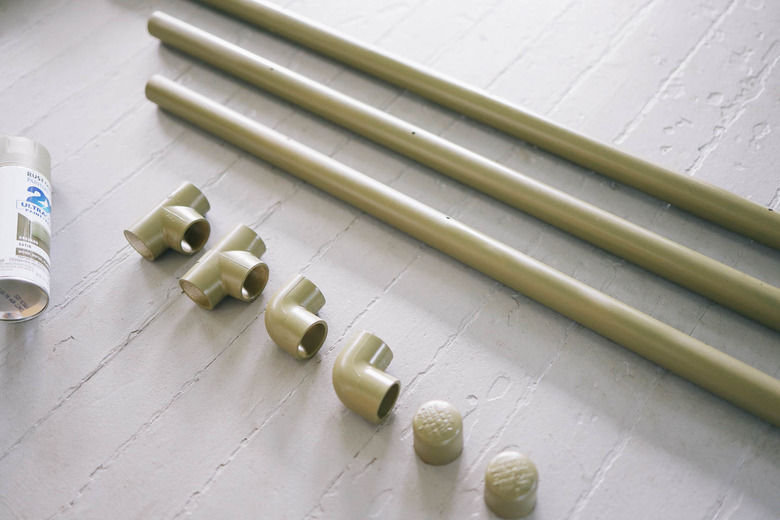
3. Paint the Pipes (Optional)
Your mister doesn't need to be painted, but if your aim is to create a beautiful backyard oasis, then paint will make it chic. Lay your PVC pipes, connectors, and caps flat on a drop cloth or scrap paper, and spray several light coats of paint. Once dry, flip and paint the other side. Let dry for an hour.
 Trisha Sprouse
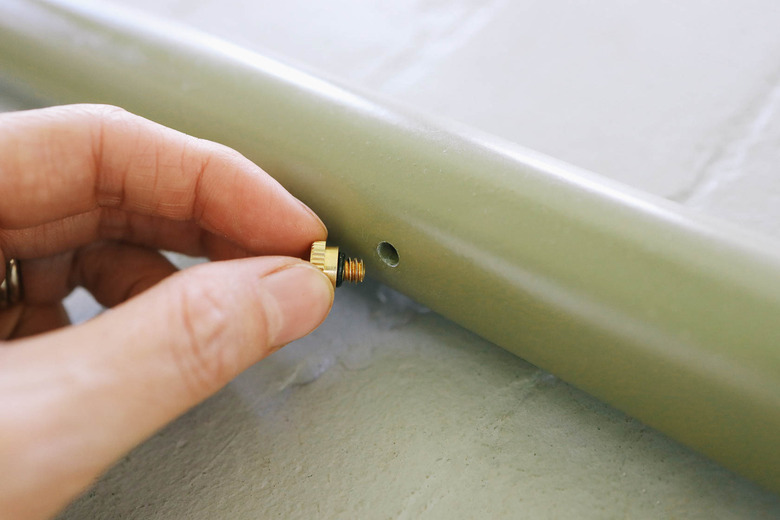
4. Attach the Misters
Screw a mister jet into each of the holes you drilled. You'll need to push the end of the mister firmly through the hole, then twist several times until the threads catch onto the pipe for a secure connection. It helps to wear gloves so you can get a better grip.
 Trisha Sprouse
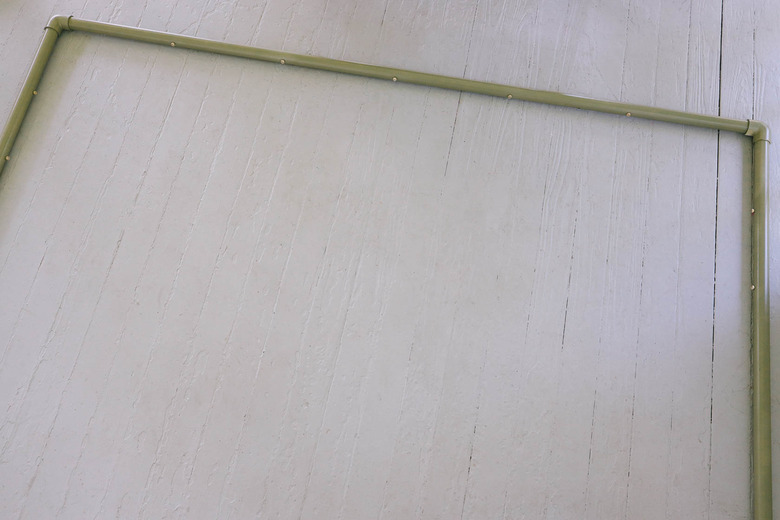
5. Assemble the Top Pipes
Place the 6-foot pipe horizontally and attach a 90-degree elbow to each end. Insert a 4-foot pipe vertically into each elbow connector to create a horseshoe shape with the pipes. Make sure the holes on the 6-foot pipe are pointing downward (where the pool will be) and the holes on the two 4-foot pipes are facing inward (the pool will be between them). Once all the pipes are in place, glue them together with PVC cement.
 Trisha Sprouse
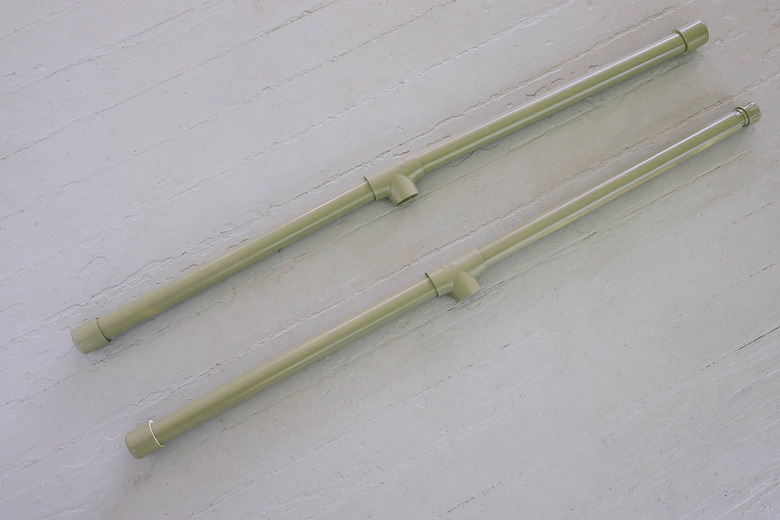
6. Assemble the Base Pipes
Lay the two tee connectors flat on the ground, and place a 1 1/2-foot pipe into each side of the tee connectors. Place a cap on the ends of three of the pipes. On the end of the fourth pipe, place the hose adapter. Glue everything securely together.
 Trisha Sprouse
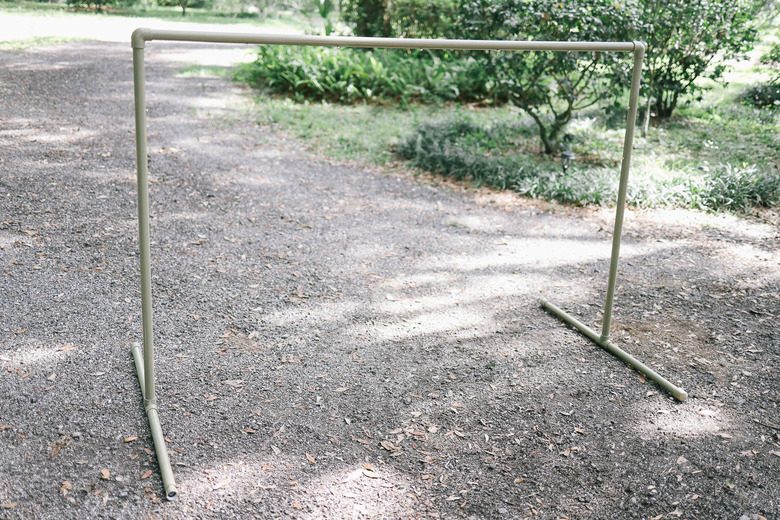
7. Glue Top to Base
Stand the two base pieces upright, and then slide the vertical pipes from the top piece into the tee connectors. Glue the pieces together, and let dry at least an hour. Once dry, connect a garden hose into the hose adapter, turn the water on low for a minute or two until water starts coming out of the misters, and then turn it on full strength.
 Trisha Sprouse
Let the pool party begin!
 Trisha Sprouse
 Trisha Sprouse
Tip: If you find that any of the misters leak, you can wrap teflon tape around the base of each mister to seal them.