Choosing And Installing Bathroom Wallpaper: A DIY Guide

We may receive a commission on purchases made from links.
Traditional cellulose wallpaper that people tend to use in a living room doesn't do well in a high-humidity environment. If it doesn't start peeling off, it could instead trap moisture that can result in potentially unhealthy mold growth. That doesn't mean bathroom wallpaper is nothing but a pipe dream. If you're considering wallpapering your bathroom, the most important thing to consider isn't whether to use a toile or floral wallpaper design but instead the type of wallpaper itself and how to install it.
Should You Use Bathroom Wallpaper?
Should You Use Bathroom Wallpaper?
Bathroom wallpaper can add an elegant and unexpected touch to your decor, but it's not right for every bathroom. Generally, wallpaper is a safe bet in bathrooms that stay relatively dry, such as a small powder room or an infrequently used guest bathroom. On the other hand, it's best to consider another wall treatment if you have young children who splash a lot of water, insufficient ventilation or frequent leaks or if you notice your bathroom walls are frequently damp. For best results, the wallpaper shouldn't directly touch the shower, the countertop behind the sink or the bathtub, so you may want to stick with just an accent wall that doesn't touch any water fixtures.
That's because even wallpapers that are designed to be water-resistant still cannot have water seep behind them. Water leaks can result in gray, yellow or brown stains appearing on your wallpaper. If moisture gets trapped behind the wallpaper, the adhesive may start to fail, and when this happens, the wallcovering will start to peel at the edges, and these pieces will need to be removed and replaced. Wallpaper that is not designed for moist environments, such as the cellulose-based variety, is particularly prone to this problem.
Wetness behind the wallpaper can be a breeding ground for mold, including molds that can cause allergies, infections and even abscesses. This can be a particularly nasty problem, as the mold can often proliferate under the wallpaper without any change to the surface of the paper, so you may not know it exists until you remove your wallcovering. When this happens, you'll need to strip out all of your wallpaper, and if the area is larger than 10 square feet or if the damage is severe, the Environmental Protection Agency says you should bring in a mold-abatement specialist.
If you have a bathroom that's not well-suited to wallpaper, you can mimic its appearance without the risk by painting a stenciled pattern on your wall. It's worth mentioning that while this is a great alternative, it can be a lot of work to DIY, so you might prefer to use this option in small spaces or just on a feature wall.
The Best Type of Wallpaper for Bathrooms
The Best Type of Wallpaper for Bathrooms
If you have a well-ventilated bathroom that rarely has water splashed directly on the walls, you can use wallpaper, but it's best to choose vinyl. This is by and large considered the best choice for bathrooms since it resists water and humidity better than other varieties. However, there are different types of vinyl wallpaper — some are made from solid vinyl, some have a thick vinyl top layer over a fabric or paper backing and some only have a thin layer of vinyl on the top, which adds protection to standard paper but can be ripped easily. Solid vinyl holds up the best to the humidity and wetness of bathrooms, but paper or fabric-backed vinyl is suitable enough.
Because bathroom wallpaper needs to be cleaned regularly, only buy products labeled "scrubbable" or "highly wash-resistant" because these hold up better than simply "washable" wallpapers. Many manufacturers make finding the right product for each room easy by labeling their best uses, so if you notice such a label, be sure the paper is suitable for the bathroom.
Whatever type of paper you order, make sure you have enough to cover your entire installation area, whether a single accent wall in a small bathroom or a massive master bathroom. To make sure you have enough, measure the width and height of your installation area as well as any areas that will not be covered, such as vanities, large windows or doors, and then use a wallpaper estimator online to find out how many rolls you will need. Order an extra roll or two to give yourself a little wiggle room in case you make any mistakes and to account for waste related to lining up the pattern properly.
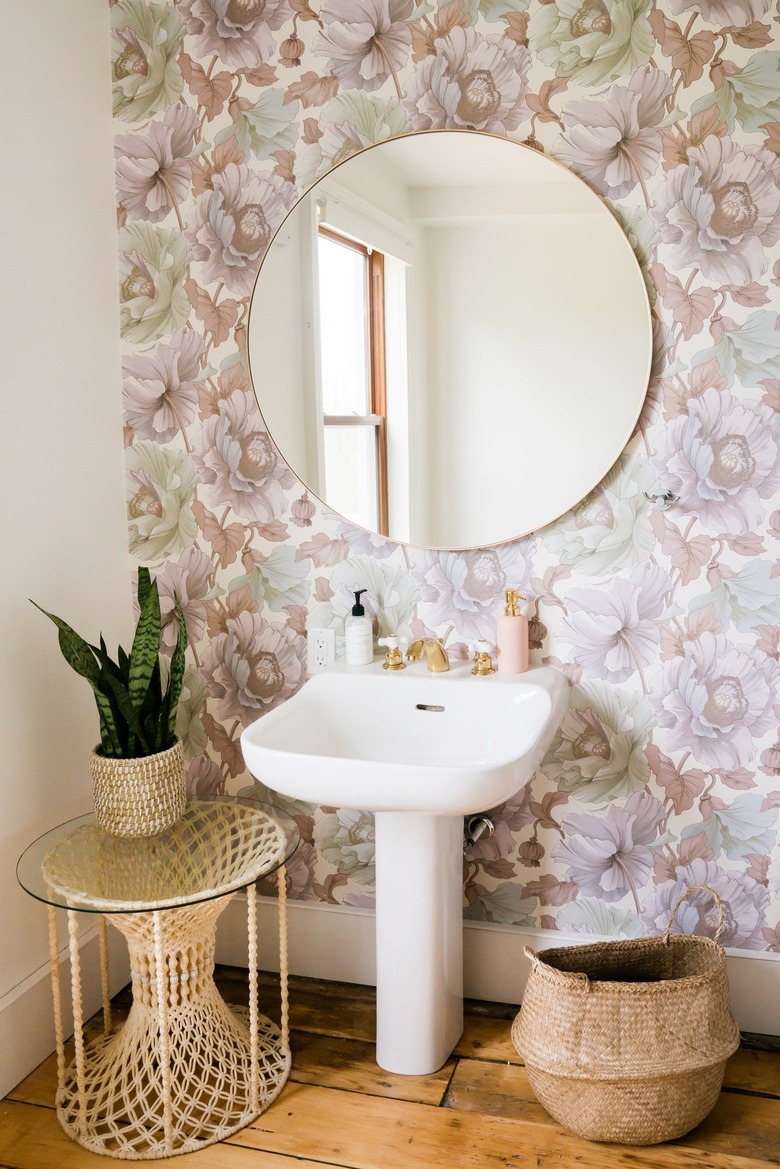 Renee Rodenkirchen
Wallpaper Adhesion Methods
Wallpaper Adhesion Methods
Wallpaper is sold in rolls designed for one of three different adhesion styles: unpasted, prepasted and peel-and-stick. Wallpaper that is sold unpasted is generally more high end since these companies expect it will be installed by professionals rather than DIYers. To use unpasted wallpaper, you will need to buy your own paste and mix and apply it according to manufacturer instructions. While the process is a little more complex, it's still something that most amateurs can do themselves, though it's important to buy the right paste.
Use wallpaper paste that is compatible with your chosen paper and that is suitable for the bathroom, meaning that it has a fungicide in it to prevent mold. This means that if you use vinyl wallpaper, you should get adhesive compatible with vinyl that is labeled as being mold inhibiting or safe for bathrooms. Wallpaper From the 70s suggests working with adhesive that contains dispersion or plastic dispersion glue to prevent peeling. For pastes without dispersion adhesive, you can add one part dispersion adhesive to four parts of traditional wallpaper paste in order to increase its strength.
Prepasted varieties have glue already applied to them, which is activated by soaking in water. When shopping for prepasted wallpaper, it's particularly important that the designs are safe for bathroom use because you need a paste that is appropriate for a high-humidity environment in order to prevent peeling and mold. For instance, York Wallcoverings paper fitted with the company's Sure Strip adhesive allows air to pass through the surface. If you want to change your wallpaper frequently or if you are a renter who needs to be able to restore the home to its original condition easily, look for removable prepasted wallpaper, as this comes off easier than other types.
Peel-and-stick wallpaper, as the name implies, is wallpaper with ready-to-go adhesive and a protective backing that just needs to be peeled away before use. It also comes in bathroom-safe vinyl materials and is always removable, so if you end up getting water stains or peeling corners on your removable wallpaper — or even just get tired of the design — it can easily be peeled off and replaced or removed. Peel-and-stick paper is the easiest to install, especially since you can remove and reapply it if you make a mistake. Always check the label before buying to find out if a product is safe for the bathroom.
Priming the Wall Before Installation
Priming the Wall Before Installation
The installation of bathroom wallpaper will vary based on the adhesive method (peel-and-stick, prepasted or unpasted), but the preparation process is always the same. Before installing, remove all nails, mirrors, screws and light fixtures. Patch holes with spackle and a putty knife, allow them to dry and then sand the spackle flush. Wipe down the walls and allow the water to dry.
Apply a mold-resistant primer to the walls. The primer will help create a smooth surface for application, will make the wallpaper grip easier to the wall than with just paint alone and will ensure it is easier to remove later. When buying primer, look for one labeled as a universal sealer/sizer that can work under all types of conditions and on most surfaces. You can choose to bypass primer if you're using a removable wallpaper on a temporary basis and want the wall to be in its original condition when you take down the paper (a great option for renters).
Hanging Bathroom Wallpaper
Hanging Bathroom Wallpaper
Since most people work with prepasted wallpaper, it is helpful to learn about its installation, but outside of the adhesive method, the process is largely the same for other wallpaper types. When installing wallpaper, always start in the least-visible area of the room.
Measure the width of the paper and mark where the seams will fall on your wall, ensuring that each corner will go over 1/8 inch onto the other side of the wall and that the final piece will not end up smaller than 3 inches (if it does, plan on taking a little off the first strip to make the last piece wider). Use a level, straightedge and pencil to draw a straight vertical line on the wall on the first seam mark and use this as a guide so your paper will end up straight, as corners are rarely naturally straight. Also measure the height of your installation area and cut your first wallpaper panel to this size plus 3 inches to give yourself some flexibility.
Understand how your pattern lines up so you can cut the next panel based on how it lines up next to the first. Go ahead and cut out a few strips that are long enough for the pattern to match up and still be at least as long as the first strip. Fill a large tub with clean water, fold the first panel so the two ends meet together at the center point and submerge the paper according to the manufacturer's recommendations. This is known as booking and allows the wallpaper to relax and the paste to soften. Before hanging, give the paper some time after taking it out of the water so the excess water can drip off.
Install along the vertical guideline on your wall, gently pressing and adjusting until the panel is in the right place. Gently use a plastic smoother, working from the center of the panel outward until all bubbles, wrinkles and excess glue have been removed. Use a damp wallpaper sponge to wipe down the paper, removing any excess glue. You don't need to do this step if you are using peel-and-stick paper.
Apply the next panel the same way, lining it up to the first panel. Go over seams with a roller to prevent curling. On corners, use a plastic scraper to push the paper into the corner.
Use a drywall knife as a straightedge and cut off excess paper on the top and bottom of the wall with a razor. For tough spots like doors, windows, backsplashes and vanity sides, start hanging the strip as usual and then cut some of the excess paper, leaving an inch to spare. Make small, diagonal relief cuts to prevent tearing and then use a drywall knife and a razor to cut the remaining excess paper.
When laying over a fixture, such as an outlet, use a pencil to mark where the hole is located before preparing the paper's adhesive and then use scissors to cut out the fixture shape, working conservatively and carefully. Always turn off power to electrical fixtures before removal and allow the wallpaper to fully dry before replacing them.
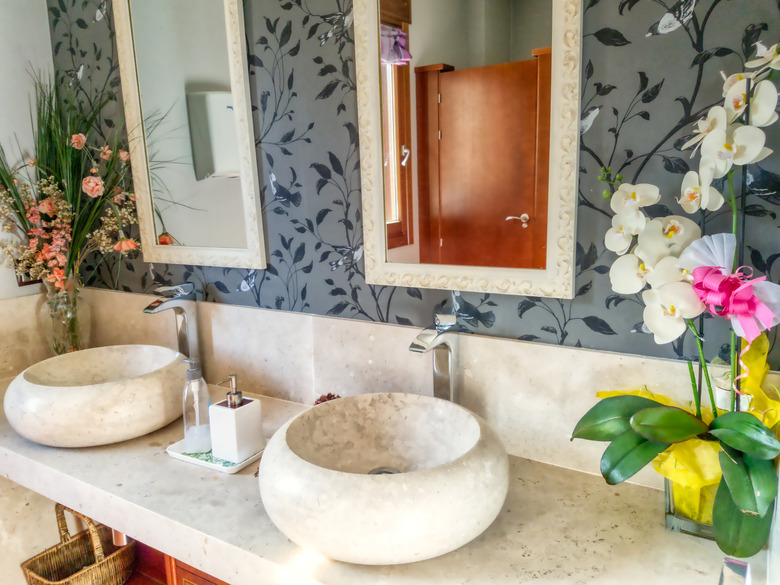 juanorihuela/iStock/GettyImages
Using Nonvinyl Wallpaper
Using Nonvinyl Wallpaper
While experts agree that scrubbable vinyl is the best option for bathroom wallpaper, you can use other wallpapers as well with the right preparation. If you are absolutely set on a particular wallpaper that would normally not be suitable for the bathroom, you'll need to protect it with decorator's varnish. Purchase a flat variety (the most popular brand, Polyvine's decorators varnish, offers a dead flat version), as it should not affect the appearance of your wallpaper. Always do a test patch before installation to be sure that the varnish will work with your wallpaper.
Apply three thin coats according to the manufacturer's instructions after installing the wallpaper. Once dry, the varnish will protect and seal your wallpaper to help prevent water and steam damage. It is worth noting that if you have moisture behind the wallpaper, this will not prevent water damage or mold.
Caring for Bathroom Wallpaper
Caring for Bathroom Wallpaper
While some people worry that having wallpaper in the bathroom might be unhygienic, the truth is that it's not dirty unless it is left unclean. In fact, keeping your wallpaper clean is easy. Use an extendable hand duster once a week to remove dust and debris from the wallpaper.
Once a month, create a solution made from 2 tablespoons of dish soap and 3 cups of warm water. Wash the walls with this solution and a soft sponge that has been wrung out until it is just barely damp and then dry with a microfiber cloth. If you notice dirty smudges from handprints, use a gum eraser to rub them away.
For water stains, combine 1/4 cup of bleach or vinegar with a cup of water. Use a Q-tip to dab the solution in a small spot in an inconspicuous area of the wall and let it sit for 10 minutes. If you don't notice any discoloration, dip a sponge in the mixture, wring it out until it is just damp and dab it on the stain. Let it sit for 10 minutes and then wipe away excess bleach with a clean, damp sponge and dry with a microfiber cloth.
References
- Better Homes & Gardens: Choosing Bathroom Wallcoverings
- Ideal Home: Bathroom Wallpaper Ideas That Will Elevate Your Space to Stylish New Heights
- United States Environmental Protection Agency: Mold Cleanup in Your Home
- Driven by Decor: My Secret Weapon for Wallpapering Your Bathroom!
- Wallpaper From the 70s: Which Wallpaper Paste to Use for Specific Wallpapers and Surfaces
- Limitless Walls: Does Removable Wallpaper Work?
- RoomMates Decor: How to Install Peel and Stick Wallpaper
- Wallpaper From the 70s: How to Wallpaper in the Bathroom
- This Old House: Don't Be Afraid to Wallpaper Your Powder Room