Bathroom Mirror Installation: A Beginner's DIY Guide
We may receive a commission on purchases made from links.
Mirror installation is a DIY home improvement project that you can approach in more than one way depending on the wall material, the weight of the mirror and whether or not it has a frame. The simplest way to hang a frameless bathroom mirror is to simply stick it to the wall with tape or adhesive, but this is a risky strategy, especially for large, heavy mirrors, and it's almost always a better idea to use clips. To hang a framed mirror, you usually attach a hanging bracket or picture-hanging wire to the back of the frame.
Mirrors can be heavy. According to data from NOXTAT, 1/4-inch mirror glass weighs 3.27 pounds per square foot, which means a 3 x 3-foot frameless mirror weighs almost 30 pounds. Upgrade to 1/2-inch beveled glass, which weighs 6.54 pounds per square foot, and the wall and hangers have to support almost 60 pounds, which is the equivalent of a bag of concrete mix. If you don't want that mirror to come crashing down, the screws holding it have to be sunk into wall studs or the right kind of wall anchors.
Using Adhesive for Mirror Installation
Using Adhesive for Mirror Installation
You can buy double-sided mirror mounting tape at any hardware store, but while it can hold a small mirror, you would have to apply an entire roll to the back of a heavy mirror to support it, and even then, it might not do the job if the mirror weighs more than 44 pounds. Besides this, there's another problem with mounting tape. Unless the surface to which you stick it is perfectly clean and flat and the conditions in the bathroom are uncharacteristically dry, it can peel off all by itself.
Bunnings Warehouse demonstrates a safe way to use mirror mounting tape and that's to supplement it by spreading adhesive caulk on the back of the mirror. Bunnings uses silicone caulk in the demonstration, but you could also use construction adhesive, such as Liquid Nails. This obviates another problem with using an adhesive, though — it's permanent. You'll have a tough job removing the mirror if and when the time comes.
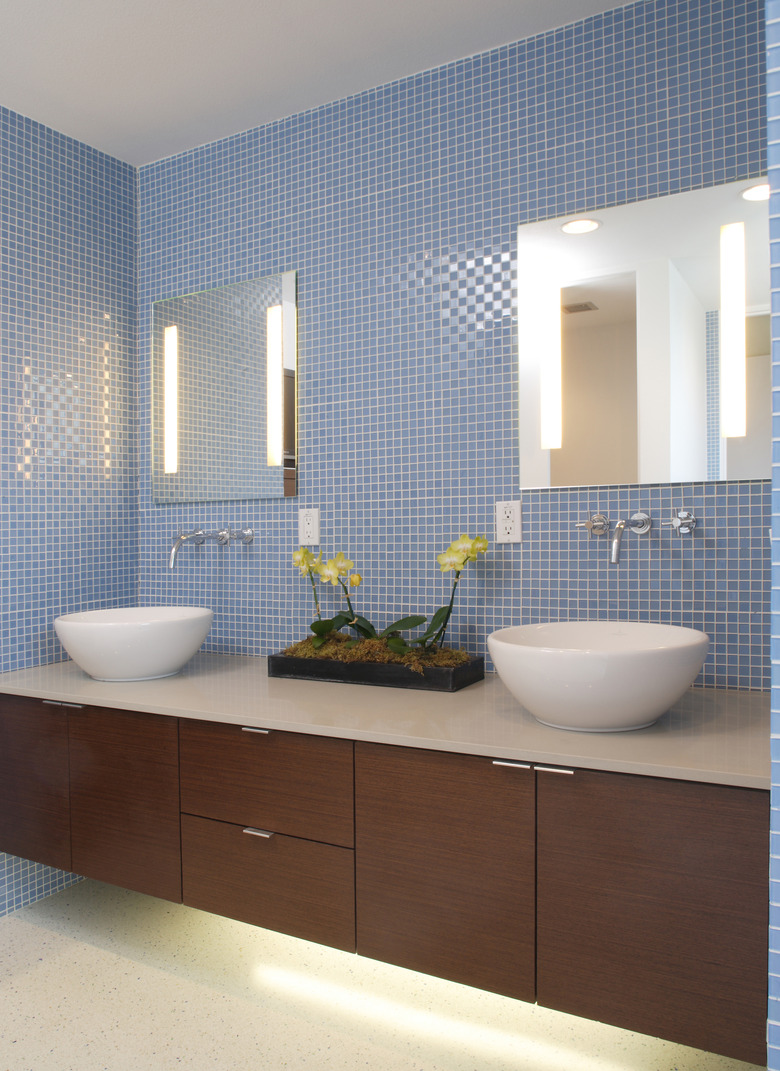 Scott Van Dyke/Corbis Documentary/GettyImages
Anchoring Mounting Hardware for Your Bathroom Mirror
Anchoring Mounting Hardware for Your Bathroom Mirror
The most reliable way to secure mounting brackets and clips to any type of wall covering, including drywall and tile, is to sink the screws into wall studs. You can locate wall studs with a stud finder, mark their positions on the wall and position the mirror brackets accordingly. The studs aren't always where you want them, however, and that's when wall anchors come in handy.
Choose anchors that can support the weight of the mirror. Toggle bolts and molly bolts wedge against the back of the wall and can support the most weight, but if you aren't hanging a heavy mirror, you can use winged plastic anchors or something suitably lightweight. Do not use conical plastic anchors because they can easily pull out.
How to Hang a Frameless Bathroom Mirror
How to Hang a Frameless Bathroom Mirror
Whether you use mounting hardware or adhesive, you have to mark the position of the mirror. Modern Bathroom reminds you that a heavy mirror requires special care, including resting it on the vanity countertop for support if you're using adhesive. Before hanging frameless mirrors with adhesive, make sure the wall is free of contaminants that would interfere with adhesion by wiping down the wall with isopropyl alcohol.
Warning
Have a friend nearby to help you lift the mirror into place so you don't drop the mirror and injure yourself during the installation process. Wear heavy-duty gloves at all times when handling glass.
1. Draw Two Vertical Lines for the Sides of the Mirror
To center the mirror over your vanity, measure the horizontal length of the mirror and the length of the vanity countertop. If the mirror is shorter, subtract the difference, divide by two and make two marks that distance from the ends of the countertop toward the center of the wall. If the mirror is longer than the countertop, make the two marks equal distances from the edge of the countertop toward the side walls.
Using a 4-foot level and a pencil, draw a light vertical line through each mark that extends toward the ceiling. The line doesn't have to extend the full height of the mirror, but it should be long enough to allow you to align the side of the mirror. The most important thing is to make it plumb (perfectly vertical).
2. Draw Horizontal Lines for the Bottom and Top of the Mirror
Determine where the bottom edge of the mirror should be and draw a level line on the wall to represent the bottom of the mirror. When using mounting hardware, you also need a horizontal reference line for the top of the mirror. Measure up from the bottom line, mark the height of the mirror and then make a second level line through the mark.
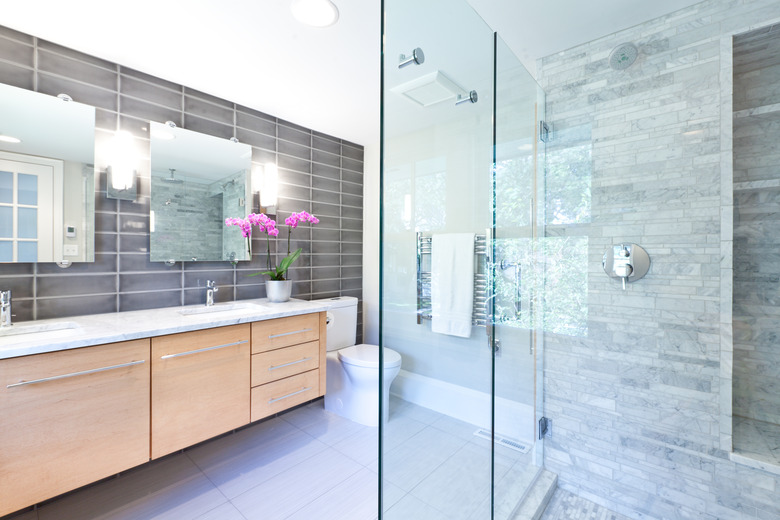 YinYang/iStock/GettyImages
3. Locate the Wall Studs (Only When Using Mounting Hardware)
Use a stud finder and a pencil to locate and mark each stud behind the mirror. Mark both side edges of each stud so you can easily find its center. Mark the studs on both the upper and lower horizontal lines representing the mirror edges.
The stud spacing may not allow you to space the clips evenly, so choose the stud closest to one corner, mark its position on both horizontal lines and measure its distance from the corner. Measure the same distance from the opposite corner and make marks on both lines to tell you where to install wall anchors (assuming there is no stud present).
4. Apply Adhesive to the Back of the Mirror and Hang It
Lay double-sided tape in strips that extend the full length or height of the mirror, spacing them by about 6 inches to allow room for adhesive. Spread the adhesive between the rows of tape with a caulking gun.
Place blocks of wood on the countertop to support the mirror and then lift it with a helper. Align the edges with the lines you drew on the wall, set it on the blocks and press it against the wall. Tape the corners with masking tape to hold the mirror while the adhesive sets.
5. Install Mounting Hardware and Hang the Mirror
Drill holes on all four marks you made on the horizontal lines and tap an appropriate wall anchor into each hole that is not in front of a stud. Loosely screw both bottom clips to the wall, set the mirror on them and install the top clips while a helper holds the mirror in place. Tighten the bottom clips after installing the top clips. If there are any side clips, install them now.
Mirror Installation for Framed Mirrors
Mirror Installation for Framed Mirrors
Framed mirrors often hang from a single screw driven into a wall stud or wall anchor, but when the mirror hangs from a wire, it's better to drive two screws separated by 2 or 3 inches to provide more support and prevent the mirror from tilting.
To determine the location of the single screw or the midpoint between two screws, measure the distance of the hanging bracket or wire (when it's supporting the mirror) from the top edge of the frame and add this to the distance of the top of the mirror from the ceiling. Then, make a mark and draw a level line. Make a mark on the line that is centered on the vanity and use this mark as your reference for drilling the pilot holes for the screws.