How To Install Frameless Shower Doors
We may receive a commission on purchases made from links.
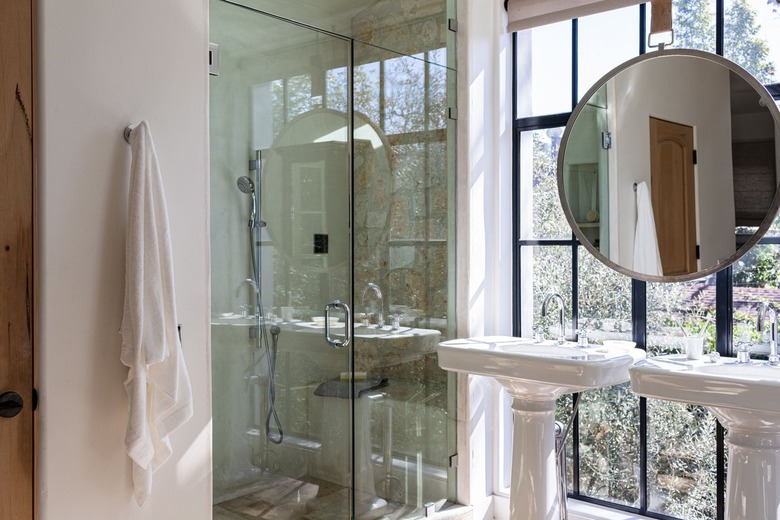
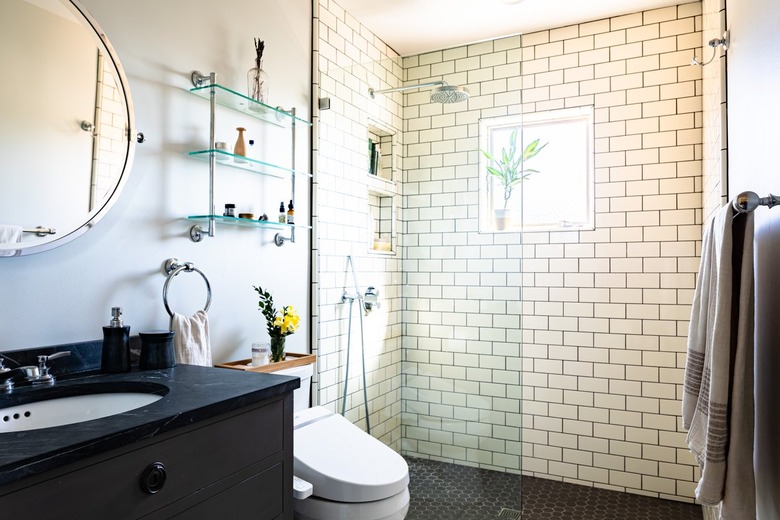
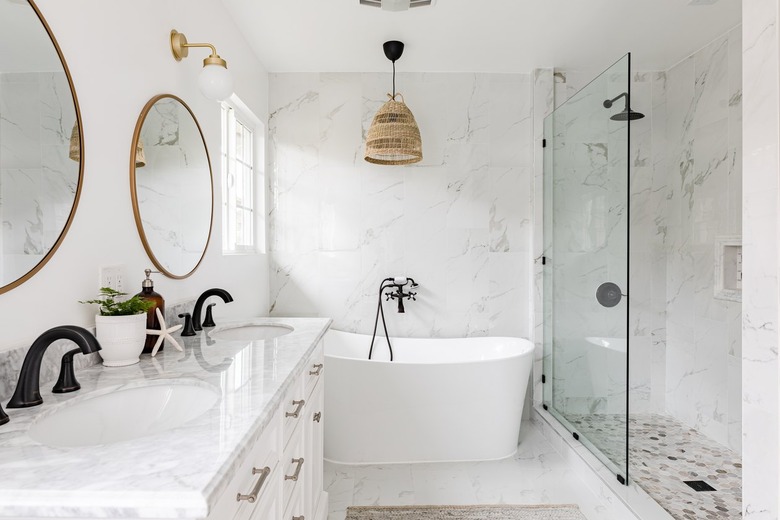
Frameless shower doors are all the rage in upscale bathrooms with a tiled or stone shower wall, and they're becoming more common in bathrooms with an acrylic or fiberglass shower enclosure. They are elegant and easy to clean, and they don't provide much real estate for mold colonies. If you're considering a DIY frameless shower door installation to spruce up your bathroom, though, keep in mind that Basco Shower Enclosures, a leading supplier, advises that you proceed with caution.
Basco recommends professional installation, and the reason isn't because of the difficulty level of the installation process — which is higher than installing a framed glass door — but because your new shower door is fragile, and professional installers have the equipment and expertise to handle it safely. Nevertheless, Basco sets the difficulty level at five out of 10, which isn't that bad, so with the fragility of the glass in mind, you may decide to DIY it anyway to reduce the installation costs. If you do, you'll need a helper because the last thing you need is to lose your grip on a large sheet of expensive tempered shower glass and have it fall on a tiled floor.
Two Mounting Systems for Frameless Shower Doors
Two Mounting Systems for Frameless Shower Doors
Most frameless shower doors come with glass doors and glass side panels, and you usually install the panel before the door. Some models are held to the wall with U-channel, and some models come with mounting brackets that match the hinges. These types of brackets, like the hinges, come in two pieces and install over a precut notch in the glass, and they hold the glass by friction. This arrangement allows for small leveling adjustments.
Note that you can't install a frameless shower door in an acrylic or fiberglass door opening that doesn't have wood blocking behind it because thin plastic materials don't provide enough support for the door and won't hold the screws. When installing in more solid materials, such as stone or tile, you can tap in screw anchors to hold the screws if there is no blocking in the wall.
Things Needed
-
Plastic shims (typically supplied with the glass door)
-
Pencil
 Stephen Paul for Hunker
Warning
Have an assistant at the ready to help with lifting and installing the glass shower door, which can get slippery and dangerous to wield by yourself.
How to Install Frameless Shower Doors
1. Draw a Center Line on the Shower Curb
Lay painters' tape on the shower curb and on the hinge wall, centering it over the locations of the door and fixed panel. Using a straightedge, tape measure and pencil, draw a line on the curb that extends from wall to wall and is exactly the same distance from the front edge of the curb at both ends. Use a 6-foot level and a pencil to draw a plumb line up the hinge wall to guide you when placing the hinges. If you're using mounting brackets, you'll also need a similar reference line on the opposite wall.
2. Set the Curb Mounting Brackets (Bracket Systems Only)
Set the inside portion of each bracket flush with the line on the curb, spacing the brackets the same distance apart as the notches in the glass panel. Mark the screw holes and then remove the brackets and drill pilot holes into the curb using a masonry bit (for tile and stone curbs) or a wood bit (for acrylic and fiberglass curbs). Remove the tape, set the brackets back in place and screw them down using the stainless steel screws that came with the brackets.
3. Set the U-Channel or Wall Brackets for the Fixed Panel
Measure the height of the fixed panel, cut a length of the supplied U-channel to that measurement and drill three evenly spaced holes through the back face of the channel. Set the U-channel against the wall with its bottom end flush against the curb line, plumb it with a level, mark the holes and then remove the channel.
Drill pilot holes at the marks using a masonry bit (for tile and stone walls) or a wood bit (for acrylic and fiberglass walls). Remove the tape from the wall. If there's no wood blocking behind the wall, tap a screw anchor into each hole. Screw the U-channel to the wall and double-check to make sure it's plumb.
When using brackets, set the inside portion of each bracket flush against the plumb line you drew, spacing the brackets according to the manufacturer's instructions. Mark the holes on the tape. Drill the pilot holes and then remove the tape, tap in anchors (if necessary) and screw the brackets to the wall.
4. Place the Fixed Panel
For installation with U-channel, remove the tape from the curb if you haven't done that already and set plastic shims on the curb to protect the bottom edge of the glass. The shims are usually supplied with the door. Using a caulking gun, lay a bead of silicone caulk inside the U-channel groove to hold the panel. With a helper, lift the glass into place and push one edge into the U-channel as far as it will go and let the bottom edge rest on the shims.
Measure from the edge of the curb (near both side edges of the panel) to make sure the panel is parallel to the curb. Cut the shims flush to the door with a utility knife and seal the bottom edge on both sides of the panel with silicone caulk. Also caulk along both sides of the U-channel where it meets the wall.
If you're using brackets, fit one of the supplied gaskets onto each bracket and then set the edge of the panel against the wall in front of the brackets so that they align with the notches in the sides and bottom of the glass. Fit a gasket on the other half of each bracket and then screw the two halves of each bracket together using an Allen wrench or screwdriver.
 Hunker in Partnership With Acme Real Estate
5. Attach the Hinges to the Door
Separate each hinge. Fit one of the supplied gaskets onto each half of the hinge, center the two halves over the notch on the door and screw them together with the supplied screws. Tighten the screws enough to prevent the hinge from moving when you pull on it.
6. Hang the Door
A frameless glass shower door is slightly shorter than the fixed panel to allow for the installation of a door sweep on the bottom edge of the door. Place two wooden shims on the curb, set the door on the shims and align it with the line you drew on the wall. Have your helper hold a level on the top of the fixed panel (extending the level over the door opening) while you adjust the shims to raise or lower the top of the door until it's flush with the bottom of the level.
Mark the screw holes for the hinges onto the wall. Take the door down and drill pilot holes at the marks. Remove the tape from the wall. Tap in screw anchors if necessary. Set the door back on the shims and secure the hinges to the wall with screws.
7. Adjust the Gap
The gap between the door and fixed panel should be a uniform 3/16 inch from top to bottom. If the gap is tapered or too wide, loosen the screws holding one or both hinges to the door just enough to allow you to pull out the door. When the gap is a consistent 3/16 inch (or as directed by the manufacturer), retighten the hinge screws to secure the door.
Let the caulk cure fully (typically 24 hours) before using the shower.
8. Install the Door Sweep
If the door is supplied with a U-shaped rubber or plastic door sweep, install it by opening the door, fitting one end onto the bottom outside corner of the door and sliding it all the way on. Most door sweeps are removable for easy cleaning.