Jetted Tub Installation: A DIY Homeowner's Guide
To complete a jetted tub installation, you'll be making use of your electrical, plumbing and carpentry skills, and as a DIY home improvement project, it's no picnic. Online resources for installation tips and how-to knowledge, such as Better Homes & Gardens, give this task the highest difficulty rating, but if you're a DIY warrior, that's simply an incentive. Before you dig into a project that's going to take several days, though, check the manufacturer's warranty for your tub to make sure it doesn't require professional installation.
A jetted tub installation involves adding one or more dedicated circuits to your electrical panel, and if it's a brand-new tub and not a replacement for an existing one, you have to install new plumbing. Unless you're living in the middle of the woods far from civilization, you'll need permits for both of these phases of the installation, so even if you do all the work yourself, it's a good idea to hire a licensed contractor as a consultant to make sure you do everything according to code. Besides that, you're going to need at least one helper when it comes time to lift the new tub into the enclosure you've built for it.
What's Involved With Jetted Tub Installation?
What's Involved With Jetted Tub Installation?
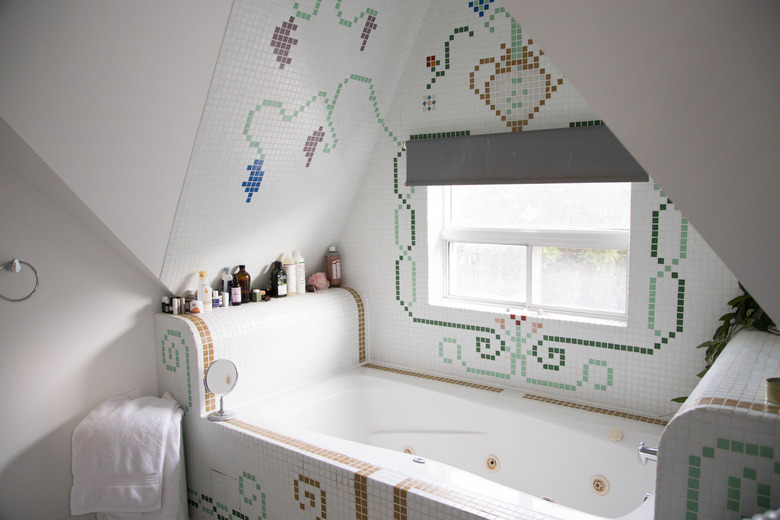
A Jacuzzi, a whirlpool tub and other types of jetted tubs are drop-in tubs, and they need an enclosure. You can construct an enclosure in an alcove that accommodates a standard tub, you can attach one to a single wall or you can build a freestanding enclosure in the middle of the bathroom floor. The inside dimensions must match the outer dimensions of the tub, and the enclosure, or tub surround, must be high enough to allow the rim of the tub to rest from 1/16 to 1/8 inch above the finished deck. The tub sits on a bed of mortar, foam or some other recommended material and isn't supported by the rim.
A jetted bathtub is molded to allow room for a jet pump and sometimes a heater in the same enclosure. Both the jet pump and heater must be plugged into dedicated ground-fault circuit-interrupter (GFCI) protected outlets, and the enclosure must include an access panel that is large enough to service them and remove them if necessary. The access panel isn't optional; it's required by the electrical code.
Apart from the electrical wiring, a jetted bathtub installation isn't much different from a standard drop-in tub installation. After you've built the tub surround, most of your labor will be devoted to hooking up the plumbing, tiling the enclosure after you've set the tub and, depending on where you build the enclosure, doing wall repairs.
 Oppdowngalon/iStock/GettyImages
Electrical Requirements for a Jetted Tub Installation
Electrical Requirements for a Jetted Tub Installation
The electrical requirements for the jet pump and heater are specified in the literature that comes with these components, and for a standard bathroom model, you'll need a 120-volt, 15-amp dedicated circuit for the jet pump and a separate identical dedicated circuit for the heater. The 15-amp specification means exactly 15 amps, not "at least" 15 amps. As discussed on the International Association of Certified Home Inspectors forum, a 20-amp circuit breaker could allow a current surge large enough to damage the motor.
GFCI protection must be provided on all circuits associated with the jetted tub, and the easiest way to do this is to install GFCI breakers in the panel. If you choose to install GFCI receptacles, they must be easily accessible so you can reset them when they trip. The electrical circuitry must also include a disconnect switch within easy reach of the tub, but most manufacturers, such as Kohler and American Standard, include an air-actuated on/off switch on the tub rim that fulfills this function.
Some larger tubs require jet pumps and heaters that operate at 240 volts, and these must be hardwired into the circuits, not plugged into receptacles. Each of these must also be on a GFCI-protected dedicated circuit controlled by a breaker with a rating that matches their specified current draw. This type of circuit should be installed by a licensed electrician.
Before Installing a Jetted Tub
Before Installing a Jetted Tub
Almost any type of bathtub, even one made from lightweight acrylic or fiberglass, weighs 500 pounds or more when filled with water, and the weight of a person adds to the force exerted on the floor. The subfloor must be solid and in good condition with no rotted joists, and the surface should be dry and level. If the floor needs structural repairs, complete these before installing the tub.
Always consult the manufacturer's instructions for the tub you plan to install. If you are installing a used tub and the instructions aren't available, you can usually get them online by inputting the model number on the manufacturer's website. Among the vital information you'll find there are the electrical specifications and the bathtub dimensions, which you'll need to construct the tub surround.
The installation of water pipes for the faucet valve can be done before or after setting the tub depending on the faucet type and/or location, but you need to plan where water supplies are going to go. If the tub surround is going to be integrated with the wall, you'll have to install the supplies before tiling the surround and the wall. The drain rough-in and plumbing for a floor-mounted tub filler faucet can be installed after setting the tub as long as you have under-floor access. If you have to do all the plumbing from above, you may have to remove part of the floor to do it, so you'll want to complete that and patch the floor before installing the tub.
How to Install a Jetted Tub in an Existing Enclosure
How to Install a Jetted Tub in an Existing Enclosure
Warning
To complete a jetted tub installation, you'll need to secure permits for both the electrical and the plumbing portions of the project. You'll also need an assistant to help you lift the tub into the proper place.
1. Prepare the Enclosure Decking
A jetted bathtub rests on the floor, and there is a small gap between the rim and the finished surface of the decking. Some contractors recommend tiling the decking before installing the tub, but if you don't want to do that, you should do the following as a bare minimum:
Fasten cement board to the surface of the decking. Then, space several of the tiles you plan to use evenly along the length of the decking, and on top of each tile, set a 1/16-inch spacer. The tub rim will rest on the spacers while the mortar or foam below the tub is fresh, and after it sets, you can remove the spacers and set the tiles.
2. Cut the Drain Opening in the Subfloor
Measure the location of the drain opening with respect to the sides and front end of the tub and make a mark on the subfloor the same distance from the sides and front wall of the enclosure. Cut an elliptical opening using a reciprocating saw that extends from 2 inches behind the mark to the front wall and that is about 3 inches wide. This cutout is necessary to allow the drain assembly to hang below the floor.
 Oppdowngalon/iStock/GettyImages
3. Install the Drain Assembly on the Bathtub
The drain assembly may be supplied with the tub, or you may have to purchase it separately. It consists of elbow fittings for the drain opening in the bottom of the tub and the overflow opening in the front, a tee and pipes to connect these fittings.
Set the bathtub on a pair of 2x4s to raise it off the floor. Assemble the drain, cutting pipes to the proper length with a hacksaw and connecting everything together by gluing them or using compression fittings. Connect the assembly to the drain fitting in the bottom of the tub by screwing in the drain flange (after packing it with plumbers' putty) and connect it to the overflow opening by attaching the overflow plate with the screws that come with it. Tighten the tub drain flange with a drain tool.
4. Lay a Mortar Bed
Mix one or two bags of mortar with just enough water for a stiff, crumbly consistency and then shovel it into the enclosure and spread it onto the floor with a trowel to a depth of 1 or 2 inches. Focus on getting the mortar in places where the tub makes contact with the floor.
Some manufacturers recommend using high-density spray foam or base-coat plaster instead of mortar, and some design their tubs to be set in construction adhesive or silicone adhesive caulk. This is another reason to have the installation instructions handy — to determine which method to use for your model.
5. Set the Tub in the Enclosure
Gather as many people as necessary to lift the tub and then hoist it over the enclosure wall and set it down as gently as possible. You may have to stand in the tub and wiggle it back and forth gently to get it to settle to the point at which all four rims are resting on the spacers. Check the level on all four sides of the tub and make any adjustments necessary to center the bubble.
Let the mortar set overnight and then remove the spacers and fasten the tub to the enclosure with any fasteners provided with it. Alcove tubs have nailing flanges on three sides, and you fasten these to the studs with oval-headed screws or roofing nails.
6. Finish the Enclosure
Install a suitable backing material for the material you plan to use to cover the enclosure. Fiber cement board is the best choice for tile, wood and most other materials because it won't be damaged by water, but if your plan includes paint or a vinyl wallpaper covering, then water-resistant drywall may be a better choice. If you choose to install tile, be sure to seal the grout to resist mold and hard water stains.
After you've finished the enclosure decking, apply a bead of silicone caulk around the tub rim to seal the gap and keep water from seeping into the enclosure.
Installing the Plumbing
Installing the Plumbing
After the mortar dries and the tub is stable, install a P-trap on the drain tee and connect the trap to a waste line that ties into the building's sewer system. Don't forget to install a vent within 5 feet of the trap that connects to the building's main vent stack. If you omit this crucial step, the tub won't drain properly, and you'll violate code, so if you're in doubt about how to do it, consult a plumber.
The final procedure in a jetted tub installation is to install a faucet, and whereas most plumbers routinely use 1/2-inch copper or PEX pipes for a tub water supply, the National Kitchen and Bath Association recommends 3/4-inch pipe for large tubs that demand higher water flow.
One water supply pipe ties into a cold water branch and the other to a branch coming from the water heater. Both pipes stub out in a wall from the floor or inside the enclosure depending on the location and style of the faucet, spout and showerhead as applicable. Install the faucet and faucet trim according to the instructions that come with it or hire a plumber to do the job.
References
- Better Homes & Gardens: How to Install a Whirlpool Tub
- North Central Washington Home Inspections: What Were You Thinking? Whirlpool Baths, Receptacles and GFCI's
- International Association of Certified Home Inspectors: Whirlpool Tub Wiring
- National Kitchen and Bath Association: Bath Planning: Guidelines, Codes, Standards
- This Old House: Jetted Tub Installation Guide
- American Standard: Installation and Operation Guide | Everclean/Evolution Combination Tubs