How To Install A Toilet
As you prepare to install a new toilet in your remodeled or brand-new bathroom, it's good to address some terminology that will make it easier to purchase parts you might need as well as the new toilet itself. Plumbers officially refer to a toilet as a "water closet," a term that hearkens back to the days of the special room into which English aristocrats retired to do their business. The entire room was also sometimes called a "toilet."
According to John C. Flood of VA Inc., it wasn't until the turn of the 20th century — not that long ago — that modern bathroom plumbing became commonplace, and people began using the term "toilet" for the actual sanitary fixture itself. Since the term had originally been interchangeable with "water closet," the correlation has persisted, and plumbers still refer to it that way as well as calling the bolts used to hold the toilet to the floor "closet bolts" and the drainpipe fitting just under the toilet the "closet flange." That's the terminology you'll find in all the plumbing codes.
DIY plumbing know-how is more important than words when it comes to installing a toilet, but you don't need an overabundance of skill because toilets are designed for easy installation, and not much can go wrong. Every toilet has a standard toilet base that fits on a closet flange, which is also more or less standard, and the water connection also varies little from bathroom to bathroom. The only difficulty you might encounter would be caused by a closet flange that's mounted too far above the floor surface or recessed too deeply below it.
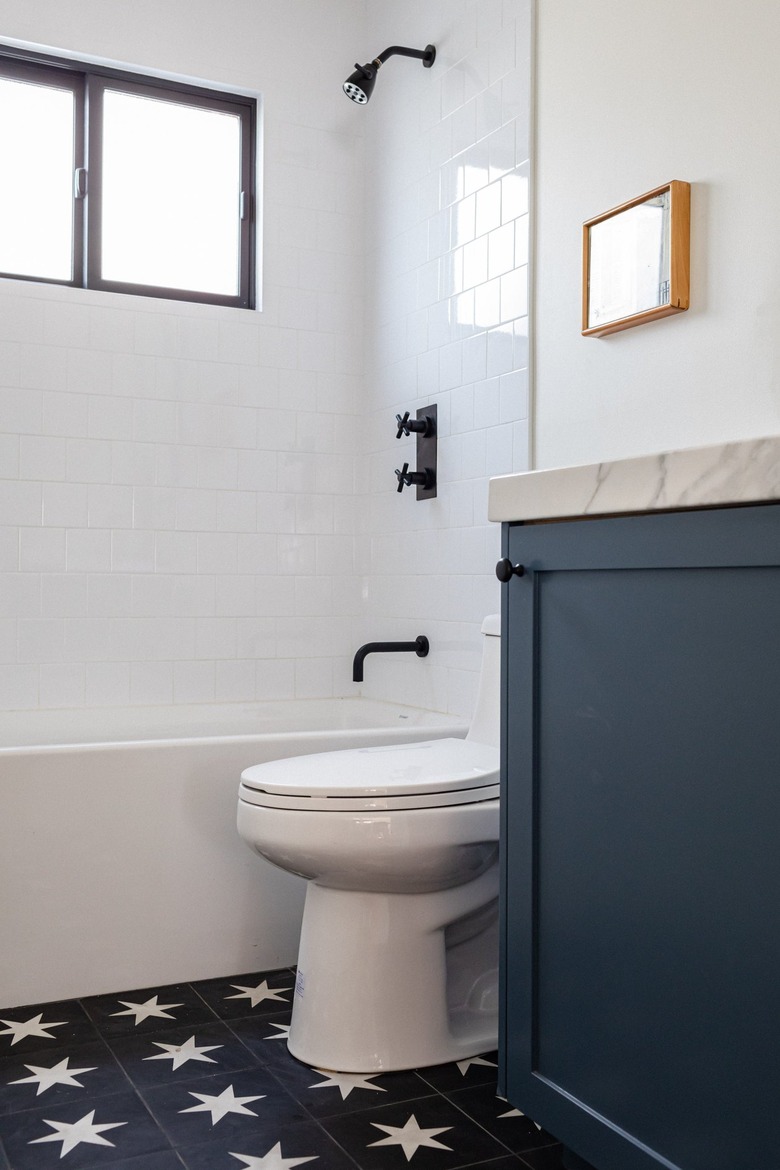
Toilet Installation Begins With a Clean Closet Flange
Toilet Installation Begins With a Clean Closet Flange
If you're replacing an old toilet, you'll have an old closet flange before you that is probably caked with leftover wax from the previous wax ring. Clean off as much wax as possible wearing rubber gloves and using a putty knife and disposable towels. Examine the flange carefully. Since it's old, it's probably made of cast iron, and it may have partially corroded. If so, it might not be able to hold the closet bolts for the new toilet for long if at all.
Replacing an old flange is a big job that you don't want to do, and in most cases, you don't have to do so. Depending on the extent of the damage, you can repair a corroded flange with a flange bracket or an entire repair ring that you bolt to the subfloor. A flange repair bracket or ring offers a secure anchor for the closet bolts, but it often adds enough thickness to the flange to lift the toilet off the floor, so you might have to be ready to shim the base of the toilet to prevent rocking.
Another problem you might encounter during a home improvement project that includes a new bathroom floor covering is that the flange sits too far below the surface of the new floor for the wax ring to make contact. To prevent a leak, install a flange extender, which is like a repair ring but thicker and made of plastic. Use one that is thick enough to bring the surface of the flange to within 1/4 inch of the floor surface to guarantee a good wax seal.
 Hunker in Partnership With Acme Real Estate
What You Need to Install a New Toilet
What You Need to Install a New Toilet
When you purchase a new toilet at a plumbing supply outlet, a home improvement center or an online source such as Amazon, it usually comes with everything you need to install it except for the tools. Most toilet kits include the toilet bowl, toilet tank — including the flush and fill valves — tank lid, closet bolts, tank bolts, a rubber gasket that goes between the tank and the bowl (sometimes called a spud), a seat cover with plastic bolts and a wax ring.
The seat cover provided with most toilet kits is made of cheap plastic, so while you're at the store you may want to consider purchasing a more decorative and sturdy one. You may also want to buy a waxless toilet gasket, such as a Sani Seal foam ring or a Danco rubber gasket, to use in place of the wax ring supplied with the toilet. You seldom need a wax ring thicker than a standard one, as Tracey Fitz discovered. If the closet flange is elevated above the floor, you'll also need plastic toilet shims to prop up the base of the toilet.
One more thing you'll need is a braided, metal, flexible connector to connect the toilet tank to the water supply valve. Toilet tanks have a standard 3/4-inch male threaded inlet, but the outlet on the shutoff valve could have 3/8- or 1/2-inch male threads, so be sure to get the right connector. It's also a good idea to measure the distance of the supply valve from the toilet so you get a connector that isn't too short or too long.
Things Needed
-
Two closet bolts with clamps or nuts
-
Wax or foam ring
-
Toilet shims
-
Plastic bolt covers
-
Rubber spud
-
Rubber tank gasket
-
Two tank bolts, nuts, washers and rubber gaskets
-
Silicone caulk
-
Toilet seat
-
Toilet seat bolts and nuts
-
Adjustable wrench
-
Hacksaw
-
Screwdriver
-
Locking pliers
Warning
Have a helper on standby to assist with the installation of a new toilet. Toilets are heavy (around 80 pounds) and typically made of porcelain, which can be vulnerable to cracking or breaking.
How to Install a Toilet
1. Secure the Closet Bolts to the Closet Flange
Slip the head of each closet bolt into the enlarged end of one of the channels on either side of the closet flange, slide the bolt all the way to the other side of the channel and turn it so that the oval head of the bolt locks inside the channel. Arrange the bolts to be directly across from each other with the line between them parallel to the back wall and then slip a plastic clamp or screw a nut onto each bolt to hold it in position. The clamps or nuts come with the bolts.
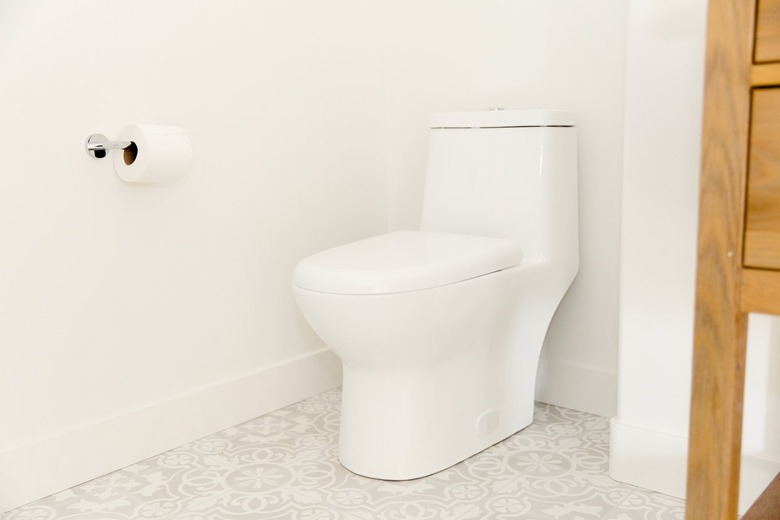
2. Set the Toilet Bowl
Set a wax ring or foam gasket on the flange and center it and then lift the toilet bowl — or, if you're installing a one-piece unit, the entire toilet — into position with the assistance of a helper. Align the holes in the base of the bowl with the closet bolts and then lower the toilet onto the flange, ensuring that both bolts come through the holes as you do this. Once the toilet is resting on the flange, sit on the bowl facing the wall and wiggle back and forth with a even motion to compress the wax or foam ring.
Ideally, the base of the toilet will make contact with the floor, but it might not if the flange is too high. In that case, insert plastic shims around the toilet base, spacing them evenly and wedging them in tightly. You can cut them flush with the toilet base when you secure the toilet to the floor.
 Sanford Creative
3. Secure the Bowl to the Floor
Most toilet kits come with decorative plastic covers for the toilet bolts. Separate these covers and slip one of the plastic bases onto each of the closet bolts and slide it all the way down to the base of the toilet. Screw a nut onto each bolt and tighten it by hand as far as it will go and then finish the job with an adjustable wrench. Tighten the bolts incrementally, alternating from one to the other to keep the toilet level. Avoid tightening one of them too much. Stop tightening when the bowl is secure and you can't rock it. Don't overdo it or you could crack the porcelain.
Closet bolts are typically much longer than they need to be, and to get the decorative covers on, you have to cut them with a hacksaw. Cut each bolt to a length of about 3/4 inch beyond the nut and then place a cover on each bolt and push it down until it snaps onto the base that you previously installed. This is also a good time to cut any shims you installed flush with the base of the bowl using the hacksaw or a utility knife.
4. Install the Toilet Tank
Fit the rubber spud around the outlet hole underneath the tank and push it all the way on. Then, set the tank on the back of the bowl with the spud resting in the bowl's inlet hole. Separate the nut and washer from each of the tank bolts supplied with the unit but leave the rubber gasket on the bolt. Insert a bolt into each of the holes in the bottom of the tank, slip a washer onto the end of the bolt sticking out from the bottom of the bowl, screw on a nut and tighten the bolt with a screwdriver.
It can be challenging to hold the nut steady with pliers while you turn the bolt heads with a screwdriver, so if your reach isn't long enough, try this trick. Clamp a set of locking pliers onto each nut and turn the bolt heads with a screwdriver. The pliers will spin around until they wedge against the side of the bowl, and at that point, they will hold the nut steady all by themselves.
Tighten the bolts incrementally, alternating between bolts to keep the tank level. It's important to get the bolts tight, or the tank will leak, but as always, don't overdo it, or something could crack.
5. Connect the Water Supply
Screw the metal connector on the toilet supply hose to the water supply shutoff valve and tighten it with an adjustable wrench. Screw the plastic connector of the supply hose onto the male connector underneath the toilet tank (the connector sticks out from the bottom of the toilet tank) and tighten it by hand.
 Stephen Paul for Hunker
6. Turn on the Water and Test the New Toilet
Turn the water valve all the way to the left (or counterclockwise) to open it and check for leaks from the supply hose or the toilet tank as the tank fills. Tighten any connections that leak.
Remove the tank lid and observe the water filling the tank. The fill valve should stop when the water level is about an inch below the top of the overflow tube. If it stops below that or if water starts spilling into the overflow tube, adjust the float screw to raise or lower the float as needed to change the water level.
Flush the toilet and watch for water coming from under the base of the toilet. That's definitely something you don't want to see because it means you have to pull up the toilet and start over, but as long as the floor is in good shape and you followed all the installation steps, you shouldn't.
7. Caulk the Base of the Toilet
Apply a bead of silicone caulk around the base of the toilet to close the gap and help secure the toilet to the floor. If you installed shims, it's best to use an opaque caulk to hide them. Note: Some plumbers leave the back side of the base without caulk so if the toilet leaks around the base, you'll see water coming out.
8. Install the Toilet Seat
Unsnap the caps on the back of the toilet seat, set the seat in position on the toilet bowl, insert a plastic bolt through each of the bolt holes under the caps and screw on a locking nut from underneath the bowl. These locking nuts usually have flanges that wedge against the toilet bowl, so you don't have to hold them. All you have to do after starting each nut is tighten the bolt with a screwdriver.