How To Install A Pedestal Sink
Installing a pedestal sink means adding room to your bathroom and also giving it a stylish, elegant look. The water and drain pipes are hidden behind the pedestal, which helps give a pedestal sink its sleek, clean appearance. While installing a pedestal sink can be a little bit trickier than installing a vanity, an experienced DIYer can usually complete the installation in a day.
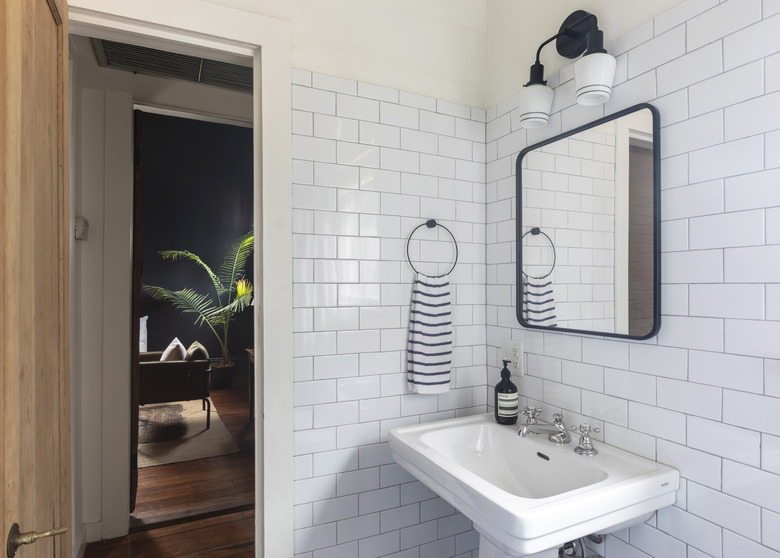
A pedestal sink is exactly what it sounds like: a sink that sits on top of a pedestal. The sink is mounted to the wall while also sitting on the pedestal to keep it secure. According to Fine Homebuilding, the empty space provided around a pedestal sink makes the room seem more open and provides extra wall space for towel bars, making it a great choice for small bathrooms. Pedestal sinks in the old days were made of cast iron and weighed roughly about as much as a car, but today's sinks are made of porcelain and come in a variety of sizes and designs.
Pedestal Sink Installation Considerations
Pedestal Sink Installation Considerations
Installing a pedestal sink might seem like it would be easy, but there's a lot to think about before getting started. The first step is to pick out your sink and faucet. Once you know the height of your sink, you will need to open the wall behind the sink and install wood blocking to provide solid backing for the wall mount and for the lag screws. A pedestal sink is too heavy to hang using wall anchors, so blocking is essential. Once the blocking is in place, you have to repair the drywall and paint the wall.
The wall will also need to be open if you need to make adjustments to your plumbing. The water and drain pipes all need to be stubbed out and hidden behind the pedestal. If you are not skilled at plumbing, you may need to have a plumber rough-in the drain at the right height and reroute the water pipes so they fit behind the pedestal. Ending up with a leak inside the wall or having pipes in the wrong location for your pedestal is not a good way to start your project.
For some steps of the pedestal sink installation, you'll need an extra pair of hands, so make sure you have someone lined up to help before you begin. A porcelain pedestal sink is quite fragile, and one slip up can result in a cracked sink or pedestal. Speaking of cracked porcelain, you need to be careful with how you handle and tighten both the sink and the pedestal. Snug is usually best. Overtightening a fastener can easily result in cracks or breaks.
One last factor to consider is that you may need to do some work to the floor and wall if you are replacing a vanity. In addition to adding blocking and/or moving the plumbing, some or all of the flooring may need to be replaced before the sink is installed. Also, keeping everything level is particularly important with a pedestal sink. Be prepared to do a lot of measuring and keep your level handy.
 Stephen Paul for Hunker
Warning
Be careful when mounting the sink and pedestal with lag screws. If you overtighten the screws, you can crack the porcelain. Use a socket wrench, not a drill, to drive the screws.
Installing a Pedestal Sink
1. Install Wood Blocking
Use the instruction manual to determine the height of your pedestal sink's mounting plate. Measure and mark the location on the drywall and then cut out a piece of the drywall using a drywall saw.
Cut from stud to stud. Cut a 2x8 lumber board to fit snugly between the studs. Install the blocking with angled screws driven through the blocking and into each wall stud. Patch the drywall and paint the area. If you are installing tile or adding new flooring due to replacing a vanity, this is the best time to do that as well.
2. Attach the Mounting Plate
Some pedestal sinks come with a mounting plate. To find the location where it should be installed, place the sink on top of the pedestal and set it against the wall. Then, mark the wall where the plate will go. This may take two people — one to hold the sink steady and the other to mark the wall. If the sink is not held steady while unsecured, it can easily slip off the pedestal.
Remove the sink and anchor the mounting bracket to the wall. The bracket doesn't always come with screws, so use lag screws or other heavy-duty fasteners recommended in the installation manual. Use a level while you attach it to make sure the mounting plate is perfectly level across the top.
3. Install the Faucet
Install the faucet on the sink. It is much easier to do this now as opposed to when the sink is mounted on the pedestal. If a gasket is not provided, use plumbers' putty under the faucet base to prevent leaks. Tighten the stem nuts beneath the faucet deck by hand and then tighten until snug with an adjustable wrench or a basin wrench. Be careful not to overtighten to avoid cracking the sink.
Install the drain pop-up assembly, again making sure to not overtighten the nuts. If you are using flexible faucet supply lines, attach them now to the hot and cold sides of the faucet. It's much easier to attach them as part of this step than to do so later when the sink is on the wall and space is limited.
4. Mount the Sink
Set the sink onto the wall by sliding it into the mounting bracket. Once it is positioned securely, use a level to make sure that the sink is level from side to side. Then, slide the pedestal into place to make sure it fits. If the pedestal rocks a little, you can use small shims to level it. When the sink and pedestal fit correctly, use a pencil to mark the sink's anchor holes on the wall and the pedestal holes on the floor. There should be two for the sink and one or two for the pedestal.
5. Drill Holes for Lag Screws
Remove the sink and pedestal and drill pilot holes for lag screws at the wall and floor anchor marks. The sink lag screws will sometimes come with the pedestal sink from the manufacturer. Place the sink back on the mounting plate without installing the lag screws. Leaving out the screws at this point provides more flexibility when you install the pedestal. Otherwise, it may be very difficult to get the pedestal in place.
6. Connect the Drain
Install the P-trap assembly. You may want a helper to hold onto the sink to keep it from slipping off the wall mount during this step. While you can push down on the sink without it slipping off the bracket, pushing up to slide the nut, washer and trap onto the tailpiece can result in the sink lifting up and out of the bracket. Hand-tighten the slip nuts and then use adjustable pliers to snug them an extra turn. Again, you don't want to overtighten, or you can end up with leaks.
 Mitch Geiser
7. Connect the Water Pipes
Attach the flexible faucet supply lines to the shutoff valves and tighten with a wrench. If you are using chrome supply tubes, measure the distance between the faucet and the shutoff and add an inch before cutting. This extra inch will allow you to bend the tubing to fit. Be careful to not kink the tubing when bending it. Tighten the top nuts onto the faucet. Place a little pipe dope on the ferrules to prevent leaks and then tighten the compression nuts to the valves.
8. Check for Leaks
Remove the aerator from the faucet spout and slowly turn on the water valves. Let it sit for a minute and check the supply lines for leaks. Then, turn on the water and run it for 30 seconds to a minute to clear any air and debris from the lines while checking for leaks in both the water and drain line. It's easier to find and fix a leak before the pedestal is in place. Close the water valves until the project is completed.
9. Set the Pedestal
Slide the pedestal back into place under the sink. This is one step of installing a pedestal sink when you'll want another person to help you. If the front of the sink needs to be lifted slightly in order to set the pedestal underneath, have the helper do so gently. There may be resistance due to the drain and trap connections, but it should lift enough to get the pedestal underneath if it is done carefully. Lifting too hard or fast can result in leaks or damage to the sink.
Once the pedestal is where you want it, check to make sure the sink is level. Open the water valves and run water through the drain to check for leaks again. Turn the water valves back off.
10. Install Lag Screws
Insert the lag screws through the sink mounting holes and drive them into the predrilled holes in the wall, using a socket wrench. Tighten the screws alternately instead of tightening one side first and be sure to only tighten until snug.
Install the pedestal screws the same way — insert into the predrilled holes and tighten with a socket, alternating frequently between bolts while tightening. There is a reason for this — if you tighten one screw fully before the other, it may be too tight, and when you tighten the second screw, you will hear that slight "tink" sound telling you the porcelain has cracked. Check your work with a level one last time.
11. Finish and Check Your Work
Open the hot and cold water valves and check all water and drain connections again for leaks. Once you are certain that everything looks good, use a matching silicone caulk to fill in any gaps between the pedestal and the floor.