How To Install A Wall-Mount Bathroom Sink
One of the main reasons for installing a wall-mount sink, according to Snow and Jones, is that it saves space. You'll also like the fact that it's easy to clean and trendy, and because it automatically provides the required leg room underneath for wheelchair users, it's the best choice for an accessible bathroom.
In some ways, installing a wall-mount sink is easier than installing one in a cabinet, but if you're converting from a conventional sink to a wall-mount sink, you'll have to do some rough-in plumbing, and that will require a permit. That shouldn't stop you from doing the job yourself if you're the DIY type, but it's a good idea to consult a licensed plumber to be sure your work passes inspection.
An Overview of Wall-Mount Sink Installation
An Overview of Wall-Mount Sink Installation
A wall-mount sink hangs from a bracket, which is supplied with it, and the bracket has to be mounted to the wall framing, not to the wallboard. If the sink is wide enough, the bracket might overlap at least two of the wall studs, and if so, you may be able to anchor it to the studs with lag screws. In most cases, though, you have to remove the wall covering and fasten horizontal lengths of 2x6 or 2x8 lumber to the studs. Removing the wall covering also makes installation of the water supply lines and the drain possible if they aren't already there from a previous sink.
Once you've installed the blocking and plumbing, covered the wall and fixed the floor, the process of installing and hooking up the sink is no more trouble than it is for any other sink. In fact, it's easier because you don't have to crawl inside a cabinet to make the plumbing connections.
Things Needed
-
2x6 or 2x8 lumber
-
Wood screws
-
1/2-inch copper or CPVC pipe and fittings
-
Soldering supplies
-
Plastic pipe cement
-
Drywall
-
2 shutoff valves
-
2 escutcheons
-
2 x 1 1/2-inch trap adapter
-
Sink mounting bracket
-
Sink drain assembly
-
Plumbers' putty
-
Pop-up stopper assembly
-
Drywall saw
-
Pry bar
-
Angle grinder
-
Drill
-
Screwdriver bit
-
Torpedo level
-
Hacksaw
-
Pipe cutter
-
Socket wrench
-
Tongue-and-groove pliers
-
Wrench
 Sanford Creative
How to Install a Wall-Mount Sink
How to Install a Wall-Mount Sink
Warning
Before you begin the wall-mount sink installation process, shut off the water to avoid leaks or flooding.
1. Expose the Wall Studs
Make a rectangular hole in the wall that extends vertically about 6 inches higher than the planned location of the sink and horizontally to the studs on either side of the sink. Use a drywall saw to cut the drywall.
Note: If the wall is tiled, carefully pry off the tiles one by one using a pry bar and set them aside if you plan to reuse them. Cut through the cement backerboard with an angle grinder and pry it off, removing screws as necessary with a drill and a screwdriver bit. This is also reusable after you scrape off the old adhesive.
2. Install the Blocking
Screw horizontal 2x6 or 2x8 blocking between the exposed studs, flush with the room-side edges of the studs and with its face toward the room. Level the blocking with a torpedo level and place it so the middle of its face is where you want the sink to be.
3. Complete the Rough-In Plumbing
Install water supply lines and a drain if they aren't there already. If you're rerouting water pipes that served another sink, cut them back to about 6 inches before the point where you now want them to stub out of the wall using a hacksaw and solder or glue short lengths of 1/2-inch pipe and elbow fittings to extend them straight out about 2 inches past the finished wall. Use solder for copper pipes and plastic pipe cement for CPVC ones.
If you have to install a new drainpipe or modify an existing one, it's best to consult with a plumber. The vent for the drain has to be installed no more than 5 feet from the sink P-trap, and doing that calls for extra plumbing work that you probably won't want to do yourself.
4. Finish the Wall and Install Shutoff Valves
Install new drywall and whatever other wall covering you need and completely finish the wall and the floor. When you're done, cut the pipe stubouts to a length of about two inches past the wall using a pipe cutter for copper pipes or a hacksaw for plastic. Install a shutoff valve on the end of each pipe by soldering it, gluing it or tightening a compression fitting, as applicable. Be sure to place an escutcheon on each pipe before installing the valve to hide the gap between the pipe and the wall since the valves will be visible.
5. Install an Adapter for the P-Trap
Most drain pipes are 2 inches in diameter, and most bathroom sink P-traps are 1 1/2 inches, so you need to install a trap adapter, which is a 2 x 1 1/2 reducing bushing with a compression fitting for the P-trap pipe that you can hand-tighten, similar to the fittings on the rest of the P-trap assembly. Cut the drainpipe to a length of 1 to 2 inches beyond the wall and glue on the fitting with plastic pipe cement.
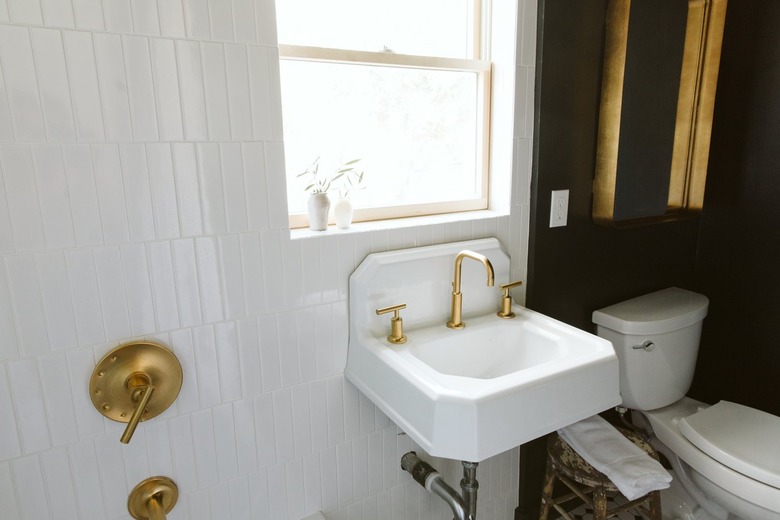
6. Install the Sink Mounting Bracket
Position the mounting bracket (part of the sink hardware kit that comes with the sink) on the wall, level it with a torpedo level and mark the positions of the mounting holes for the lag screws. Remove the bracket and drill pilot holes with a drill and appropriate drill bit using a masonry bit if you have to drill through tile or stone. Set the bracket back in place and double-check the level (the bracket must be perfectly level) and screw the bracket to the wall using a socket wrench to tighten the screws.
7. Prepare the Sink
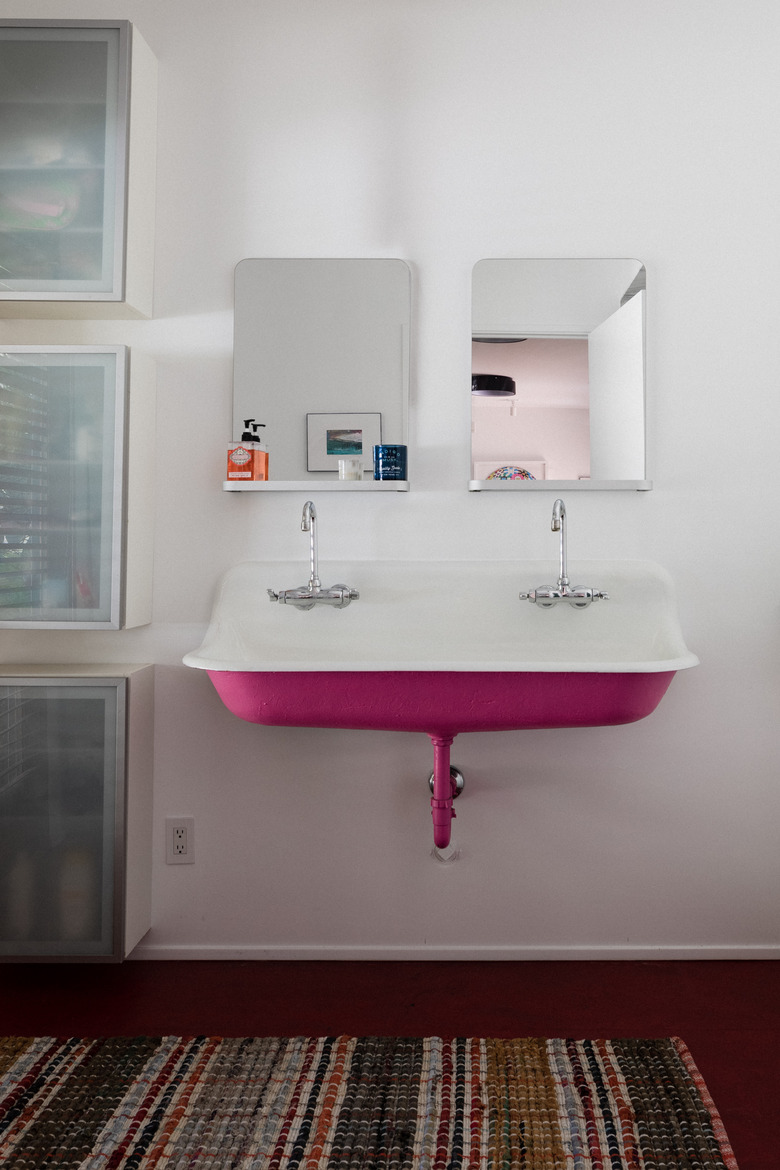
Install the sink drain assembly by packing the underside of the sink strainer flange with plumbers' putty, slipping the strainer through the sink drain hole and tightening the nut with tongue-and-groove pliers. Install the faucet onto the sink deck following the manufacturer's instructions.
8. Hang the Sink
Follow the manufacturer's instructions for hanging the sink. After hooking it onto the bracket, you may have to secure it with more lag screws and washers, which will be supplied with the mounting hardware. Make sure the sink is level from side to side and from front to back before you completely tighten the screws.
 Stephen Paul for Hunker
9. Install the Pop-Up Stopper
Screw a tailpiece onto the sink drain. This is a length of plastic or metal pipe that usually comes with the faucet, and if the faucet has a pop-up stopper, the tailpiece has a hole for the stopper lever. Make sure this hole is facing the back wall.
Drop in the stopper, insert the stopper lever, hook it onto the bottom of the stopper flange and then screw it to the tailpiece. Drop the lift rod into the hole behind the faucet and connect the lever to the lift rod with the strip of perforated metal and screws that come with the stopper assembly.
10. Hook Up the Drain
Cut the tailpiece to make it the same height from the floor as the drain opening in the wall. Install the P-trap by sliding a slip nut and washer onto the tailpiece, inserting the tailpiece into the mouth of the trap and screwing on the nut. Swivel the other end of the trap to face the drain opening, cut the horizontal connecting pipe that comes with the trap assembly to the proper length, insert one end into the trap adapter and the other end into the trap outlet and tighten the slip nuts.
You can usually tighten these nuts by hand, but you might need pliers to provide extra torque if you find that the connections leak, which often happens with chrome P-traps.
11. Connect the Faucet to the Water Supply
Screw one end of a flexible water supply hose to each of the faucet inlets and the other end to one of the shutoff valves. You don't need plumbing tape to make these connections watertight, but you do need a wrench. When you're done tightening, turn on the valves and check for leaks. Tighten more if necessary.