How To Install A Bathroom Vessel Sink
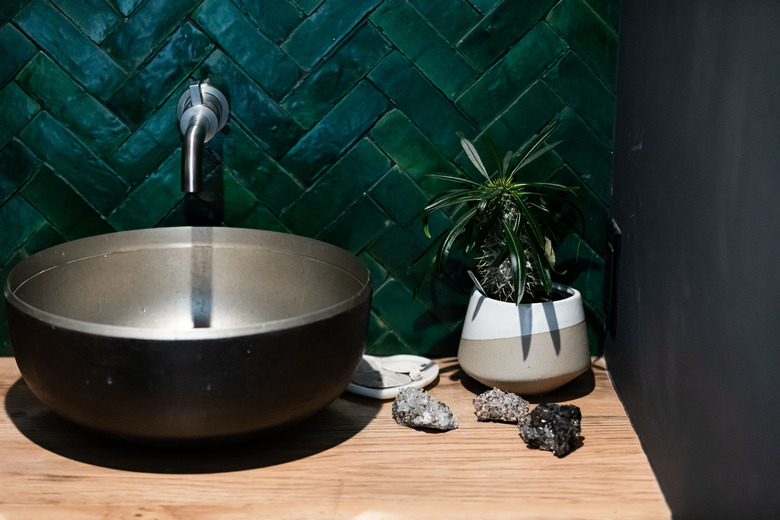
Whether you choose a vessel sink to add a touch of aristocratic flair to your bathroom or you have more functional motivations, the good news for the DIY enthusiast is that vessel sink installation is easier than it is for any other type of sink. Unlike an undermount bathroom sink, which you install from underneath the countertop, or a fully-recessed drop-in sink, a vessel sink either sits on top of the countertop or is partially recessed inside it, and you can use one on any type of vanity, even a repurposed antique dressing table if you want.
Vessel sinks come in many shapes, and they are made from a variety of materials. You can choose an oval or circular sink made from glass, copper or ceramic; a rectangular one made from porcelain, cast iron or stainless steel; or even one with an irregular shape hewn from wood burl. If the sink has an irregular shape, you don't have to worry about cutting a matching hole for it — just secure it to the countertop with silicone adhesive and the sink's drain assembly will hold it in place.
Two Methods of Vessel Sink Installation
Two Methods of Vessel Sink Installation
The classic vessel sink sits on top of the vanity and gives the impression of a freestanding washbasin. The main drawback of this configuration is that it raises the sink rim to a height that may not be comfortable for everyone using it. You can mitigate this deficiency by lowering the countertop, but that isn't always possible or practical. A countertop much lower than the standard 32 inches, as specified by List Vanities, can be difficult to use.
The alternative is to partially recess the sink to lower the rim. The difference between this vessel sink installation method and the top-mount method is that instead of simply drilling a 1 1/2-inch hole for the drain, you have to make a cutout just as you would for any other type of sink.
Installing a recessed vessel sink only works with sinks that have a regular oval or round shape, are wider at the rim than at the base and have a smooth outside surface because any texture on the outside will create gaps at the interface between the sink and the countertop that could allow water to seep through. Bathroom Vessel Sinks warns that the sink should not be made of glass or a similarly fragile material because the weight of a glass vessel sink can put stress on the sides and cause it to crack.
You can fit a partially recessed vessel sink on a smaller countertop area than a comparable drop-in or undermount sink, and it occupies less space underneath the bathroom vanity countertop as well. Recessing doesn't offer the same design benefits as mounting a vessel sink on top of the vanity top, though, and a recessed vessel sink installation is more akin to that of a conventional drop-in sink than that of a top-mount vessel sink.
Choosing a Faucet for a Vessel Sink
Choosing a Faucet for a Vessel Sink
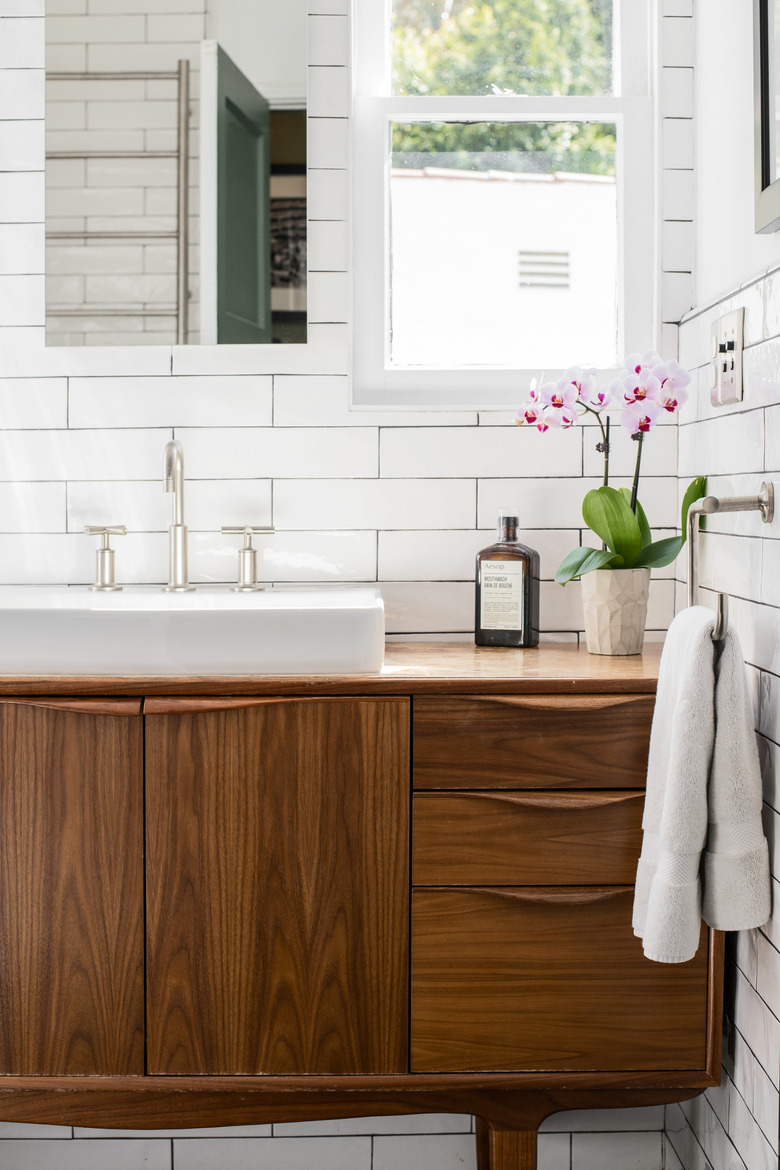
Most vessel sinks are just that — vessels — and have no mounting holes for a faucet and a rim that's too high for a standard counter-mount bathroom faucet. You can install a wall-mount faucet or a high-arc counter-mount one, and a number of manufacturers supply vessel faucets, which are a third (and probably the best) option.
A vessel sink faucet isn't the same as a conventional high-arc one. Instead of a high, looping spout, it has a long body that brings the spout just above the sink rim, which reduces splashing that occurs when the spout is too high. You can choose a brass or rubbed bronze faucet to complement your glass or stone vessel sink, and for an extra touch of class, you might also select a waterfall faucet with an open spout.
Things Needed
-
Faucet
-
Faucet supply hoses
-
Sink drain assembly
-
Plumbers' putty
-
Silicone caulk
-
Drain tailpiece
-
Pop-up stopper assembly
-
2 x 1 1/2-inch trap adapter
-
Plastic pipe cement
-
Locking joint pliers
-
Caulking gun
-
Hacksaw
-
Wrench
Warning
Before you begin your vessel sink installation, turn off the water supply to your sink to avoid leaks and flooding.
Top-Mount Vessel Sink Installation Procedure
1. Install the Faucet
If you've chosen a wall-mount faucet, you'll complete that installation independently of the sink installation. If you've chosen a countertop faucet, it's easier to install it before you install the sink. Insert the faucet posts through the predrilled holes in the countertop and secure it with the mounting nuts supplied with it, tightening the nuts with locking joint pliers. Connect the flexible supply lines to the faucet ports and tighten them with pliers.
2. Mount the Sink Drain Assembly
A vessel sink drain typically comes with the tailpiece, which is the vertical length of pipe extending down from the drain opening, already attached. However, in some cases, you may have to screw this on after installing the drain. Start the vessel sink installation by packing the underside of the sink strainer with plumbers' putty and inserting the tailpiece or the threaded end of the drain through the sink drain hole. Don't screw on the retaining nut yet.
3. Place the Sink
Use a caulking gun to run a bead of silicone caulk around the drain opening in the countertop and on all parts of the sink that will be in contact with the countertop. Space the beads by several inches on a sink that has a flat bottom. Insert the threaded end of the strainer through the hole in the countertop, fine-tune the position of the sink, slip the gasket onto the strainer and tighten on the mounting nut with locking joint pliers to hold the sink in place. Wait overnight for the caulk to set.
4. Screw On the Drain Tailpiece
Screw the tailpiece onto the strainer threads (if it comes separately) and tighten it hand-tight. The tailpiece and drain assembly are often supplied with the faucet, and if the kit includes a pop-up drain stopper that connects to a lift rod on the faucet, the tailpiece has a hole for the stopper lever. Make sure this hole is facing the back wall when the tailpiece is tight.
 Sanford Creative
5. Connect the Stopper and Install the P-Trap Assembly
If the faucet comes with a pop-up assembly, screw the stopper lever into the tailpiece and connect it to the faucet lift rod with the perforated metal strip and screws that are supplied.
Cut the tailpiece and trap arm to the proper lengths using a hacksaw to make the P-trap fit in such a way that the trap arm, which is the horizontal length of pipe that goes from the trap to the drainpipe, has a slight downward slope (at least 1/4 inch per foot) toward the drain. Glue a 2 x 1 1/2-inch trap adapter onto the drainpipe in the wall using plastic pipe cement. This is a fitting with the same compression connections as the ones on the P-trap assembly.
Slide compression nuts and plastic flanges onto the tailpiece and trap arm, insert the tailpiece into the mouth of the trap and the trap arm into the trap adapter and tighten the nuts hand-tight.
6. Hook Up the Water Supply
Screw the faucet supply hoses to the shutoff valves on the water supply lines and tighten them with a wrench. Turn on the valves and check for leaks in the supply connections. Fill the sink, empty it and watch for leaks in the drain assembly. Tighten any connections that leak.