Bathroom Shelves: A DIY Homeowner's Guide
Many people forget to include easy-to-access storage space in their bathroom design, and for them, bathroom shelves are an afterthought born from necessity. Sure, there's space inside the medicine cabinet, the vanity and the corner closet for storing towels, toilet paper, cleaning supplies and such, but where do you put small things you need in a hurry, such as cosmetics, toiletries and razors, not to mention decorative items that personalize your space? Until you get some bathroom shelves, you'll probably have a clutter problem around the sink.
You can buy bathroom shelves, of course. You'll find many different styles with a variety of hanging systems, and installing them is a fairly simple DIY project. Making your own, however, is just as easy, with the only added complication being that you might have to cut some wood. Even if you don't want to get out the saw, though, you can still make your own shelves with store-bought or found materials, and they can be just as attractive—if not more so—than premade ones.
 Stephen Paul for Hunker
Some Prime Locations for Bathroom Shelves
Some Prime Locations for Bathroom Shelves
Every bathroom has some spare wall space, but not all of it is good for shelving. For example, you wouldn't want to put shelves anywhere near or behind the entry door, where they could interfere with the door or create an obstacle for someone walking into the bathroom. You also don't want to put shelves high enough to be beyond reach — with the exception of over the door, which can be a great place to store towels. You also don't want to put them on the wall directly in front of the vanity or toilet if it reduces the clear floor space in front of these fixtures to less than 21 inches, which is the minimum required by code.
Suitable places for bathroom shelves include the following:
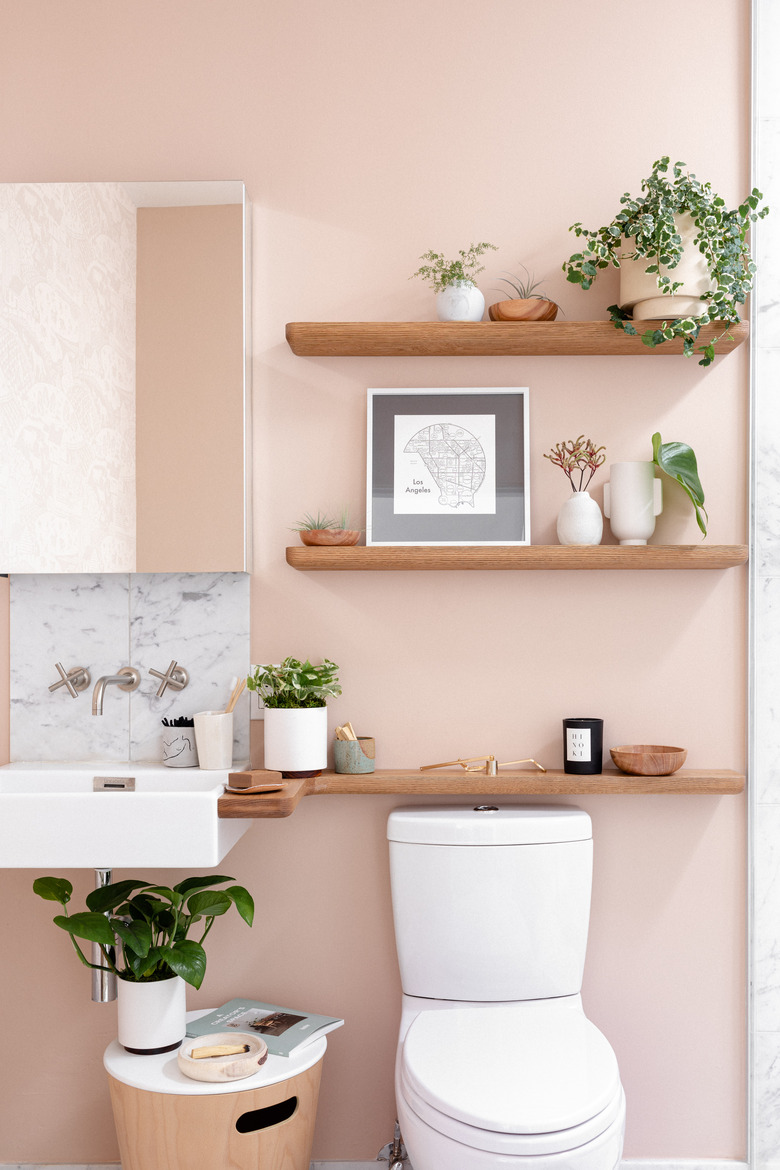
- In the clear wall space behind the toilet. This is seldom used for anything else except maybe a picture, and as long as you install them high enough to allow you to remove the toilet lid, they won't get in the way of anything, and they are easy to reach.
- Just above an existing towel bar. You can even build a shelf system with an integrated towel bar and get rid of the old one for an added home décor boost.
- Any unused wall in a large bathroom that has plenty of clearance for the sink, toilet and shower.
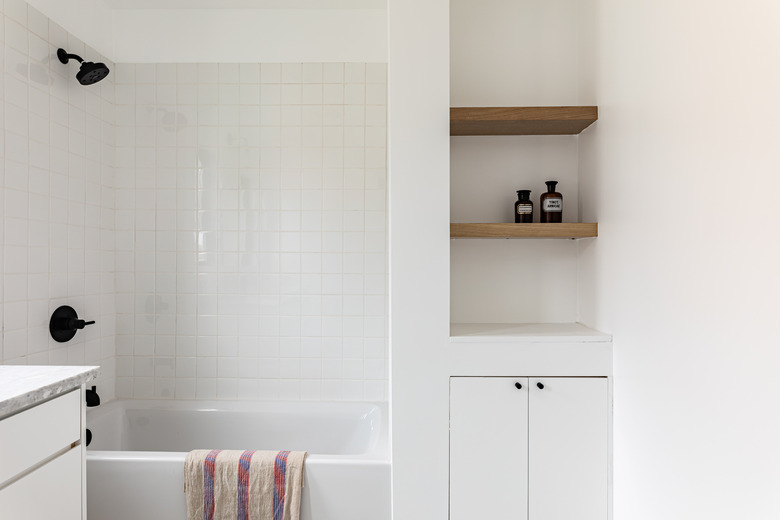
- In a corner inside the toilet alcove or on the wall behind the bathtub.
- On the back wall of the bathtub alcove. If you choose this location, you'll want the shelves to be stainless steel, glass, painted wood or some material that won't get damaged by moisture.
 Hunker in partnership with Acme Real Estate
The Best Materials for Bathroom Shelves (and the Worst)
The Best Materials for Bathroom Shelves (and the Worst)
The materials you would use for living room shelves aren't necessarily the best ones for bathroom shelves. Most bathrooms, even well-ventilated ones, have more moisture than all other rooms in the house except the laundry room, and moisture wreaks havoc on laminated particleboard and medium-density fiberboard. Even though manufacturers commonly use these materials for bathroom vanities, there are better choices for shelves:
- Wood: Hardwoods and softwoods of most species are great for bathroom shelves. Choose cedar or redwood if you like your wood unfinished because they are warp- and mold-resistant. Apply a coat of primer or clear sealer and at least one coat of paint or clear varnish to any other type of wood.
- Glass: For a touch of airy elegance, install a glass bathroom shelf. You need to buy the glass at the store or repurpose it from somewhere else because it must have finished edges, which is something you can't do at home. You can, however, fashion a custom hanging system from wood, acrylic or something more creative. The glass you choose for the shelving should be tempered (for safety) and at least 1/4 inch thick.
- Acrylic: Like glass, acrylic is transparent and fits with virtually any décor, and because you can cut it, drill it and sand the edges, it offers more design options than glass. Create rectangular hanging shelves with curved or straight edges or acrylic floating shelves with a copper frame made from plumbing pipe. Add color to your bathroom and create more storage space for small items by inserting colored acrylic dividers between the shelves.
- Stainless steel: Highlight your tile or stone bathroom with stainless steel bathroom shelves. You'll have to purchase the shelves premade, but you can make your own hanging system, or you can use a store-bought one. Stainless steel wire shelves, which come ready to hang, are some of the most common bathroom utility shelves.
Other metals, such as copper and brushed nickel, make good materials for shelving and hangers. Avoid wrought iron or plain steel unless you think rust will make a good addition to your bathroom décor. Galvanized steel is rust-resistant and makes a great material for shelf hangers, and you can always paint it if you don't like the look of gray metal on your bathroom walls.
A Variety of Hanging Systems
A Variety of Hanging Systems
Perhaps you have a shelf-size alcove in your bathroom already, and if so, it's common to support wood, metal, plastic or stainless steel shelving with brackets nailed or screwed to the studs in the side walls of the alcove. Maximize use of this space by adding a rack to the bottom shelf or screwing hangers into the front edge of that shelf for small towels. You can use the same principles to construct a corner shelf. In most cases, though, you'll want to mount shelving on a flat wall, and such shelving usually comes with its own support system.
The most utilitarian design is one that employs vertical channels with support brackets that hook into slots in the channel. The shelves are adjustable and are intended more for utility spaces than bathrooms, but a small one with 24-inch channels and stainless steel or polyethylene shelving can make a great towel shelf. You screw the channels to wall studs using a level to make sure they're plumb, install the brackets and shelves and you're done.
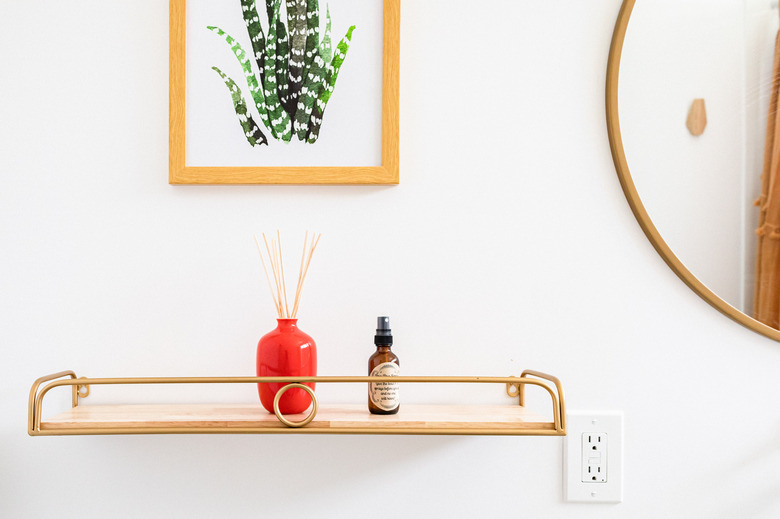
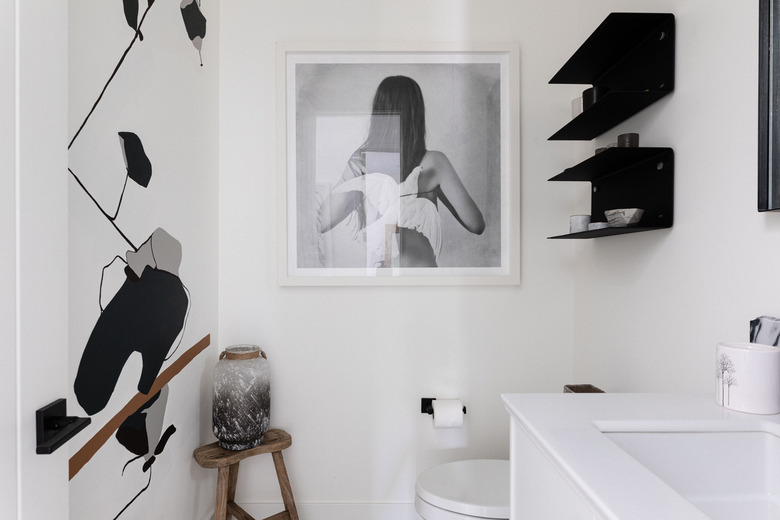
Floating shelves, which rest on partially or fully concealed supports, offer another wall shelf option for bathroom storage, and they are as easy to build as they are to find in stores. The brackets holding the shelving can be as simple as galvanized corner brackets from your local hardware store, as innovative as wall-mounted metal brackets that fit inside hollow plywood shelving or as sophisticated as French cleats, which are interlocking triangular wooden strips. You can make French cleats yourself using hardwood, softwood or, as described by Popular Mechanics, even plywood.
Tips for Hanging Bathroom Shelving
Tips for Hanging Bathroom Shelving
To give the shelves all the support they need, it's best to drive the screws for the brackets into wall studs so the positions of the studs determine the placement of the brackets and the shelves. Standard stud spacing is 16 inches (measured from center to center), and the shelves should overlap the studs by at least 1 inch at both ends, so 18 1/2 to 20 inches is the minimum shelf length if you want to take advantage of the studs.
You don't have to drive the screws into studs, though. You can also use wall anchors, but use anchors that can support a shelving unit that may have heavy items on it. Toggle bolts, molly bolts and other types of winged anchors that lock against the back of the drywall are suitable, but conical plastic screw anchors are not because the outward force exerted by the shelf can pull them out of the drywall.
A spirit level is an essential tool when hanging bathroom shelves because you want to make sure to mount the hanging brackets at exactly the same height to make the shelf level. After marking the height for one bracket, hold the level against the wall, move one end of the level onto the mark, center the bubble, follow along the level to the correct distance for the next bracket and make a mark for it. This is more reliable than measuring the height for each bracket from the floor separately because the floor might not be level.
 Stephen Paul
DIY Bathroom Floating Shelf Ideas
DIY Bathroom Floating Shelf Ideas
A floating shelf for the bathroom is little more than the shelf itself, made from wood, acrylic, metal, glass or any other moisture-resistant material and two or three hangers to hold it depending on its length — generally, any shelf longer than 30 inches should have three hangers. Wood shelves are the easiest to make yourself. Just cut each shelf to the proper length, sand it, stain or paint it the color you want and finish it with clear finish, which is recommended even over paint for a more durable surface.
You can use galvanized corner brackets to support the shelves, painted to match either the walls or the shelves, but they should extend about 3/4 of the width of the shelf to provide the necessary support. You can also purchase painted metal or chrome shelf supports with holes for screws or stops on the ends to prevent the shelf from falling off, but if you're in a creative mood, try this idea suggested at Gabe & Jenny Homes:
Purchase 1/2-inch galvanized steel plumbing pipe nipples from a hardware store that are a little longer than the width of the shelving, along with a cap and a threaded wall-mount flange for each of them. Screw the cap onto one end of the nipple and a flange onto the other, paint each assembled unit and screw the flange to the wall. When they are installed level and properly spaced, these hangers can support any type of shelving, even a glass shelf, as long as you glue rubber padding to each one.
A Wall-Hung Cabinet With Open Shelves
A Wall-Hung Cabinet With Open Shelves
Yet another shelving idea for the bathroom is to buy a shallow cabinet with open shelves to act as a storage rack for toiletries and other small items. This would typically go over the toilet or on the wall next to the vanity, but if you have a clawfoot tub or some other type of open bathtub, it can also act as your bath storage. If you can't find one you like and you have some woodworking tools, it's a fairly easy DIY project to build one.
All you have to do is construct a rectangular, open-ended box with dimensions that will fit your space, screw strips of wood to the sides to act as shelf supports and screw the shelves onto the supports. You can leave the back open and let the wall show through, but the unit is easier to hang and more stable if you add a plywood back through which you can drive the screws. Add decorative trim, sand and paint, and you have custom-built bathroom shelves that probably took less than four hours to make.