DIY Bathroom Vanity Makeover
A bathroom vanity makeover could be in the cards for you if you're on a budget and you're doing a bathroom renovation, reusing an old vanity in a new bathroom or simply salivating over pictures of stylish vanities in a design magazine. A DIY bathroom vanity makeover is not a difficult project. No matter your skill level, you can turn even a standard oak vanity into a thing of beauty for a minimal outlay of cash. Virtually all parts of your old bathroom vanity are replaceable except for the cabinet itself, and your only requirements to complete the transformation are new hardware and attractive paint colors.
Before you start, it's important to make sure your old bathroom vanity is a good candidate for a makeover. Many stock vanities, such as the builder-grade cabinets you get at Home Depot, are made of particleboard with a melamine veneer. If the veneer is lifting, think twice about putting energy into restoring the vanity because there's a good chance that the particleboard is moisture-damaged and beyond saving. If the damage is confined to the doors or drawer fronts, however, the bathroom vanity makeover can still go ahead because you can replace those.
Preparing for a DIY Bathroom Vanity Makeover
Preparing for a DIY Bathroom Vanity Makeover
The first step in any home improvement project is to get an idea of where you want to be when you're finished, and when it comes to a bathroom vanity makeover, the possibilities are limited only by your imagination. You could paint your old oak vanity a solid color to turn it into an art deco showpiece, complete with updated hardware and a new faucet, or you could change its character altogether by removing the doors and giving yourself more open shelf space. If you're tired of the bland laminate top that came with the vanity, you can replace that too.
The internet is replete with images of made-over vanities, so if you're having trouble visualizing your reborn and brand-new-looking vanity, then spend a few hours online. It will be time well spent. Various aspects of the bathroom vanity makeover you'll probably want to consider include:
- Changing the color of the old cabinet
- Replacing the hardware
- Replacing the doors and drawer fronts or removing some of them
- Updating the sink and faucet
- Upgrading the vanity top and backsplash
Few makeover procedures call for the use of carpentry tools or skills unless you want to replace doors and drawer fronts with custom-made ones, and you can always have these fabricated by a pro. If you want to install a new sink or new faucet or you want to replace the vanity top, you'll have to do some basic plumbing that will require at most a pair of locking pliers and a screwdriver. Other than that, the only tools you'll need are a paintbrush and a caulking gun.
 Hunker in partnership with Acme Real Estate
Take Measurements and Buy Supplies
Take Measurements and Buy Supplies
If you're just planning to spruce up your old cabinet with a coat of paint, you need paint and cleaning supplies. Your plans might include replacing the faucet, sink, vanity top or cabinet doors, though, and for some of these, you'll need accurate measurements so you can purchase replacement parts that fit. Use a tape measure to measure the width and length of the doors and drawer fronts and if you're replacing the top, measure the dimensions of the old one from the wall to the front and from one end to the other.
Replacing an existing sink with a smaller one without replacing the vanity top isn't possible, but you can replace it with a larger sink by making the cutout bigger. If you have your eye on an undermount sink, keep in mind that it will only work with a countertop that has a solid edge, so if you're planning on keeping your laminate countertop, you'll need a top-mount sink. When replacing a top-mount sink with another top-mount sink, the easiest option is to use a sink of the same size, and you'll need to measure the maximum length and width of the existing one from under the vanity top; don't include the rim.
 Sanford Creative
How to Replace a Sink and Faucet
How to Replace a Sink and Faucet
Before you can remove the sink and faucet, you have to undo some plumbing connections, and this is usually easier if you remove the doors from the vanity cabinet. If you're going to replace the vanity top, however, it's best to wait until you take it off before you remove the sink and faucet. To make the necessary disconnections, do the following:
- Unscrew the compression nuts holding the trap assembly to the sink tailpiece and the waste inlet by hand or by using pliers and then pull down the P-trap gently and tip it into a bucket to empty it.
- Disconnect the pop-up stopper by squeezing and sliding the clamp off the stopper lever.
- Turn off the faucet shutoff valves and unscrew the hose connectors using pliers.
If you're leaving the vanity top in place but removing the sink and faucet, then remove the sink first. To disengage it, loosen the retaining clips underneath the countertop, cut the caulk seal around the rim of the sink with a sharp knife and push the sink up from underneath. Once the sink is out, it's easier to loosen the faucet nuts than it is to do it from inside the cabinet, and if the faucet is attached to the countertop, you'll have better access when the sink is gone.
To replace a top-mount sink with another top-mount sink, clean the debris from around the sink opening, lay a bead of silicone caulk on the underside of the sink rim, drop the sink into the hole and attach the clips that come with it according to the manufacturer's instructions. The procedures for installing an undermount vary somewhat by model, so consult the instructions that came with your sink. Most bathroom undermounts are glued to the countertop with silicone caulk (or other adhesive) and may or may not use retaining clips.
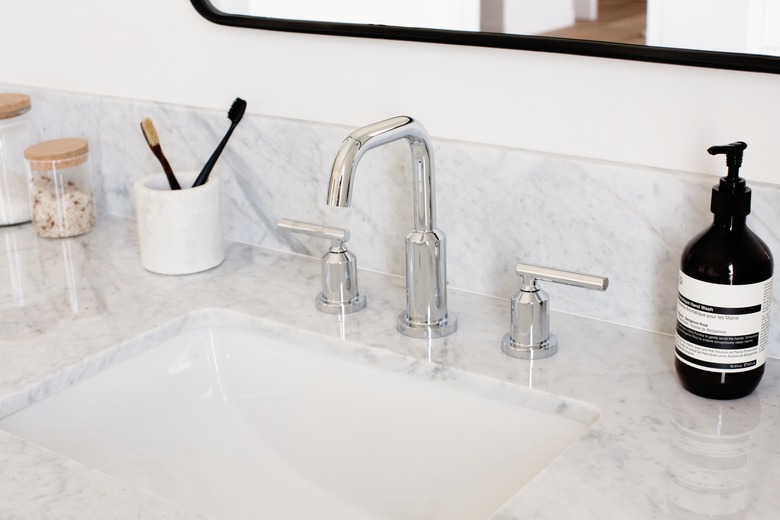
Install the faucet either before you install the sink or afterward by dropping it into the holes on the sink or countertop and tightening the retaining nuts with pliers. Finish by connecting the faucet supply hoses (which HomeAdvisor recommends replacing with new ones), the pop-up stopper and the P-trap.
Replacing the Bathroom Countertop
Replacing the Bathroom Countertop
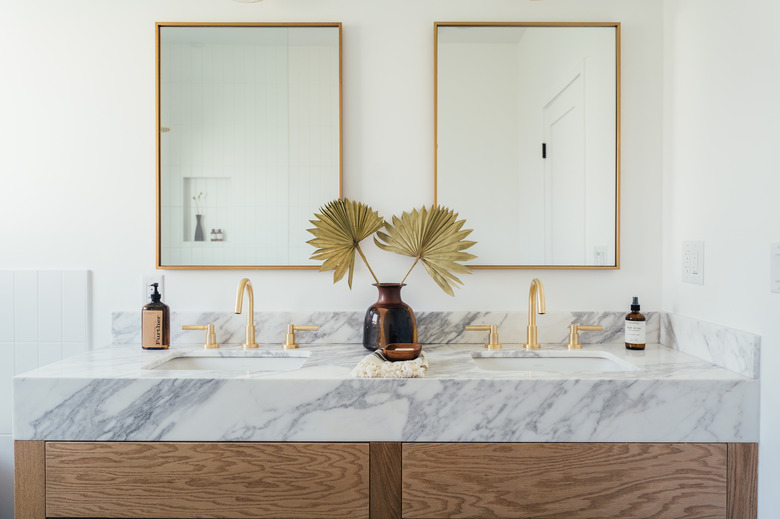
Nothing upgrades the appearance of an old vanity like installing a new countertop, and doing so gives you more flexibility in the choice of sink and faucet. For example, you can completely change the look of the vanity by equipping it with a vessel sink, which requires a 1 1/2-inch hole for the drain rather than a sink cutout. If the cabinet is long enough, you can install two sinks instead of just one. Both options require a new countertop.
Bathroom vanity tops are typically glued or caulked to the cabinet. To remove one, you usually have to chip at the glue with a chisel or paint scraper and hammer or cut through the old caulk with a utility knife and then pry off the top with a pry bar. There may also be fasteners, so look carefully with a flashlight and remove any you find. Don't forget to cut the caulk between the edge of the vanity top and the wall before you start prying.
Before dropping on the new top, scrape the old glue or caulk off the top edge of the cabinet with a chisel and then apply fresh silicone caulk and set the new top in place. While the adhesive is setting, seal the edges of the countertop that meet the wall with silicone caulk. Connect the drain for a top-mount sink, which you've already installed, and the faucet supply hoses, and you're done. If you're installing a vessel sink, do that after you've installed the vanity top. Undermount sinks may be installed before or after the top is in place depending on the installation system.
 Stephen Paul for Hunker
Paint Bathroom Cabinets Correctly
Paint Bathroom Cabinets Correctly
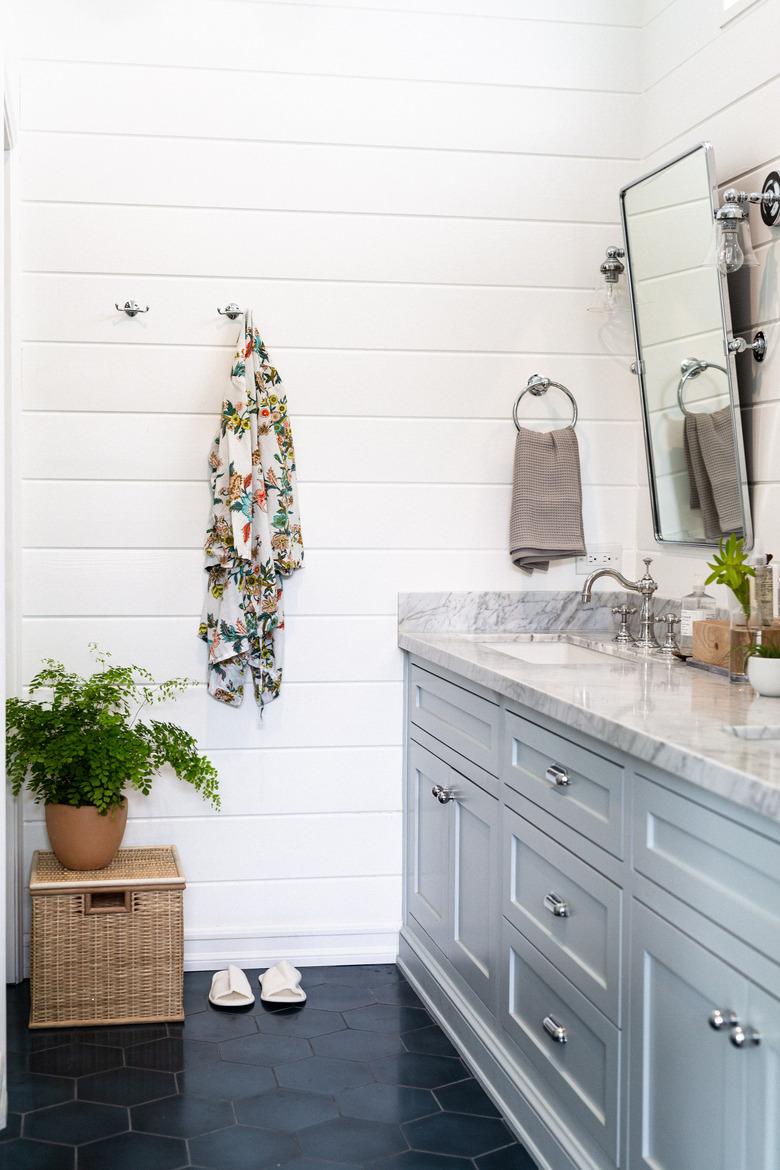
The most noticeable DIY bathroom vanity makeover is also the easiest and potentially the most fun and creative, and that's painting the cabinet, doors and drawers. This is the procedure with the most potential for going wrong but not if you follow the proper regimen. It's also important to use the right paint, which according to Sarah Joy isn't chalk paint because it doesn't hold up well in bathroom conditions. A high-quality wood enamel paint is the best choice.
If you're a creative DIYer, painting is one project you can really enjoy, and there's a procedure that helps ensure that your efforts produce lasting results.
- Take all the drawers off the cabinet and remove the doors. If you're going to replace the drawer fronts and doors with custom-made ones, now is the time to do it so you paint everything at the same time.
- Mix a solution of 1/2 cup of trisodium phosphate (TSP) per gallon of warm water or do as Bitterroot DIY recommends and use Formula 409 cleaner. Use the cleaner to wipe down all the parts of the vanity you plan to paint. Wipe it again with clean water and let the surface dry. Be sure to wear gloves if you use TSP because it's caustic enough to give mild skin burns.
- Sand everything with 150-grit sandpaper. This step is important because it removes flaky and loose material that could cause peeling and could turn your project into a blotchy mess.
- Apply a coat of high-solids wood primer. Skipping this important step could also result in a blotchy mess because only a coat of primer guarantees paint adhesion to prefinished surfaces.
- Wait for the primer to dry and then scuff it lightly with 220-grit sandpaper to provide an ultra-smooth surface for the final finish.
- Apply one coat of paint with a 2-inch brush or use a spray gun. Spraying produces a smoother final finish, but stroke marks from a paint brush create a texture that you might find desirable, so it's your choice. Let the paint as directed.
- Scuff the first coat of paint with 220-grit sandpaper, wipe down the surfaces with a damp cloth and apply a second coat.
If you use wood enamel, the paint provides the final finish, but if you need more paint colors that you can only find in wall paint or if you stain or distress the wood, apply a protective final coat of clear polyurethane to prevent the color coat from wearing off.
New Hardware Completes Your DIY Bathroom Vanity Makeover
New Hardware Completes Your DIY Bathroom Vanity Makeover
Drawer pulls and door handles shouldn't be an afterthought because their shape and the materials from which they're made complete the design motif. If you're replacing single-screw handles with some that have two screws, you may have to shift them away from the holes drilled for the previous ones. In this case, be sure to fill the existing holes before you paint.
It's crucial to get two-screw handles straight. Measure the hole distance, make two marks on the door or drawer and use a tape measure and a square to make sure they are aligned with the door's edges. It's best to do this after you've hung the doors and installed the drawers so you can double check the positions of the holes by eye before you drill.