Wood Vanity Tops: What You Should Know
A wood vanity top can bring warmth to a bathroom, which is a room that usually needs it, but wood can be a risky option in the room you use for your daily showers. A bathroom has more moisture than any room other than the laundry room, and if you've ever seen a buckled hardwood floor, you know what moisture can do to wood. However, if you take the time to protect and waterproof your wood vanity top, there's no need to let worry stop you from enjoying your stylish, if somewhat unconventional, choice of countertop materials.
Pros and Cons of a Wood Vanity Top
Pros and Cons of a Wood Vanity Top
If you're planning to install a wood vanity top, you should be prepared for some bad news, but there's also good news. First, the good news:
- Wood is warm: Wood tones bring warmth to a room that is typically punctuated by metal, glass, stone, tile and vinyl, and it isn't just visual warmth. Wood has good heat-retention properties and actually feels warmer — not to mention softer — to the touch.
- Wood offers design flexibility: You can cut, shape and sand solid wood, and you can also stain it. If your tastes run to the luxurious, you can build a countertop from exotic hardwood and bevel or shape the edges with a router, while a simple redwood slab might do the job for the more rustic-minded. Live-edge wood slabs, which are fashioned with curved edges formed from the natural contours of the wood, are popular in designer bathrooms.
- Wood won't break the bank: Compared to some other materials, wood is inexpensive. A prelaminated African mahogany slab that you can work into your own design costs about $150 compared to $500 for custom-cut marble and from $50 to $120 per square foot for a fully installed solid-surface countertop, according to data from Home Advisor. You can buy precut countertops or slabs that you cut yourself at big box stores, such as Lowe's, at lumber companies and stone suppliers. Some of the most unique and creative are available on DIY sites, such as Etsy.
Now, the bad news:
- Wood is vulnerable to moisture: More than any other material you should choose for a vanity top, wood is adversely affected by the steam from the shower and the condensation that collects in a typical bathroom not to mention daily puddles of water left on the vanity top. You can mitigate this vulnerability by properly sealing the wood and keeping the bathroom ventilated.
- Wood requires maintenance. The finish on a wood vanity top degrades over time and needs more maintenance than other materials to keep it shiny and to protect the wood. It may also need to be refinished periodically.
- Wood suffers dent and scratches: Being a relatively soft material, wood sustains more impact damage than other materials. While fixing the damage is a DIY project, you may need to refinish the wood countertop to get rid of dents and scratches completely.
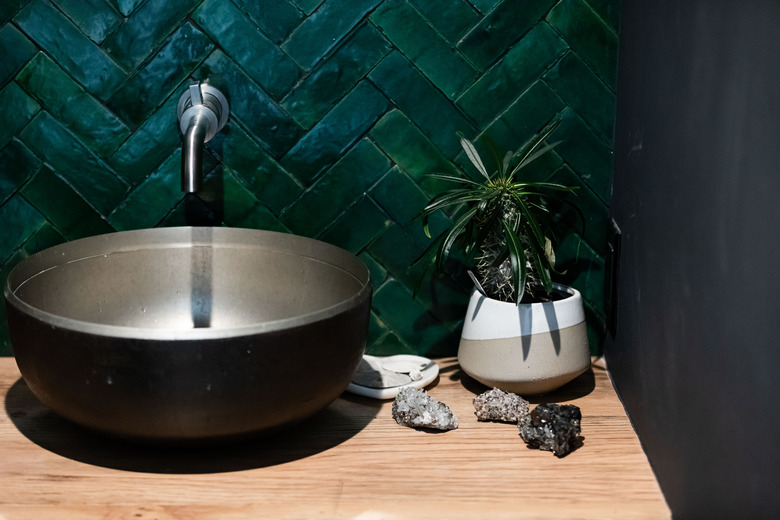
 Stephen Paul for Hunker
The Difference in Grain Orientation
Almost every wood countertop is made from lengths of wood laminated together. It's rare to find a countertop made from a single slab, partly because few tree trunks are wide enough for that and partly because warping is harder to control. The laminate orientation determines the stability and appearance of the final product.
- End-grain countertops are fabricated by gluing together short pieces of lumber with their ends facing up to form a 1 1/2-inch or thicker slab. This gives the countertop the appearance of a chess board, and because end grain is very hard, it makes the surface more durable. This is the typical laminate orientation for butcher block cutting surfaces.
- Edge-grain countertops are constructed by gluing boards together facing each other with their edges facing up to create a surface with multiple seams running parallel to the front of the countertop. This type of surface, which is typically 1 1/2 inches thick, is also durable enough for butcher blocks, and it allows the wood grain to be visible.
- Face-grain countertops are manufactured by laminating 1 1/2-inch-thick wood planks edge to edge. This laminate orientation features the wood grain, but it's also the one most vulnerable to impact damage and warping, and face-grain countertops are the ones most in need of a waterproof finish. This is the orientation that people most often choose for a wood vanity top because it's the most attractive.
In addition to laminating solid wood planks, you can also laminate thin strips of wood or some other material onto a plywood or fiberboard core, and when designers speak of laminated wood countertops, this is what they're referring to. A wood laminate countertop uses expensive hardwood only for the top layer, and it is a more stable product than a solid wood, face-grain material. Manufacturers can seamlessly build in such features as a backsplash or an overhanging front edge and make them continuous with the countertop surface.
The Best Wood for a Bathroom Vanity Top
The Best Wood for a Bathroom Vanity Top
A bathroom is no place for a softwood, such as pine or fir, that warps easily, sustains dents and is susceptible to rot. The exception is redwood, which grows large enough to produce wide slabs and has a natural ability to resist rot and warping. In general, though, you'll want a hardwood and preferably a domestic one if you're making your bath vanity cabinet top yourself.
Wood hardness is measured on the Janka scale, which ranks species according to how many pounds of force it takes to compress a 1/2-inch steel ball halfway into the wood surface. On a sample scale available at Bell Forest Products, domestic hardwoods, such as birch, walnut and oak, score between 1,000 and 1,300 pounds, while hard maple scores around 1,500. This is nothing compared to exotics such as purpleheart and rosewood, which can score as much as 3,000, but keep in mind that while hardwoods may be more durable, they're also more difficult to work with.
You might want to stay away from exotic species if you're doing the work yourself. An exception is mahogany, which has a Janka rating similar to walnut, birch and oak. Not only are domestic hardwoods easier to work with, but they are also less expensive, and they offer plenty of variety. Blonde species, such as birch and maple, bring light into a dark space, while darker ones, such as walnut and cherry, offer swank and class. If your tastes run to the exotic, though, you're better off purchasing a precut vanity top.
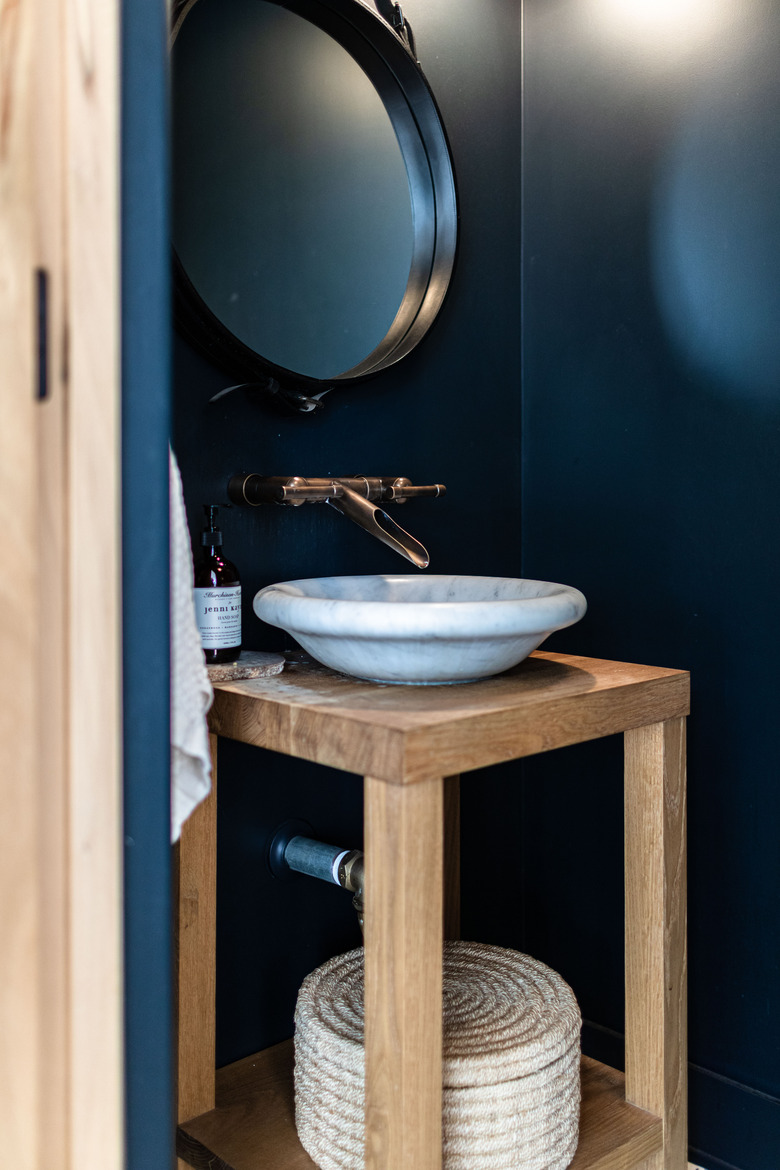
 Mitch Geiser
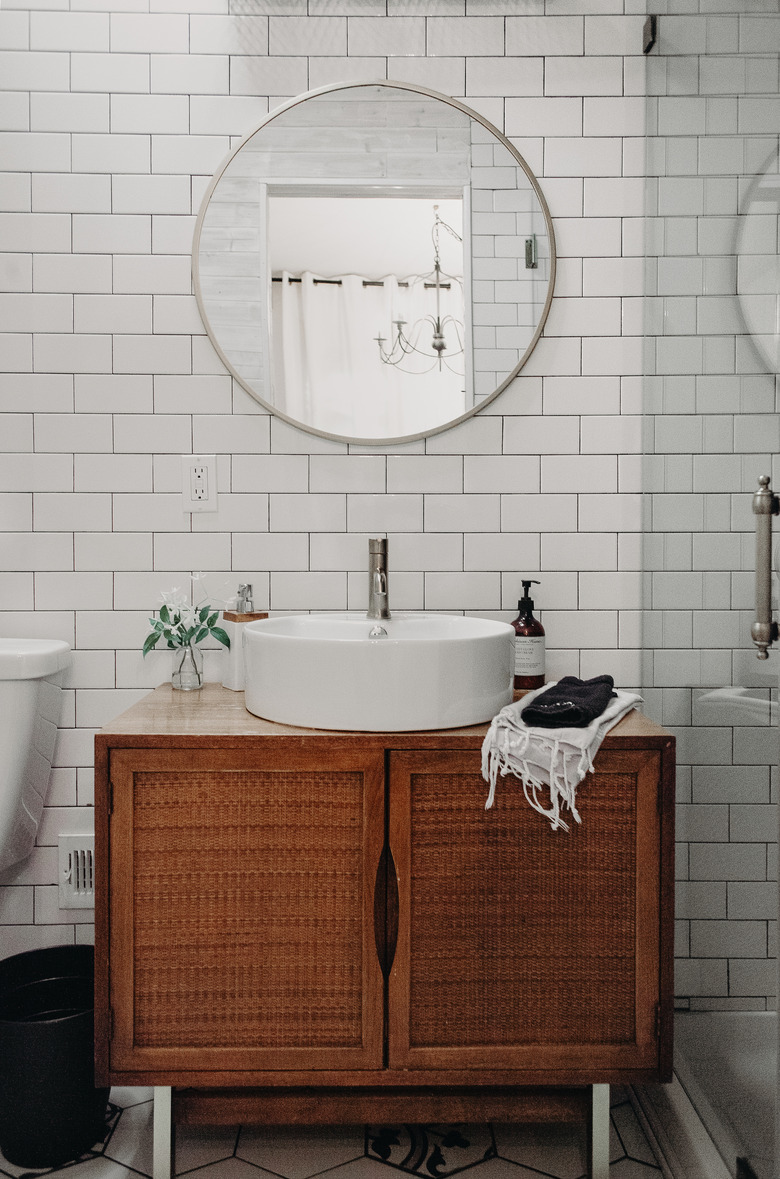
Choosing a Sink for a Wood Vanity Top
Choosing a Sink for a Wood Vanity Top
You can install any type of sink in a wooden countertop, but the best choice is probably a vessel sink, which sits on top of the counter instead of inside or underneath it. Cutting a hole for an undermount or top-mount sink leaves edges that are vulnerable to moisture damage, and while you can prevent this with extra coats of finish, you have to stay vigilant. After all, the sink is where all the water goes.
A vessel sink requires no cutout other than a small opening for the drainpipe, and once the sink is in place, you can caulk around the base to prevent water from seeping underneath it and through this opening. A vessel sink is a stylish addition to any bathroom, but it creates two problems. One is that it extends several inches above the surface on which it's sitting, so you'll probably have to lower the countertop to ensure comfortable access to the sink, and the other is that it only works with a high-arch or wall-mount faucet.
No matter what type of sink you install, the material should highlight the wood and the rest of the surroundings without clashing. Traditional materials, such as stainless steel and porcelain, work in most situations, but other materials can add punch without being overbearing. They include:
- Clear, tinted and etched glass, which are common vessel sink materials
- Black composite, which provides a pleasing contrast with blonde wood species, such as birch and maple
- Copper, which coordinates with deep, reddish wood tones, such as mahogany and rosewood, to provide the ultimate in warmth
Finishes for a Wood Vanity Top
Finishes for a Wood Vanity Top
When it comes to durability, no finish can rival epoxy, and this is the one contractors tend to recommend, but epoxy isn't perfect. It can be difficult to apply properly, and it leaves a thick surface layer that reflects light and deflects attention from the wood. In the plus column, it doesn't stain or scratch easily, and you can often repair surface damage by applying another coat.
Polyurethane is easier to apply than epoxy and provides almost as much protection, and if you don't want glossy sheen that competes with the wood grain, you can choose a semigloss or matte formulation. Polyurethane forms a surface layer that seals out moisture, and if it gets damaged, you can fix it without much trouble.
As far as penetrating oils are concerned, they are best used by themselves in rooms other than the bathroom, where the natural look and feel of the wood they make possible are better appreciated. You can, however, use a penetrating oil as a sealer and undercoat for polyurethane or a more maintenance-intensive rubbed wax finish. Waterlox is a well-known tung oil sealer that is popular for such applications.
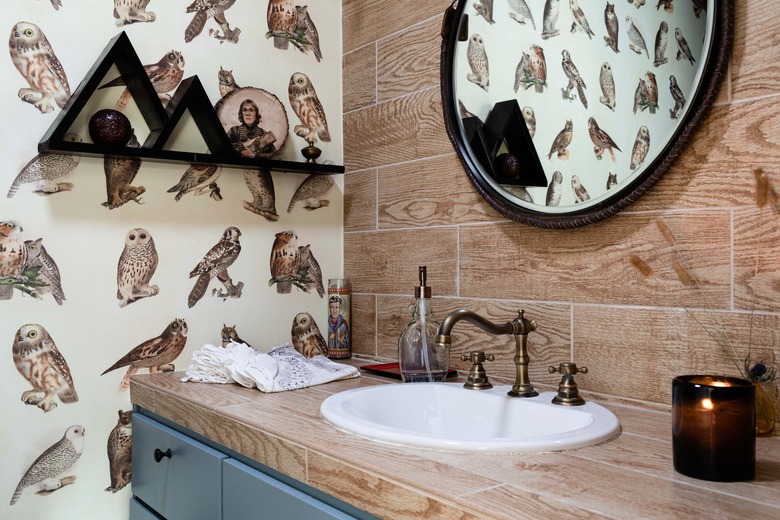
 Stephen Paul for Hunker
How to Finish a Wood Vanity Countertop
How to Finish a Wood Vanity Countertop
It's a good idea to seal both sides of a wood vanity top in the bathroom, so during your bathroom makeover, put aside a little time to apply a coat of finish to the top and underside of the vanity top and let it dry before you attach the top to the vanity. This helps ensure the top won't get stained while you're working. Once the top is in place and before you install the sink, apply a second seal coat to the surface, paying special attention to the front and side edges and edges around the sink cutout.
Once the sink and faucet are in place, you're ready for the final finish. Scuff the seal coat with 180-grit or finer sandpaper and apply the finish coat with a brush, going along the grain, brushing into previously applied material rather than away from it and lifting your brush gently and gradually at the end of each stroke. If you follow this protocol, you probably won't need more than one finish coat, but if you do, let the previous coat dry and scuff it to get the smoothest-possible finish.
Water-based polyurethane isn't the best choice of finishes because of its propensity to leave a plastic-like film, but it does dry quickly, and its low volatile organic compound content makes it safer to use in a small bathroom. If this is your choice, avoid agitating the can or stirring vigorously with your brush. Doing so causes the liquid to form bubbles that can harden into the finish if you aren't diligent about brushing them out.
References
- Armani Fine Woodworking: African Mahogany Butcher Block Countertop – Customize & Order Online
- HomeAdvisor: How Much Does It Cost To Install A Solid Surface Countertop?
- Consumer Reports: Sink Buying Guide
- Home Style Choices: Wood Countertops Beautiful and Functional
- Bell Forest Products: Janka Hardness