How To Install A Bathroom Vanity
Installing a new bathroom vanity may seem like a daunting DIY project, but it isn't as difficult as it seems, and it's nowhere near as challenging as installing kitchen cabinets. A typical bathroom vanity is relatively small and light, so it's easy to move around, and there isn't much effort involved with securing it in place, attaching the countertop (if the vanity doesn't come with a preinstalled one) and hooking up the sink. No plumber is needed.
Depending on the vanity you choose, you may have to put some effort into assembling it, but because bathroom vanities are small, they usually come fully assembled. If you're still shopping for a vanity, your best bet is a fully assembled one because it comes with a workmanship guarantee. Prebuilt cabinets are usually more expensive than ready-to-assemble ones (but not by much), and the warranty is usually worth the extra money.
What to Look for When Purchasing a Bathroom Vanity
What to Look for When Purchasing a Bathroom Vanity
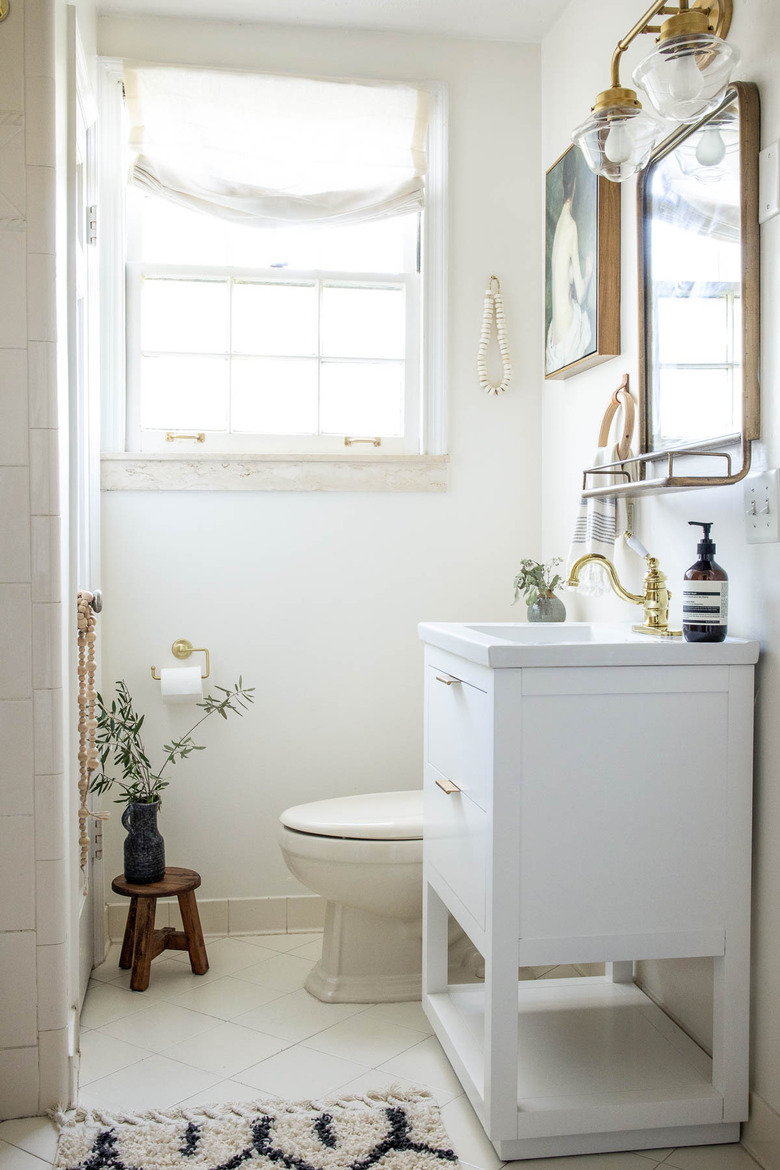
First and foremost, you need a vanity that fits the available space in the bathroom. Be sure to measure that carefully, including required clearances for the toilet. According to most building codes, the center of the toilet must be at least 15 inches from the edge of the vanity countertop, and the front edge of the vanity must be at least 21 inches from an opposing wall; 30 inches is preferable. If you have a small bathroom, you may prefer or even need a vanity that measures 18 inches from front to back instead of the standard 24 inches.
 Stephen Paul for Hunker
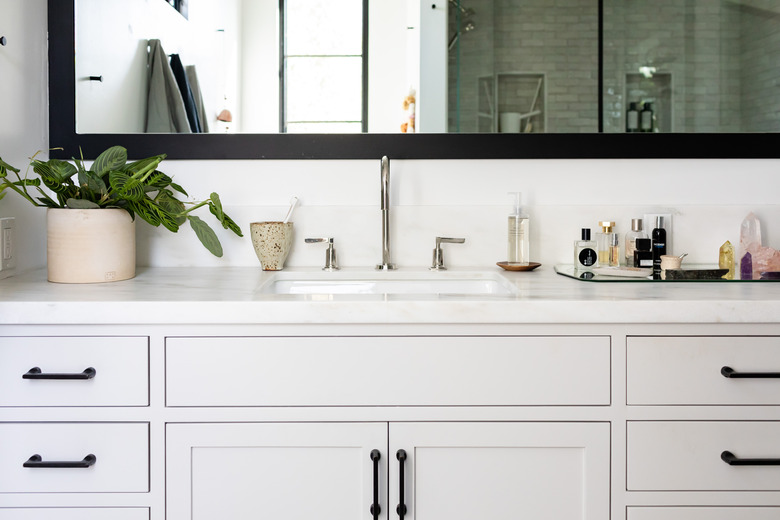
Both midrange composite and higher-end, solid-surface countertops often have a molded, or integrated, sink, whereas budget laminate tops just have a hole for the sink, and you install the sink separately. If your plumbing rough-ins are offset a long way from the center of the planned position of the vanity or you want more space on one side of the vanity top than the other, you might consider getting a countertop with no hole and cutting it yourself.
Things Needed
-
Wooden shims
-
2 1/2-inch screws
-
Plumbers' putty
-
Silicone caulk
-
Faucet
-
Sink drain assembly
-
Braided water supply hoses
-
P-trap assembly
-
Tape measure
-
Pencil
-
Level
-
Drill
-
Hole saw
-
Reciprocating saw
-
Stud finder
-
Utility knife
-
1/8-inch wood drill bit (as needed)
-
Masonry drill bit (as needed)
-
Pipe wrench
-
Adjustable pliers
How to Install a Bathroom Vanity
1. Assemble the Cabinet (as Needed)
If you purchased a ready-to-assemble cabinet, put it together. You'll need its full dimensions to place it properly, and you can't get those until it's assembled. Take all the drawers out to make it lighter and easier to maneuver.
2. Draw the Outline on the Wall
Use a tape measure to measure the length and height of the cabinet and draw the outline on the wall using a pencil. Check the horizontal line with a level to make sure it is horizontal or it might not line up with the cabinet.
3. Make a Cutout for the Plumbing
Measure the locations of the drain stub-out and the water shut-off valves and transfer those to the back of the cabinet if it has a solid panel. You can cut three individual holes with a drill and a hole saw, but if the valves and drain are close together, it's usually better to cut out a rectangular section through which they all will fit using a reciprocating saw. When using a hole saw, make the holes larger than you need to allow room for adjusting the cabinet's position. Skip this step if the back of the cabinet is open.
4. Locate the Wall Studs
Use a stud finder to locate the wall studs and mark their positions on the horizontal part of the outline you drew on the wall. You'll need these marks to fasten the vanity to the wall.
 Nicole Mason
5. Position the Bathroom Vanity and Level It
Slide the vanity cabinet into position inside the outline you drew and check the level, both lengthwise and depthwise. A bathroom vanity sometimes has adjustable feet, and you can use them to adjust the level until the bubble is centered in both directions. If there are no adjustable feet, tap wooden shims under the vanity base where you need them so that the cabinet is level.
6. Fasten the Bathroom Vanity to the Wall
Drill 1/8-inch pilot holes through the back of the cabinet at each point where it intersects a stud. Drive a wood screw into each hole and into the stud. Use screws long enough to pass through the cabinet, the drywall and at least 1 inch into the studs. Two-and-a-half-inch screws usually work. Trim any shims flush with the cabinet using a utility knife.
Tip
If the wall is tiled, use a wood bit to drill through the cabinet and then mark the hole locations on the tile. Move the cabinet out of the way and drill through the tile with masonry bit or tile bit that is slightly larger than the screw threads (to prevent the screws from cracking the tile). When you've drilled through the tile, switch back to the smaller wood bit to drill pilot holes into the wall studs.
7. Install the Sink, Drain and Faucet
Attach the faucet and install the sink drain fitting before setting the countertop. Use enough plumbers' putty when attaching the drain fitting to the sink drain opening that it oozes out from all sides when you tighten the nut with a pipe wrench or adjustable pliers.
If the sink is separate from the countertop, install that as well following the manufacturer's installation instructions. When you have a bathroom vanity with a preinstalled top and sink and the cabinet doesn't have a back, the best time to install the faucet and drain assembly is before you set the cabinet.
8. Set the Top of the Vanity in Place
Your vanity countertop may come with a fastening system and instructions for using it, but in most cases, all you need to hold it in place is silicone caulk. Spread a generous amount of caulk on the top edge of the cabinet, lower the countertop in place with the help of another person and wait for the caulk to cure.
9. Seal the Edges of the Countertop
Use silicone caulk or a similar sealant to seal the edges of the countertop wherever it meets the wall, especially the top and sides of the backsplash. If you installed a drop-in sink, you should also seal around the rim of the sink.
10. Connect the Faucet to the Water Supply
Use flexible braided supply hoses to connect the faucet inlets to the shut-off valves. Use hoses that are long enough to reach but not much longer. If you have to use long hoses, loop them to make sure they don't kink.
11. Hook Up the Drain
Screw a tailpiece, which is a vertical length of pipe that comes down from the drain, to the strainer in the sink drain, which has threads for it. Insert the other end of the tailpiece into a P-trap, which is a curved pipe with an inverted "P" that holds water to block sewer gases. Secure the joint with a compression nut and tighten it by hand or with adjustable pliers. Connect the other end of the P-trap assembly to the waste pipe stubbing out of the wall, which is part of the drain system that leads to the sewer, using the same type of compression nut.