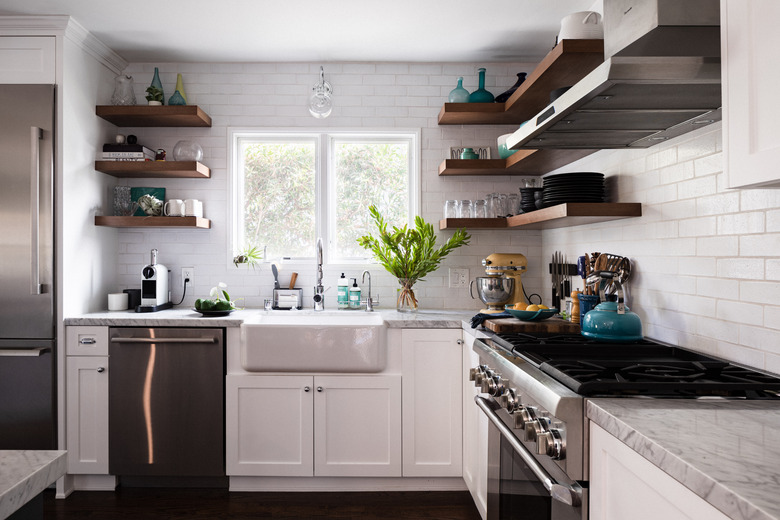
How To Install A Farmhouse Sink
Farmhouse sinks can add great style and improved functionality to your kitchen, but installing a farmhouse sink is a much more involved process than adding a standard drop-in sink. In fact, you'll not only need to remove part of the front of the cabinet to make room for the apron front of your new sink but you'll also need to add supports to bear the weight of the sink. This is particularly important since some of these sinks can weigh as much as 300 pounds, which is why this project requires at least two people to lift the sink into place.
How to Choose a Farmhouse Sink
How to Choose a Farmhouse Sink
The number one thing to keep in mind when ordering a farmhouse sink is that it must fit in your cabinet. To properly fit, your cabinet must be at least 3 inches wider than the sink. Also, the space between the top of the cabinet and the cabinet door opening has to be at least 1/4-inch larger than the height of the sink so that the sink doesn't interfere with the doors.
Aside from size, you'll also need to keep in mind what mounting style you'd like, as this will drastically impact the installation process. The majority of farmhouse sinks are undermount style, meaning the completed installation will sit below the countertop surface. That being said, farmhouse sinks can also be installed flush with or above the countertop.
While a flush-mount farmhouse sink is the easiest to clean, many people do not like how the sealant is visible. It's possible to DIY this project by adjusting your measurements to include the height of the counter as well as the height of the cabinet, but because the installation process must be more precise, many people prefer to hire a professional when installing a flush-mounted apron-front sink.
If you prefer a farmhouse kitchen sink that's installed above the counter, you must specifically buy a top-mount sink. These sinks are the easiest to install, though they make cleaning your counters more difficult than the other two options. Top-mount apron-front sinks can often be installed with no additional support, although it's best to check the sink manual and the weight-bearing capabilities of your countertop and base cabinet first. Aside from not usually requiring supports, the installation process for a top-mount sink is slightly different in that the countertop does not need to be removed.
Things Needed
-
Manufacturer template (optional)
-
Cardboard
-
Shims (optional)
-
Masking tape
-
80-grit sandpaper
-
(1) 2x4 board
-
Construction adhesive
-
Screws
-
Caulk
-
Undermount farmhouse sink
-
Marker
-
Scissors
-
Screwdriver
-
Oscillating saw
-
Tape measure
-
PVC cutter (optional)
-
Pipe cutter (optional)
-
Level
-
Pencil
-
Jigsaw (optional)
-
Straightedge
-
Drill
-
Caulk gun
How to Install an Undermount Farmhouse Sink
How to Install an Undermount Farmhouse Sink
You may be tempted to cut your cabinet or countertop before you actually get the sink in order to expedite the installation process. However, as the Sink Boutique points out, fireclay farmhouse sinks can vary in size by as much as 2 percent, so it's always best to wait until you have the sink in hand before making any cuts.
1. Review the Manual
As with every home improvement project, it's important to review the manufacturer's instructions first. This is particularly true with a farmhouse sink, as some have very specific instructions or precautions to which you need to adhere. For example, some sinks require padding underneath.
Check to see if your new sink comes with a template, which can make the installation process a lot easier. If the sink doesn't come with a template, make your own by putting a piece of cardboard in front of the sink's apron, tracing around the outside of the front with a marker and then cutting the cardboard with scissors so it fits exactly over the front of your sink.
2. Strip Your Sink Cabinet
If you're building a new kitchen or doing a full kitchen remodel, you can skip this step since your sink cabinet will probably already be stripped down, but if you're replacing your existing sink with a new farmhouse sink, you'll need to take everything apart until you're left with just a cabinet box.
- Turn off water supply lines and shut off the breakers to all electrical circuits in the area.
- Disconnect the pipes and unplug the garbage disposal.
- Remove your old sink (this process will vary depending on
the mounting style). - Remove your countertop by unscrewing it and using an
oscillating saw to break or cut it away from the cabinet. You may need a few
friends to help lift off the counter. - Unscrew cabinet doors,
false drawer fronts and hardware.
3. Check Your Plumbing Connections
Check the height of your drainpipe and water inlets to ensure they'll work with your new sink by measuring the height of your sink, adding a few inches to account for drain fittings and the garbage disposal (if you have one) and measuring the height from the top of the cabinet to that distance to see if the pipes are too high. You may need to hire a plumber to move the connections, but if they're just too high, use a PVC cutter or pipe cutter to the right height and then deburr the pipes.
4. Cut the Cabinet Front
Before cutting a hole in the front of the cabinet for the sink apron, use a level on the top of the cabinet face to make sure your cabinet is level and even with the other cabinets next to it. If not, use shims to adjust the cabinet base so it sits level and even.
- Measure and mark the center point of the front of your sink
cabinet. - Center the sink template on the front of the cabinet and tape it
down. - Apply masking tape or painters' tape where you'll be cutting to help prevent
splintering and make it easier to mark. - Trace the template onto the masking tape with a pencil and then
remove the template. - Use a jigsaw or oscillating saw to cut out the outline.
- Sand the cut edges with 80-grit sandpaper until smooth.
5. Add Sink Supports
While it's best to install supports on both cabinet walls and the back of the cabinet, a rear cabinet support is not always possible, as it can interfere with plumbing connections.
- Measure the depth of your cabinet and cut two pieces of a 2x4 board to
that length. If adding a back wall support, measure this width as well, deducting
the thicknesses of the two intersecting side support boards. - Subtract the height of your sink from the interior height of
your cabinet. Measure and mark this distance on the inside of the cabinet box
using a straightedge to create a guide line. Note: Some sinks have a ledge that rests on top of the supports. - Apply construction adhesive to your side supports and glue
them just below the guide line. If using a rear support board, repeat the procedure along the back wall. - Screw the support boards into the cabinet, making sure the
screws do not go through the cabinet wall into the neighboring cabinet box. - Measure the space below the bottom of the horizontal supports and then cut four pieces of 2x4 to make vertical supports for the horizontal pieces. You'll need
an additional two if using a rear support beam. - Glue the vertical supports and then screw them in place.
6. Put the Sink in Place
With a partner, lift up the sink and lower it into place gently. Double check the height and use a level to make sure the sink is level across the top. Use shims as needed to adjust it for level.
How to Finish the Installation
How to Finish the Installation
Because the countertop needs to fit in perfectly with your other countertops and because many counter materials are notably heavy, it is generally best to hire professional counter installers. This step should be completed before the backsplash and faucet are installed. The installers will glue the sink to the counter.
Let the glue cure fully and then install the faucet, drain fittings and garbage disposal as applicable. Connect the supply lines, drain pipe and dishwasher lines. Finally, caulk around the perimeter of the sink where it meets the countertop.
References
- YouTube: Lowe's Home Improvement: How To Install a Farmhouse Sink | DIY Kitchen Remodel
- Lowe's: How to Install a Farmhouse Sink
- Sinkology: Fireclay Farmhouse Kitchen Sink Step-By-Step Installation
- HomeTips: How to Install a Farmhouse Sink
- Annie & Oak: Installing Your Farmhouse Sink: 6 Easy Steps
- The Sink Boutique: The Ultimate Farmhouse Sink Installation Guide
- BuildDirect: How to Install a Farmhouse Sink
- Showroom Sinks: How to Install a Farmhouse Sink


