Hanging Wall-Mounted Shelf DIY For Literally Any Bathroom
We may receive a commission on purchases made from links.
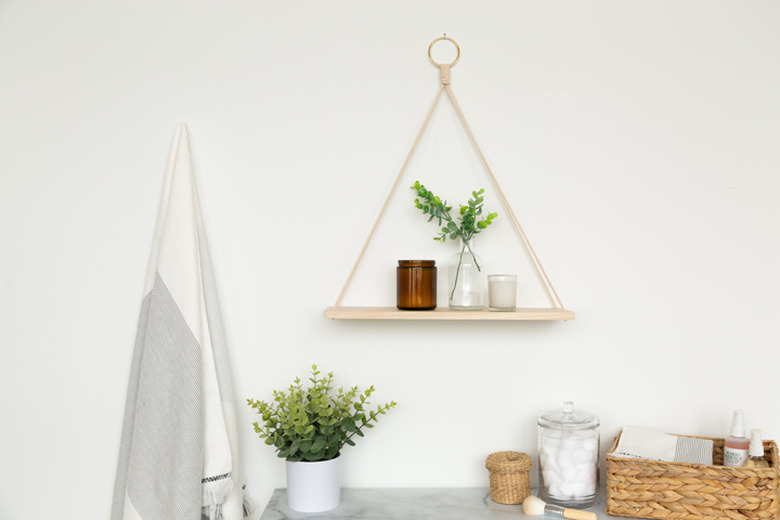
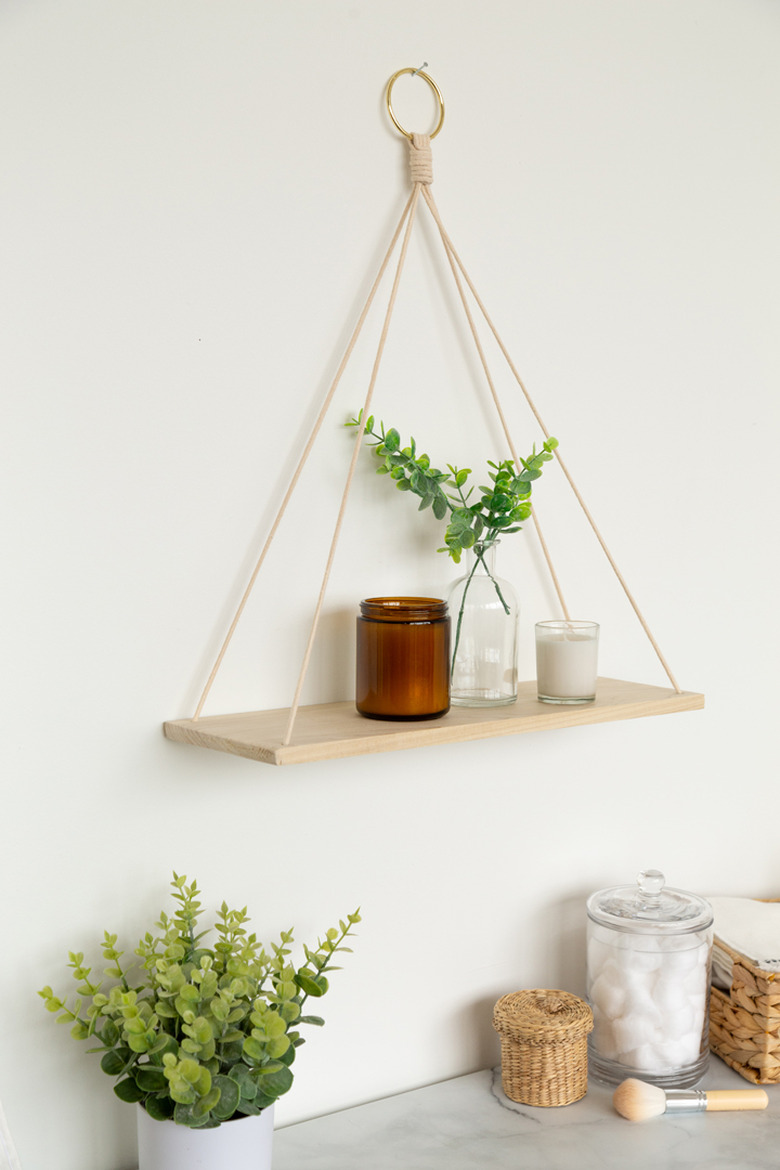
If you are looking for more wall storage options for your bathroom, you are not alone! We are always on the hunt for simple, stylish, and affordable shelving. Today we are delighted to show you just how simple it is to make a hanging wall shelf. You could even make this a multiple shelf DIY as well. We love the look of natural cotton cording (macrame cord) and natural wood. It's timeless, while giving a look of Scandinavian design as well.
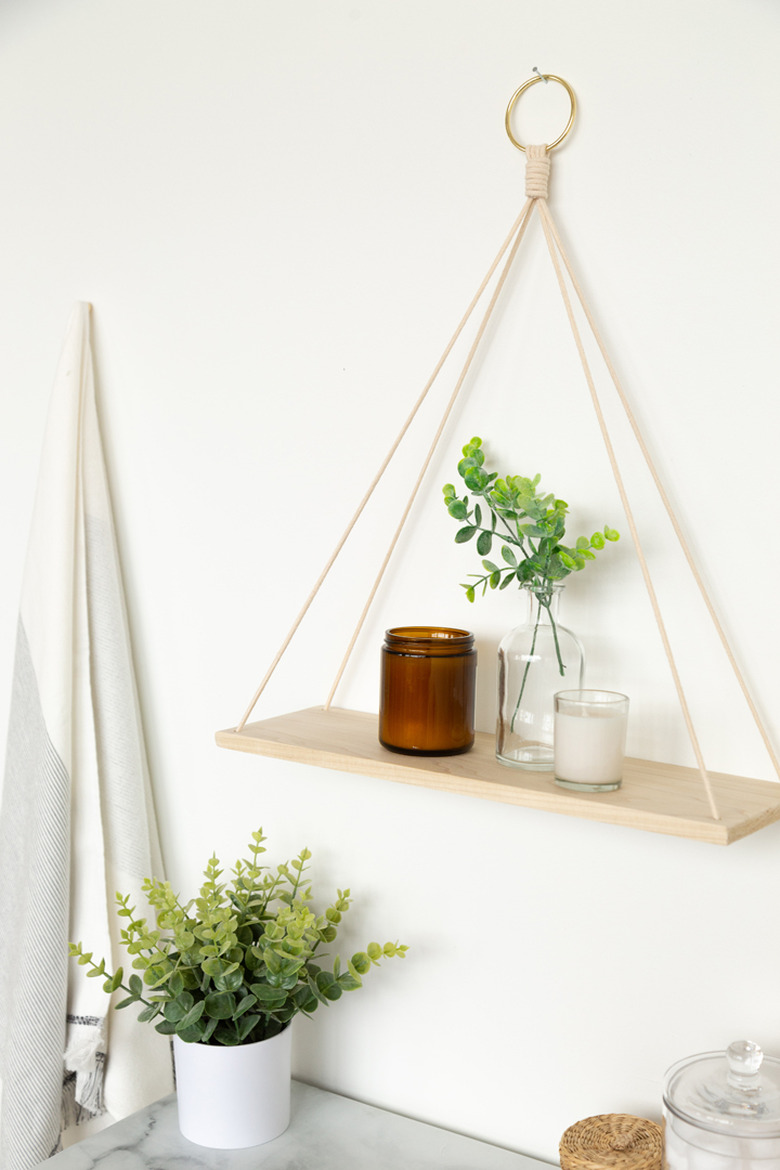
Adding some fresh greenery, candles, and pretty beauty products to this hanging shelf will elevate the look of the bathroom ... and give you more storage options, too!
 Sara Albers
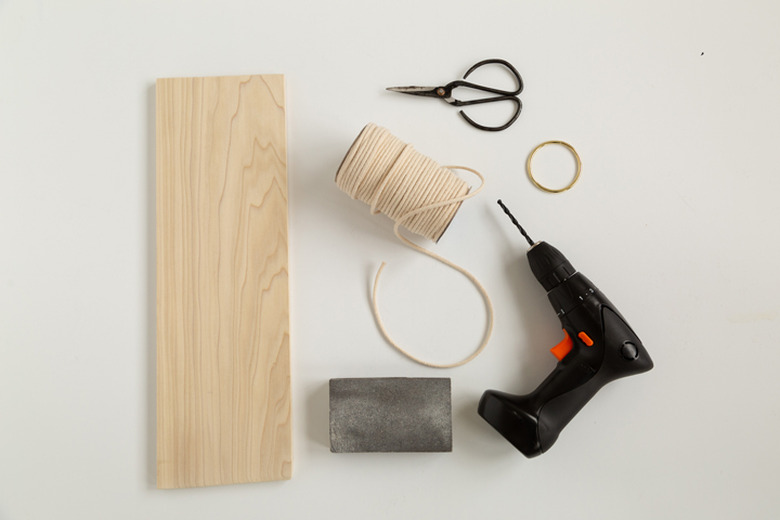
You will only need some basic materials for this project, so let's get started.
Things Needed
-
Wood (Poplar, 5 1/2 x 24)
-
Power drill
-
Drill bit (match the size to your cord/rope)
-
Sanding block
-
Gold macrame hoop, 2 inch
-
Glue gun
-
Scissors
 Sara Albers
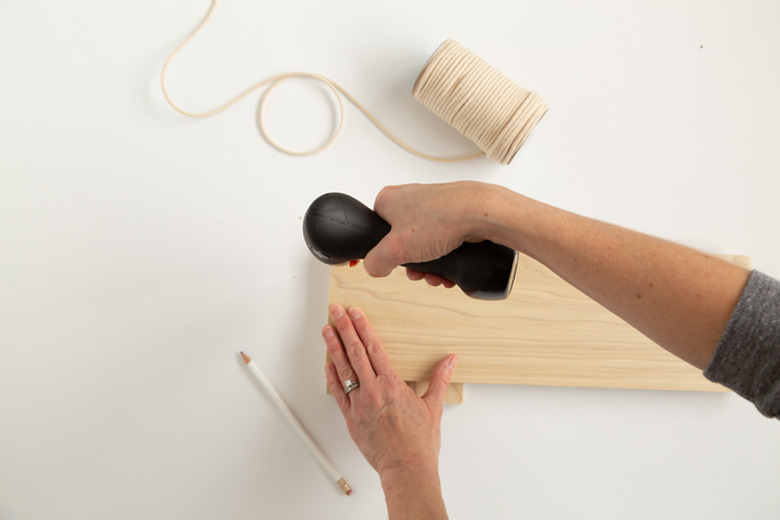
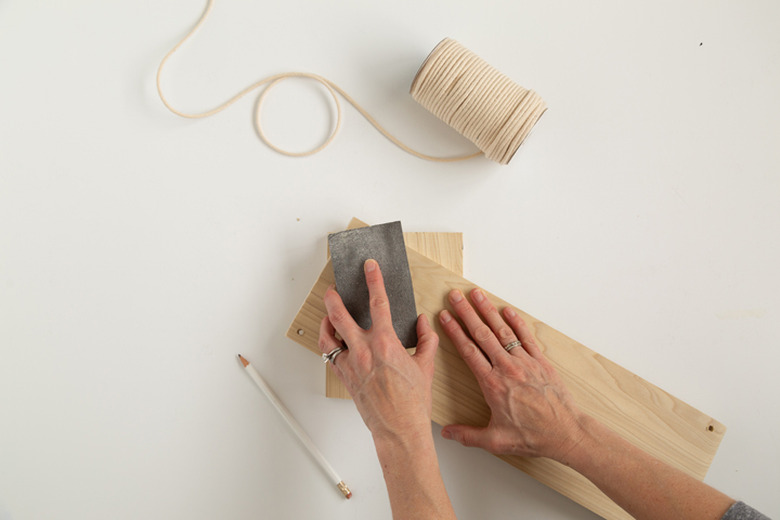
Step 1
Trim wood to appropriate size. The shelf featured here is 5.5 inches x 17 inches. Sand edges. Drill holes using appropriate size drill bit.
 Sara Albers
Step 2
Lightly sand drilled holes.
 Sara Albers
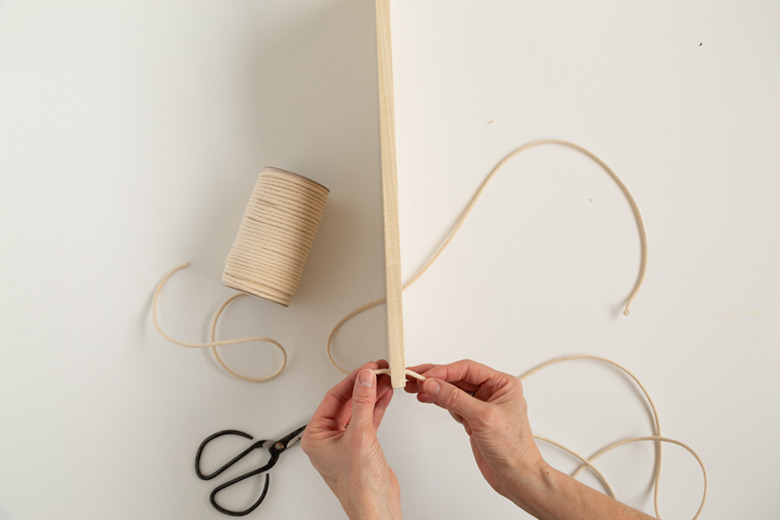
Step 3
Cut two pieces of cording, 3 to 4 feet. Thread one piece up through the holes on the left side, and then the other cord through the holes on the right, pulling the cording up from the bottom.
 Sara Albers
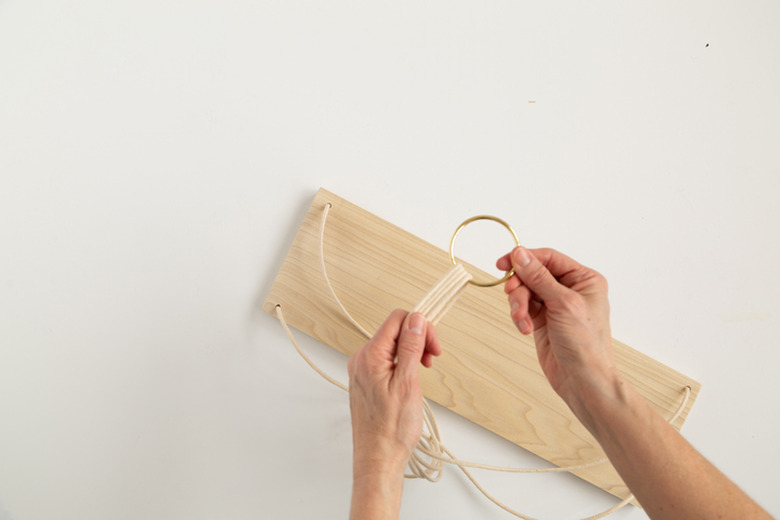
Step 4
Pull the left and right sides of the cording to meet evenly at the top. Loop the four pieces of cording through the metal ring.
 Sara Albers
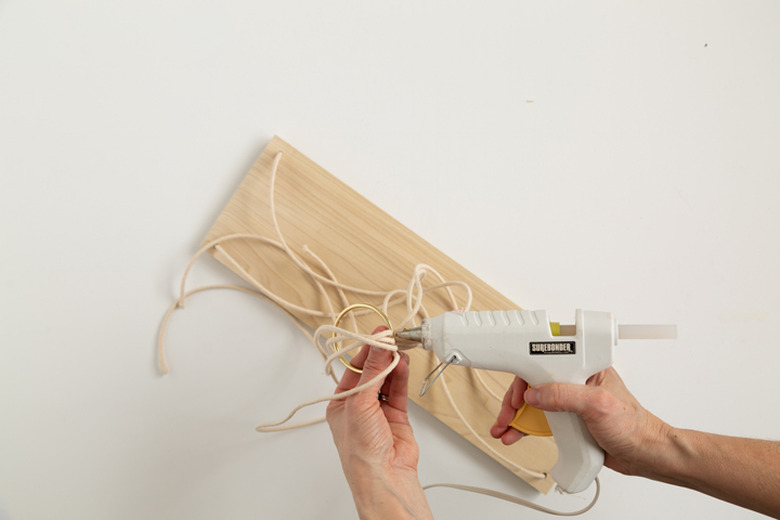
Step 5
Determine how long you want your shelf to hang from the gold ring. Secure the cording onto the ring using hot glue. Fold the cording over the ring and glue.
 Sara Albers
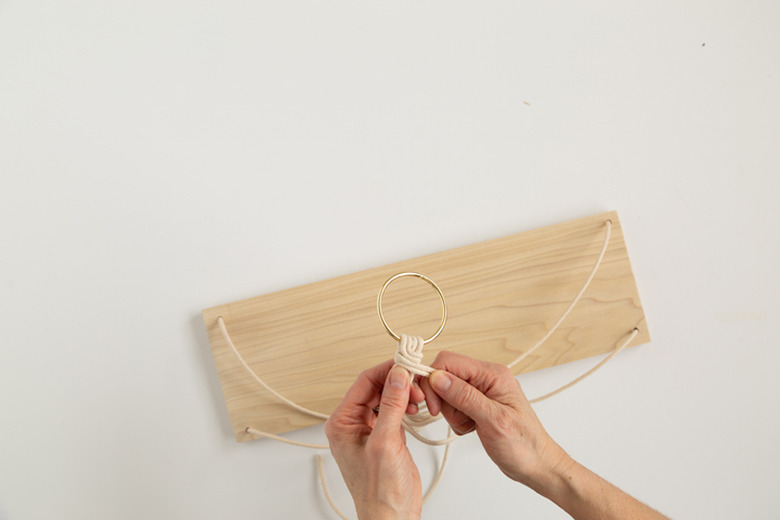
Step 6
Take two pieces of the cording and wrap around the other two pieces of cording. You will wrap around four or five times.
 Sara Albers
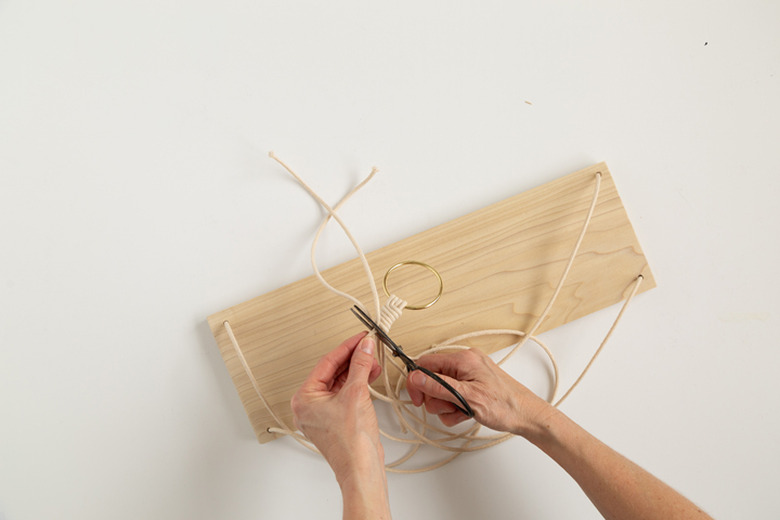
Step 7
Trim the ends of the rope that you wrapped around the other cording.
 Sara Albers
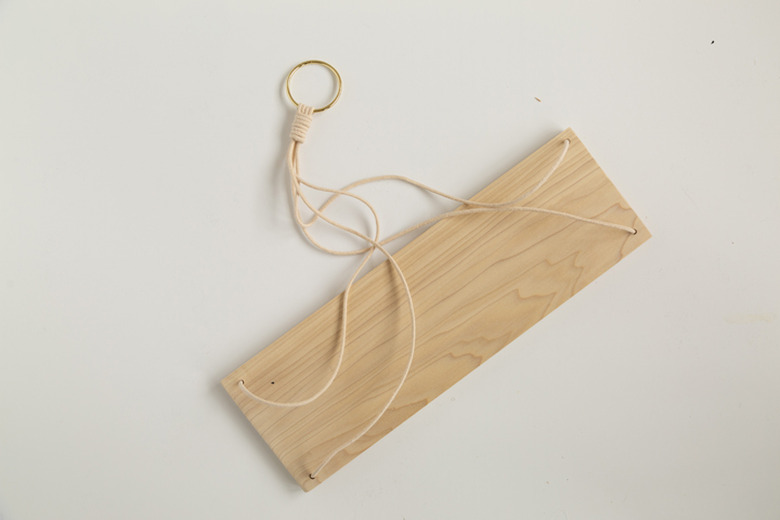
Step 8
Wrap the end of the rope and add some hot glue to make sure it stays secure. Glue on the front and back of the ends of the wrapped rope.
 Sara Albers
Hang the shelf and add your favorite small vases, candles, ceramics, beauty products, and more!
 Sara Albers