Installing A Stainless Steel Backsplash: A How-To Guide
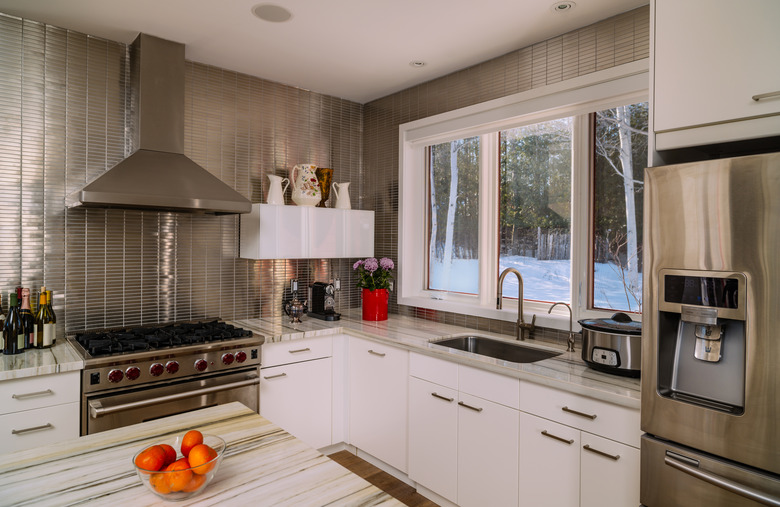
From appliances and sinks to cabinets and countertops, stainless steel is the go-to material for the modern kitchen right now and with good reason — it looks sleek and is easy to clean, ensuring your kitchen is both stylish and sanitary with minimal effort. This trend has also brought the stainless-steel backsplash out of commercial restaurants and into the home kitchen. This metal backsplash option is easier to clean than many forms of wall tile and can tie your kitchen together by not just limiting your stainless-steel accents to the appliances.
Stainless-steel sheet cutting is not a DIY project, but once you have the sheets cut by a professional, you shouldn't need to hire a professional installer because hanging this kitchen backsplash is something most homeowners can manage.
How to Design a Kitchen Backsplash
How to Design a Kitchen Backsplash
Not everyone wants the entire area above the countertop to be covered with backsplash, let alone the entire wall. Some people want backsplash to go a few inches up the wall, some want it to go all the way to the cabinets above and some want it to go all the way to the ceiling.
You might only want stainless-steel backsplash behind the stove or above one of your countertops but not the other. You might want to leave the rest of the wall painted, or you may want to use another tile backsplash (there's even ceramic tile covered in steel to create the appearance of stainless-steel tile) alongside your stainless-steel backsplash.
The important thing is to plan exactly where you want to install the stainless-steel backsplash so you can measure and make a template for the metalworker to cut out the sheet metal. Because it's so important that the sheets fit correctly in your home kitchen, Commerce Metals suggests you completely ignore the "standard sizes" of sheet metal that are available and figure out what you want in your own kitchen.
If you're still not sure about how to lay out your backsplash, know that most people install the backsplash so it is either the exact width of the range or counter, or they add either 3 or 4 inches to both sides of the cooktop to extend the backsplash past the edge of the appliance. For best results, ensure the backsplash stops at least a few inches away from any outlets because it looks weird when backsplashes end right next to the outlet.
How to Know What to Order
How to Know What to Order
Aside from knowing how you want your backsplashes to look, you should also know what to order. Generally, steel manufacturers and steel fabricators are the right places to go for a stainless-steel backsplash. If you don't have any of these businesses in your area, you can find custom steel sheeting, cutting and bending.
When you order, you'll not only need the exact dimensions but also the right grade, thickness and finish for your backsplash. Metal Supermarkets says the most common grade for home purposes is 304, which is made with 8-percent chromium and between 8- and 10-percent nickel and holds up well in home-cooking environments. As for thickness, most people who get stainless steel backsplashes order 20- or 22-gauge steel, which is thick enough to not get damaged easily but still light enough to easily hang on the wall.
Finish is largely a personal aesthetic choice, with options such as mirror, brushed, hammered, textured or embossed widely available. Most people like the #4 brushed finish, which looks like the finish used on the majority of stainless-steel appliances. Expect to pay a minimum of $20 per square foot for stainless-steel backsplash.
Things Needed
-
Kraft paper (optional)
-
Masking or painters' tape 2-inches wide or larger (optional)
-
Precut stainless-steel backsplash
-
Construction adhesive such as Liquid Nails
-
Detergent
-
Drywall patch (optional)
-
Drywall compound or grout (optional)
-
100-grit sandpaper
-
Wooden cleat (optional)
-
Screws (optional)
-
Newspapers (optional)
-
Tape measure
-
Level (optional)
-
Screwdriver
-
Utility knife (optional)
-
Ruler (optional)
-
Gloves
-
Damp towel
-
Caulk gun
-
Putty knife
-
Rolling pin
How to Install a Stainless-Steel Backsplash
1. Measure the Backsplash Area
Since sheet metal has to be cut precisely and you don't want to be left with useless sheets that don't fit properly on your wall, it is critical that you have exact measurements before ordering. That is why you must spend a lot of time measuring where the backsplash will fit.
- Measure and mark out exactly where the four corners of the backsplash should fit unless you intend to have the backsplash edges stretch all the way between your cabinets, countertops and
walls. - Measure the length between the two highest corners, then the
two lowest corners and then between the two left corners and the two right
corners. - Take each measurement twice to guarantee they are accurate.
- Use a level to ensure the cupboards, countertops or walls are exactly straight. If not, you'll need to tell the metal fabricators that they will need to cut the backsplash at an angle, and
they may be able to figure out how to angle it from these
measurements, a template (instructions below) and photographs (including the level being held against any nonlevel surfaces). If not, they may send a professional out to measure the area for you. - Subtract 1/16 inch from each measurement to make sure you have just enough wiggle room to ensure it will fit just right.
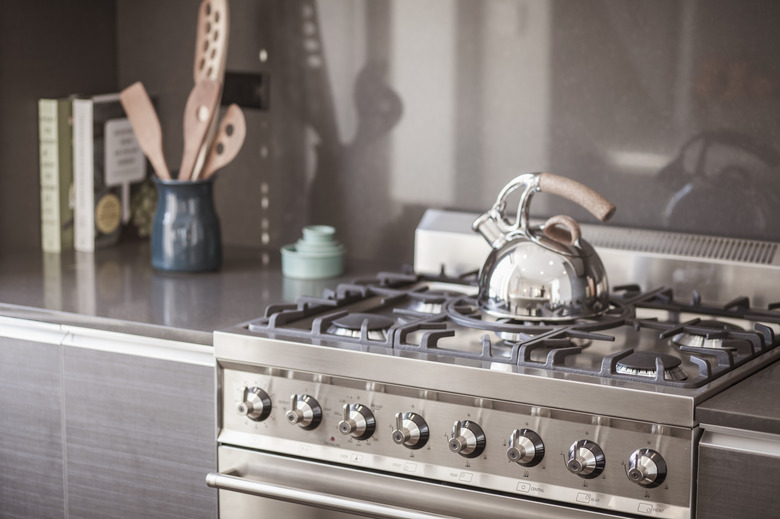 Alberto Guglielmi/DigitalVision/GettyImages
2. Record the Location of the Outlet and Switch Holes
If you have any outlets or switches in the backsplash area, turn off the breakers for that portion of your kitchen and remove the cover plates. Then, measure the distance from the countertop to the bottom right of the hole for the outlet and then to the bottom left of the outlet hole. Then, measure the distance from the top of where your backsplash will fit down to the top left and top right of the outlet.
Measure the right edge of the backsplash area to the top right corner of the outlet and the bottom right corner of the outlet. Repeat for the left edge of the backsplash and the left side of the outlet. Again, measuring all corners will help the fabricator in case any outlet or switch holes are not straight.
3. Make a Kraft-Paper Template
If you have a somewhat complex installation area, you may want to try making a kraft-paper template. This can be given to your metal fabricator in place of or in addition to measurements to ensure the stainless-steel backsplash will fit just right.
- Tape kraft paper at one edge of your installation area and
then unroll it along the wall, taping as you go. Cut and tape at the other edge of your intended installation area. - Use a utility knife, level and ruler to cut along the top
and bottom edges of the backsplash area. - Carefully cut openings along the edges of outlets and
switches, making sure to not cut too deeply so you do not damage any wires. - Remove the tape and roll up your template so you can bring it to the fabricator.
4. Order the Backsplash
Once you're 100 percent confident with your measurements and have made a template, if appropriate, you'll need to place your order. Give your measurements, photographs and/or template to the fabricator along with details like your metal grade, thickness and finish — with nonmirror finishes, be specific about which direction the pattern should run. If your backsplash will have any exposed edges, tell the fabricator that you want hemmed edges on those sides. Request that the other edges be smoothed or deburred so they aren't razor-sharp.
5. Prepare the Backsplash for Installation
Once you receive your stainless steel backsplash, remember to wear gloves and use caution while holding or moving it since the edges will be sharp. Before installing, hold it up against the installation area just to make sure it fits correctly. You can install steel backsplash to drywall or tile-backsplash surfaces.
- Place your construction adhesive in a sunny spot or near a
heater vent to ensure it is warm enough to spread evenly, preventing ridges or bumps from appearing in the installed backsplash. Even if your backsplash comes prefitted with mounting tape, you'll still
need additional adhesive. - Clean the wall with detergent to remove any stuck-on grease
or dirt. Completely rinse any cleaners from the wall and then dry it with a towel. - Verify the wall has no holes larger than three inches (small holes won't affect installation) and
that it is even so the backsplash will lay flat. If necessary, repair holes
with a drywall patch or use a drywall compound to level the wall out. - Turn off all breakers to switches and outlets in the installation area and remove the cover plates.
- Sand the wall with
100-grit sandpaper to remove ridges and bumps so it can better grip to the
steel sheeting. - Wipe down the wall with a slightly damp towel to remove any residual sanding dust.
- If the backsplash won't be sitting entirely on a counter (when installed behind a range, for example),
fasten a wooden cleat with screws between the cabinets on either side, level with the countertop. This will serve as a
shelf on which the backsplash can rest during the installation and curing processes. - If applying above a counter, tape down newspaper to the
counter to prevent the steel from scratching the countertop during installation.
6. Install the Backsplash
When you get your precut stainless-steel backsplash, it will have PVC protective film on one side and will be blank on the other side. After installation, the side with the film will be showing, and the other will be mounted against the wall. Do not remove the protective film until the very end, but if you have hemmed edges, peel up the edge of the film that is curved around the back before installing.
- If your backsplash is fitted with mounting tape, apply small beads of adhesive 1/2 inch
away from the tape every 3 inches, never coming closer than 1/2 of the edge of the backsplash. Spread the adhesive evenly with a putty knife and then remove the adhesive liner. - If your steel sheets were not fitted with mounting tape,
apply the adhesive beads no closer than 1/2 inch from the edge, working in rows
and columns 3 inches away from one another. Spread out the adhesive
beads evenly with a putty knife. - Rest your backsplash on the corner between the wall and either your wooden mounting cleat or countertop. Put the steel sheet in its final installation position, taking care to line up holes in the backsplash with your outlets or switches before pushing the adhesive against the wall.
- Secure the sheeting with masking or painting tape.
- Use a rolling pin to gently smooth out the backsplash against the
wall and remove air bubbles.
7. Complete the Project
After the adhesive has cured for 24 hours or the time recommended by the manufacturer, remove the tape and the wooden installation cleat if used. Finally, peel up the PVC film, starting at one corner and working your way across the rest of the backsplash.