This Leather-Wrapped Planter Tutorial Is Our New Fave

We may receive a commission on purchases made from links.
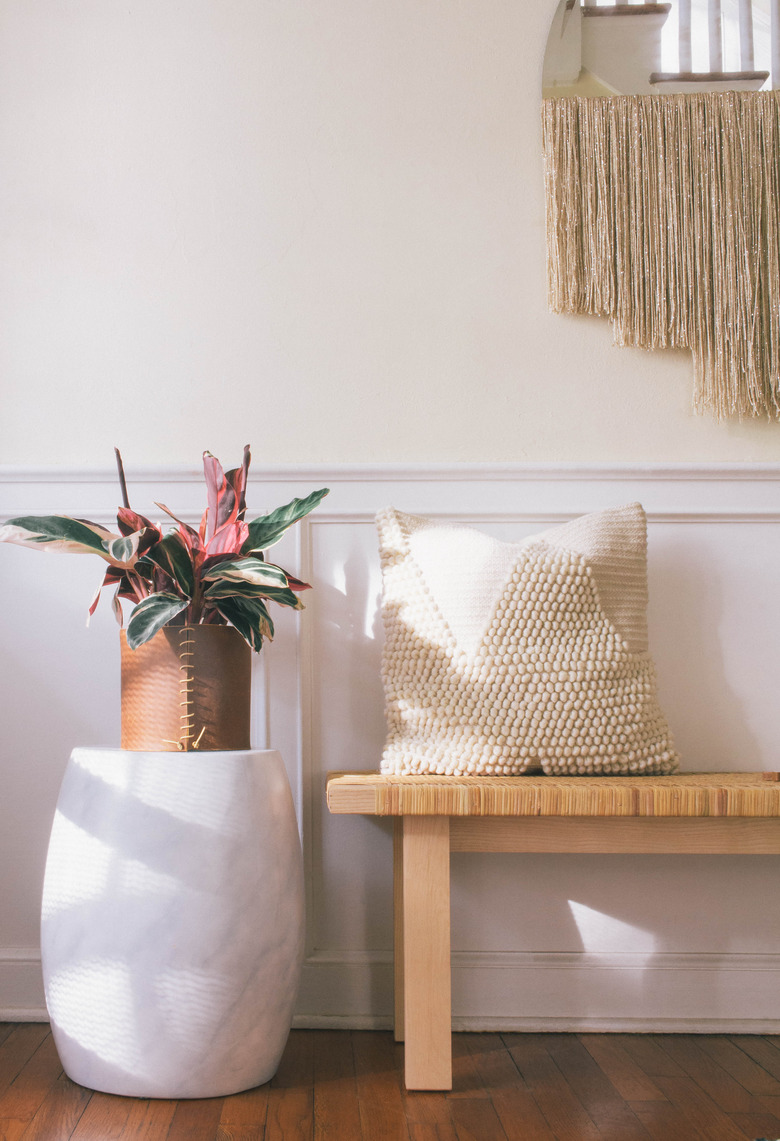
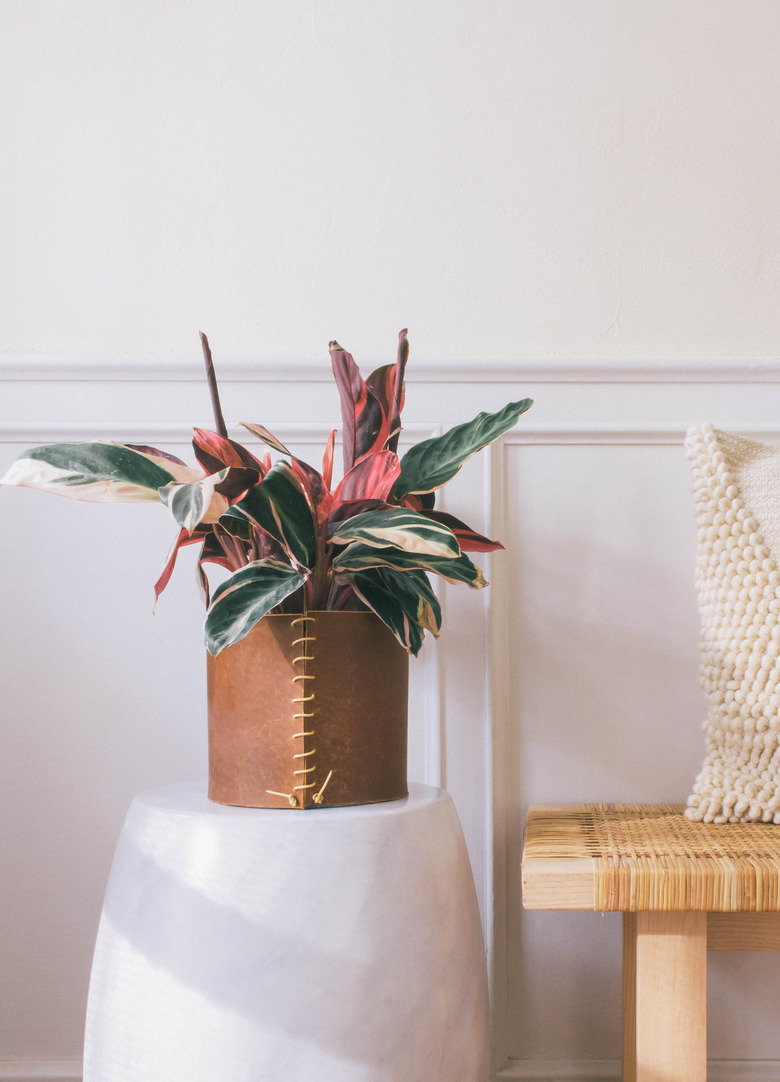
Bring a luxe look to your plants with a leather-wrapped planter. It's easy to make and adds a touch of artisanal appeal to your space. The stitched detailing offers a bit of interest to an otherwise simple design, especially when contrasted with a darker tone leather. (But tone-on-tone would be equally beautiful, too.) We promise your houseplants will look infinitely cooler and Insta-worthy when paired with this beauty.
 Trisha Sprouse
Things Needed
Tip
Be sure to look for a planter with an equal diameter at the top and bottom, as opposed to a tapered one. Also, if you buy your leather from a craft store, do a quick internet search for that week's coupon — you can usually save at least 30% to 40% off!
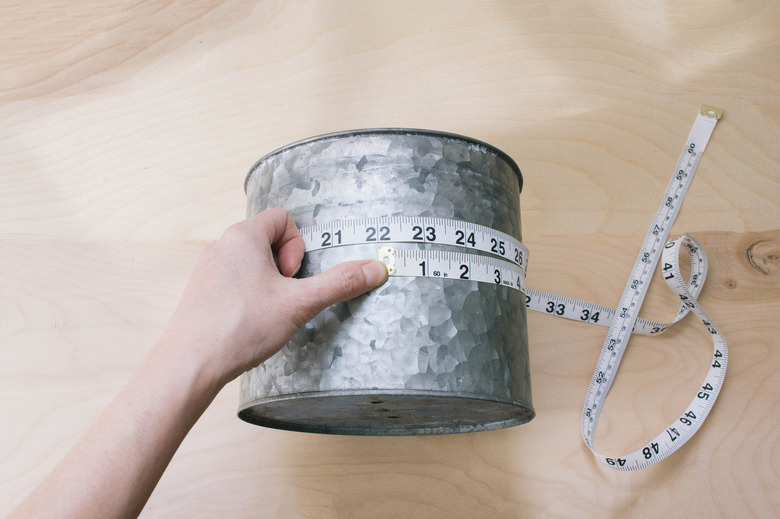
Step 1
Measure the height and diameter of your planter. (Ours was 6 inches tall by 22 inches in diameter.)
 Trisha Sprouse
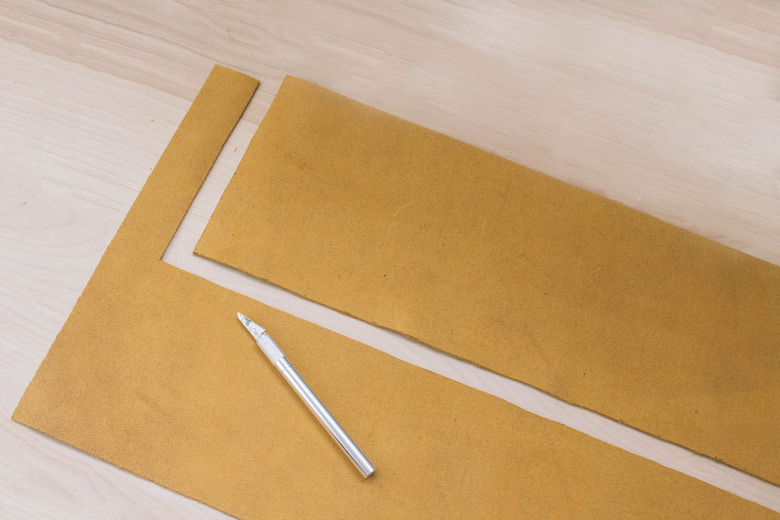
Step 2
Mark the dimensions of your planter on the back of the leather, and cut out with a utility knife.
 Trisha Sprouse
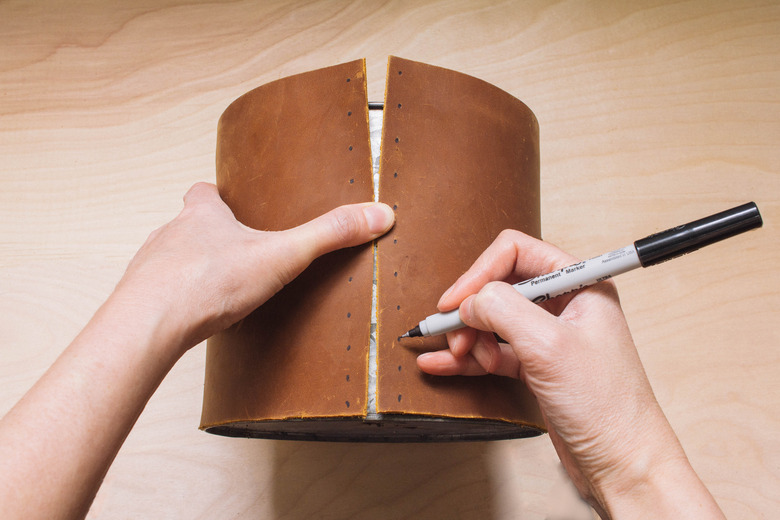
Step 3
Wrap the leather around the planter, and draw parallel dots 1/4 inch in from each edge, spaced an inch apart.
 Trisha Sprouse
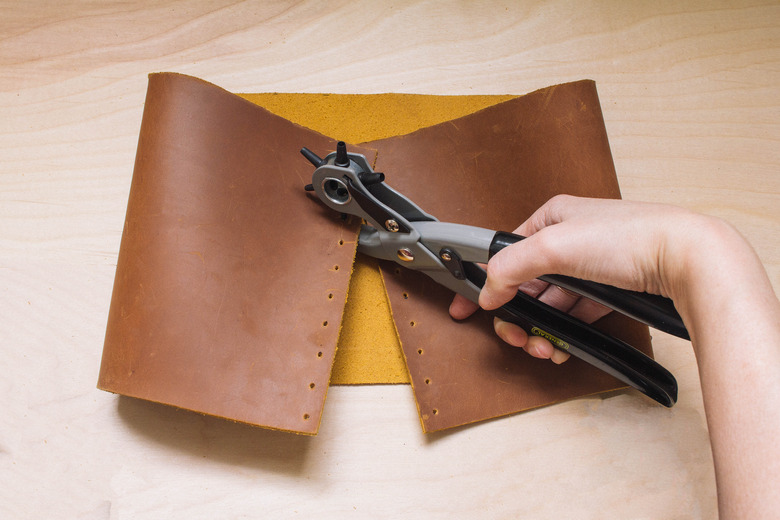
Step 4
Use a leather punch to punch holes on each dot. (We used the smallest setting on our leather punch.)
 Trisha Sprouse
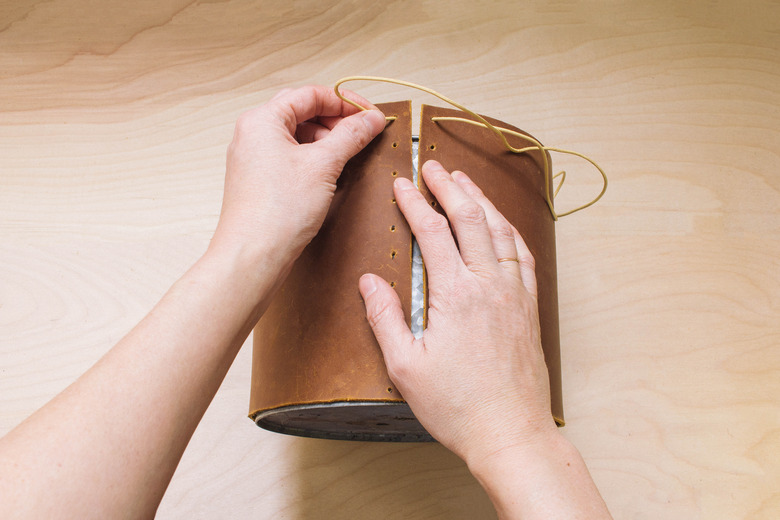
Step 5
Wrap the leather around the planter, and thread a long piece of leather cord through the backside of the top right hole. Pull it over and thread it through the frontside of the top left hole.
 Trisha Sprouse
Keep pulling until the tail of the cord on the right side is a few inches longer than the pot's height. Keep this tail underneath the leather, but sticking out at the bottom — you'll use it later.
 Trisha Sprouse
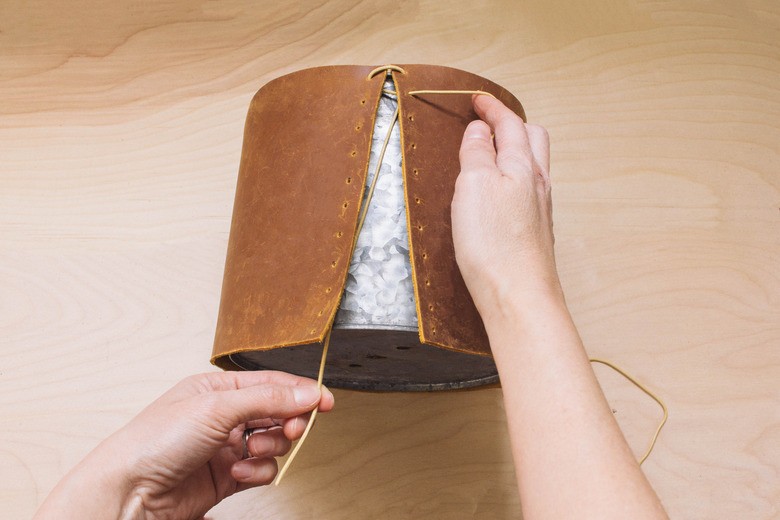
Step 6
Keep threading the longer tail on the left through the corresponding holes, each time entering from backside of the right hole and through the frontside of the left hole.
 Trisha Sprouse
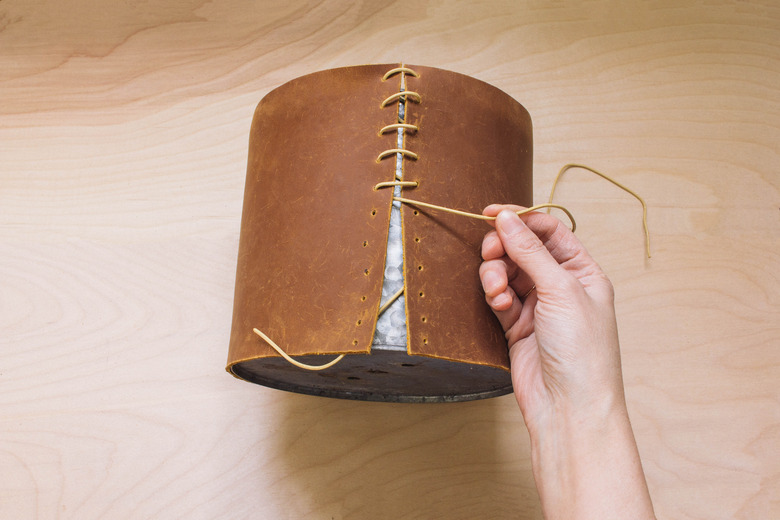
Step 7
When you thread the cord through the last hole on the right side, tie it in a double knot and cut off the excess.
 Trisha Sprouse
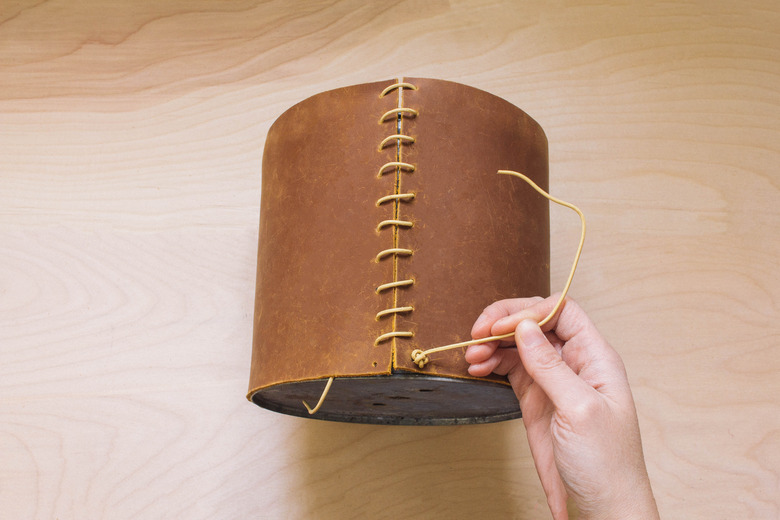
Step 8
Thread the other tail you left hanging out at the beginning through the backside of the last left hole.
 Trisha Sprouse
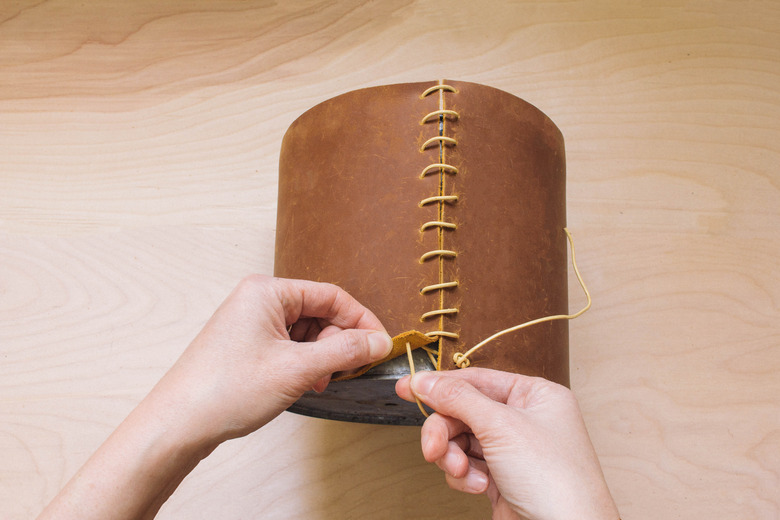
Tie it into a double knot and cut off the excess.
 Trisha Sprouse
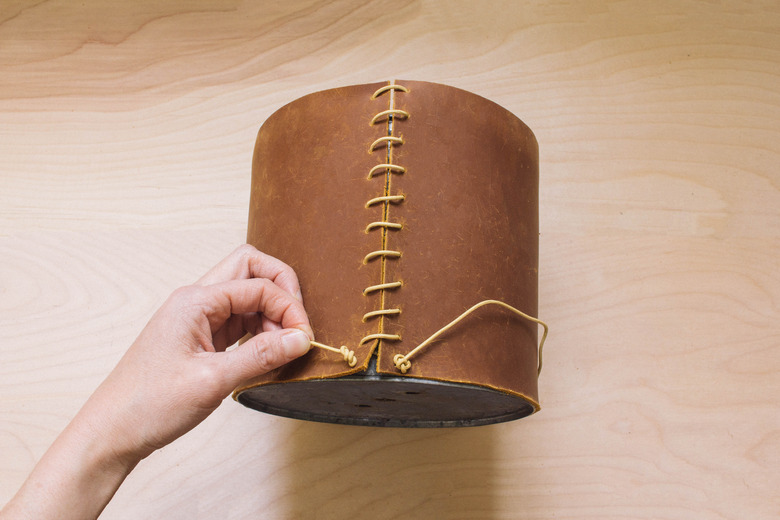
Now all your new leather planter needs is a pretty plant!
 Trisha Sprouse