Replacing Subfloor: What You Should Know
The subfloor is the base part of the floor that is located underneath the finished flooring material. It is made of plywood (or other sheet material) or with lumber boards. The subfloor rests above the framing and provides a level, sturdy surface for the underlayment as well as the hardwood, tile or carpeting.
If the subflooring gets wet or suffers damage, it must be replaced to protect the integrity of the floor or to prevent any related damage from spreading. Since this layer of the floor is difficult to reach, repairing it can be a challenging task, even for an experienced contractor.
Causes and Symptoms of Subfloor Damage
Causes and Symptoms of Subfloor Damage
Generally speaking, widespread subfloor damage is fairly uncommon. The primary reason that a subfloor fails is exposure to water, which can happen due to a flood, a poorly sealed window, a leaky pipe or other similar issues. Water damage from improperly seated toilets is another typical problem that leads to the need for subfloor repair or replacement. According to the Department of Housing and Urban Development, some other causes include pest infestation, foundation settlement and even earthquakes.
Symptoms of subfloor problems may or may not be obvious depending on the extent of the damage and the location. Some things for which to keep an eye out include water stains on the ceiling, any musty or moldy smells, spongy or squeaky floor areas and/or any visible damage to floor coverings, such as cracked tiles or loose spots on your hardwood floors. A rocking toilet is another thing for which to look, as it usually means the wax seal has been broken, and water may be compromising the subfloor that is surrounding it.
Professional Help With Subfloors
Professional Help With Subfloors
If there are any issues that arise with your subflooring, you'll likely want to call a professional. Because of the complexity of figuring out the extent of the damage and the possibility of having it quickly become a large-scale project, this is not a great DIY project for homeowners to tackle. Not only can qualified contractors evaluate the current state of the floor but they also have the proper equipment and knowledge to address whatever they may find and make sure nothing important gets missed.
 JaniceHazeldine/iStock/GettyImages
Sometimes, you may be able to handle the portion of the job that has to do with identifying and stopping the water damage so it doesn't occur again. For example, if there was a leak in your roof that needs a patch, you may want to handle that on your own. The same is true if there was a leaky connection on a hose or something else that is DIY-friendly. The Environmental Protection Agency recommends being proactive and periodically checking for leaks in your home to help minimize maintenance costs and uncover any potential water-related issues.
Investigating the Extent of Subfloor Damage
Investigating the Extent of Subfloor Damage
Repairing a subfloor requires a thorough examination of the problem at hand as well as an inspection of the supporting floor joists to make sure they aren't involved. This means that the framing below needs to be visually inspected to check for signs of damage. In some rare cases, you may be able to take a look at the subfloor yourself. If flooring has come loose or if the issue is under the edge of carpeting, it might be possible for you to take a peek underneath to see if there is damage. Joists will require a more in-depth investigation.
If the floor is above an unfinished basement or crawlspace, you can start looking for damage from the underside of the subflooring, but damage will be visible only if it goes all the way through the subfloor. Otherwise, the subfloor issue will likely be in a place where you can't easily see what is happening. In cases like this, it will be necessary to do some flooring removal, which may be best left to a professional. It's important to get an idea of the full scope of the problem so that the integrity of your subfloor and any related framing issues can be assessed, and repairs can be made.
Removing a Subfloor
Removing a Subfloor
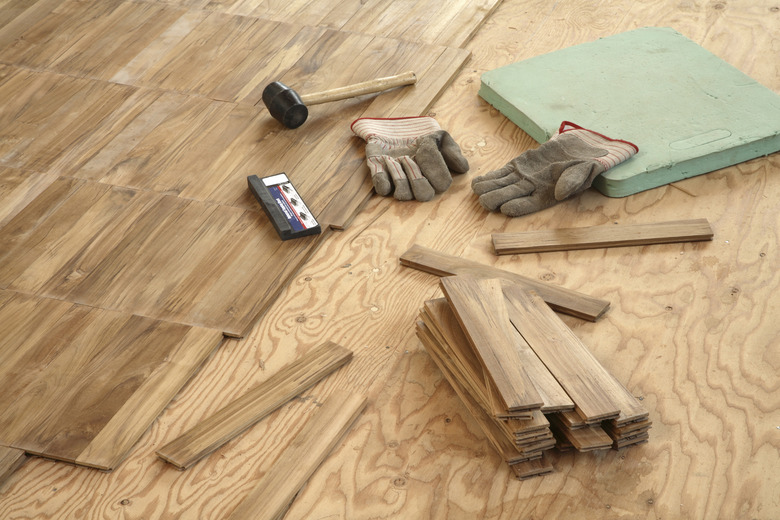
If your subfloor is in need of replacement, the damaged portion will need to be completely cut out. This also requires the removal of all floor covering over the problem area as well as the accompanying underlayment materials. The process for this portion of the job will vary based on the type of flooring you have. A circular saw and pry bar are typically the tools of choice, and the contractor will remove all damaged materials. A drill may also be used if any screws are found along the way.
 Jens_Lambert_Photography/iStock/GettyImages
Sometimes, the entire floor may need to be replaced. Other times, a section of subfloor can be patched in. Your contractor will likely begin the removal process by using a pry bar to take out nails (or a drill to remove screws) and to separate the subflooring from the joists below. A circular saw can be used to cut through the subfloor. The depth of cut is carefully set so the saw does not cut into the joists or hit any wiring or pipes running through the joists. A reciprocating saw can be helpful for cuts along edges or other hard-to-reach areas.
Replacing a Subfloor
Replacing a Subfloor
Once the damaged portion of the subfloor is out, any framing issues must be resolved, and then the subfloor can be replaced. This work starts with the joists if needed. In the most serious cases, entire joists may need to be removed, but many times they can be "sistered," or attached to another supporting joist for additional strength. Your contractor may use something called a moisture meter to see what the approach should be for joist damage, or it may be more obvious based on the appearance of the wood.
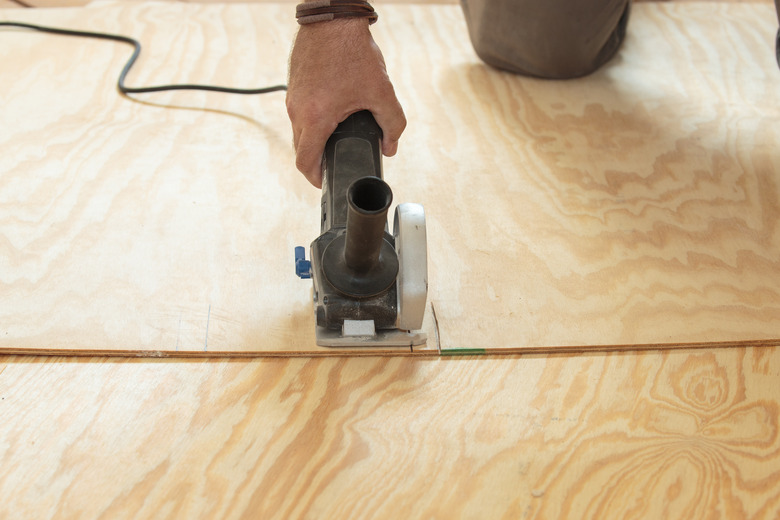
Once this assessment and any related work is complete, a new subfloor will be put in place. The existing subflooring may be particleboard or oriented strandboard, but neither of these materials is the most desirable: The gold standard in subflooring is tongue-and-groove plywood subflooring. With this material, the tongue of one sheet fits into the groove on the next, forming a solid connection between. Tongue-and-groove subflooring is typically 3/4-inch thick and is commonly sold at lumberyards and home centers.
Best practices for installing this material include gluing and screwing it into the joists below for additional stability as well as staggering the joints between sheets from one row to the next, similar to a bricklaying pattern. The glue used is construction adhesive, and it helps to keep the subfloor securely attached and to minimize squeaks in the future.
The contractor will center the ends of the plywood on each joist for maximum support. They may also leave an 1/8-inch gap between sheets to provide some room for expansion, and the panels should run perpendicular to joists. Once the subfloor is down, the underlayment and flooring can be addressed.
Partial Subfloor Replacement
Partial Subfloor Replacement
Not every subfloor needs to be completely removed, and this tends to be especially true in places such as the bathroom or underneath a kitchen sink. Leaky toilets or sink areas can cause a lot of subflooring damage in a local area. In many cases, the damaged subflooring can simply be cut out so that new subflooring can be patched in. Ideally, the cuts can be made over the centers of the joists so the joists can provide backing for the plywood patch and its screws. Otherwise, sister joists or lumber blocking can be installed to provide backing.
References
- Wagner Meters: Acceptable Moisture Levels in Wood – Knowing the Moisture Content
- Environmental Protection Agency: Moisture Control Guidance for Building Design, Construction and Maintenance
- Environmental Protection Agency: Detect and Chase Down Leaks
- U.S. Department of Housing and Urban Development: Partitions, Ceilings, Floors & Stairs