The 7 Best DIY Flooring Options
If you're looking to upgrade any room in your home, renovating the flooring can be a great place to start. Fortunately, not all flooring jobs require the help of professionals, and there are several DIY options that are suitable for even the most novice homeowner. Like any other home improvement project, DIY flooring installation can be found in varying levels of difficulty and cost, although most can be done using household tools or items that are easily rented from a local home center or rental outlet.
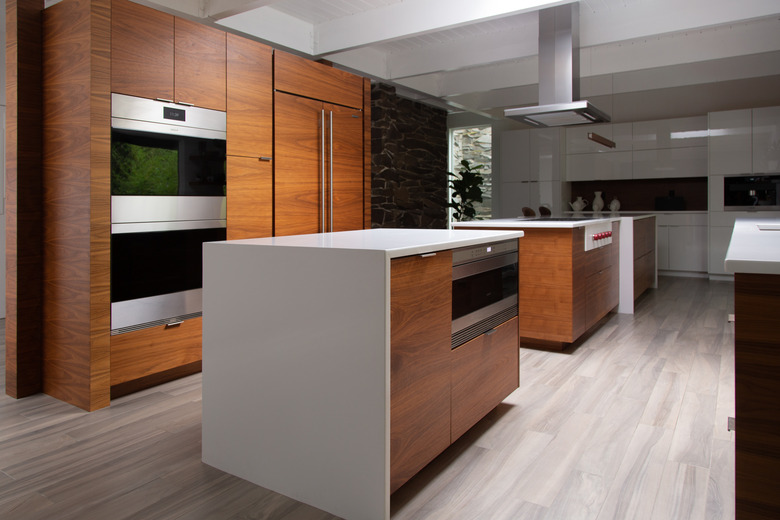
Engineered Wood Flooring
Engineered Wood Flooring
Do you love the look of solid hardwood floors but can't swing the added cost of a professional installation? Engineered wood flooring may be the right option for you. Engineered wood can either be nailed, stapled or glued down to a subfloor, or it can be laid as a floating floor.
Engineered wood planks can last anywhere from 20 to 80 years, according to Old House Online. They are sold prefinished, meaning you can use them as soon as they're installed. While engineered wood can hold up to light moisture, areas like basements that are prone to flooding are better left to other flooring types, like concrete or stone tile.
To install engineered flooring, some basic math skills or a calculator will be needed since planks will need to be trimmed to fit around certain edges and corners. This will also require a pencil, tape measure and saw to cut planks down to size. The only other tools you'll need include a rubber mallet, a flooring pull bar and possibly a urethane adhesive depending on the type of planks you're installing. A tongue-and-groove system installed as a floating floor will require glue, while planks with click-lock edges do not.
The Best DIY Linoleum
The Best DIY Linoleum
Linoleum is eco-friendly and is comprised of renewable substances like linseed, cork dust and tree resin among others. This flooring type is also incredibly easy to maintain, usually requiring little more than a basic dusting and mopping on a regular basis.
Linoleum is very cost effective when compared to some other flooring types like wood or ceramic tiles, generally costing between $2 and $5 per square foot depending on the type, according to HomeAdvisor. Linoleum does have a few drawbacks, however, including an inability to stand up well to moisture and a tendency to fade or yellow when exposed to sunlight over time.
By far, the easiest linoleum with which to work on a DIY install are click-lock tiles and planks, as they require no adhesive and can be laid as a floating floor. Others require that you apply adhesive to your subfloor and then press your linoleum tiles on top of it, as does linoleum sold in sheets — although for most homeowners, the latter is not the best type for DIY installations. To install linoleum tiles or planks, you'll need a chalk line, a utility knife, adhesive and a notched trowel (when needed), a tape measure, a chisel and a 100-pound roller.
Installing Sheet Vinyl
Installing Sheet Vinyl
Vinyl flooring is often confused with linoleum although the two types are certainly different in a number of ways. One way that vinyl has a leg up on linoleum is due to its ability to stand up better to moisture, which can make it an ideal and practical option if you're looking to renovate spaces like the bathroom, basement or kitchen.
 narvikk/iStock/GettyImages
Fortunately, installing vinyl is easy to do on your own, especially when applied over a 1/4-inch plywood underlayment, as it does require a smooth surface upon which to lie. Vinyl gets points in another area as well — it's generally cheaper than linoleum to purchase and install.
Like linoleum, vinyl can easily stain or become discolored, and unlike the aforementioned flooring variety, it's not eco-friendly since it's made of PVC. That said, you can install sheet vinyl at home by gathering your flooring and adhesive along with a pencil, a notched trowel, a rubber mallet, a bucket of water, a rag and something to roll down the flooring.
To make this easy, create a template of your sheet flooring by taping together large pieces of paper, like butcher paper, and cutting around permanent fixtures over which you don't need floor laid, like toilets and sinks. Then, place your template under your vinyl sheet and trace the outline to mark the exact shape and size of the flooring you need to install.
Vinyl Tile Floors
Vinyl Tile Floors
What's easier to install than a vinyl sheet? Vinyl tiles, like linoleum, can be found as adhesive-free tiles or in the peel-and-stick variety. Vinyl tiles offer almost all of the same perks of vinyl sheet with the addition of an even easier installation thanks to their manageable size. One thing that sheets have over tiles are their ability to better withstand moisture, as water can seep through tile seams. Luxury vinyl tiles and planks are popular choices for homeowners, as they come in a wide variety of looks that can closely resemble ceramic, stone or wood flooring for a fraction of the price.
Unlike sheet flooring, however, vinyl tiles and luxury vinyl tiles do need to be applied one by one, which can add hours to installation times depending on the size of the space you're looking to tile. Luxury vinyl tiles are also much more expensive than sheet options and can cost around $7 per square foot or more.
Installing luxury vinyl flooring requires a smooth and sturdy subfloor and requires that tiles be glued down, spaced and filled in with grout. This makes for more work than some DIY flooring options but can be done by most homeowners in as little as one day.
Installing Laminate Flooring
Installing Laminate Flooring
Laminate flooring is an attractive choice for many homeowners since it is affordable, easy to maintain and moisture-resistant. A popular type of laminate flooring is made to look like wood flooring and can come incredibly close to looking like the real thing if you opt for more high-end plank models. On the low end, however, laminate floors can look cheap and won't do much to add to the value of your home, but they can be a great option if you need flooring that's quick, cheap and easy to install.
 Stephen Paul
Laminate flooring should be laid over a solid, smooth subfloor as well as an underlayment that rests on top of that. Laminate wood planks do need to be cut to size, which can be done with laminate shears or a table saw, although making cuts to fit around spaces like heating vents should be done with a jigsaw. Other than that, planks can be snapped together, and installation can be completed using basic household tools like a tape measure, a level, a hammer and spacers.
DIY Cork Flooring
DIY Cork Flooring
Like ceramic tile, installing cork flooring can come with a set of hassles and may require a more advanced level of carpentry knowledge than some of the other choices. Cork flooring, albeit somewhat difficult, can be installed as a DIY project using basic tools and taking only a couple of days. Cork, like much flooring, does require a stable subfloor, so you may need sandpaper and cement-based floor leveler to get your surface smooth. Additionally, installing cork requires a chalk line, contact adhesive, a rubber mallet, a notched trowel and a cutting jig.
Cork flooring is sold in tiles and is either unfinished or prefinished with a urethane top coat. Unfinished tiles should be coated with a protective wax and buffed. If you don't wish to glue down your cork tiles, you can apply them as a floating floor. To make a floating floor with cork, purchase tile or planks that are designed as a click-lock setup and attach your pieces together. When installing your floating floor, be sure to use spacers to leave a 1/2-inch gap around your wall edges for expansion and affix your tiles or planks using a rubber mallet and a tapping block to avoid damage to your flooring pieces.
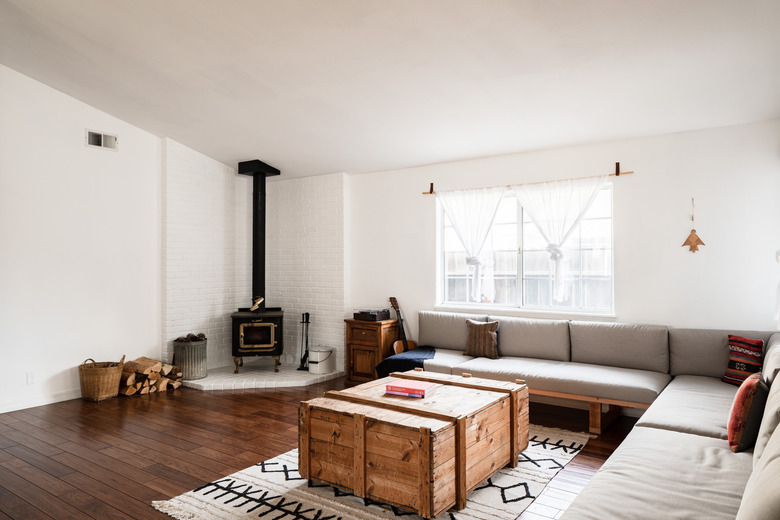
Add Carpeting With Carpet Squares
Add Carpeting With Carpet Squares
If you're looking for something that's a little softer on the eyes and under your feet but don't have the skills required to install wall-to-wall carpet, then carpet squares are a great alternative. Carpet squares are quick and easy to install and allow for a variety of flooring patterns to be created on your floor. Additionally, stains can be washed away more easily than with standard carpet thanks to the mobility of the tiles, which can be removed and then put back in place after cleaning.
Unfortunately, carpet tiles cannot provide a fully seamless look in the same way as wall-to-wall carpet. Additionally, if you choose to remove your carpet tiles and store them elsewhere for any length of time, like in a box, faulty storage can result in disfigurement of the shape of your tiles. If you store your carpet tiles in a room that sees extreme temperatures, like a hot attic or a cold basement, the rubber backers on the tiles can also become warped and possibly less effective.
Installing carpet tiles is very easy and requires only a few tools, including a tape measure, a marker and a utility knife. Tiles are typically sold with adhesive already applied, so simply peel the backing and stick them where you desire. FLOR-brand carpet tiles come with specially designed stickers that keep tiles together without requiring you to glue down anything to a subfloor.
References
- The Flooring Lady: How to Install Linoleum: A Step-by-Step Guide
- HomeAdvisor: How Much Does it Cost to Install Vinyl & Linoleum Flooring?
- Express Flooring: The Advantages and Disadvantages of Carpet Tiles
- Old House Journal: Hardwood vs. Engineered Flooring
- Family Handyman: Luxury Vinyl Tile Installation