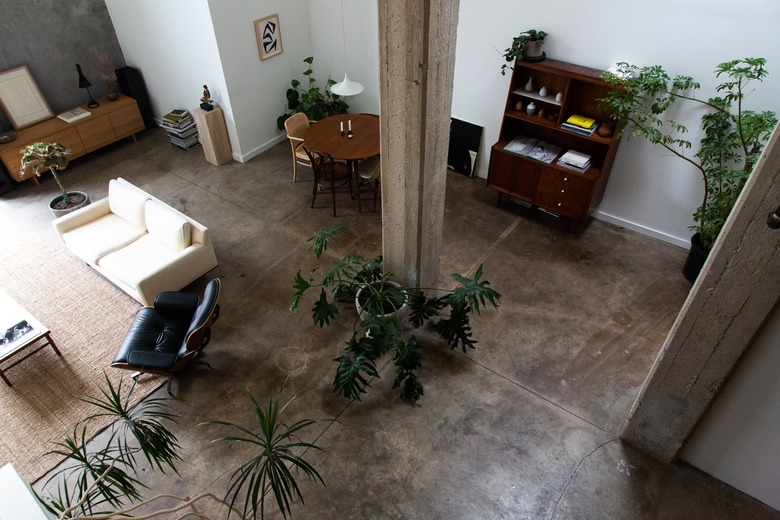
Stained Concrete Floors: A How-To Guide
Stained concrete floors are becoming more and more popular, because adding color to concrete creates a nice, finished look. Concrete staining updates a room without the expense that is often involved when installing tile or other flooring. Many homeowners tackle this as a DIY project for a patio, basement or garage floor. Although it can be a good choice for many areas, it's important to know if it is a good solution for your space before getting started.
Do a spray test to make sure the concrete will absorb the stain. Polished or sealed concrete will likely not be porous enough to accept the material. Spray the floor with a light coat of water. As long as the flooring gets darker, it should take the stain. Also, be sure to protect any walls, windows and other areas that you don't want to be affected by the process with sheet plastic and tape.
Staining Concrete: Pros and Cons
Staining Concrete: Pros and Cons
Each concrete area is unique, and some will look better than others with stain. For example, concrete floors that have a lot of cracks or pitting won't get camouflaged. Think of the stain as a clear coat that is tinted rather than a paint that will fill in and completely cover blemishes. Overly moist concrete isn't a good candidate for staining either since it can cause both drying and sealing issues.
On the upside, concrete staining is a fairly cost-effective way to update your floor. It is less expensive than a high-gloss, polished concrete floor or epoxy coating. In addition, it can be applied inside or outside the house depending on where you need it. You will also be able to select a color instead of going with the default gray.
Choosing a Stain
Choosing a Stain
There are two stains for concrete floors. Acid stains contain hydrochloric acid and metallic salts that cause a chemical reaction when mixed with the lime in concrete. Because of this, the results are not completely uniform, but that can actually add appeal. Acid stains come primarily in natural tones and colors such as browns and blue-green shades, according to the Concrete Countertop Institute. This type of staining works well outside and in applications where there will be plenty of ventilation.
Staining concrete can also be done with a water-based stain that is made up of pigment and acrylic polymers. This type of stain soaks in and bonds to the porous surface of the concrete when applied. It has more color variety and tends to be more consistent in appearance because it is absorbed rather than reactive. Water-based concrete stains are a good choice for basements or other areas that are hard to ventilate properly.
Things Needed
-
Concrete-cleaning solution
-
Concrete degreaser (if needed)
-
Acid or water-based stain
-
Trisodium phosphate or baking soda
-
Concrete sealer
-
Sheet plastic/tape
-
Vacuum or broom/dustpan
-
Stiff-bristled floor brush
-
Mop/bucket or pressure washer
-
Eye protection, respirator, gloves, long pants, long-sleeved shirt (if needed)
-
Hand-held pump sprayer
-
Push broom
-
Small brush or cloth (if needed)
-
Roller or sprayer
How to Stain Concrete
1. Prepare the Concrete
The first thing that needs to be done in any concrete-staining job is a thorough cleaning. First, sweep and/or vacuum any loose dirt or debris. Next, scrub the floor with a stiff brush using a concrete-cleaning solution to remove any ground-in dirt and help open the pores of the concrete. This will ready the flooring to accept either the acid or water-based stain.
You may also need to use a concrete degreaser to remove any oil or grease spots on the floor. You can use a synthetic mop and bucket or a pressure washer to rinse. Consumer Reports notes that a finer nozzle is probably the best pick for greasy concrete surfaces, which you may find in a garage. Make sure the floor is clean and rinsed and then let it dry fully before the next step.
2. Apply the Concrete Stain
When acid-staining concrete, you'll want to make sure you wear safety equipment, including eye protection, a respirator, gloves, long pants and a long-sleeved shirt. Also be sure there is plenty of ventilation. For both types of stain, you'll mix the solution in a hand-held pump sprayer according to the product specifications. (For acid staining, choose a unit that doesn't have metal parts.) Many products will require the addition of water, so be sure to get the mixture right before starting.
Spray the acid stain or water-based product slowly and evenly, moving across the floor from one side to the other. Try to avoid putting too much on at one time. If desired, use a push broom to smooth out stain once it is applied. You may also need to use a small brush or cloth to get in hard-to-reach areas.
For water-based stains, you can apply a second coat if needed to deepen the hue. Acid stains will continue to develop color as the chemical reaction progresses, so you'll want to keep an eye on the tone and follow the next step when ready.
3. Apply a Neutralizer (Acid Stain Only)
Acid stains require an additional step. You'll need to neutralize the concrete floor prior to rinsing to stop the chemical reaction. Trisodium phosphate (TSP) and baking soda work well for this purpose. Mix it with water as directed and scrub the concrete thoroughly with a floor brush. You'll probably need more than one rinse to remove it all. Let the floor dry completely.
4. Seal the Concrete Floor
The final step in concrete staining is to lay down a seal coat once the floor is fully dry. This will give a finished look as well as protect the floor. For water-based stain, it also helps keep the color from fading over time due to wear and tear. Use a roller or a sprayer and, if needed, apply a second coat.
It's better to lay down multiple thin layers rather than one thick one; just make sure to allow time for it to dry in between as well as once you are finished. To keep stained concrete looking its best, be sure to reseal the floor periodically.


