How To Install A Bamboo Floating Floor
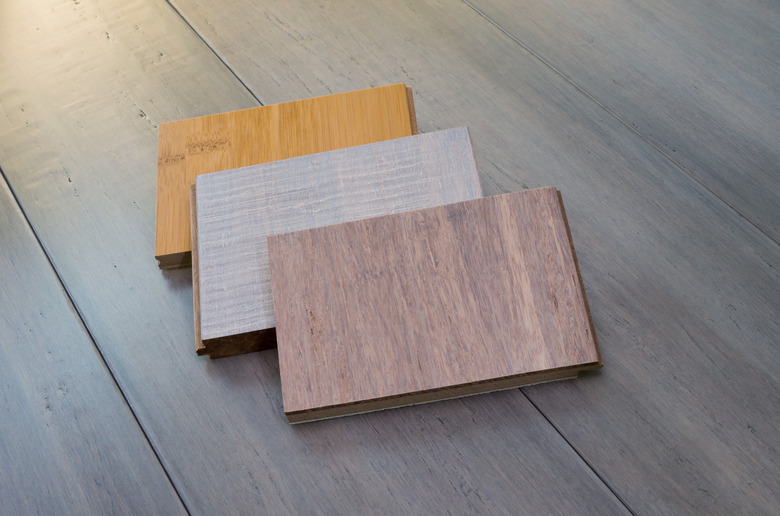
Since it was first introduced to the North American market in the mid 1990s by Smith & Fong, bamboo flooring has enjoyed a steady rise in popularity, especially after the introduction of strand-woven bamboo in 2000. Although all types of bamboo flooring rival most domestic hardwoods for wearability, strand bamboo is in a class by itself in terms of hardness, and it's an attractive and eco-friendly product as well.
Today, homeowners have their choice of solid strand-woven bamboo flooring boards, engineered ones and, for the budget conscious, traditional solid horizontal and vertical bamboo boards manufactured by the process that predates strand weaving.
About the Floating Floor Format
About the Floating Floor Format
If you're considering a new bamboo floor, you may be leaning toward a floating floor for one of at least three reasons:
- You want to install it directly over existing flooring.
- The installation space is subject to humidity changes that would cause gaps in a nail-down floor.
- You like the idea of a DIY-friendly product that you can install yourself.
You'll be purchasing engineered planks for a floating floor installation because solid bamboo planks are designed only to be nailed or glued to the subfloor. The most common floating floor format is click-lock, but some manufacturers also provide engineered tongue-and-groove planks that you glue to each other but not to the subfloor. You can also nail or glue engineered tongue-and-groove planks to the subfloor.
The procedure for installing a click-lock bamboo floor isn't much different from that for installing any laminate floating floor, so if you've ever done that, you won't find much to mystify you. Although the procedure for installing glue-together planks is slightly different, you'll probably easily develop the knack for that as well. If you're new to flooring installation, relax because the procedure is easy to learn, especially if you read the installation instructions provided by the manufacturer of the product you purchase, which is recommended for all DIY installers.
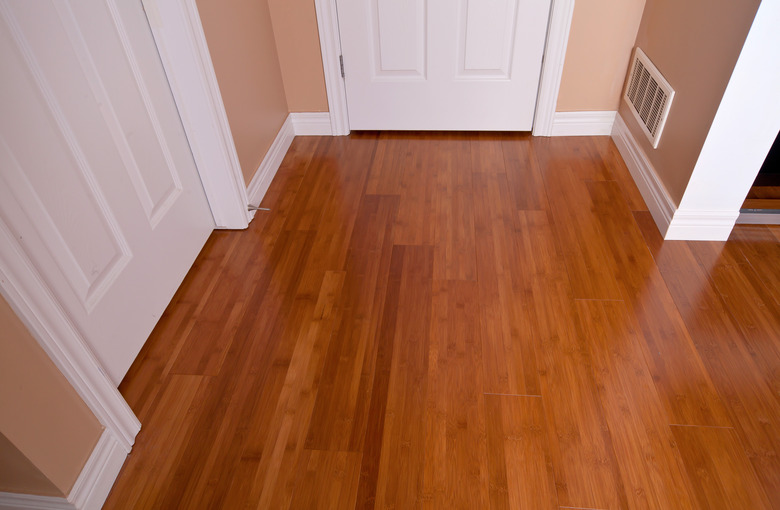
 jferrer/iStock/GettyImages
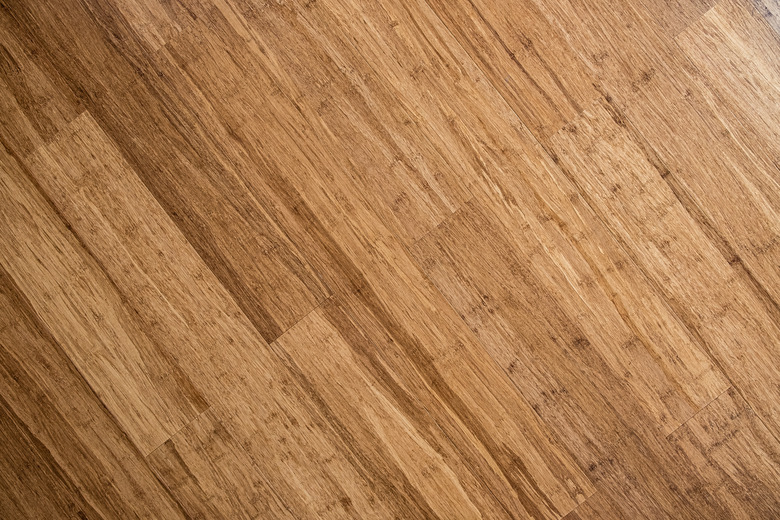
Why Choose Bamboo Flooring
Why Choose Bamboo Flooring
Many people have the misconception that bamboo flooring is more fragile than hardwood flooring, but when it comes to strand-woven bamboo engineered flooring, the opposite is true. Strand bamboo has a Janka hardness that equals or exceeds the hardest exotic wood species, and it comes prefinished with as many as 10 coats of extremely durable finish. Once the floor is installed, it's practically indestructible, and it hardly ever needs sanding and refinishing.
Add to this the fact that bamboo is a fast-growing grass and a sustainable forest product. Engineered flooring isn't quite as green as solid bamboo flooring, but it's definitely greener than a comparable product made from lumber milled from rapidly disappearing tropical rain forests. Also, bamboo flooring looks great in almost any setting.
Things to Do Before Installation
Things to Do Before Installation
Once you've decided on the color and type of bamboo flooring you want, you need to measure the installation space, calculate the square footage and buy enough to cover it, allowing a 5 to 10 percent overage for inevitable cutting waste. Make sure you buy all you need because if you have to order more, it may come from a different batch and may not be a good match. When you unpack the flooring, mix planks from the different boxes to create a uniform color distribution.
Like wood flooring and perhaps even more so, bamboo flooring expands and contracts with changing humidity conditions and needs time to acclimate to the installation space. The minimum acclimation period is three days, but a longer period — up to seven days — is better.
Finally, clean the subfloor, sanding or grinding down high spots or using leveling compound to fill depressions if necessary and check the moisture content using a moisture meter. The Bamboo Flooring Company recommends a maximum moisture content of 16 percent for a wood subfloor and 6 percent for a concrete one.
 All rights belong to Dmitri Smoljannikov/iStock/GettyImages
Don't Forget the Underlayment
Don't Forget the Underlayment
Unless you're installing a glue-down floor, an underlayment is always a good idea, and it should have a moisture barrier in any of the following conditions:
- You're installing the floor over concrete.
- The plywood subfloor has a moisture content at the limit of what is acceptable.
- The subfloor is directly over a crawl space.
- You're installing the floor in a basement or somewhere else below grade.
Available underlayment materials include tar paper, sheet plastic, foam, felt and cork. Foam, cork and felt provide cushioning as well as varying degrees of sound and thermal insulation, but they don't provide a moisture barrier. If you use them in areas where moisture protection is required, spread a sheet of plastic on the subfloor before you lay the underlayment. It's a good idea to staple the underlayment to the subfloor, but if you're installing over concrete, it's fine to leave it unattached. Always check with the flooring manufacturer for installation recommendations when using a moisture barrier.
How to Install a Click-Lock Bamboo Floor
How to Install a Click-Lock Bamboo Floor
Things Needed
-
Tape measure
-
Chalk line
-
Circular saw
-
Table saw (optional)
-
Laminate-cutting blade
-
Spacers
-
Tapping block
-
Mallet
-
Laminate pull bar
-
Jigsaw
-
14-tpi jigsaw blade
1. Scribe a Line for the First Row
You usually lay the first row along a wall, but that wall may not be straight with respect to the opposite one, and if the room is severely out of square, you may end up making noticeably triangular cuts in the last row. You can't avoid this altogether, but you can split the difference between the first and last rows.
Measure the width of the room at both ends of the starting wall using a tape measure. If the room isn't square, there will be a difference, so calculate half the difference and measure this distance from the end of the starting wall at the wider end of the room and make a mark. Snap a chalk line from this mark to the corner at the opposite end of the wall.
A 1/4- to 1/2-inch expansion gap is required around the entire perimeter of the floor to prevent buckling when the floorboards expand as the humidity changes. To achieve this gap, you usually have to cut off the tongues of the planks against the wall (the groove side faces out). Use a circular saw or table saw with a laminate-cutting blade with 80 or more teeth.
2. Lay the First Row
Lay out the planks for the first row, calculate the length of the last plank and cut it with a saw, remembering to allow for a 1/4-inch expansion gap at both ends of the row. Assemble the bamboo flooring end to end, snapping the ends together as you go. Set spacers between the planks and the wall to maintain the 1/4-inch expansion gap.
You connect planks by lifting the one you're installing at an angle, fitting its tongue into the groove of the one on the floor and lowering the other end until the joint snaps together. You can also tap the planks together using a tapping block and mallet. When you get to the end of the row, use a laminate pull bar to draw in the last plank and connect it with the second-to-last plank.
Use the offcut from the first row to start the second row or cut a fresh plank as needed to ensure the end joint is at least 6 inches from the previous one. Maintain a random stagger pattern in this way as you lay the rest of the planks. A stagger pattern is necessary in any flooring installation for appearance and stability.
3. Snap and Tap
The easiest way to install a click-lock plank into a floor is to snap it sideways into the adjacent one just far enough away from the end of the previous one in the row for the tongue to clear the groove when you lower it. Tap the free end with a tapping block until the other end mates with the previous plank in that row. You sometimes have to step on a joint to keep it flat while you tap.
4. Cut Curves and Notches With a Jigsaw
You'll have to cut notches to fit planks around door jambs, cabinets and other obstacles, and some of these notches may be curved. Make the cuts with a jigsaw and a blade with at least 14 teeth per inch.
5. Install the Last Row
Measure the distance between the first plank in the second-to-last row and the wall. Be sure to measure at both ends because the wall may not be straight. Subtract 1/4 inch for the expansion gap, transfer the measurements to a fresh plank and draw a line. Cut along the line with a circular saw.
Install the plank by snapping it into the plank next to it using a pull bar if necessary to draw the planks together. Set a spacer at the end to keep it 1/4-inch away from the wall and then install the rest of the planks in the row in the same way. Remove the spacers before installing baseboard (see below).
 zianlob/iStock/GettyImages
How to Install Glue-Together Bamboo Flooring
How to Install Glue-Together Bamboo Flooring
The procedure for installing glue-together boards is essentially the same as the one for installing click-lock planks. The only difference is that instead of snapping the planks together, you connect the planks by gluing them together.
To make gluing easier, a glue-together floor should be installed with the tongues facing out, which means you lay the first row with the groove side of the planks facing the wall. A professional installer may cut off the groove before installing the first row, but it probably doesn't matter because the baseboard usually covers the groove, and even if it doesn't, the groove is strong enough to support weight, especially if you're installing high-quality flooring.
Be sure to use waterproof urethane glue (per the flooring manufacturer's specifications) that comes in a container with a tapered tip that fits easily inside the groove. Keep a rag handy so you can wipe off any excess glue that oozes out when you tap the planks together before it dries.
Finishing the Installation
Finishing the Installation
Once the floor is in place, you must install baseboard. It isn't optional because it holds the floor down as well as hides the expansion gap. Baseboard that is 3/4-inch thick is enough to cover most gaps created by angled walls, but if not, you can always nail quarter-round or base shoe molding to the baseboard for extra coverage. Prime and paint (or stain and clearcoat) the baseboard before you install it so all you have to do afterward is touch up nail holes.
Engineered bamboo flooring comes prefinished, so no staining, sanding or finishing is required. In fact, the floor requires very little maintenance: periodic vacuuming and occasional mopping with a damp — not wet — mop or a dry microfiber mop and a commercial hardwood-floor cleaner.
References
- Smith & Fong Plyboo Direct: About Smith & Fong Co. Plyboo
- The Bamboo Flooring Company: Beginners Guide to Installing Bamboo Flooring
- BuildDirect: How to Install Glueless-Click Bamboo Flooring
- Hosking Hardwood: Underlayments for Floating Wood Floors
- Ambient Bamboo Floors: 5 Different Types of Bamboo Flooring – Pros & Cons