Indoor Water Garden: Plants And Ideas To Get You Started
We may receive a commission on purchases made from links.
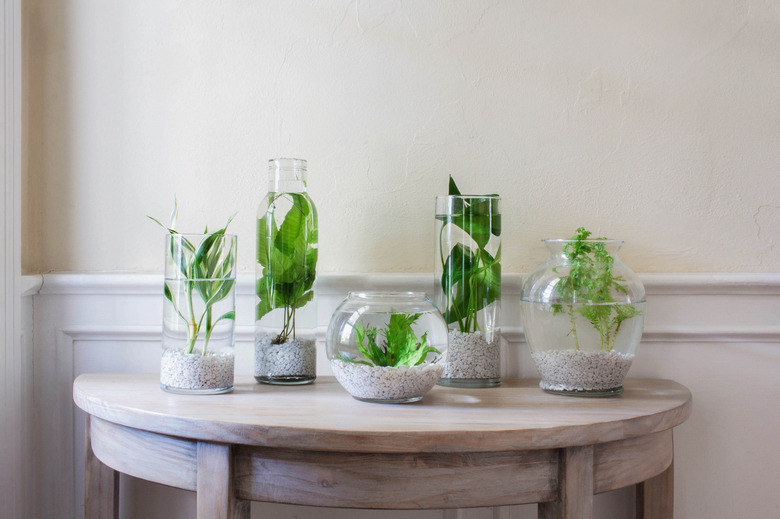
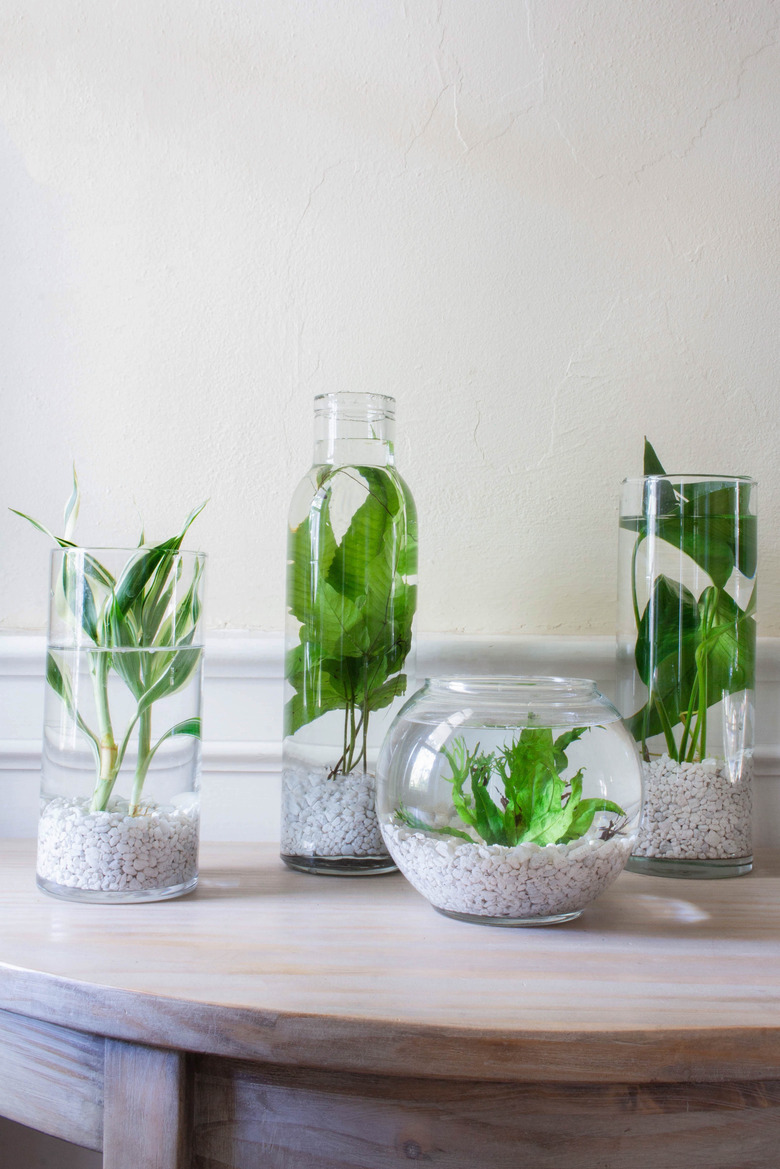
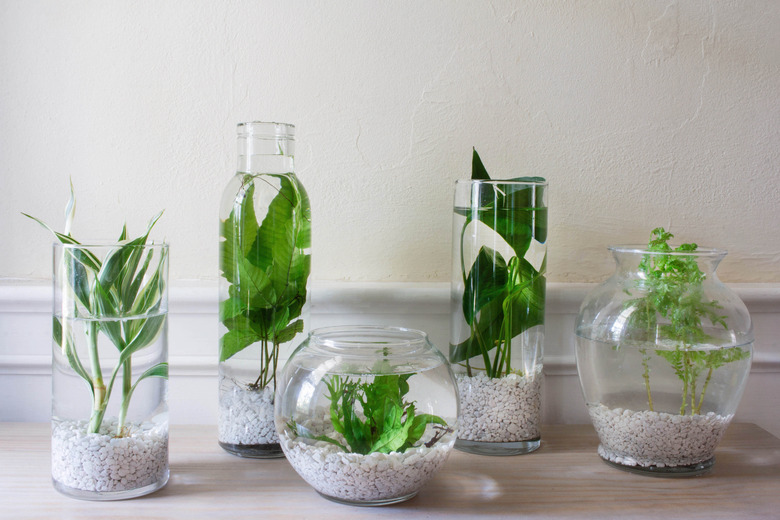
If you ever find your home in need of more calming vibes, just add plants. There's something about bringing the outdoors in that instantly soothes the soul. So imagine how zen you'd feel if you were to create your own indoor water garden? A cluster of aquatic plants displayed inside clear vessels gives the look and feel of a serene water feature, but it can be as small-scale as a simple jar. The process of setting up a water garden couldn't be easier, and it requires very little maintenance — that's pretty great news for newbie gardeners.
Things Needed
-
Clear vases, jars, bowls, etc.
 Trisha Sprouse
Step 1
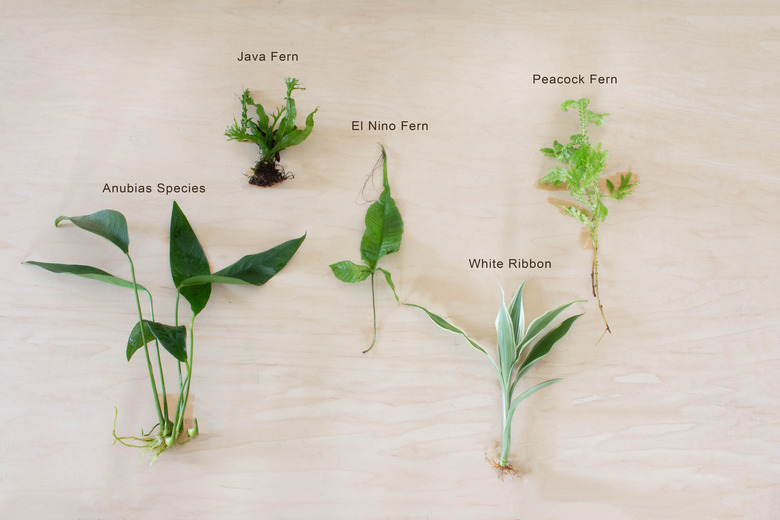
Select a variety of aquatic plants with different heights, tones, and textures. Be sure to choose freshwater varieties. We found a pretty large selection at our local pet store in the aquarium/fish section. Garden centers or plant nurseries are likely to have some as well.
Some common freshwater varieties are:
- Java fern
- Water wisteria
- Anubias
- Amazon sword
- White ribbon
- Hornwort
- Peacock fern
- Dwarf lilies
 Trisha Sprouse
Step 2
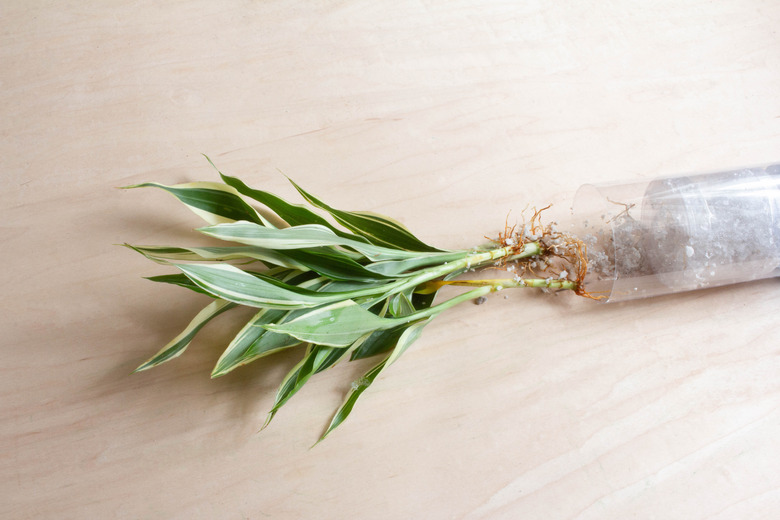
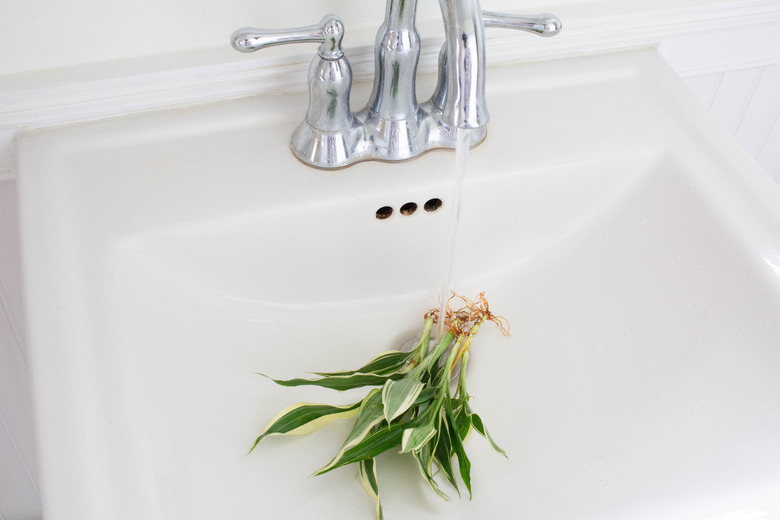
Your plants will likely come packed in a tube with their roots covered in a gel substance. Gently wiggle the roots to loosen them from the gel, and slide the plant out of the tube.
 Trisha Sprouse
Rinse the gel off of the roots and leaves.
 Trisha Sprouse
Step 3
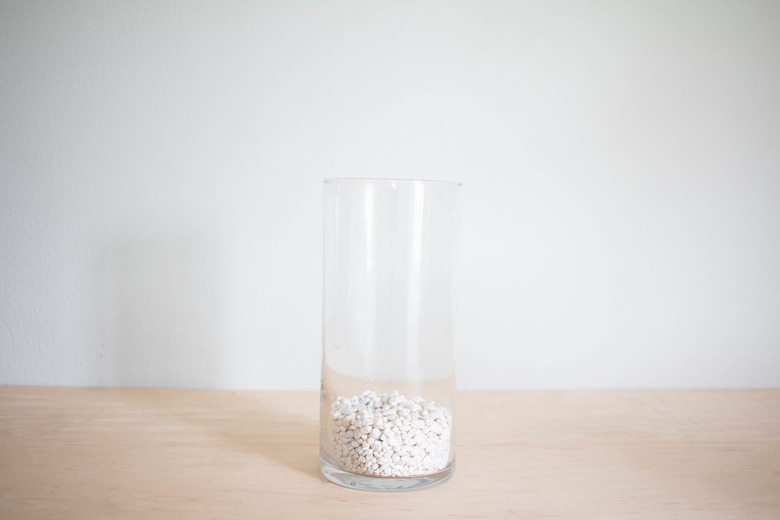
Rinse the gravel to remove any dust or impurities (otherwise, it'll make the water cloudy). Then add about 2-3 inches of gravel to your vessel — you'll need enough to provide a stable base for your plant roots to grow.
 Trisha Sprouse
Step 4
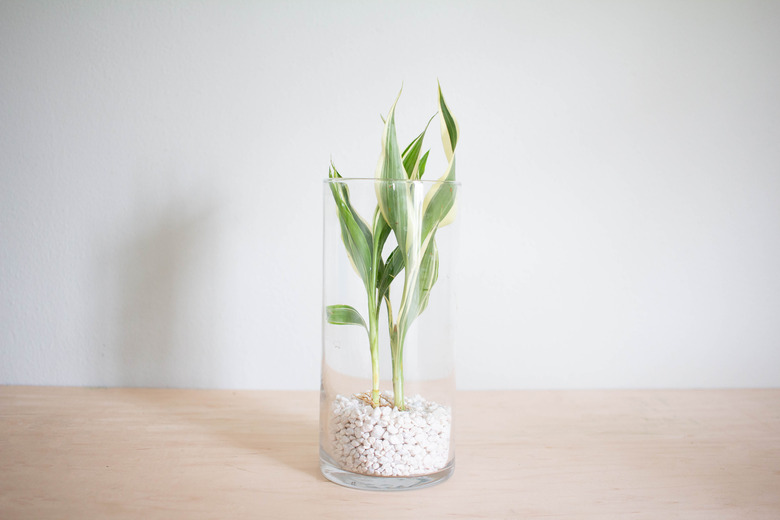
Add your plant to the vessel, and wiggle the roots down until they are covered by the gravel and secure enough that the plant can stand upright.
 Trisha Sprouse
Step 5
Add room temperature water to the vessel. Tap water or spring water is fine. Some plants require the tops to remain above the water level (semi-aquatic) while others can grow completely submerged (aquatic). Be sure to check the plant care instructions that came with your plant.
 Trisha Sprouse
Step 6
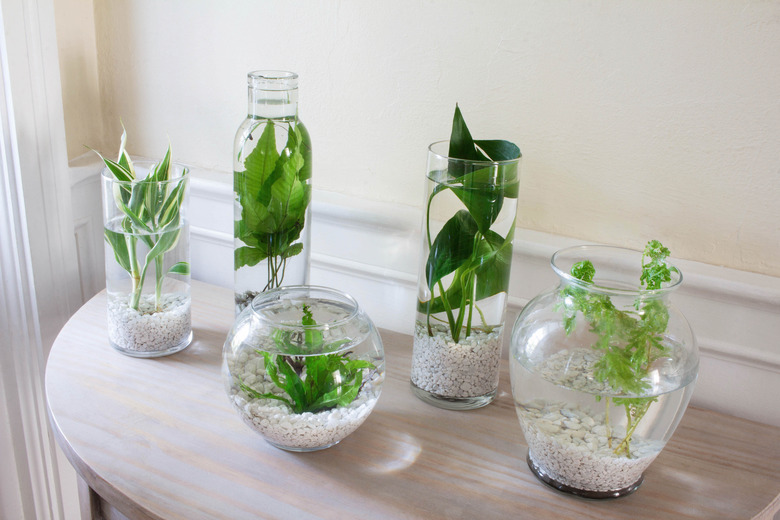
Place your plants in a spot that gets plenty of indirect light, but not direct sunlight. Once a month, add fertilizer to the gravel bed to provide plants with essential nutrients for growth. To keep water clear and prevent algae growth, change the water and rinse the plants and gravel about once a month.
 Trisha Sprouse
Now bliss out to the soothing sights of water and plants every time you pass by your indoor garden.
 Trisha Sprouse
 Trisha Sprouse