Sealing A Tile Floor: What You Should Know
Applying a sealer to your tile floor to protect the grout is recommended in almost every circumstance because grout is a cementitious material that will soak up water (and stains) and degrade if you don't apply a sealant. The tiles themselves are a different matter, and it may or may not be a good idea to seal them. Glazed ceramic and porcelain tile never need to be sealed except under special circumstances, but unglazed ceramic, porcelain, clay and natural stone are porous and quickly become dirty and discolored without a sealer.
The Pros and Cons of Sealing Tile
The Pros and Cons of Sealing Tile
Not every tile pro is a fan of sealing, though. David Blamire of XO2 cautions against sealing, and some of his reasons are:
- Sealers can make the tile more slippery.
- Sealers may change the color of the tile.
- A sealer coat is more fragile and damages more easily than the surface of the tile itself.
- You might apply a sealer to avoid having to clean the tiles as often, but sealers require maintenance too, and you may end up doing more work in the end than you would have done otherwise.
Despite these considerations, tile manufacturers and installers generally recommend sealing unglazed tiles for many reasons, some of which are:
- Sealers protect the tiles from staining caused by spills.
- Not all sealers change the tile color, and not all of them leave a glossy finish.
- Despite the fact that they need maintenance, sealers generally make the tiles easier to clean.
Porcelain and ceramic tile are basically fired clay, and while water soaks into these materials, it quickly evaporates just as it does when you pour the water from an unglazed clay jug and let the jug dry out. The same is true for natural stone. Consequently, unglazed tile in a dry and sunny location such as a sunroom probably doesn't need a sealer as much as those in a bathroom or basement, where humidity is higher and evaporation is less efficient.
Tile Sealers Are Like Hardwood Floor Finishes
Tile Sealers Are Like Hardwood Floor Finishes
Tile sealers generally fall into two categories: those that penetrate the tile and provide a moisture barrier inside and those that form a protective film coating on the surface. The difference is analogous to a penetrating oil finish for hardwood floors and a coat of polyurethane. A film coating may be glossy or matte, and because it remains on the surface of the tile, it usually darkens the color somewhat.
A penetrating sealer generally leaves a matte finish, and you might not even realize it's there. If you move into a new house with unglazed tile or travertine floors and you're wondering whether the material is sealed, pour a small amount of water on the floor and see if it beads on the surface, which indicates that the tile is sealed. A film finish is more obvious, especially when it begins to wear off and leaves the tile looking mottled.
 Sanford Creative
Glazed tile doesn't normally need a sealer, and most conventional sealers won't even stick to it, but even so, certain types of sealers are designed to bond to glazed tile. One such product, GlazeGuard, is a two-part product that undergoes a hardening reaction when you mix the parts together. One reason you'd want to use a product like GlazeGuard is to reduce the slip coefficient on glazed ceramic and porcelain tile, which can be very slippery, especially when water is present.
Which Product Is Right for Your Tile Floor?
Which Product Is Right for Your Tile Floor?
The fact that some pros aren't in favor of sealing unglazed tile notwithstanding, it's almost always a good idea, especially in high-traffic areas. Whether or not the tiles need a sealant, however, the grout almost always does unless it's epoxy based. This is why many products you'll find on the shelves of hardware stores are labeled as tile and grout sealers. In fact, one of the main differences between a tile and grout sealer and a grout sealer is that the latter comes with a roller-brush applicator that fits in the grout lines.
As it is with hardwood floor finishes, toxicity is one of the issues to consider when purchasing tile and grout sealer. Water-based products are generally not as toxic as solvent-based ones. They emit fewer VOCs, they dry faster and they're easier to clean up. It's a good idea to check the label before you purchase a product and check for toxic ingredients such as formaldehyde.
Three recommended brands include Aqua Mix Sealer's Choice Gold, SafeCoat and 511 Impregnator Sealant. All are long-lasting, reliable and nontoxic penetrating grout sealers, but you can use them to seal unglazed tile as well. If you're looking for a surface sealant with a glossy finish, choices include GlazeGuard for glazed tile and Miracle High Gloss Finish Sealer for unglazed tile.
How to Seal Floor Tiles
How to Seal Floor Tiles
If you're going to apply a sealer to your new floor tile, professional tilers recommend doing it before grouting because the sealer will prevent the grout from staining the tiles. The only disadvantage is that you'll have to seal the grout lines separately, which introduces an extra step for the tile installer. If you're in danger of overspending your home improvement budget, you may want to choose a grout color that matches the tiles so you can seal the tiles and grout in a single operation.
Things Needed
-
Tile-cleaning product
-
Sealer
-
Sealant-residue remover
-
Gloves
-
Goggles
-
Sponges and/or scrub brush
-
Wet vac
-
Rags
-
Paint pad or paint roller (optional)
-
Mop (optional)
-
Grout wand
1. Clean All Tile Surfaces Before Sealing
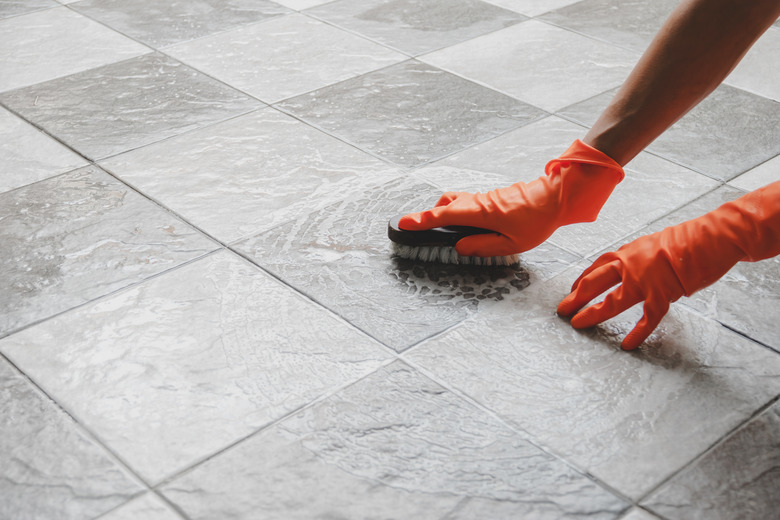
Whether you're sealing tile floors or countertops or you're putting the finishing touches on a new tile backsplash, the tiles and grout must be free of dirt, oils and mildew. Commercial cleaning products for tile surfaces tend to be highly alkaline, so wear gloves and goggles and use them according to the directions. You can normally do the job with sponges, but you may also need to do some scrubbing with a scrub brush to remove stubborn discoloration.
 wattanaphob/iStock/GettyImages
For a more thorough cleaning when the tiles are especially dirty, flood the floor with water after scrubbing with a chemical cleaner and wait for 10 minutes to allow the cleaner to dissolve oils you couldn't scrub out. Remove the water by vacuuming with a wet vac, wipe down the floor with rags and allow the floor to dry thoroughly for at least six hours.
2. Read the Directions
Some tile and grout-sealer products are very easy to use, and some come in a spray bottle to make application even easier, but others must be spread by hand using a mop, a roller or some other application tool. Penetrating sealers are generally the easiest to apply. Always read and follow the application directions on the product label.
3. Apply a Coat of Sealer
Spread the sealer using the applicator recommended on the product label. Options include a paint pad or paint roller for surface sealers and a sponge, rag or mop for penetrating sealers. If the product you're using comes in a spray bottle, just spray it liberally on the floor.
4. Apply a Second Coat
Allow the sealer to dry for the time recommended on the product label, which is about an hour for most penetrating sealers but longer for film coatings and then apply a second coat following the same procedure you used for the first coat. Clean up your tools with soap and water or the recommended solvent when you're done.
5. Remove Excess Sealant
Use a product such as Miracle 511 Sealant Residue Remover and Cleaner to clean up excess sealant after it has dried but before it cures. Follow the directions on the container, which usually amount to wiping the product over the tiles with a rag. Rinsing usually isn't required.
6. Let the Product Cure
The cure time is longer than the drying time, and it's also listed on the product label. It could be several hours to one or even two days. Stay off the floor until the product has completely cured.
7. Seal the Grout Lines of Glazed Tile
Glazed tile usually doesn't need a sealer, but the grout joints do, especially when installing new tile or after extensive grout cleaning. When you're only sealing grout joints, use an applicator designed for that, such as a grout wand. Wipe excess sealer off the tiles as you go using a clean rag.
Some Tips to Keep in Mind
Some Tips to Keep in Mind
When sealing glazed tiles to make them less slippery, you usually have to etch the tiles before applying the sealer to ensure proper adhesion. You can buy acidic cleaners designed for this purpose, but it's good to remember that they dull the surface finish somewhat, and the sealer may not be as glossy as the original finish. The acidic cleaner is even more corrosive than conventional cleaners and requires extra care and adherence to the product directions.
If you're applying a new surface sealant to floor tiles with an old sealer that is in poor condition, you may have to strip the old sealer. You may get good results using a residue remover and cleaner such as Miracle 511, but in some cases, you may need a heavier-duty product, and you may even have to resort to a paint stripper, which is necessary to remove solvent-based polyurethane sealers. This can be a tough job, and it may be one you'd prefer to avoid by increasing your home improvement budget so you can hire a pro.
When Do You Need to Reseal?
When Do You Need to Reseal?
When you clean your sealed tiles, use a pH-neutral cleaner such as plain water or a commercial tile-cleaning product and a soft, nonabrasive mop or cloth. Avoid household cleaners such as ammonia and vinegar or at least use them sparingly because they degrade the sealer and reduce the time between refresher coats. Vacuuming and cleaning removes surface grime and prevents mold and mildew from forming, but even so, you'll have to add another sealer coat eventually to keep the tiles looking new.
As a rule of thumb, penetrating sealers can last longer before resealing than film coatings. Tile professionals recommend resealing film coatings every year, although few homeowners actually stick to this protocol and usually wait for the film to start cracking or peeling. If you do that, though, you're asking for the extra work of removing the old sealant before applying the new one, so things will be much easier for you if you just go ahead and reseal annually.
Penetrating sealers don't peel off, but they do wear out, and when that happens, the tiles and grout start to turn a darker color. The discoloration may be due to dirt, mildew or both, and it usually comes out with a deep cleaning using a commercial tile-cleaning product. Once the tiles are clean and dry, apply a refresher sealant coat using the same technique you would use to apply new sealant.