Hardwood Floor Refinishing: A How-To Guide

We may receive a commission on purchases made from links.
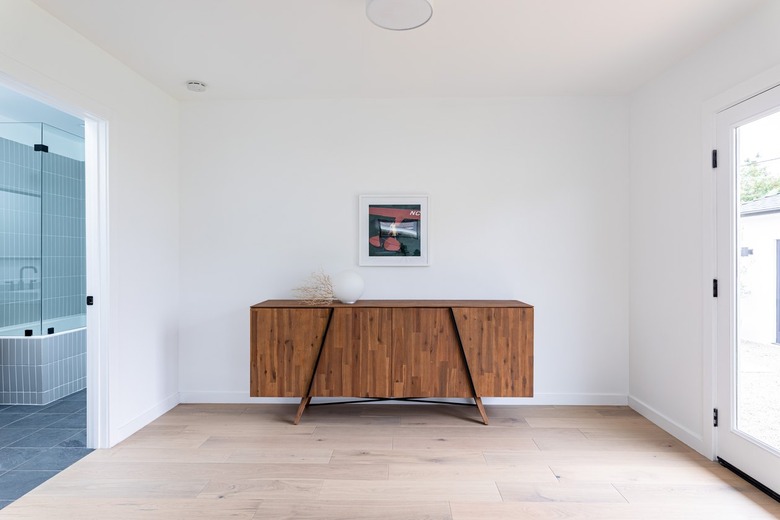
If your hardwood floor is looking dingy and scuffed, a new finish could restore the luster and make your floor look sparkling new again. As Old House Journal points out, the matter isn't just one of appearance — a new finish also seals the wood, preventing the pores from absorbing water, dirt and spills and helping to keep the wood safe from scratches and dents. However, keep in mind that refinishing the whole hardwood floor isn't necessary for most homes, and instead, a simple recoat may suffice.
Does Your Hardwood Floor Need Refinishing?
Does Your Hardwood Floor Need Refinishing?
In most cases, you don't need to completely refinish your entire hardwood floor unless there is actually widespread damage to the wood itself or unless you want to add a new stain. In many cases, the old finish can be lightly sanded with a floor buffer, and a new finish can be applied on top of it.
This won't just make the DIY project a lot easier on you — you'll also avoid sanding down to the bare wood, meaning you won't be removing any of the wood itself. Since you can refinish wood floors only a limited number of times before you sand down to the tongues and grooves that hold the boards together, avoiding a complete refinish is always a good thing.
Because a surface refinish won't help any problems in the wood itself, though, you need to ensure that the damage to your hardwood floor is only in the finish and not any deeper. The National Wood Flooring Association says if you have many deep scratches or dents going through the finish, this is a good sign that the whole floor will need to be completely sanded and refinished.
If you can see any nails in the gaps between the planks on the floor, this is a sign that your whole floor needs to be replaced, not refinished. Also, if you have a laminate floor, the surface is made with an image of wood and not with real hardwood, so it cannot be refinished.
 Hunker in Partnership With Acme Real Estate
Preparing for the Project
Preparing for the Project
Whether you are going to recoat or fully refinish your wood floors, there is a lot of preparation involved, starting with removing any furniture, rugs and decorations from the room. Expect to keep the room clear for at least a week for the refinishing process.
Clean your floor with a commercial hardwood cleaner and look for problem areas like gouges, creaks, ridges or stains. Note that shallow water stains can be fixed when doing a full refinish, but not during a recoat. Next, nail down raised boards or loose boards that creak and remove or hammer in any protruding nails and then fill the holes with matching wood putty.
 BanksPhotos/iStock/GettyImages
Finally, close the doors connecting the room to the rest of the house and cover them in plastic sheeting to prevent dust from going into the rest of the house. Put box fans in the windows to aid in ventilation.
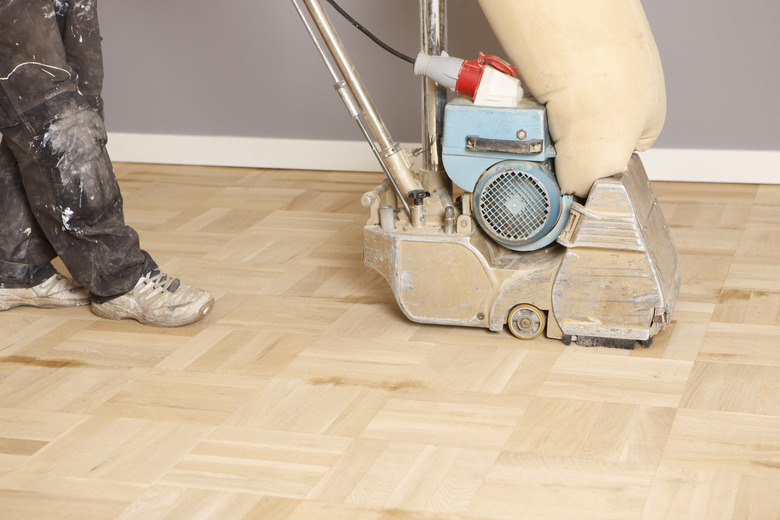
Sanding for Full Hardwood Floor Refinishing
Sanding for Full Hardwood Floor Refinishing
Manually sanding a floor with a pad sander or even a belt sander is not an option. You need the heavy-duty drum floor sanders and edge sanders that professionals use, which can be rented from most home improvement stores. Before sanding your hardwood flooring, practice on a plywood board until you know how to use both tools comfortably.
Floor sanding belts are good for around 250 square feet of flooring, so make sure you measure the square footage of the room ahead of time and buy enough belts in a full sequence of grits: 36, 60, 80, and, if the floor is in terrible shape, 24. Don't be tempted to skip a level of sandpaper — this will not save you time or money and might even ruin the entire hardwood floor refinishing project by leaving you with a scratched floor.
Floor sanders can easily damage shoe molding and baseboards, so remove these and number them so they can be easily replaced after you finish. Put on a dust mask and fit the sander with a 24- or 36-grit sandpaper belt. Run the sander along the floor boards, going with the grain, back and forth over 3- to 4-foot lengths at a time.
Keep the sander moving to avoid creating dents, and overlap areas as you go. Eliminate any scratches and water stains as you go but do not attempt to remove pet urine stains or other stains that penetrate deep into the flooring because these can rarely be removed without damaging the floor.
Once you've gone across the whole floor with the coarsest sandpaper, let the dust settle and sweep and vacuum the floor. Repeat the process with the next higher grit. Always wait until the dust settles and then sweep and vacuum before switching sandpaper grades. Complete the final sanding passes with an 80-grit belt.
 Photoevent/iStock/GettyImages
After you've finished sanding with each grade of sandpaper using the drum sander, use the same grit of paper on the edge sander and work the edges of the room and along small areas like closet floors and stairs. Move the machine — which rolls on the floor — in small, semicircular motions, and overlap the area done by the drum sander so they blend together. Repeat sanding with the edge sander after completing each pass with the drum sander, going through every grade of sandpaper until you've used the 80-grit paper.
Finally, go over any particularly small, hard-to-reach areas and corners with a sharp wood scraper and sandpaper, remembering to finish with 80-grit sandpaper. If there are any particularly deep gouges that go further than you could reasonably sand out, fill them with wood putty in a similar shade.
Scuff-Sanding a Hardwood Floor
Scuff-Sanding a Hardwood Floor
If you're only doing a recoat rather than a full hardwood floor refinishing, you must use a buffer to scuff-sand the old finish so that the new finish will bond to the old. Buffers are available for rent at home improvement stores and equipment rental centers.
You'll need to do a little preparation before moving on to the scuffing. Start by fixing deep gouges by filling them with wood putty in the same color as the hardwood floor. Then, fix scratches that go through the finish by applying a wood stain that is much lighter than the floor color, using a cotton swab. You don't need to remove the baseboard when doing a screen-and-recoat.
Set up the buffer with a 120-grit sanding screen. Start buffing the floor in an irregular sweeping motion, going across the grain. Get as close to the walls as possible without damaging the baseboard. When you've finished with the whole floor, spot-check the end result to ensure everything is even. If you missed any areas, hand-sand them with 120-grit sandpaper. Do this until the whole floor is even.
When you're done sanding, clean any flat surfaces above the floor, including windowsills, shelves, hearths, etc. with a vacuum or microfiber cloth. Use an industrial-grade vacuum fitted with a soft-bristle hardwood floor attachment to suck up the dust on the floor. Do not sweep the dust, as it may settle between floorboards. Wipe the hardwood flooring with a damp microfiber cloth and ensure the area is as dust-free as possible because dust can create craters or bumps in finish.
How to Apply Finish to Hardwood Floors
How to Apply Finish to Hardwood Floors
Make sure you have the right finish for your hardwood flooring. If you are doing a complete refinish, then any finish should be fine for the most part, although you may want to check on what finish types work the best with the species of wood in your flooring. Generally speaking, water-based polyurethane is the easiest finish to work with, making it a good choice for DIYers. If you want to stain the floor, be sure to let the stain color fully dry before applying finish.
If you didn't remove the existing floor finish, then it is best to use the same finish if possible. If you don't know what kind of finish was previously used, try to determine if it was water-based or oil-based because these two finishes are not compatible. A good test is to wipe the floor in an inconspicuous area with a cloth dipped in Goo Gone — if the cloth changes color, then the finish is oil-based.
Before starting, put on rubber gloves and cover your mouth and nose with a respirator. Then, use a 7-inch painter pad to apply finish along the edges of the room, going with the wood grain. Once you've covered about a foot from the wall on all sides, use a lamb's wool applicator to apply the rest of the finish, being sure to overlap the area you already covered.
One coat should be fine if you're just reapplying finish, but if you completely stripped the finish, apply one coat of sanding sealer according to the manufacturer's instructions. Let it dry, then lightly sand the finish with a power buffer and a 120- or 150-grit screen. Vacuum the dust and wipe the floor with a microfiber cloth before applying a second coat. Repeat to apply as many coats as the manufacturer recommends, usually three for oil-based finishes and four for water-based finishes.
When dry, you can walk on refinished hardwood floors with socks but wait until it is fully cured to walk in the room with shoes. Reinstall the baseboards and move your furniture or rugs back into the room.
References
- Old House Journal: Refinishing Wood Floors | 7 Easy Steps
- Old House Journal: Repairing & Refinishing Old Hardwood Floors
- This Old House: How to Refinish Wood Floors
- Tips.net: Testing for Oil or Water Based Finishes
- Home Depot: How To Refinish Hardwood Floors
- National Wood Flooring Association: Refinishing Your Floors