How To Install Vinyl Plank (LVP) Flooring
If you're looking for a durable, easy-to-install floor covering that can go right over many types of existing flooring, it's time to check out vinyl plank flooring, also known as luxury vinyl plank (LVP) flooring. This type of flooring is also available as tiles, which are known as luxury vinyl tiles (LVT). The procedure for installing them is virtually the same as it is for installing LVP flooring, but with tiles you begin the installation in the middle of the room instead of along a wall.
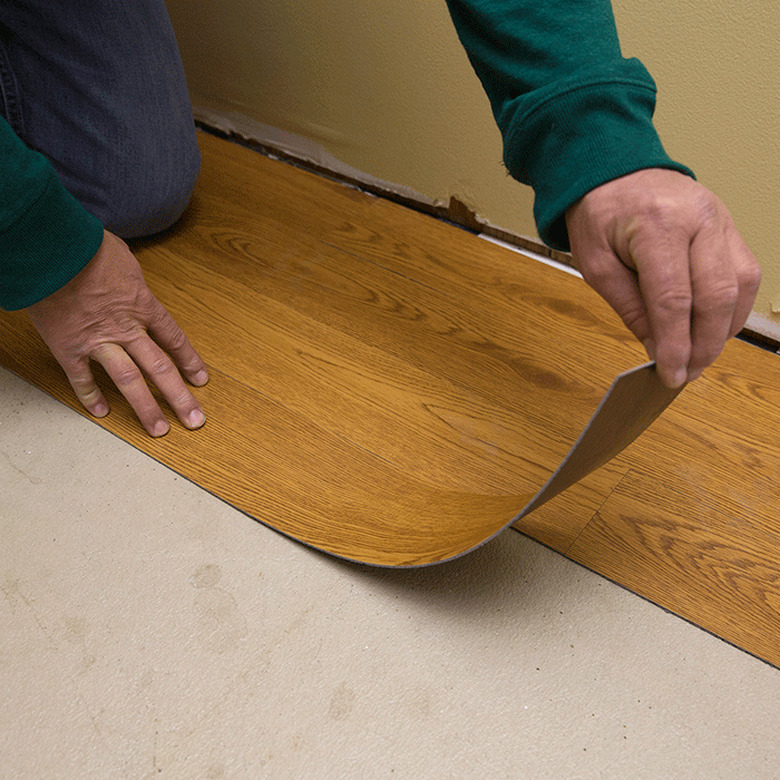
Not all vinyl flooring planks are the same. Some have interlocking (tongue-and-groove) edges, just like laminate flooring planks, while others come with adhesive strips that hold the planks together. Both of these styles create floating floors that aren't attached the subfloor. A third type comes in peel-and-stick planks that are designed to adhere to the subfloor.
If you've ever installed a laminate floor, you can install a floating LVP floor. In fact, you'll find the job much easier because of the flexibility of the planks. If you haven't worked with laminate flooring before, don't worry, because this is a job for which no experience is required, and you'll get the hang of it after installing just a few planks. Before you begin snapping or taping planks together, though, there are a few things you need to do first.
Why Choose Vinyl Plank Flooring
Why Choose Vinyl Plank Flooring
Laminate and vinyl flooring planks have much in common. Both are engineered with a locking mechanism, which makes them easy to install, and both can look like hardwood, stone or tile. But unlike those hard materials, vinyl planks have some give when you walk on them, making them a bit more comfortable underfoot.
Like laminate planks, LVP planks have four layers:
- Core—usually made of vinyl; flexible and completely waterproof
- Backing—provides some cushioning; also flexible and waterproof
- Image layer—usually mimics some type of hardwood, but can also depict stone, tiles or a geometric pattern
- Wear layer—prevents scratches and damage to the material; usually a clear, durable polyurethane or acrylic finish
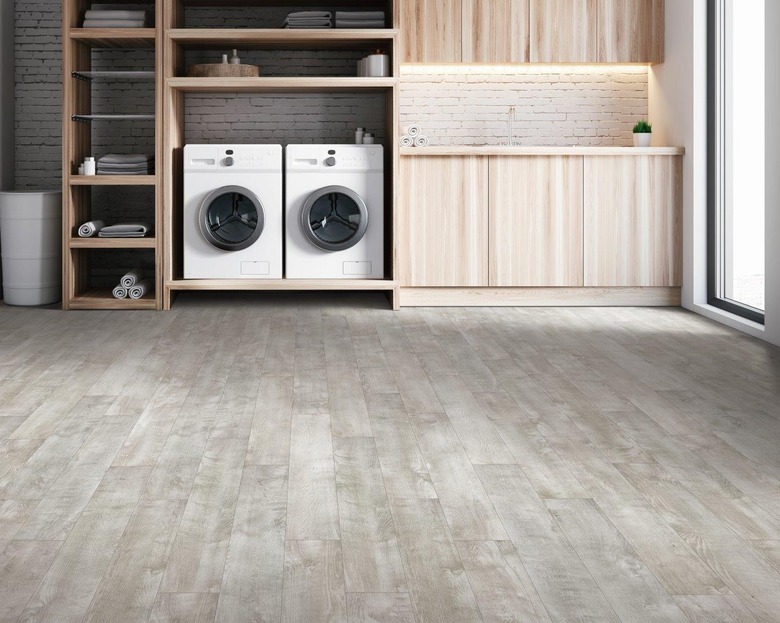
Vinyl plank flooring and luxury vinyl tiles are typically thin, with a thickness in the neighborhood of 5/32 inches. This is more robust than sheet vinyl but not as thick as most laminates, and because LVP and LVT flooring is waterproof and doesn't require an underlayment, it can go right over your existing flooring without raising the level of the floor by a significant amount. However, because it's such a thin floor covering, you can feel every defect in the floor underneath, so the subfloor must be flat and smooth. This requirement rules out laying LVP over tiles, slate and other uneven materials.
Getting Ready for Vinyl Plank Installation
Getting Ready for Vinyl Plank Installation
After you've purchased your new luxury plank flooring, you need to give it a chance to acclimate to the installation area. Let it sit in the room where you will install it for at least 48 hours. Planks in different boxes may have slightly different colors and visual effects, so when you unpack the planks during installation, pull planks from different packages to prevent any discernible pattern or color changes in the finished floor.
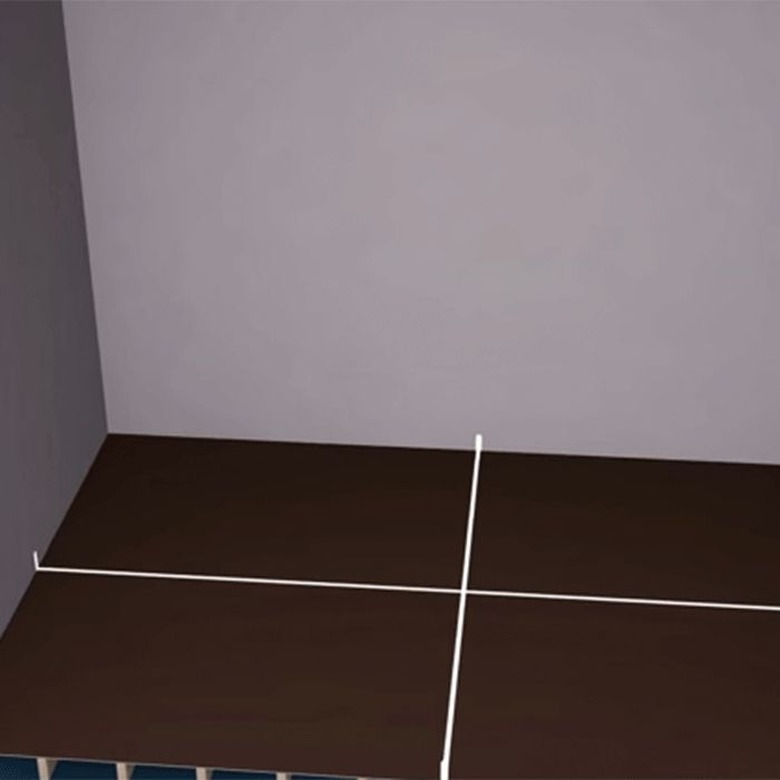
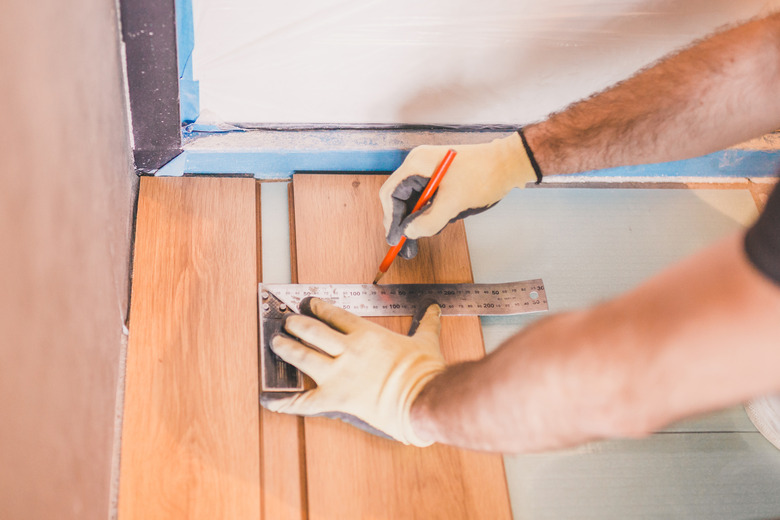
Next, you need to establish a starting line that is square to the room—even if the room is out of square or the walls aren't perfectly straight. To create a starting line, measure the length of each wall, then mark the floor at the center of the wall, so you have four marks total. Snap a chalk line across the room at each pair of opposing marks to create perpendicular lines that meet at the room's center. Measure from the intersection of the lines toward the starting wall, subtract 5/16 inch for an expansion gap, and mark the floor. Using this same dimension, measure from the centerline and mark the floor at both ends of the starting wall. Snap a chalk line through the three marks. This is the line along which you will lay the first row of flooring.
Finally, measure from the chalk line to the opposite wall; divide this dimension by the finished width of a single plank. If the sum has a remainder and it is less than 0.33, or one-third of a plank width, plan to trim the first row of planks by about one-third their width. This ensures the last row (opposite the starting wall) won't be too skinny. For example, if the room measures 121 inches and the planks are 6 inches wide: 121 divided by 6 = 20.17. The remainder is only 0.17, which is less than one-third of a plank. Therefore, you would trim off about 2 inches of width from the first row of planks to ensure the last row is wider.
 Lowe's
How to Install Luxury Vinyl Planks
How to Install Luxury Vinyl Planks
Things Needed
-
Tape measure
-
Chalk line
-
Utility knife
-
Square
-
Hammer or mallet
-
Tapping block
-
Laminate pull bar
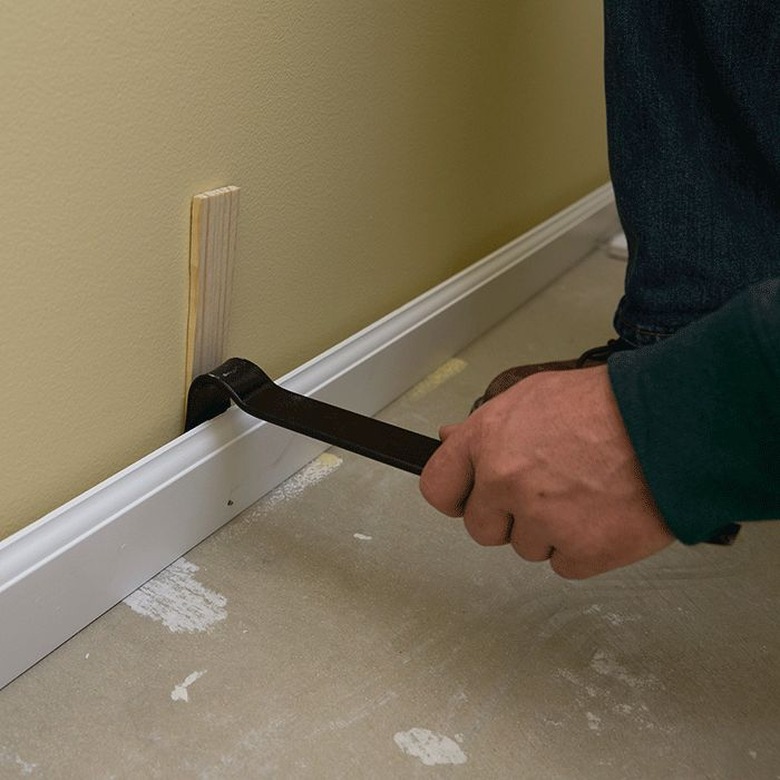
If you haven't already pried off the baseboards, you need to do this before beginning installation. Number the baseboards and store them outside the room if you plan to reuse them.
1. Lay the First Row
If you're using interlocking planks, trim off the tongue edge of each plank for the first row (or trim the plank to width, if necessary), using a utility knife. Place the planks along the chalk line, with the trimmed edges facing the starting wall. Maintain the 5/16-inch expansion gap at the side wall. Fit the end joints of the planks together, following the manufacturer's directions. Cut the last piece in the first row to fit, leaving an expansion gap.
Install adhesive-strip or peel-and-stick planks using the same techniques, but there's no tongue to cut off with these styles of planks; simply lay them along the chalk line.
Tip
Cut vinyl planks with a utility knife and a square, using the square to ensure a straight cut. Score the plank with the knife, then snap the plank backward along the scored line to break the material.
2. Install More Rows
 andreygonchar/iStock/GettyImages
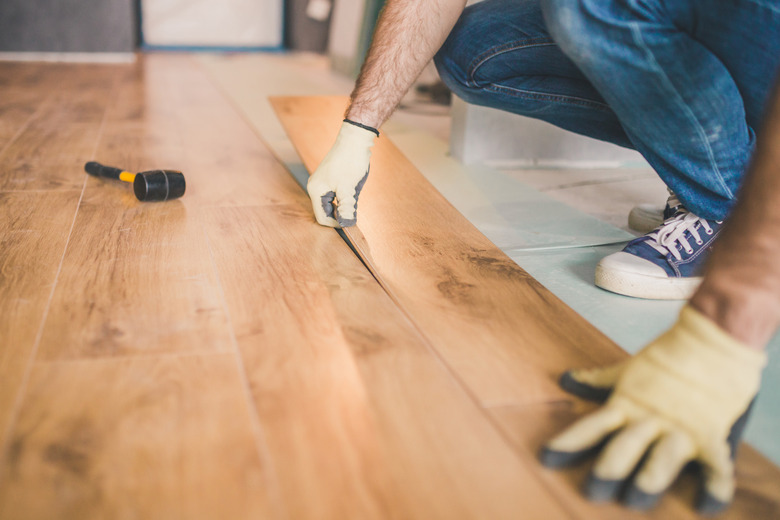
Begin the next row with a full-length or partial plank, as needed, to ensure that the end joints (where neighboring planks in each row butt together) are offset by the end joints in the adjacent rows by at least 6 inches. This is called staggering. If possible, vary the stagger distance in successive rows to avoid a visible stair-step pattern. Complete the second row, trimming the last plank to length, as needed.
If the flooring has a locking system, you connect the planks by snapping them together side-to-side and then end-to-end. You may have to tap the planks lengthwise to get the ends to join. Use a tapping block to do this to prevent damage to the planks.
Continue installing more rows across the room, using the same techniques.
3. Install the Last Row
 andreygonchar/iStock/GettyImages
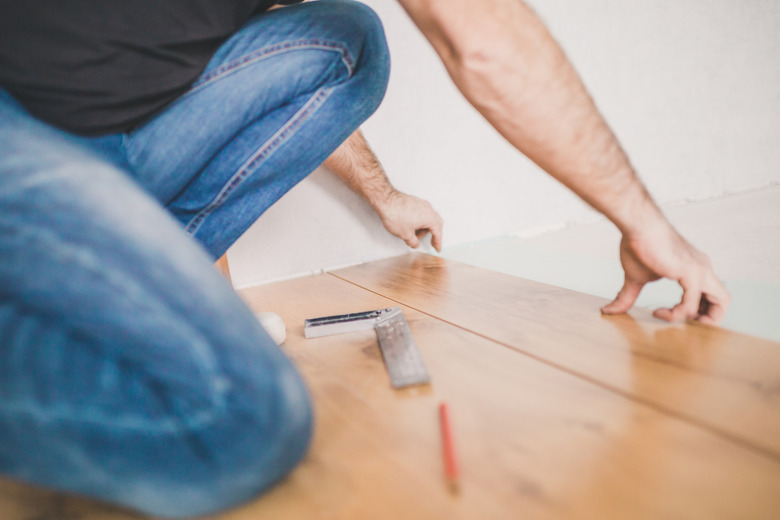
Measure the gap between the second-to-last row and the wall, and trim the planks lengthwise to fit, remembering to allow for an expansion gap at the wall.
If the planks lock together, set each last plank into place and draw it toward the preceding row using a laminate pull bar. Hook the bar on the wall-side edge of the piece you're installing, and tap the bar to lock the planks together.
Complete the job by installing the baseboard. Fasten the trim to the wall (or cabinet, as applicable), not to the floor.
Tips for Installing Vinyl Plank Flooring
Tips for Installing Vinyl Plank Flooring
You'll probably have to cut a few planks to fit around door jambs, cabinets and other obstacles. You can cut curves with a utility knife, but you can also use a jigsaw, which is faster. If you opt for a jigsaw, use a fine-tooth metal-cutting blade to avoid chipping out the wear and image layers of the flooring. An even better way to avoid chip-out is to cut the planks from the back, if possible.
When you install LVP flooring on an existing floor, you usually have to undercut the door jambs to get the flooring to fit underneath them. A Japanese-style pull saw is ideal for this, but if you prefer power tools, use an oscillating multi-tool. Use a spare piece of flooring to gauge the depth of the cut.
Baseboards are a requirement. They hide the gaps at the edges of the floor, and they also hold the floor down. When installing LVP flooring around a cabinet, attach quarter-round or base shoe molding to the cabinet in lieu of a baseboard. To ensure the flooring can move, be sure to nail the baseboards to the wall or cabinet, and not to the floor or subfloor.