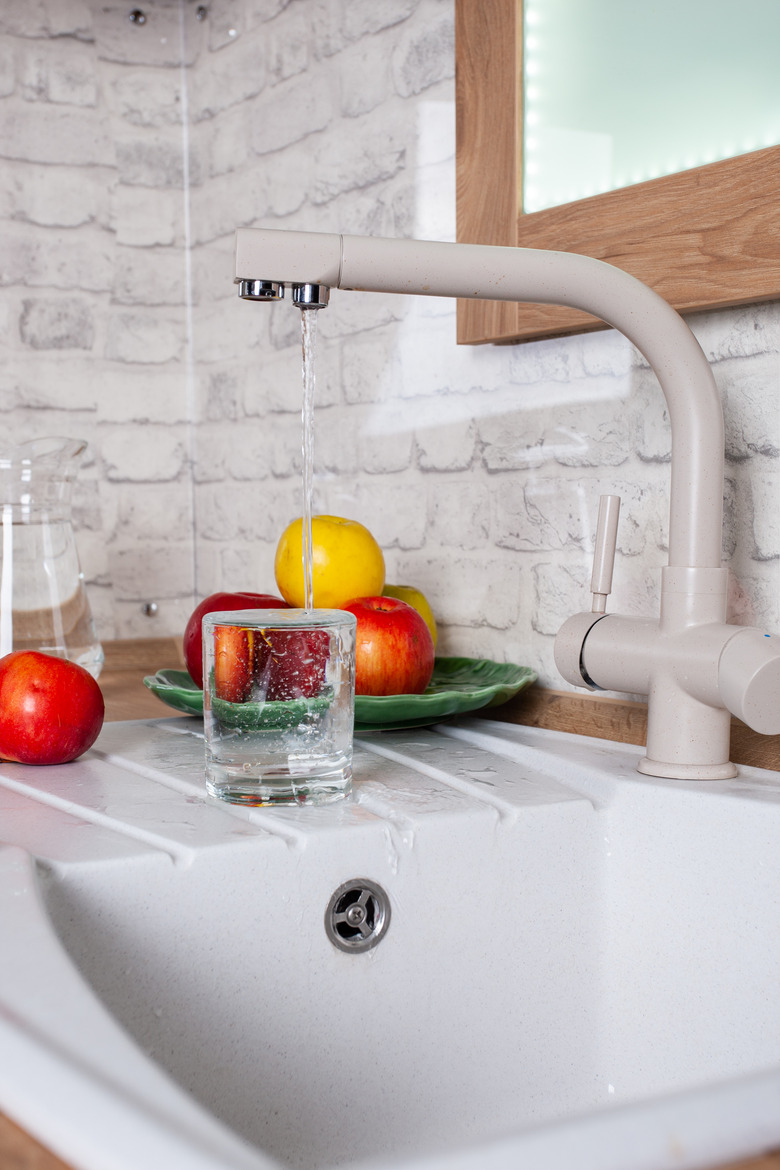
How To Fix A Leaky Kitchen Faucet
Even if you've gotten used to the drip-drip-drip from your kitchen faucet, and it no longer keeps you awake at night, you should still fix it. A leaky faucet wastes a surprisingly large amount of water—as much as 3 gallons a day. Water is a precious resource, and you're paying for what you waste.
 igorartmd/iStock/GettyImages
There is really no reason to waste water in this way, since stopping a faucet leak is one of the easiest home improvement tasks there is. The problem almost always boils down to a worn rubber gasket or O-ring, and when the problem is a piece of hardware, the part in question is usually replaceable. That even goes for valve seats, which screw into the faucet body and can be responsible for leaks when worn out.
Know the Valve Style in Your Faucet
Know the Valve Style in Your Faucet
Faucet manufacturers have come up with four different valve designs over the years and incorporated them into a huge selection of kitchen faucet models. Knowing which type of valve your faucet has can help you figure out why the faucet is leaking even before you take it apart. The four valve designs are:
- Compression valves: Compression valves are the simplest (and oldest) in design and the easiest to fix. Faucets with compression valves always have two handles, and you open and close the handle by turning the handle through several rotations. The screw-down valve stem on a compression valve has a rubber washer, and when the faucet leaks, all you usually have to do is replace the washer.
- Bal-style valves If the faucet has a single handle, and the area where the handle is attached to the faucet body is dome-shaped, the faucet probably has an inner mechanism known as a ball valve. The parts that usually cause leaks are the rubber gaskets that fit into the inlet holes in the valve seat and the springs that push them against the ball. Occasionally, the ball itself may be nicked or cracked, in which case the entire ball can be replaced.
- Cartridge valves: Cartridge valves are probably the most common types of valves. Many single-handle faucets use this design, as well as some double-handle faucets. The valve housing is cylindrical, and the cartridge fits tightly inside it. The rubber parts that usually need replacement are the gaskets inside the inlet holes in the valve seat and the O-rings around the cartridge itself. It is also very common to repair these faucets by simple replacement of the entire cartridge.
 Moen
Moen
- Ceramic disk valve: If your faucet has two handles, but you can turn each handle only through 90 degrees, the faucet probably has ceramic disk valves, which are similar to cartridges. These are removable, although you might have to remove some screws to get one out, and they are the least likely valves to leak. Not all ceramic disk faucets have two handles; and not two-handle faucets with handles that turn through 90 degrees use ceramic disk valves. Some have less durable plastic cartridge valves. Repairs to a ceramic disk valve can involve replacing rubber valve seats in tthe bottom of disk, or someitmes complete replacement of the disk cartridge.
Your main clue as to the type of faucet you have may be the manufacturer's logo on the cap. If the faucet has a Moen logo, it's a cartridge valve, because that's the only type that Moen sells. If there's a Delta logo, there's a good chance the faucet has a ball valve. Other manufacturers, including Pfister, American Standard, Sisco, Grohe, Kohler and others sell mainly cartridge and compression valve faucets.
A General Procedure for Fixing a Faucet Leak
A General Procedure for Fixing a Faucet Leak
Things Needed
-
Flat-head screwdriver
-
Phillips screwdriver
-
Hex wrench
-
Hammer
-
Wrench
-
Pliers
-
Replacement seals or washers
-
Plumber's grease
-
Valve seat wrench (where necessary)

1. Turn Off the Water
Don't forget this vital step, or you'll have a flood on your hands. The shut off valves are under the sink. They are attached to the water supply stubout pipes, and the water supply tubes running to the faucet tailpieces. Turn both of them clockwise as far as they will go and open the faucet to relieve water pressure in the faucet and supply tubes.
2. Remove the Handle
Look for the cap in the faucet handle that hides the set screw holding the handle to the faucet body. This cap often displays the manufacturer's logo. Wedge a flat-head screwdriver underneath the edge and pry upwards to pop it off. To remove the screw, you'll need either a Phillips screwdriver or a hex wrench, depending on the faucet model. One the screw is out, the handle should just lift off, but if the faucet is old, the handle may be frozen to the valve stem by mineral buildup. A few light taps with a hammer usually breaks the bond.
 Sloan Repair
Tip
When the handle is hopelessly stuck, you may need a handle puller to get it off. This is a corkscrew-like device you can find at hardware and plumbing supply outlets.
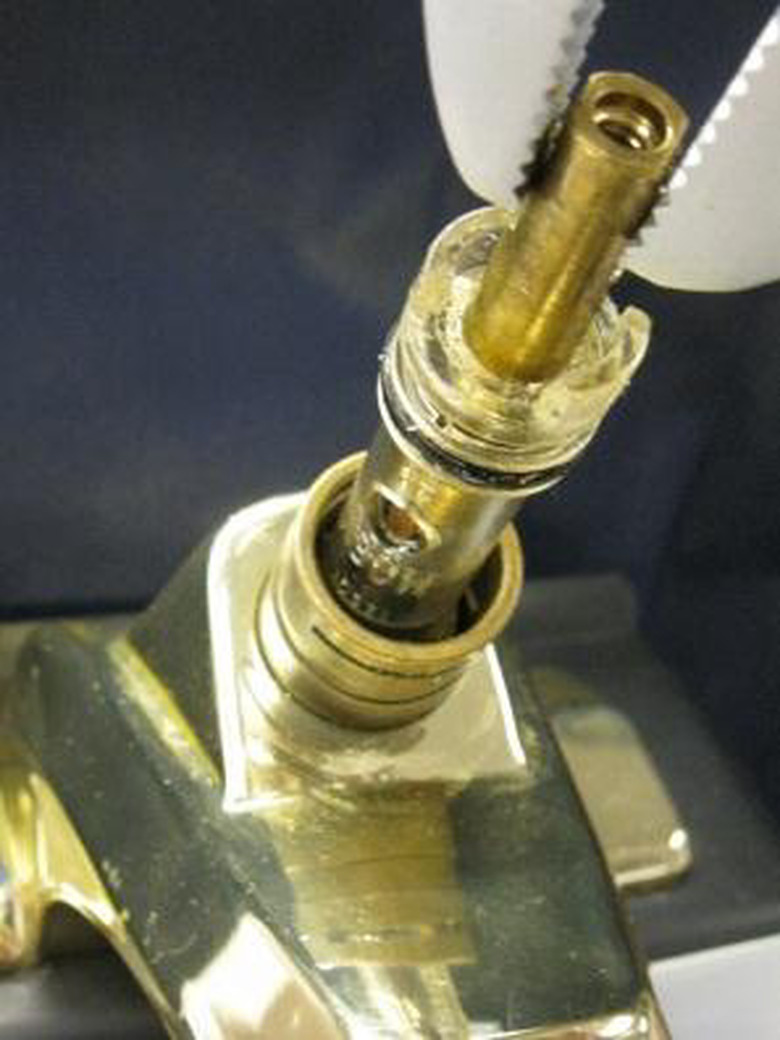
3. Remove the Valve Insert
Once the handle is off, you should be able to see what you have to do next. You may have to unscrew a retaining nut or a collar, using a wrench, or pull a pin, using pliers. Expect to find a pin if you're servicing a Moen faucet. Once you've removed the nut, collar or pin, you should be able to lift out the valve insert—the ball, cartridge, or ceramic disk insert.
If the faucet has a ball valve, you can usually unscrew the retaining collar by hand. Remove the ball carefully to avoid having the anything in the valve housing that is spring-loaded pop out and go down the drain.
Tip
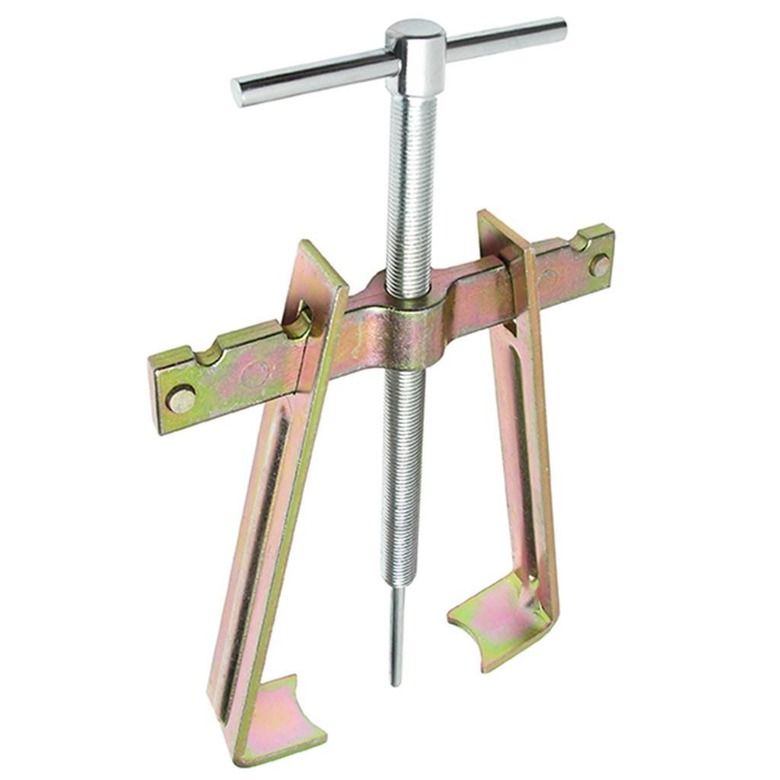
If the handle was frozen with mineral buildup (scale), and the faucet is a cartridge-type, there's a good chance the cartridge will be stuck, too. If you absolutely can't budge it by grasping the valve stem with pliers and pulling, you may need a cartridge puller. Like a handle puller, it's available at hardware and plumbing supply stores.
4. Replace the Rubber Parts
The parts you'll find in the valve housing vary according to the valve type. In most ball-valve and cartridge faucets, you'll find rubber gaskets in the water inlet holes. Fish these out with a screwdriver and replace them. You'll usually find a model-specific package of repair parts at the hardware store.
If the faucet has a cartridge, replace all the O-rings on the cartridge itself. If your faucet has a compression valve, unscrew the screw holding the washer to the end of the valve stem, and replace the washer.
Tip
It's a good idea to rub plumber's grease on all rubber gaskets and O-rings before installing them. The grease lubricates the rubber and reinforces the seal.
5. Inspect the Hardware and Replace if Necessary
When servicing a ball-valve faucet, it's usually a good idea to replace the ball along with the washers. Most repair kits include a new ball. When servicing a cartridge valve, inspect the cartridge for nicks and cracks and replace it if you find any. Sometimes, it's best to replace small plastic cartridges even if you can't find anything wrong. They are usually inexpensive.
6. Reassemble and Test the Faucet
Reinstall the valve, then tigh down the retaining nut or collar or replace the retaining pin. Set the handle back in place and tighten the set screw to hold it, then pop the cap back on to hide the screw. Once everything is secure, open the shut-off valves slowly. Turn on the faucet to make sure the water is on, then turn it off and make sure the leak has stopped.
You May Have to Replace the Valve Seat

You May Have to Replace the Valve Seat
If your compression faucet still leaks from the spout after you've serviced the valve, the valve seat may be cracked or nicked. The valve seat is a threaded metal component that screws into the base of the valve housing. To remove it, you need a seat wrench, which resembles a long, tapered hex wrench.
Remove the valve again, then poke the seat wrench into the valve housing far enough to fill the hexagonal hole in the seat. Turn the wrench counterclockwise to unscrew the seat. You can find replacement valve seats at most hardware stores. Bring the old valve seat along for comparison to make sure you buy the right valve seat.