Installing A Stainless Steel Sink

Stainless steel sinks are mainstay of kitchens, where utilitarianism is paramount, although some models are also available for bathrooms. Whether you're looking for a drop-in, undermount or farmhouse-style sink, stainless steel is a lightweight, durable choice. It's easy to keep clean provided you follow a few basic guidelines, and it looks good with almost any countertop material. Stainless steel sinks are among the easiest to install, but whether or not you want to do it yourself depends on the sink style.
Drop-In Sinks Are the Most DIY-Friendly
Drop-In Sinks Are the Most DIY-Friendly
If you choose a drop-in sink—the style in which a rim that rests on the countertop—you can almost certainly do the installation yourself. The most difficult part of the job is cutting the hole, but the manufacturer usually supplies a cutting template to make this job easier. The work becomes even easier if you are simply replacing an old sink with a new one the same size, or if you have a new countertop that already has the sink cutout.
Installing an undermount sink—the type of sink suspended from the underside of the counterop—is more of a challenge, and you'll probably find that the manufacturer recommends professional installation. The problem with this style is that you have to secure mounting brackets to the underside of the cabinet, a job that calls for precision and, possibly, special tools. If you have the tools, and you're confident in your skill level, you can save several hundred dollars by doing this installation yourself, but proceed with caution.
Farmhouse sinks are the most challenging to install, because they usually require a support structure to be built into the cabinet. These are often quite heavy sinks that really can't be supported by the contertop itself. These types of sinks often go in before installation of the countertop and are technically part of the cabinet construction. But you can save money by hooking the sink up the drain and faucet yourself, and this portion of the job is virtually the same as it is for a drop-in sink.
 IronHeart/Moment/GettyImages
How to Install a Drop-In Stainless Steel Sink
How to Install a Drop-In Stainless Steel Sink
A typical drop-in sink comes with no pre-attached drain assembly or faucet. You have to purchase these separately and install them as part of the procedure. It's best to do this before you drop in the sink. To make this part of the job easier, it's a good idea to have pair of sawhorses available so you can suspend the sink upright from its rim. This makes it a breeze to tighten the drain and faucet retaining nuts.
Things Needed
-
New sink
-
Tape measure
-
Pencil
-
Cardboard (if needed to make a template)
-
Jigsaw
-
Drill
-
3/8-inch drill bit
-
Angle grinder (where needed)
-
Drain assembly
-
Plumber's putty
-
Rag
-
Channel-lock pliers
-
Adjustable wrench
-
Screwdriver
-
Faucet
-
Water supply tubes (2)
-
Silicone caulk
-
Caulk gun
-
P-trap assembly

1. Choose a Sink
Measure the countertop with a tape measure and choose a sink that will fit, allowing an inch or more from the front rim to the edge of the countertop and at least 2 or 3 inches from the back rim to the backsplash.
If the hole has already been cut, measure the dimensions. The outside dimensions of the sink basin—not including the rim—should match.
2. Draw a Hole Outline on the Countertop (if Necessary)
Using the template that comes with the sink, draw the opening on the countertop, using a pencil.
No template? Find a piece of cardboard large enough to cover the sink and draw an outline of the sink on the cardboard. Measure the width of the rim and draw another outline inside the original, inset by a distance equal to that width. Cut out the inner outline and use this cutout portion as a template to trace the sink outline on the countertop.
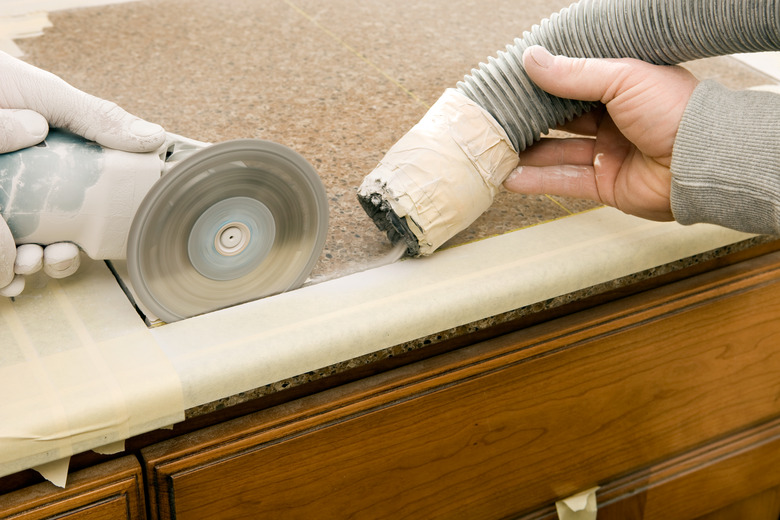
3. Make the Cutout (if Necessary)
 BanksPhotos/iStock/GettyImages
Use a jigsaw to make the sink cutout in countertops made of wood, laminate (which is actually mostly plywood) or solid-surface material. Drill a pilot hole for the saw blade on the edge of the outline, using a 3/8-inch drill bit, then cut along the inner edge of the line to complete the cutout.
For stone, metal, or composite countertops, you'll need to use an angle grinder and diamond cutting wheel to make the cutout. When cutting stone, it's important to keep the countertop wet to prevent overheating, which can cause hairline cracks in the countertop surface.
Tip
Most stone and metal countertops come with pre-cut holes. Cutting granite, marble and other types of stone or concrete can be challenging, so you might want to consider having the cutout made by a pro.
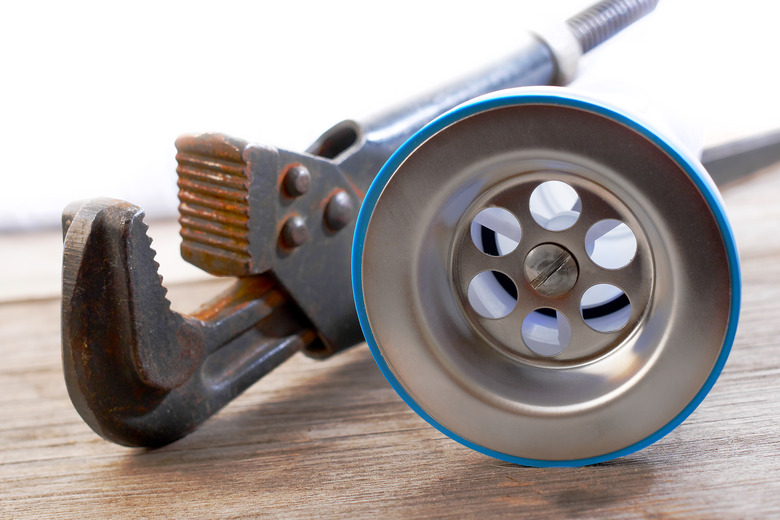
4. Install the Drain Assembly
 asadykov/iStock/GettyImages
- Begin installing the drain by forming a thin rope plumber's putty by rolling it between your palms.
- Wrap the putty around the bottom surface of the strainer flange (or garbage disposal collar).
- Insert the strainer into the drain hole, slide the rubber gasket and metal washer onto the threaded tailpiece under the sink, and tighten the nut with channel-lock pliers while holding the strainer steady with a second pair of pliers or a screwdriver.
- Clean up the putty that oozes from under the strainer with a rag.
5. Install the Faucet
Set the base plate that came with the faucet on the sink deck, align it with the predrilled holes and insert the faucet. Secure it to the sink with the supplied mounting nuts and washers, according to the faucet manufacturer's instructions. This normally involves threading mounting nuts or a bracket onto the tailpiece (or tailpieces) of the faucet.
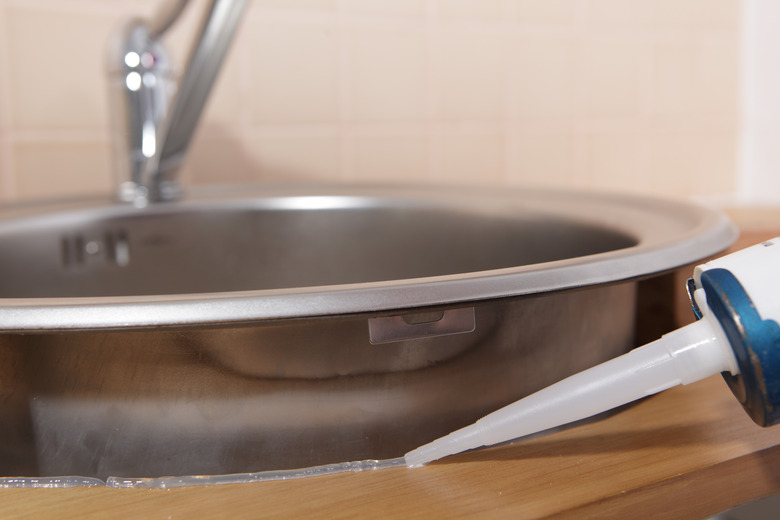
6. Insert the Sink
 -lvinst-/iStock/GettyImages
- Lay a continuous bead of pure silicone caulk around the perimeter of the hole in the countertop. Alternatively, you can apply caulk to the underside of the rim of the sink before lowering it into place.
- Drop the sink into place and push down along the rim to embed sink in the caulk.
- Install the clips to hold the sink as per the manufacturer's instructions and tighten them with a screwdriver. (Heavy cast-iron or composite sinks may not have mounting clips.)
- Lay another bead of caulk along the edge of the rim to seal it.
7. Connect the Faucet
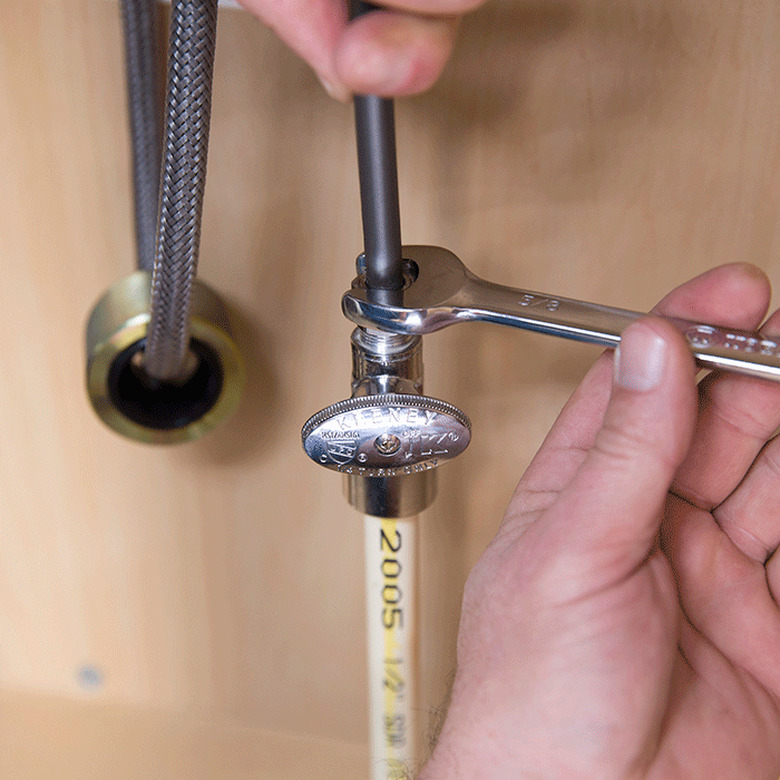 Lowes
Lowes
You'll need a pair of flexible supply tubes to connect the faucet to the fixture shut-off valves. (Sometimes these tubes are already mounted on the faucet or they may8 be included as part of the faucet kit.) Make sure the tubes have appropriate connectors. The two most common sizes are 3/8 and 1/2 inch; you may need tubes with two 1/2-inch connectors, two 3/8-inch connectors, or one of each, depending on the size of the fixture shutoff valves and faucet tailpieces. Purchase the shortest tube that will reach to avoid having to loop the tubes under the sink.
Thread the supply tube mounting nuts onto the fixture shutoff valves and faucet tailpieces, then tighten the nuts with channel-lock pliers or a wrench. The connectors are usually compression fittings, which means you shouldn't have to seal them with plumber's tape.
8. Install the Garbage Disposal
The garbage disposal comes with detailed installation instructions. In most cases, you screw it onto the collar, giving it a quarter turn to lock it in place, then you install a clamp around the collar and tighten it with a screwdriver.
9. Assemble the P-Trap and Connect the Drain
The P-trap assembly varies slightly for every sink, depending on the location of the waste inlet in the wall relative to the sink drains. In most cases, you screw a tailpiece onto the sink drain, connect the trap to it, and use whatever fittings are necessary to direct the horizontal trap arm into the inlet of the branch drain. If the sink has a garbage disposal, the canister has an outlet on the side or bottom that allows you to connect a waste line into the trap. P-trap fittings are designed to be tightened by hand, but you'll probably want to use channel-lock pliers to secure the connections.
10. Test the System
 Florin Cristian Ailenei/iStock/GettyImages
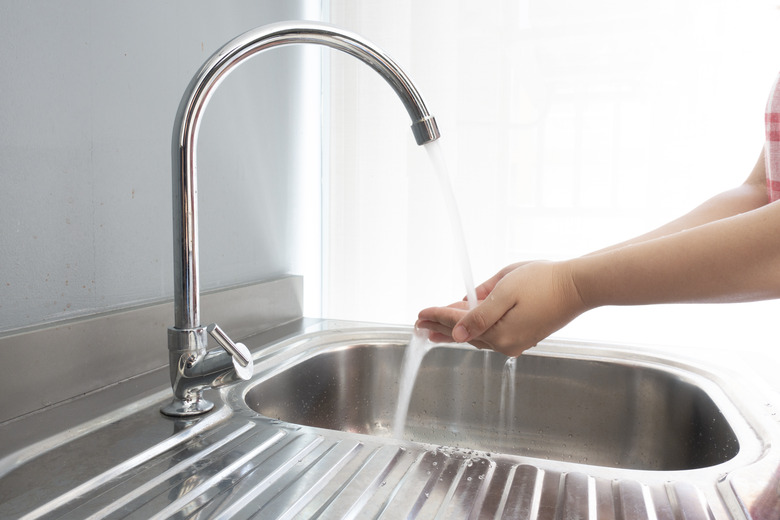
Plug in the garbage disposal, flush the faucet, then turn on the water and run the disposal while you check for leaks. After completing this test, put the stopper in the drain, fill the sink about half full, and check again. Finally, remove the stopper and check for leaks a third time while the water is draining.
Installing an Undermount Sink
Installing an Undermount Sink
The installation procedure for an undermount stainless steel sink is similar to that for a drop-in sink, with a few key differences. Because the sink mounts to the underside of the cabinet, you need to install mounting posts or brackets to support it. Depending on sink model and countertop material, you may have to screw these posts into the countertop or stick them on with adhesive, which is usually supplied with the sink. You typically use the adhesive method when installing an undermount sink on stone countertops. Stone often has a fine layer of dust that prevents glue from sticking, so most manufacturers recommend wiping down the surface with a damp rag or one soaked with alcohol.
Once you've set the posts, you need a way to hold the sink in place while you connect it to the posts. The method used by most contractors is to lay a 2 x 4 across the countertop cutout, insert bar clamps through the drain holes in the sink, and tighten the clamp to hold the sink in place, suspended from the 2 x 4 . Just before you do this, run a bead of silicone caulk around the perimeter of the rim to provide waterproofing and extra stability.
Tip
If you use this method to hold the sink—which is virtually the only way to do it if you're working alone—you can't install the drain assembly until after the sink is in place. The faucet, on the other hand, mounts to the countertop. You can install it anytime, but it's easiest to do before you install the sink.