How To Build A Base For An Apron Front Sink
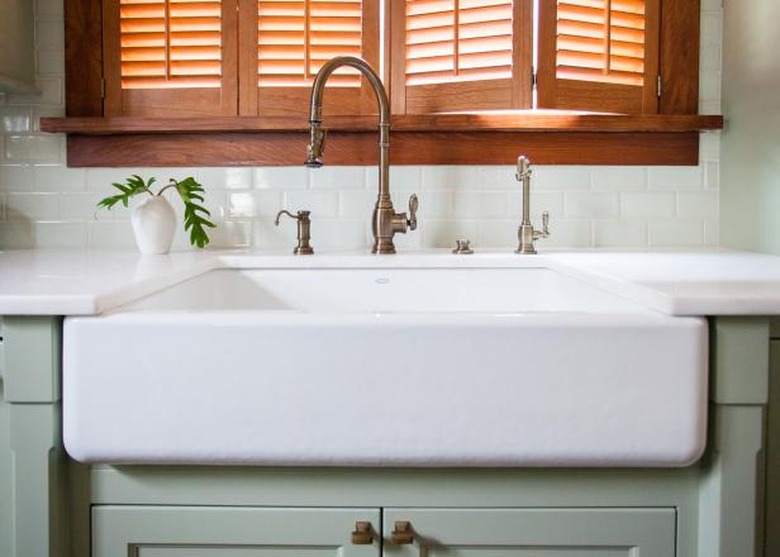
The "farmhouse" sink has been around for a long time but it is only recently that it has become popular in upscale kitchen design. Also called an apron sink or apron-front sink, these distinctive fixtures transform a purely utilitarian vessel into a focal point of your kitchen. But installing one is a rather different project than hooking up an ordinary drop-in stainless steel sink. Unlike drop-in or undermount sinks, apron sinks are supported independently from the kitchen countertop. They rest either on cleats or on a self-standing platform. In most cases, you can use the surrounding cabinets as anchors for cleats to support your apron sink.
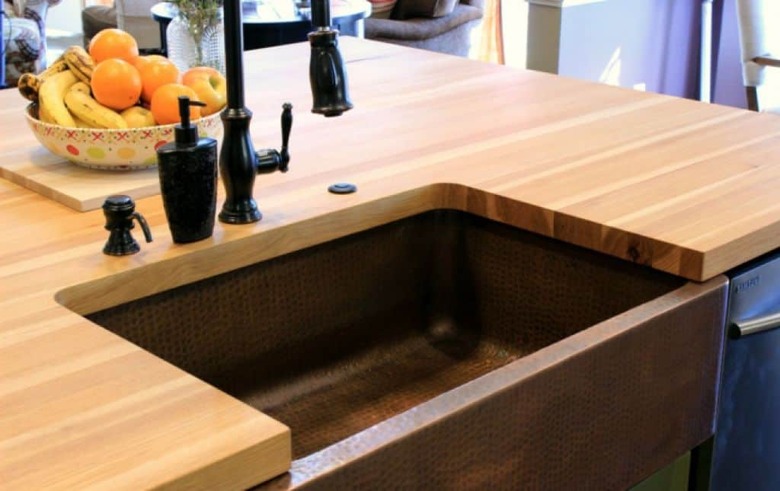
Not every type of countertop is suited for an apron sink—at least not without significant modifications. Because the finished height of the sink is ideally lower than the surrounding countertop, the inner core of the countertop will be exposed. In a laminated, tiled or post-form countertop, this is problematic; but it can be solved by making a cutout and trimming the edges with a strip of plastic laminate or with tiles. But a more elegant solution is to install your apron sink in a countertop made of a contiguous material, such as solid-surface material, composite stone (quartz) or butcher block.
 Signature Hardware
How to Install an Apron Sink
How to Install an Apron Sink
Typically, a farmhouse sink extends 1/2 to 1 inch past the font edge of the countertop, emphasizing the projection of the apron. Because they are quite heavy, usually made of enameled fireclay, you need to build a sturdy platform on which the sink can rest. This is normally done by propping a support platform on two or three cleats attached to the adjoining cabinets. For a home DIYer, the easiest countertop material to work with is butcher block. Butcher block also works well with the farmhouse aesthetic.
Things Needed
-
Tape measure
-
Jig saw
-
Power sander
-
Router and round-over bit (optional)
-
Wood finish or varnish (for butcherblock countertop)
-
2 x 4 lumber
-
Miter saw or circular saw
-
Utility screws
-
Farmhouse sink, with faucet and drain kit
-
Construction adhesive
-
Caulk gun
-
Utility screws
-
Screw gun
-
Carpenter's level
-
Silicone adhesive
-
3/4-inch particleboard or MDF
-
Drill with hole saw
1. Mark a Cutout
Make a cutout for the sink basin in the contiguous countertop material. The cutout should be one inch narrower than the sink width so the countertops slightly overhangs side and back edges of the sink. The depth of the cutout should be 1/2 to 1 inch less than the front-to-back depth of the sink.
2. Cut the Sink Opening
Remove the waste material from the countertop, cutting just inside the layout lines. Make curved cuts at the corners and then finish them by making perpendicular straight cuts. If you are working with butcher block, lay out the cutting lines and make the cut with a jig saw fitted with blade that cuts on the downstroke.
Sand the cut edges of the sink cutout , including the top edges, until they are smooth. For a professional appearance, use a router and a 1/4-inch roundover bit to cut a profile all around the top of the cutout.
Apply finish to the countertop and cut edges. Urethane varnish is a good choice that does not require replenishment; butcher block oil is a more natural finish but it will need occasional re-application.
3. Build the Sink Support
Measure and mark the location for the sink platform and U-shaped frame on the sidewalls of the sink base cabinet. Careful measurement is required here to ensure that the bottom of the sink will just graze the bottom edge of the countertop. Make sure to take the thickness of the support platform into account when marking the position for the frame cleats on the side walls of the cabinet.
Build a U-shaped support frame for the sink from straight 2 x 4s. The side members of the frame should be cut so the front member overlaps their ends. The front member should be flush with the fronts of the kitchen cabinet frames.
Attach the side members by screwing through the cabinet walls and into the 2 x 4s, making sure the frame is square and level. Screw the front member into the ends of the side members. For extra holding power, apply construction adhesive to the frame before screwing it in place.
4. Install the Sink Platform
Install a platform cut from 3/4-inch particle board or medium-density fiberboard onto the support frame. The platform should stop a couple of inches before the cabinet back to allow you to run the water supply tubes to the faucet. Anchor the platform to the support frame with screws and construction adhesive.
You will also need to make a cutout in the platform beneath the sink drain opening. Make the cutout (circular is best) large enough to accommodate the drain pipe and trap.
5. Position the Sink
Place the sink onto the platform. This job will be easiest of you have a helper, because farmhouse sinks are usually quite heavy. If you have located the support framework correctly, the sink should slide in, almost grazing the underside of the countertop. Check to make sure the gap between the sink top and the countertop underside is slight and uniform around the perimeter of the sink.
Because of the weight of most apron sinks, no mechanical fasteners are required. But do use clear silicone adhesive to bind the sink to the countertop underside, either by caulking the gap or applying silicone to the top to the sink flange if you will be installing the countertop after the sink is in place.
6. Complete the Plumbing Connections
Make the water supply and drain hook-ups. Most apron sinks do not have precut holes for faucets. You'll need to drill them into the countertop in the strip between the sink and the backsplash and then mount the kitchen faucet directly to the countertop.