How To Fix A Faucet Aerator

The aerator is an unobtrusive little faucet add-on that fits on the end of the faucet spout, and it performs more than one valuable function. Not all faucets have one, and if you aren't sure about yours, note the stream of water that emerges from the spout when you turn on the faucet. If the water flows in a steady, controlled stream full of air bubbles, it's probably passing through an aerator, but if it spills out like a mountain stream falling over a precipice (or it shoots out like a mini firehose), there's probably no aerator.
The aerator ensures that all the water ends up in your cup or wherever you point the faucet, and none of it sprays against the side of the sink or the backsplash and gets wasted. It also limits water flow, so it helps to conserve this valuable resource. The aerator can accomplish this because it contains a fine screen that separates the water into hundreds of tiny streams, thereby increasing the exposure of the water to the atmosphere and oxygenating it, which is why it's called an aerator.
The most common problem with aerators is that they collect mineral deposits (scale) and get blocked, reducing flow from the faucet and disturbing the stream. Many people mistake a clogged aerator for issues in the faucet or the water pipes and pay money for a plumber when they could easily restore water flow themselves with nothing but a pair of pliers and a bowl of vinegar. When water flow from a faucet is less than it should be, the aerator is the first thing you should check.
Know Your Faucet Aerator
Know Your Faucet Aerator
The aerator screws onto the mouth of the faucet spout. It can have male or female threads, depending on the faucet. Kitchen faucets with long spouts typically have spouts with male threads, so the aerators that fit onto them have female threads. Bathroom faucets, especially designer ones, are more likely to have female threads that accept aerators with male threads.
Either way, you remove the aerator by unscrewing it. When you do, you'll be able to separate it into its component parts, which typically include the following:
- The outer casing. This is the metal or plastic housing into which all the other components fit. It's the part of the aerator with threads that screw onto the faucet spout.
- The inner housing, which is usually plastic. It slips into the casing.
- The screen, which fits onto a ridge inside the housing. This is the main working part of the aerator and the one that collects scale.
- The screen bushing. This plastic part fits into the opening of the housing and keeps the screen in place.
- The washer. This rubber ring sits on top of the bushing and seals it against the faucet spout when you screw on the aerator and tighten it.
In addition, many aerators contain two extra parts. One is a mixer, which is a disk with several holes that buffers the water flow so it doesn't damage the screen. The other is a flow restrictor, which is a separate disk with a single hole that reduces water flow. Some states, such as California, require flow restrictors.
Tip
When you take apart your faucet aerator, be sure to inspect all these parts and replace any that are worn or damaged. Keep track of all of them. The aerator will leak if you forget to reinstall any of them.
How to Clean an Aerator
How to Clean an Aerator
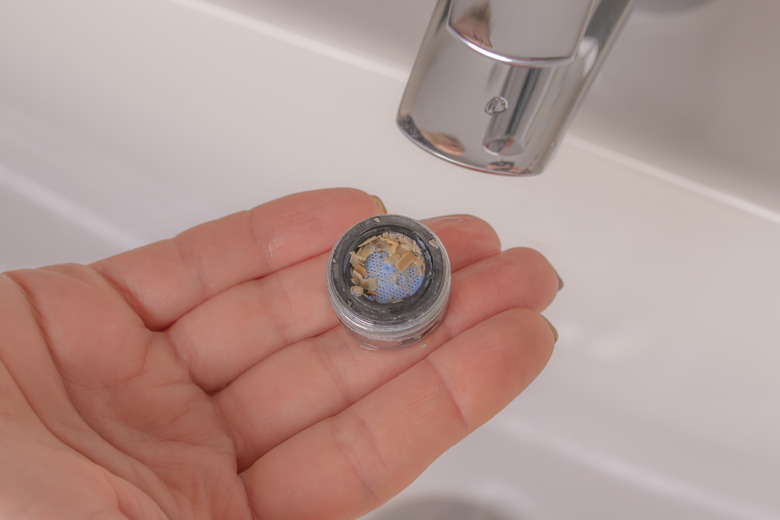
If flow from your faucet is less than it should be, your aerator may just need cleaning. Hard water deposits and sediment in the water collect on the screen and gradually clog it. It's easy to clean an aerator, and it takes less than 5 minutes. Here's how to do it:
 PAVEL IARUNICHEV/iStock/GettyImages
Things Needed
-
Rag
-
Pliers
-
Bowl
-
Distilled white vinegar
- Turn off the faucet.
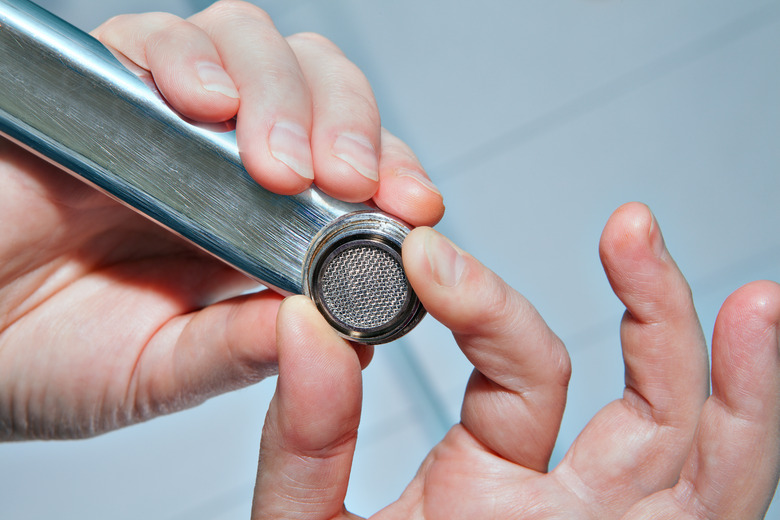
- Wrap a rag around the aerator to protect it, then grip it with pliers and turn it counterclockwise to loosen it. Once it turns freely, unscrew and remove it with your fingers.
Note: The aerator threads are standard and loosen by turning counterclockwise, but because you're viewing from above the faucet (the reverse side of the connection), you will actually be turning the pliers clockwise. - Turn the aerator upside down, hold it under the faucet and turn on the water. This back-flushes the screen and removes sediment lodged inside it.
- Remove the rubber washer and put it in a safe place. Place the rest of the aerator in a bowl of white vinegar and leave it overnight. The vinegar will dissolve hard water deposits that won't come off by back-flushing.
- Put the washer back on the aerator and screw the aerator back onto the faucet. Using the rag and pliers, tighten the threads to prevent water from leaking from the top of the aerator when you turn on the water. If water does leak, tighten the aerator a bit more.
Selecting a New or Replacement Aerator
Selecting a New or Replacement Aerator
If your aerator is damaged or you need to install an aerator on a faucet that doesn't have one, you'll need to measure your faucet to ensure you get an aerator that fits. Aerators come in standard imperial and metric sizes. The most reliable way to get a match is to take the old aerator to the store and buy an identical one. If you don't have an old aerator, try this trick:
 New Resources Group
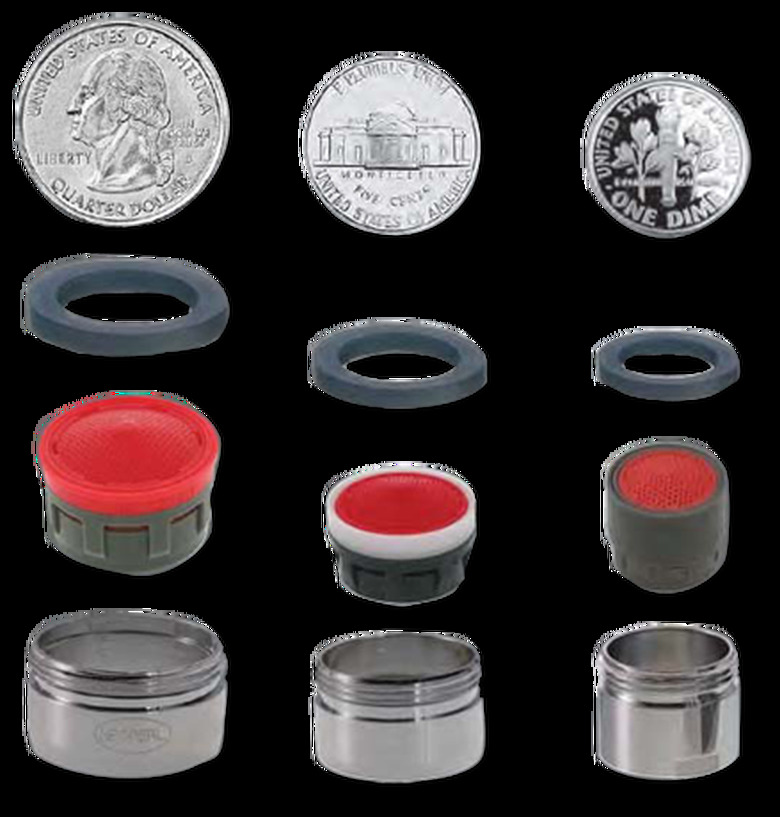
Hold a quarter, a nickel and a dime under the faucet opening. Choose the coin that most closely matches the opening and select an aerator with that size. The one matching the quarter is a regular-size aerator, the one matching the nickel is a junior, and the one matching the dime is known as a "Tom Thumb" aerator.
If your faucet doesn't match any of these coins, it's probably a metric size. Measure the diameter of the faucet opening with a ruler or tape measure and buy an aerator with that diameter.
Tip
Aerators are inexpensive, so replacing one won't break the bank. However, if the screen is damaged in your existing aerator, you can save a bit of money by removing it and replacing only that. Use the same guidelines for measuring the size of the screen you need.