We LURVE The IKEA Lurvig Cat House, Especially With These Cute Upgrades
We may receive a commission on purchases made from links.
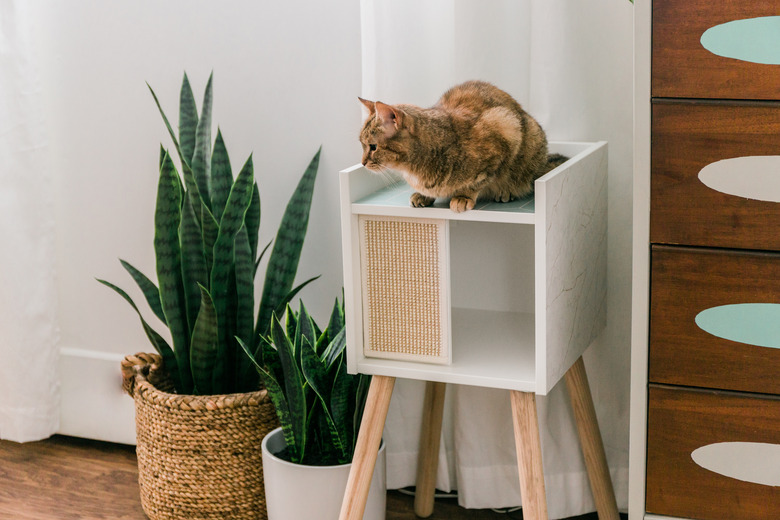
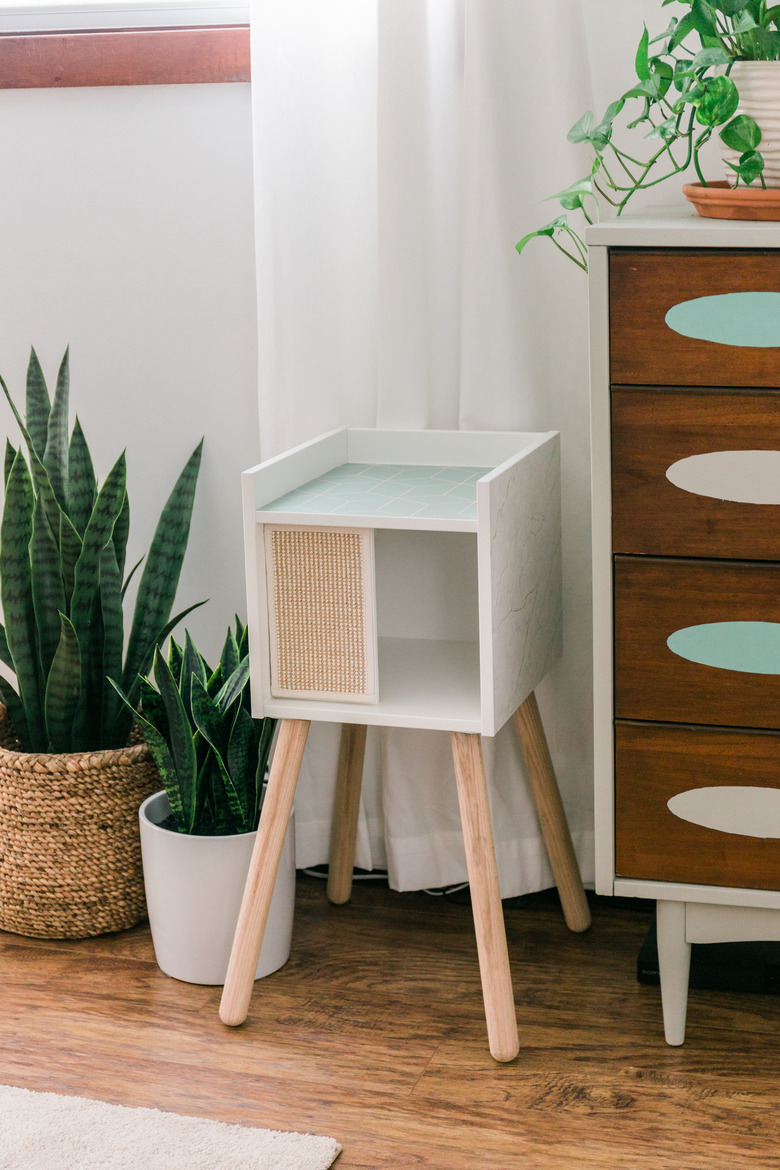
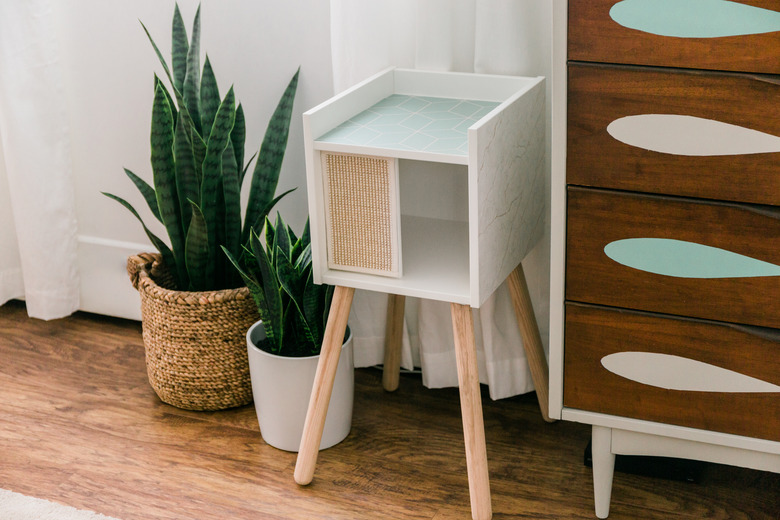
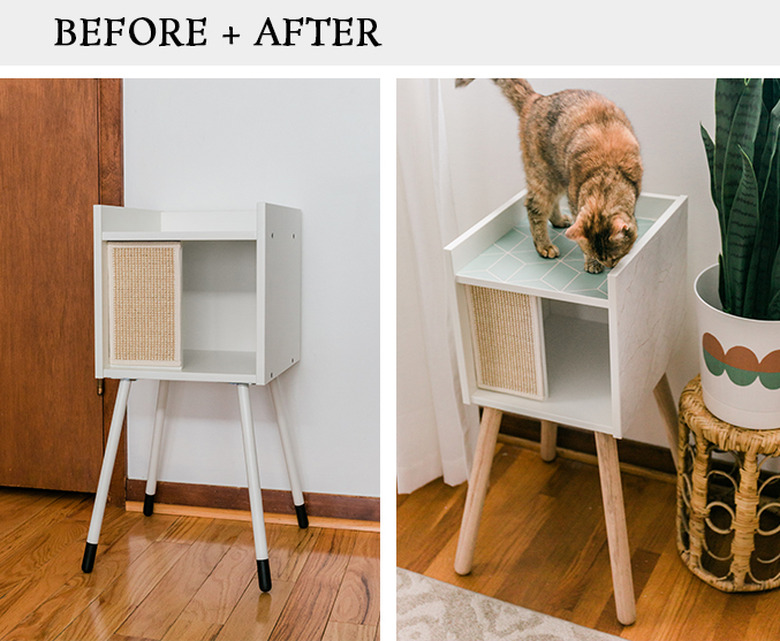
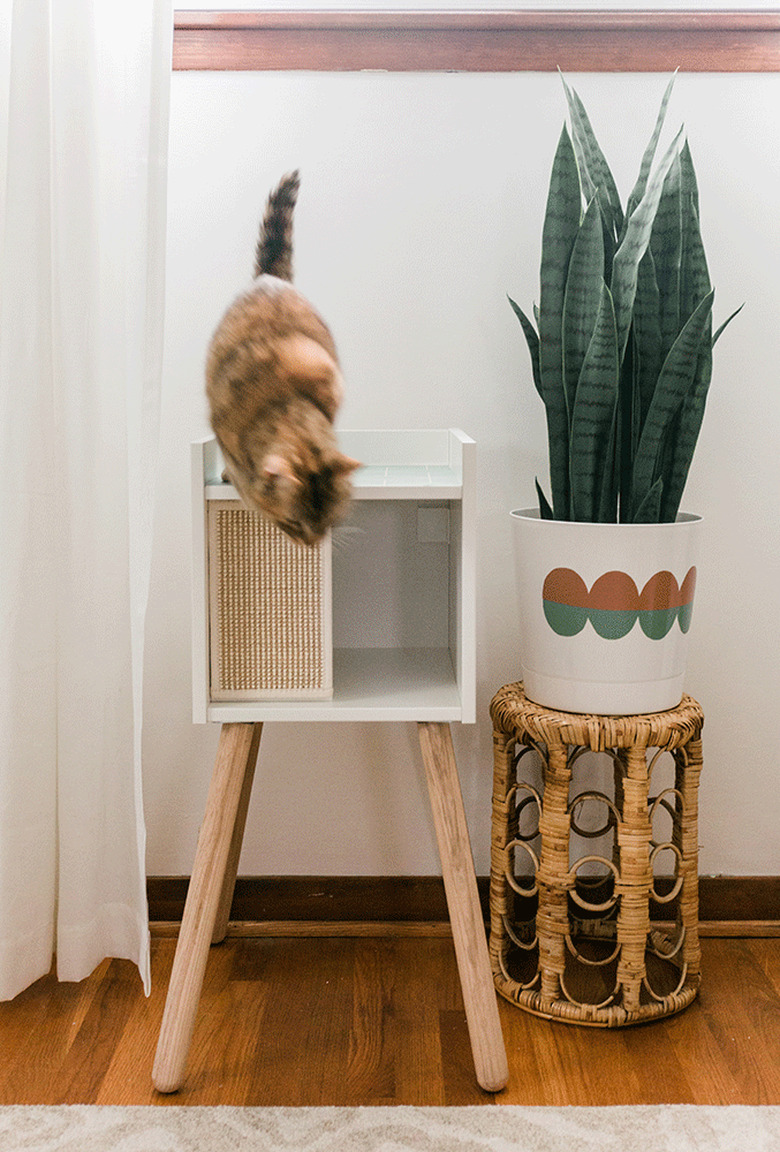
Things we love about the IKEA Lurvig cat house: the sturdy construction (you can trust that it won't topple over onto your feline friend!), the sleek white silhouette, and that perfectly boho-chic rattan scratch pad in front. Still, we felt as though it could use a little zhuzhing: a little color, a little character, a little upgrade. Because Kitty. So, we dreamed up a quick way of hitting "upgrade" on all the details we do love, while giving it a little "oomph." Find out how we pulled it off in 30 minutes below!
 Carrie Waller
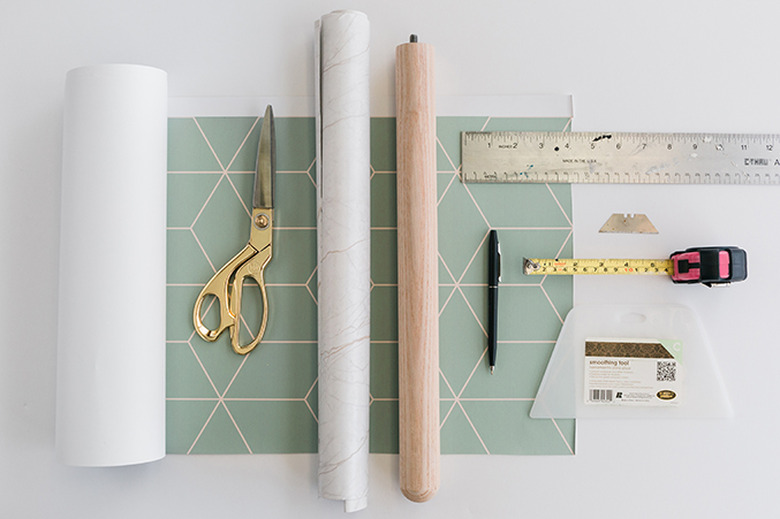
Things Needed
-
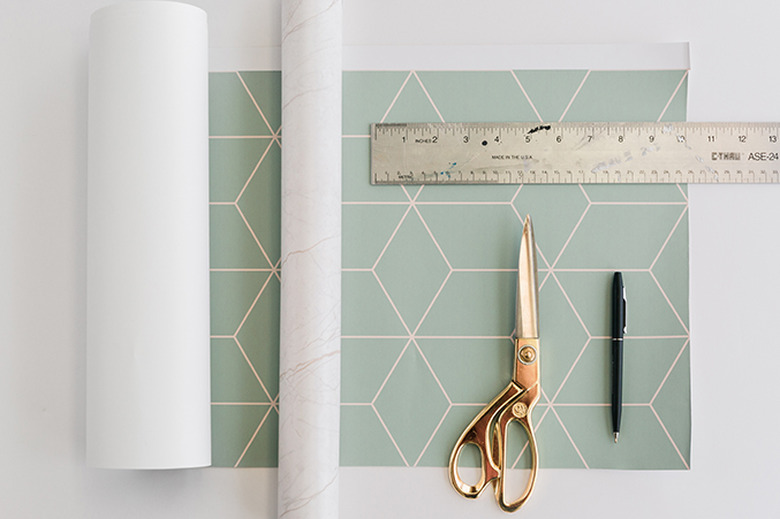
Waddell wood ash end table legs, 1.625 inches by 17 inches, (4)
-
Stacked Cubes peel-and-stick wallpaper (Get 20% off your order with code 'DGDIY')
-
Ruler or measuring tape
-
Pen/marker
-
Scissors
-
Straightedge
-
Razor blade
 Carrie Waller
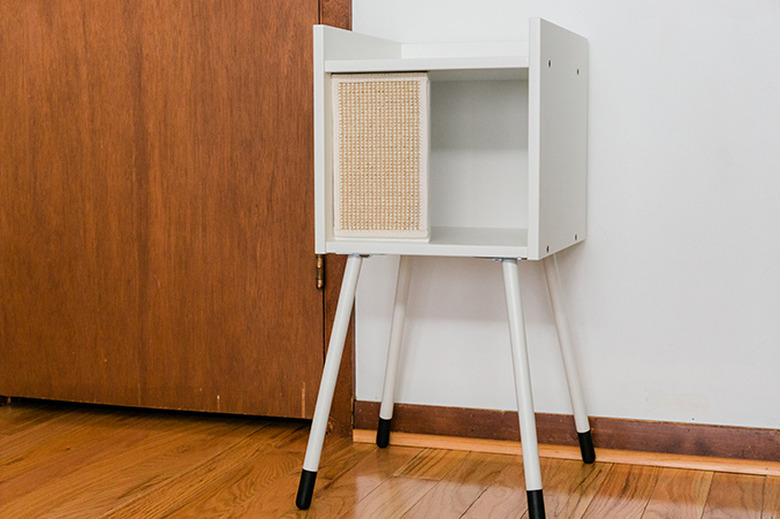
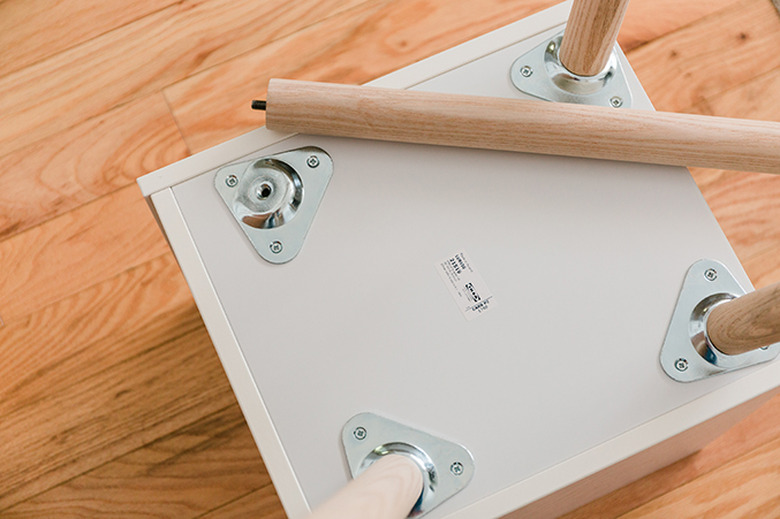
Step 1
Assemble the IKEA Lurvig cat house according to the directions that came with the piece of furniture. Stop at the point before attaching the legs, though, as we'll be tweaking that part of the design in the following step. (We assembled ours completely for the sake of a killer before/after!)
 Carrie Waller
Step 2
Screw the 17-inch ash end table legs into the hardware that you already installed on the underside of the IKEA cat house. You may choose to leave the wooden legs unfinished for a matte Scandinavian-inspired look, like we did, or you could paint, stain, or simply seal them with polyurethane.
 Carrie Waller
Step 3
Measure the top section and two sides of the cat house using a ruler or measuring tape. Trace the measurements you took of the top of the cat house on the backside of the Stacked Cubes peel-and-stick wallpaper. Next, trace the measurements of the sides of the cat house you took onto the backside of the marble self-adhesive paper. You may want to use a straightedge to keep your lines extra straight. Cut out the three traced shapes using scissors.
 Carrie Waller
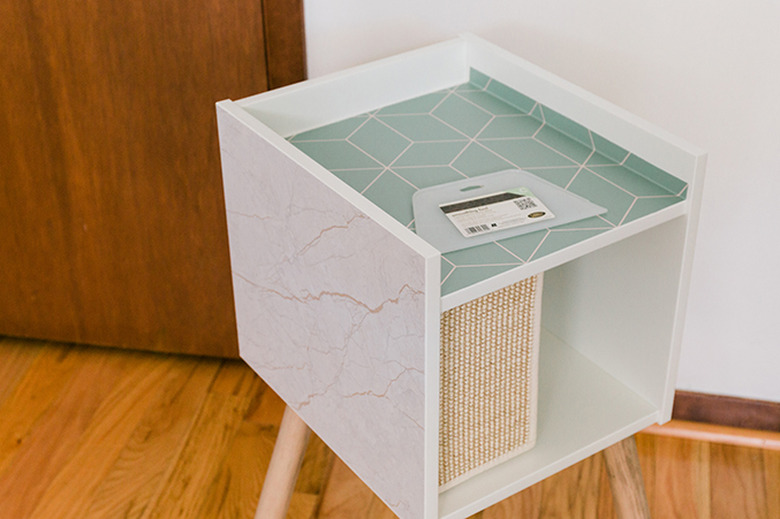
Step 4
Remove the backer paper from the three cut patterned shapes one at a time, and lay them sticky side down onto the top and sides of the IKEA cat house. Squeeze out any air bubbles that form with a flexible smoothing tool.
 Carrie Waller
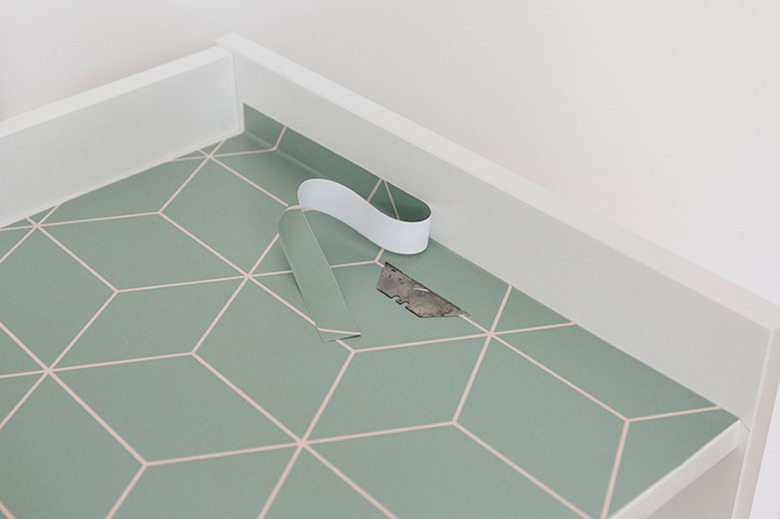
Step 5
Clean up any ragged or uneven edges that might appear along the sides of the cat house where you laid down the patterned paper using a razor blade.
 Carrie Waller
Step 6
If you didn't use any paint or stain on the legs, your cat house is immediately ready for use! Otherwise, allow your painted finish to cure overnight before allowing your pet to enjoy her new playhouse.
 Carrie Waller
 Carrie Waller
 Carrie Waller