Because Your Walls Are Worthy, Make These Graphic Art Prints

We may receive a commission on purchases made from links.
So you want wall art but not the big expense? Time to hunker down with a good old fashioned DIY. These do-it-yourself prints are the quickest way to create art on a budget — no painting, printing, or skill required.
We're taking things old school by using paper and some chic retro-inspired designs.
 Caroline Burke
Things Needed
-
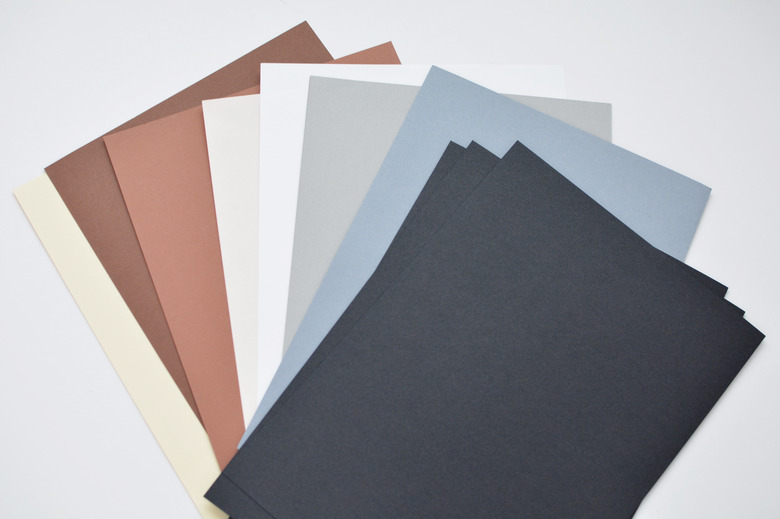
Selection of colored paper (150gsm quality works well)
-
Scissors
-
Tape measure
-
Picture frames
Step 1
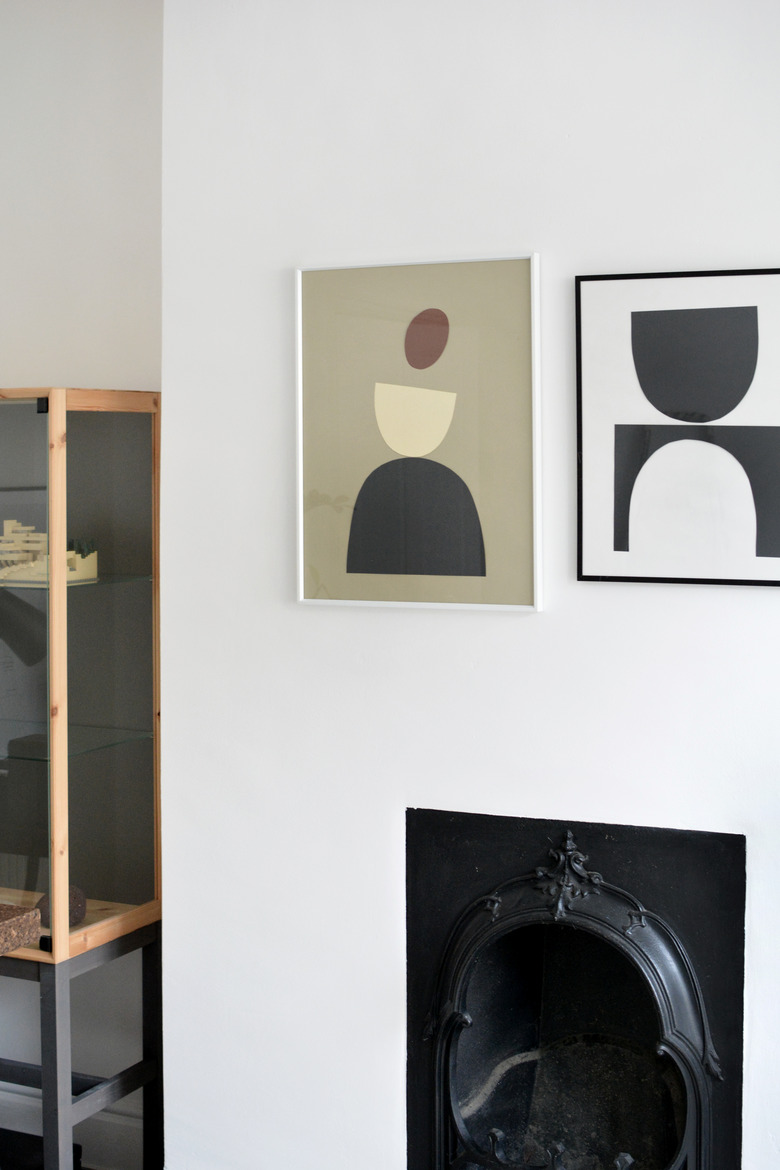
Select a color palette. For this project, we've opted for a muted collection of brown and blue shades for one art piece, and black and white for another.
 Caroline Burke
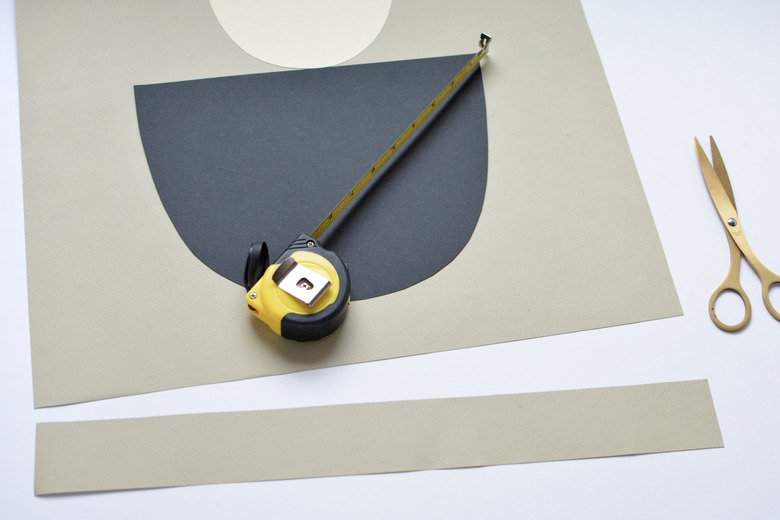
Step 2
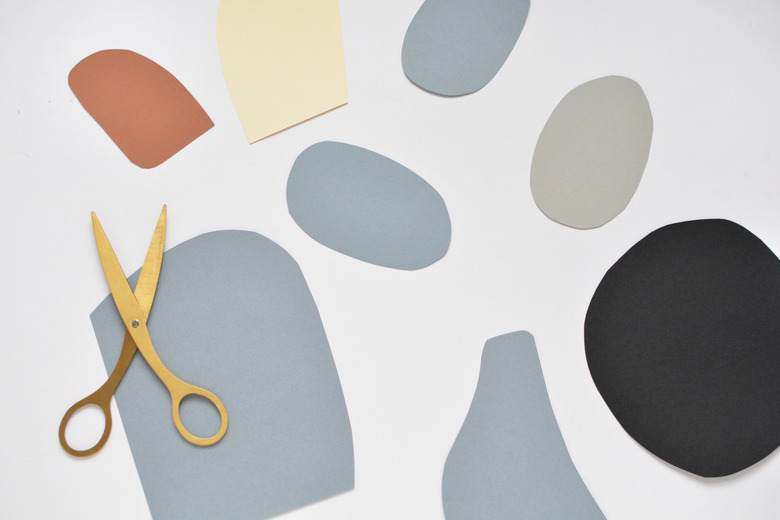
Use your scissors to cut out shapes. We experimented with a mix of abstract and geometric forms in a variety of sizes. You don't need to measure or be precise here — simply cut freehand. An irregular look adds to the charm.
 Caroline Burke
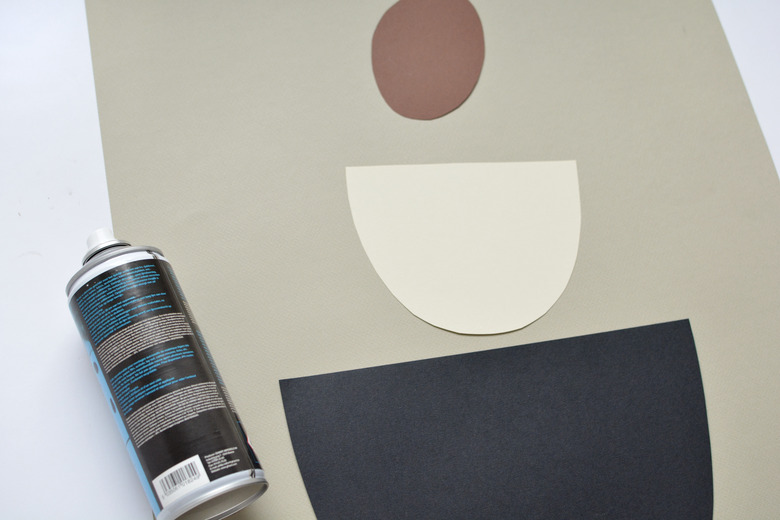
Step 3
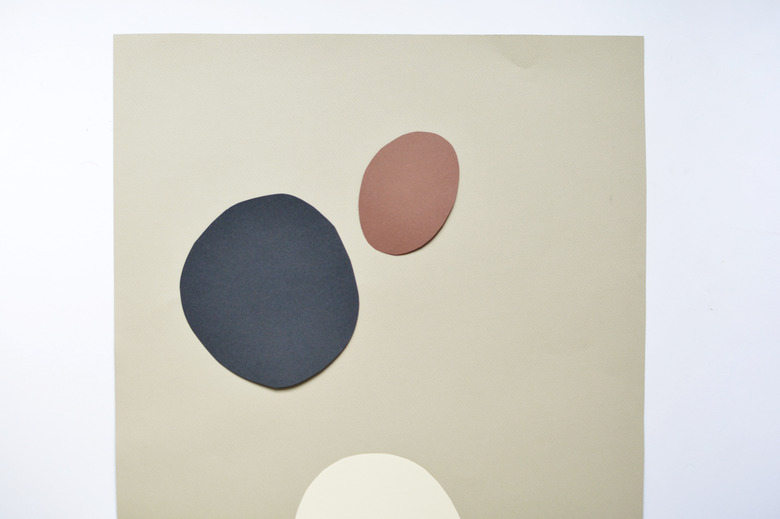
Now it's time to play around with composition. Take a large sheet of paper or thin cardstock to use as a background for your artwork. Take the paper shapes and lay them out on the background; add, remove, and shuffle the pieces until you find a design that you like.
 Caroline Burke
TIP: Take photos on your phone when you find a composition you like. You can recreate your favorite later after you have tried out different options!
Step 4
Trim your background paper to fit your picture frames (the frame we used for the larger piece pictured here is 19 inches by 28 inches.)
 Caroline Burke
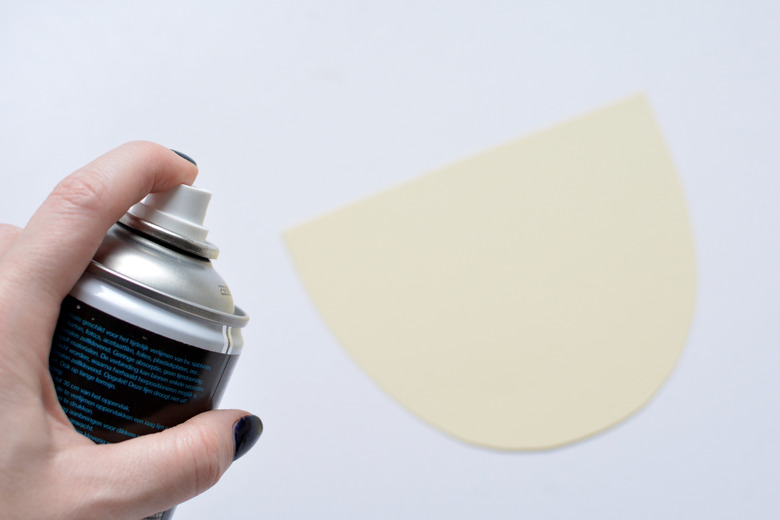
Step 5
Once you've decided on the placement, it's time to "fix" your design in place. Take your can of spray mount and lightly spray the back of each paper shape. (This stuff is sticky, so spray it over scrap paper away from your artwork.)
 Caroline Burke
Press the shapes onto the background — the mounting spray will hold them in place and keep the edges from curling up.
 Caroline Burke
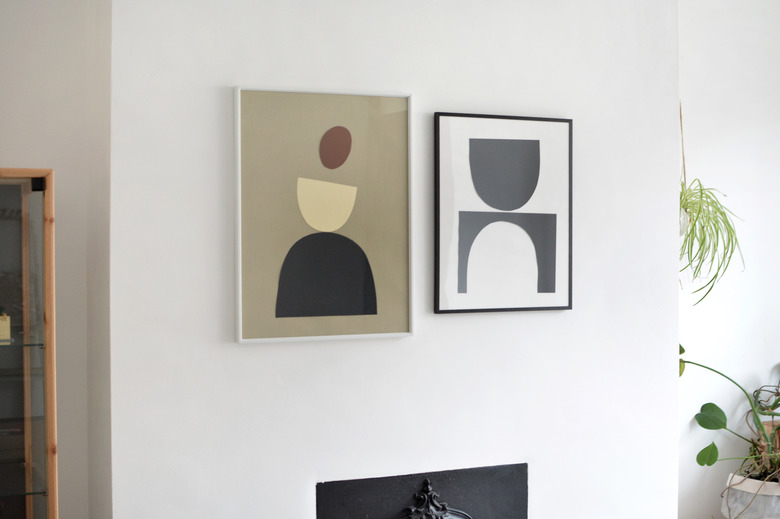
Step 6
Frame your finished artwork and hang in your favorite spot.
 Caroline Burke
We made the black-and-white print by mounting a half-moon shape that we cut out from some black A4 paper along with the remaining inverted shape onto a sheet of white paper. How quick and easy is that?