How To Use A Table Saw
We may receive a commission on purchases made from links.
If you work with wood, you need a table saw. It's as simple as that. You can do more things with a table saw than you can with any other single cutting tool, and you can do them more accurately. A table saw is more versatile than even a circular saw, because it allows you to re-dimension lumber, which is a function you often need when making cabinets, installing trim and framing. A table saw allows you to rip wood (cut it longitudinally), cross-cut and miter (cross-cut at an angle) and bevel (produce edges that aren't 90 degrees). You can also cut grooves and rabbets with a special accessory called a dado blade. You can even use your table saw to cut materials besides wood, such as tile.
Whether you have an industrial-grade shop saw or a portable bench model, the basic procedures for using your table saw are the same, and so are the accessories you need. Most of these come with the saw, but you'll probably have to make some yourself. Safety and proper maintenance are key. A table saw can inflict serious injury if used improperly, and it can produce drastically inferior results if it isn't maintained properly.
Know Your Saw
Know Your Saw
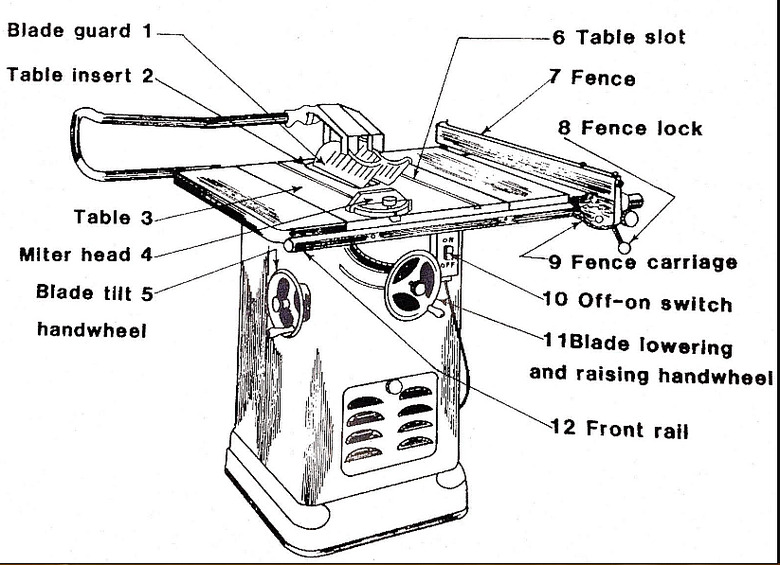
When you unpack your saw and set it up on a level surface (very important!), you should take a few minutes to familiarize yourself with all its parts. You'll see the blade, of course, or at least the insert where it goes. If you have to mount the blade yourself, remember that the arbor nut is reverse thread—turn it counterclockwise to tighten it on the arbor.
Most table saws come with a blade guard and wood splitter, and although these are important for safety, the guard does restrict your view of the material you're cutting. Experienced woodworkers often forego it, but if you're new to table saws, it's best to install it as per the instructions and to use it.
The fence on the saw is primarily for ripping, though it also has other functions, such as when cutting tenons for mortise-and-tenon joints. Mount the fence on the front rail and make sure it slides freely, then tighten the fence lock and make sure it's secure. If not, adjust the tension to the point that you can't move the fence but you can release the lock reasonably easily.
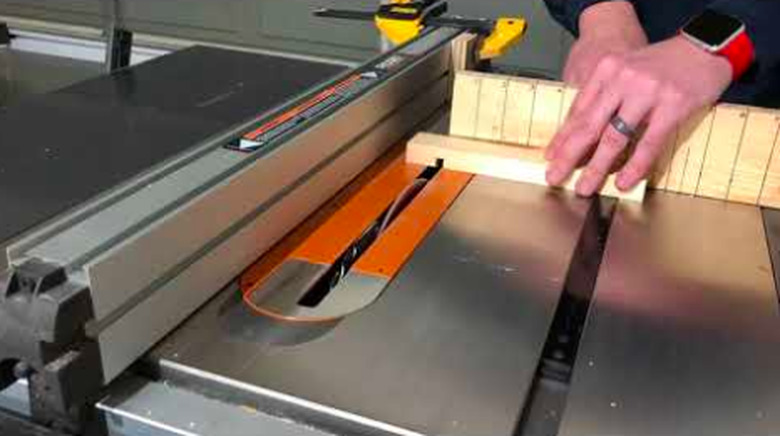
The crosscut carriage, also called the miter gauge, fits into one of the slots located about a foot from the blade on either side. This accessory has an adjustment that allows you to change the angle of the wood relative to the blade.
Finally, note the two adjustment wheels on the body of the saw. The one on the front adjusts the height of the blade, and the one on the side adjusts the blade angle, allowing you to cut bevels. On lightweight saws, the bevel control is incorporated into the front wheel. You change the blade angle by sliding the wheel along a 45-degree scale.
With a Table Saw, It's Always Safety First

With a Table Saw, It's Always Safety First
Any primer on table saws is incomplete without a discussion about safe use, because a small mistake can send you to the emergency room or cost you a finger. The list of safety recommendations is long, and they are usually specified in the owner's manual, but here are some of the most important:
- Always wear goggles—no ifs, ands, or buts. Flying wood chips abound, and getting one in your eye could easily send you to the emergency room.
- Keep your hands behind the blade and never closer than 3 inches. If you have to reach in front of the blade, turn off the saw and wait for the blade to stop turning. To keep their fingers away from the blade, pros make a push stick by cutting a notch in the end of a piece of 1-by lumber and use this to give the workpiece a final push through the blade.
- Adjust the fence so the far end is slightly tapered (1 or 2 millimeters) away from the blade. This prevents the wood from binding and kicking back. Kickback can cause serious injury to you and can damage anything that is behind you. Some fences adjust themselves automatically, and many saws come equipped with anti-kickback fingers. These features are helpful but don't rely on them exclusively.
- Set up an out-feed table for cutting plywood and long pieces of lumber. This eliminates the need to press down on the wood as you're finishing the cut and the possibility of slipping as you do so.
Choose the Blade According to the Job
Choose the Blade According to the Job
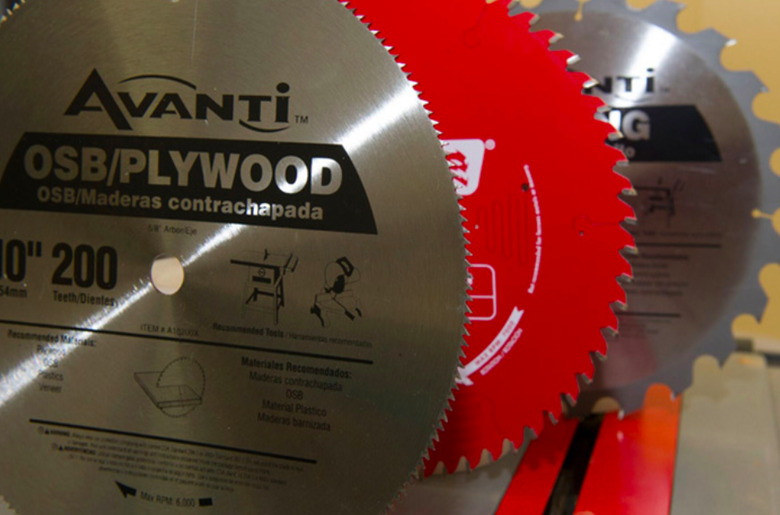
Your new saw may come equipped with a blade, and if so, it's probably a utility blade. That blade is fine for most jobs, but if you really want to get the most out of your saw, you should have a collection of blades. Tooth count is the most important variation between blades. Utility blades usually have 24 to 36 teeth, whereas specialty blades for cutting plywood, OSB and materials other than wood typically have a higher tooth count. This ensures a smoother cut with less chip out.
A number of other factors distinguish saw blades from one another, but one of the most important is the width of the blade, also known as the kerf. It determines how much material the blade removes and also how hard the saw has to work to cut with that blade. Most blades are full-kerf, meaning the width is about 1/8 inch. If you're cutting plywood or primarily using the saw for crosscutting, you should opt for a thin-kerf blade with a width of only 3/32 inches. That might mean that the teeth do not have carbide tips and will wear out more quickly, but that's the price of precision.
Get the Most from Your Table Saw
Get the Most from Your Table Saw
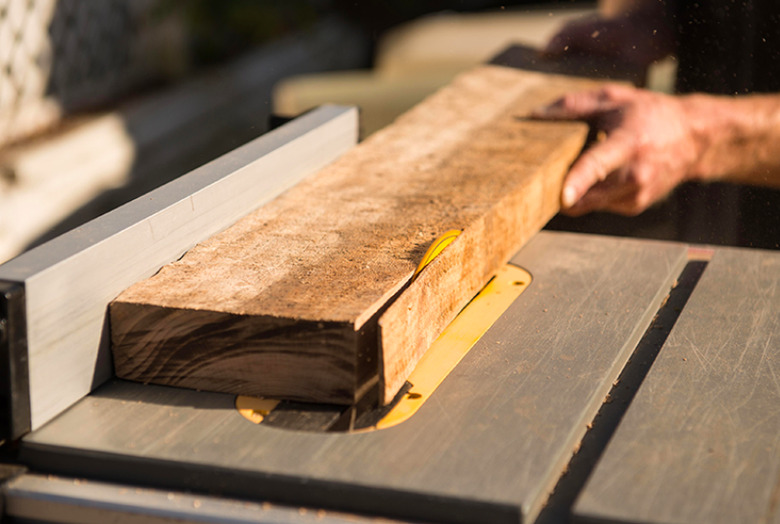
A table saw can do crosscuts, but so can a chop saw or circular saw. The table saw is at its best when it's doing its primary job, which is ripping wood lengthwise. The basic technique is to set the fence, turn on the saw and push the wood through the blade, but of course, it's more complicated than that, especially if you're after quality results. When you use it properly, a table saw can produce more accurate crosscuts and miter cuts than a circular saw, and it's the go-to tool for cutting beveled edges. Here are some tips for getting the best results with your table saw:
- Measure the fence distance with a ruler or tape measure. Don't rely on the fence gauge unless you're using an industrial-grade shop saw. When setting the blade height or angle, check it with a ruler or bevel.
- Keep the table clean, and lubricate it every so often by wiping oil on the surface with a rag.
- Use a sharp blade. Dull blades overwork the saw and burn the wood.
- Push the wood slowly. Pushing too fast causes chip-out and kickback.
- Cut plywood, hardboard and dimensioned lumber face up to minimize chip-out on the face.
- Extend the width of the miter gauge by attaching a strip of plywood or hardwood to its head.. This gives you more control and ensures better crosscuts and miter cuts.
- Use a dado blade for cutting grooves and rabbets. Dado blades come in various widths, and you install them the same way you install regular cutting blades.